MSPhysics 1.0.3 (16 October 2017)
-
@anton_s said:
Yes rombout, its windows only. Furthermore, it's unstable and incomplete.
I wish you developed it further or at least made it stable.
Here is my quick try with Thea. Maybe it will motivate you slightly
-
Tomasz!! you tease.
-
Another brick on the wall!
-
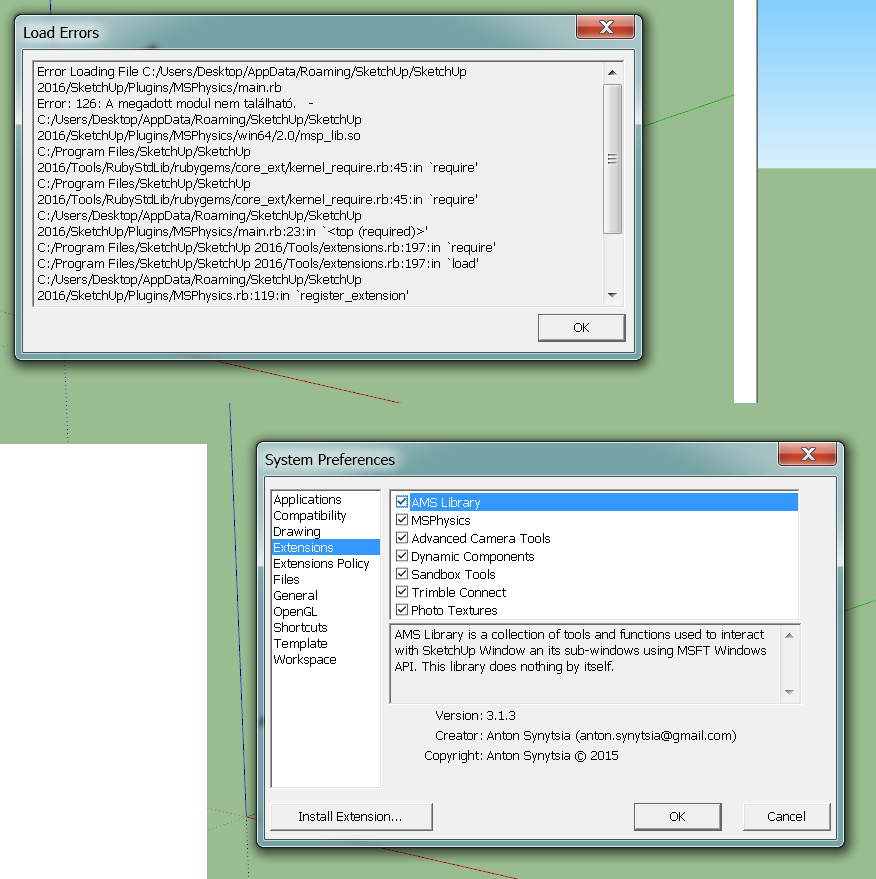
Hi, I'm using SU2015 and with
ams_Lib 3.1.2 and
MSPhysics 0.2.1
I get the following errors:[pre:16r2j6vf]Error Loading File C:/Users/[User Name]/AppData/Roaming/SketchUp/SketchUp 2015/SketchUp/Plugins/MSPhysics/main.rb
Error: #<NameError: uninitialized constant AMS::FFI>
C:/Users/[User Name]/AppData/Roaming/SketchUp/SketchUp 2015/SketchUp/Plugins/MSPhysics/sdl.rb:10:in<module:SDL>' C:/Users/*[User Name]*/AppData/Roaming/SketchUp/SketchUp 2015/SketchUp/Plugins/MSPhysics/sdl.rb:4:in<top (required)>'
C:/Program Files/SketchUp/SketchUp 2015/Tools/RubyStdLib/rubygems/core_ext/kernel_require.rb:45:inrequire' C:/Program Files/SketchUp/SketchUp 2015/Tools/RubyStdLib/rubygems/core_ext/kernel_require.rb:45:inrequire'
C:/Users/[User Name]/AppData/Roaming/SketchUp/SketchUp 2015/SketchUp/Plugins/MSPhysics/main.rb:39:in<top (required)>' C:/Program Files/SketchUp/SketchUp 2015/Tools/extensions.rb:197:inrequire'
C:/Program Files/SketchUp/SketchUp 2015/Tools/extensions.rb:197:inload' C:/Users/*[User Name]*/AppData/Roaming/SketchUp/SketchUp 2015/SketchUp/Plugins/MSPhysics.rb:106:inregister_extension'
C:/Users/[User Name]/AppData/Roaming/SketchUp/SketchUp 2015/SketchUp/Plugins/MSPhysics.rb:106:in<module:MSPhysics>' C:/Users/*[User Name]*/AppData/Roaming/SketchUp/SketchUp 2015/SketchUp/Plugins/MSPhysics.rb:88:in<top (required)>'[/pre:16r2j6vf]Please help
thanks
-
hello, I can not seem to find a tutorial to create joint . I use SketchyPhysics . I've the table IU but not the icons .
Where are the joints ???
Thanks for your help.
i've 0.2.0 it's worry ?
jean-luc
-
MSPhysics will be up and running soon. Have a great holiday!
-
Hi, 0.3.0 Alpha has been released! Go to first post for download.
Changelog:- Reverted to SDL1 and SDL_Mixer1, which fixed the crash that occurred after using SketchUp for a few minutes.
- Optimized the C++ extension.
- Upgraded to Newton 3.14.
- Added joints. Still more work to go.
- Added replay animation tool. It can record materials and emitters.
I might post videos regarding the features soon. Meanwhile, try out the chains.
-
Tried with SU16-64 Win8.1-64:
-
Try deleting the old version and download the new one. It might be bragging about localization, but in theory it shouldn't.
-
I've compared my installed files with the zip and there were some files missing in my installation. Now it's working perfect, thank you!

-
I like the debug modus of your chain model


-
How can these (groups of) bodies collide? If the lower group is exploded, the individual parts collide but not as a group/component.

-
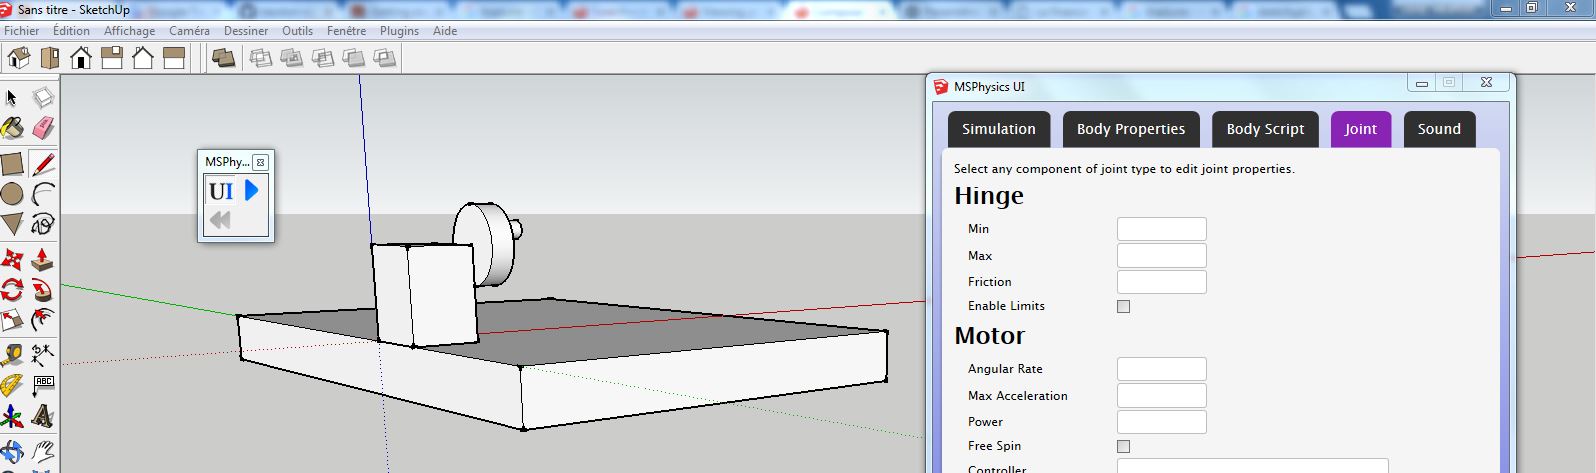
If I assign the hinge to the ground instead of the group of objects, the collision works, but I need the assignment to that group for this case:
-
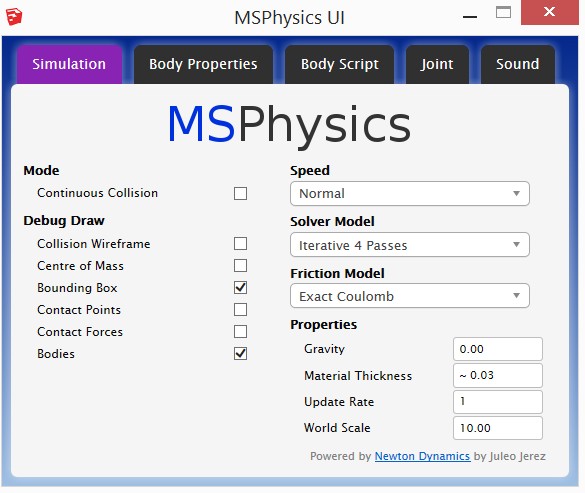
Cotty, joint properties can be editted. Select the desired joint, open MSPhysics UI, and enable 'connected collide' option.
-
Thank you, Anton, that helped!
-
Just a heads up replying to my post:
@robibue said:
Hi, I'm using SU2015 and with
ams_Lib 3.1.2 and
MSPhysics 0.2.1
I get the following errors:[pre:1doxyosj]Error Loading File ...[/pre:1doxyosj]
Please help
thanks
Thank you,
the new version "0.3.0" runs smoothly on SU 15 and 16
Great work


-
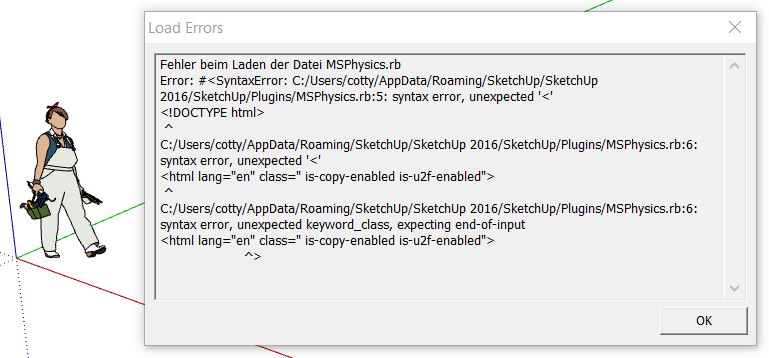
Hello Anton! For me it's not working. New installed SU16-x64 and AMS 3.1.3.
http://sketchucation.com/forums/download/file.php?mode=view%26amp;id=135827
-
Initial tests are promising. Great work Anton!
I can not resist to carry out detailed experiments with joints and scripts. Extreme wishes are an import function for SketchyPhysics models and detection of replay data by the Twilight renderer. 
-
@pituphysics said:
Hello Anton! For me it's not working. New installed SU16-x64 and AMS 3.1.3.
http://sketchucation.com/forums/download/file.php?mode=view%26amp;id=135827
I'm sorry, my fault.
 Now work perfectly
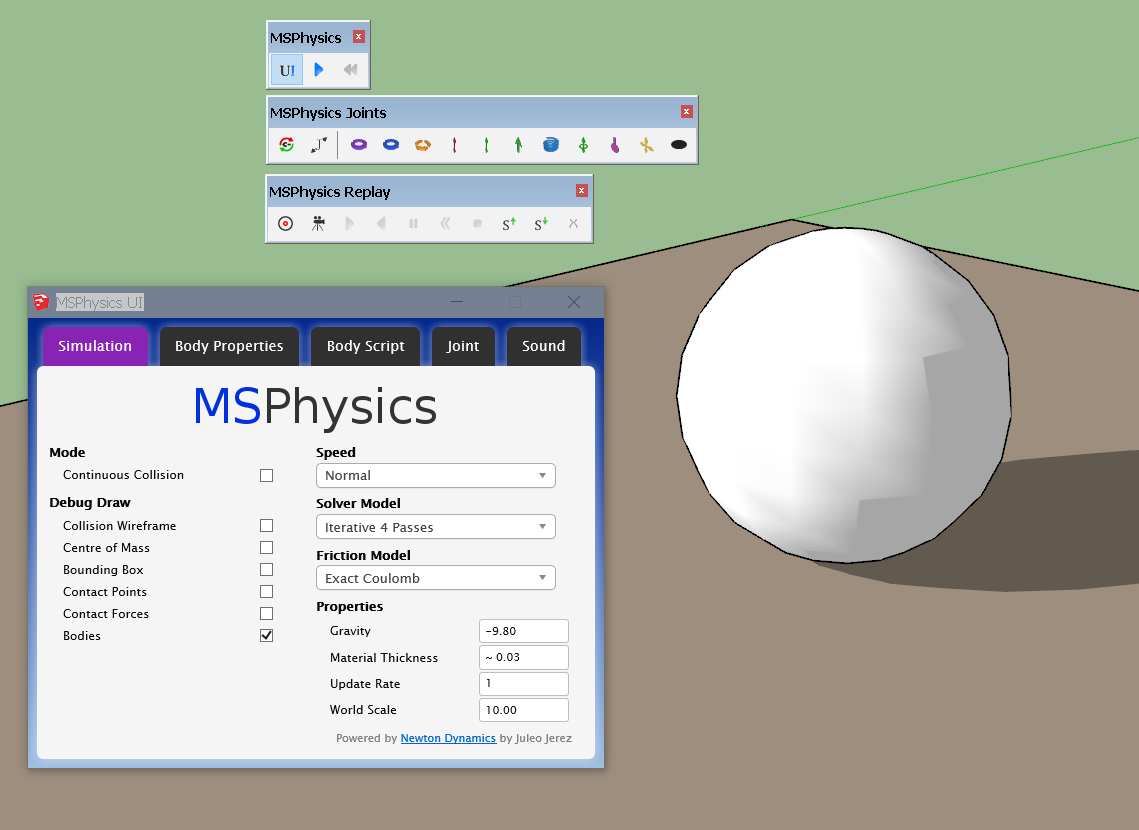
-
Seems terrific!

Nothing for multi-Languages System ?


Advertisement