MSPhysics 1.0.3 (16 October 2017)
-
Should make my question more precise:
The reason for the loose behaviour of the joints is the update rate in MSPhysics UI - Simulation - Update Rate = 1 (seems the best for my large model).
If I change this from 1 to 3, the servos remain more stable in the pivot but the spring no longer brings the steady up and down movement.
Have now tried to modify all settings at the Spring Joint, but do not get the desired result.
What can I do?
Thank you in advance, Anton!


-
Hi Anton and the community,
I think I have found the solution to control the damping of the servo motor. I worked on the geometry of "green" parts to decrease the sensitivity to the vibratory modes. As we can do in reality.
It's impressive !

Best regards.
luckyvac
-
Unfortunately, changing the Update Rate from 1 to 3 is not useful when camera, joints, emitter, etc. are based on scripts that use the OnUpdate function. Programmed objects become 3 times faster. The appearance of emitted objects no longer fits to the image rate. The weight of the emitted objects or the lifetime seems to change.
For the joints based on pivot points, an option independent of the Update Rate in the user interface seems to be useful for fixing at the pivot point. If this is possible... -
@Anton_S goood xbox controller Merci!
-
-
Platform: Sketchup 2017 on Mac 64 bit
Anton,
Got the update, (Thank you) I have not gone thru all the settings as of yet. But so far it appears to working as expected. Ill let you know as soon as I can get thru all the settings THANKS! -S -
SynSuka3d, like I said, you should reference the scripting documentation to see what each function does: http://www.rubydoc.info/github/AntonSynytsia/MSPhysics/MSPhysics/Body#set_omega-instance_method
-
my project
-
A little question regarding Export Replay to SkIndigo: The batch rendering doesn't save the frames complete rendered after the set Halt time but at the point of the last image update during the render process. This point can be minutes before the desired render time per frame. Is it an exporter question or should I ask in the Indigo forum?
-
@Faust, I don't know. I need to look deeper into that.
-
-
OK, thank you.
Have tested MSPhysics "Export Replay to Images" with the new SketchUp Make 2017 M2 (windows 7) and got a similar result as with M1 (windows 10) as mentioned in an older question.
The example is a GIF of exported frames with an original resolution 1920x1080.

-
-
@faust07 said:
Unfortunately, changing the Update Rate from 1 to 3 is not useful when camera, joints, emitter, etc. are based on scripts that use the OnUpdate function. Programmed objects become 3 times faster. The appearance of emitted objects no longer fits to the image rate. The weight of the emitted objects or the lifetime seems to change.
For the joints based on pivot points, an option independent of the Update Rate in the user interface seems to be useful for fixing at the pivot point. If this is possible...The "update rate" option controls the amount of times the simulation is to be updated per frame.
An update rate of 3, for example, tells the newton world to update 3 times a frame.
Now, to answer your question, the behavior of onUpdate event was changed in 0.9.9; instead of being called one time every frame, it was changed to be called every time the world is updated. Thus, it is updates "update rate" times every frame. To fix your problem, use onTick event instead of onUpdate. It is triggered only once every frame. See this link for all the events: http://www.rubydoc.info/github/AntonSynytsia/MSPhysics/master/MSPhysics/BodyContext@faust07 said:
OK, thank you.
Have tested MSPhysics "Export Replay to Images" with the new SketchUp Make 2017 M2 (windows 7) and got a similar result as with M1 (windows 10) as mentioned in an older question.
The example is a GIF of exported frames with an original resolution 1920x1080.The "Export Replay to Images" uses SketchUp's
view.write_imagefunction to export view into a 2d graphic. I don't think I have control over how the image is exported. Perhaps it's a SketchUp related bug. Or, since it also doesn't render fully with Indigo, it could be your hardware, not having enough memory/processing power (not much of an expert in this), to export a full image. Try exporting replay of a simple model, with only a few geometric objects, with resolution set to 1920x1080, and see if it exports properly. -
@faust07 said:
Should make my question more precise:
The reason for the loose behaviour of the joints is the update rate in MSPhysics UI - Simulation - Update Rate = 1 (seems the best for my large model).
If I change this from 1 to 3, the servos remain more stable in the pivot but the spring no longer brings the steady up and down movement.
Have now tried to modify all settings at the Spring Joint, but do not get the desired result.
What can I do?
Thank you in advance, Anton!I will fix that improper behavior of a spring joint.
Edit: Actually the spring joint works as expected. It was the oscillator function not considering the update rate. I will change the oscillator function to multiply by elapsed time (in seconds), rather than frame, which are two different things.
Edit2: Here is the new oscillator function: You can edit the MSPhysics/common_context.rb and replace the last method with this new one:
# Get oscillated value of a sine curve.
# @param [Numeric] frequency Number of sine periods per second.
# @return [Numeric] A value ranging between -1.0 and 1.0.
def oscillator(frequency)
  inc = frequency * 2 * Math;;PI
  Math.sin(inc * MSPhysics;;Simulation.instance.world.time)
end
Note that you will have to retweak the oscillation frequencies for your birdy.
-
@luckyvac said:
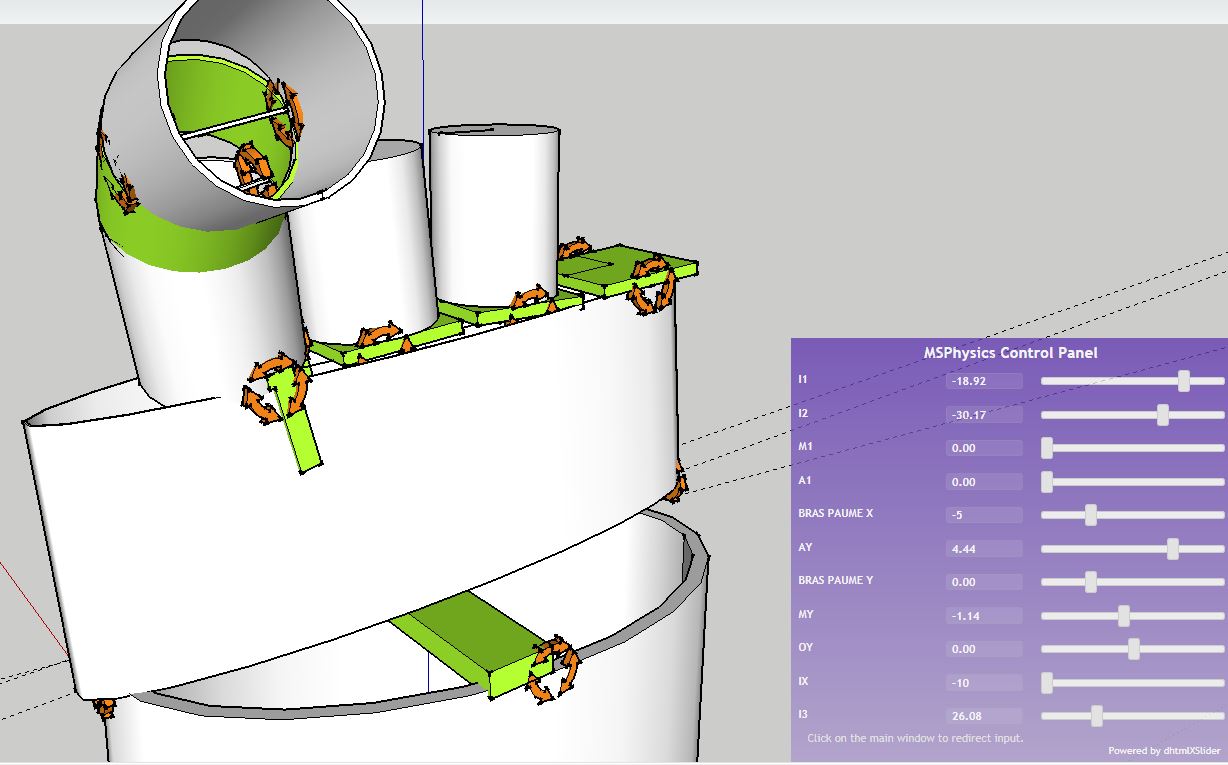
HI,
Here is the robot hand with 22 servo.
Best regards
luckyvac
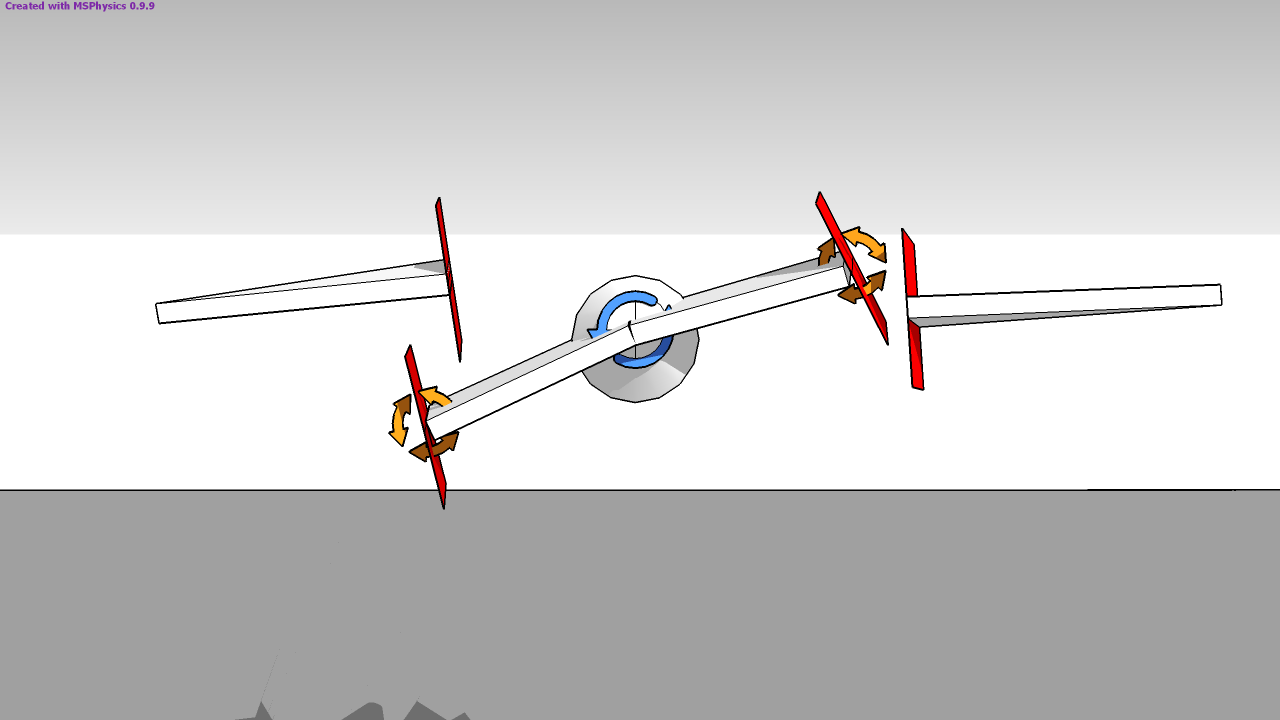
Luckyvac, this arm is very unstable with MSPhysics. This could be tweaked to be a bit more stable, but it won't be suitable to play a guitar. A programmers approach to creating a guitar would be to fake the arm and finger movements with animation rather than using the actual simulation. But that, then requires a lot of time. What I suggest you do, is look for a different software online, that emulates arm movements and guitar sounds. I'm positive that such software exits.
-
Thanks, Anton for the explanations.
The Indigo renderer update/halt time difference seems not to be a MSP or hardware problem. I've tested it with different model sizes on different machines. I'll try to ask this in the Indigo forum. In the SkIndigo Render Settings one can set the halt time a few seconds longer than the before tested update time and all is fine.The incomplete results of the view.write_image function in SketchUp 2017 I will report in the SketchUp Community Forum.
I hope my problems with Servos I can demonstrate in the following examples more dramatically. A mode to hold connected objects in the pivot position would be fine.
The tests with the Update Rate I did only to improve that. No need to change the oscillator script. For non real time simulations (large models with much MSP-objects) the oscillators based on frames are better than based on world time. (on the end the film with 30 frames per second brings the "real time" feeling).
-
-
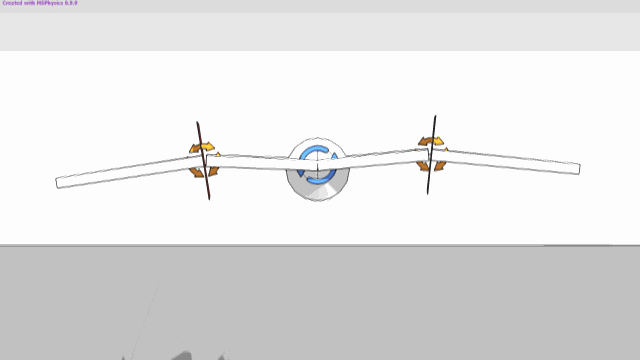
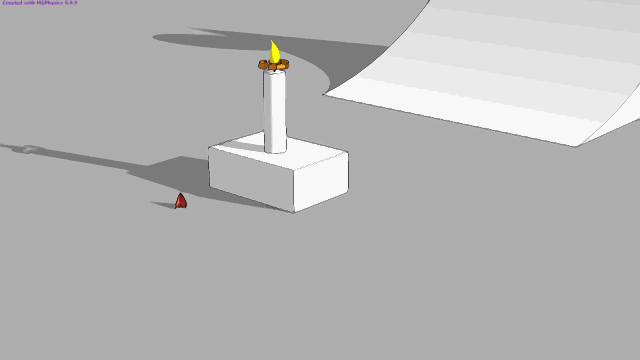
Another problem with a servo and a non-collision object. After the fall of the candle a strange behavior of the flame arises. Collision, gravitation, etc. do not seem to be completely canceled. The joint oscillates in high frequency, which can even lead to a crash. What can I do?
-
Hi Anton,
Thank you for your reply. Since I am French I do not speak English well.I did not understand everything ... the hand is unstable ?
https://www.youtube.com/watch?v=uJerEEx-btw
funny ?
I do not find
She works well my hand . I like sketchup + msphysic because I understand what I do. Other software is too complicated for me. You will have time for: "The table with angles and times must be converted to a Ruby Hash".At the moment I try this function of time:
ft = 9,75 -7,91cos(6,28world.time) -0,88cos(18,84world.time)
-0,32cos(31,4world.time) -0,16cos(43,96world.time) -5,27sin(3,14world.time)
Here is the Fourier series that works
youpi !
-9.75+7.91Math.cos(6.28world.time)+0.88Math.cos(18.84world.time)+0.32Math.cos(31.4world.time)+0.16Math.cos(43.96world.time)+5.27Math.sin(3.14world.time)
it does not work. What to do? thank you
Thank you very much, Best regards.
luckyvac
Hello! It looks like you're interested in this conversation, but you don't have an account yet.
Getting fed up of having to scroll through the same posts each visit? When you register for an account, you'll always come back to exactly where you were before, and choose to be notified of new replies (either via email, or push notification). You'll also be able to save bookmarks and upvote posts to show your appreciation to other community members.
With your input, this post could be even better 💗
Register Login


Advertisement