sketchucation logo sketchucation
    • Login
    ℹ️ Licensed Extensions | FredoBatch, ElevationProfile, FredoSketch, LayOps, MatSim and Pic2Shape will require license from Sept 1st More Info

    Rolleiflex Automat [Model Progression Thread]

    Scheduled Pinned Locked Moved WIP
    90 Posts 15 Posters 8.5k Views 15 Watching
    Loading More Posts
    • Oldest to Newest
    • Newest to Oldest
    • Most Votes
    Reply
    • Reply as topic
    Log in to reply
    This topic has been deleted. Only users with topic management privileges can see it.
    • tademaT Offline
      tadema
      last edited by

      Looking great Bryan πŸ‘ . not sure if you've seen these http://www.flickr.com/search/?q=Rolleiflex+Automat

      John

      1 Reply Last reply Reply Quote 0
      • cottyC Offline
        cotty
        last edited by

        @tadema said:

        Looking great Bryan πŸ‘ . not sure if you've seen these http://www.flickr.com/search/?q=Rolleiflex+Automat

        John

        TIP: If I want to look at flickr pictures, I usually use http://flickriver.com/ for this...

        my SketchUp gallery

        1 Reply Last reply Reply Quote 0
        • Bryan KB Offline
          Bryan K
          last edited by

          @tadema said:

          Looking great Bryan πŸ‘ . not sure if you've seen these http://www.flickr.com/search/?q=Rolleiflex+Automat

          John

          Good find John. That will help a lot. Thanks and thanks.

          See my portfolio at https://delphiscousin.blogspot.com/

          1 Reply Last reply Reply Quote 0
          • Bryan KB Offline
            Bryan K
            last edited by

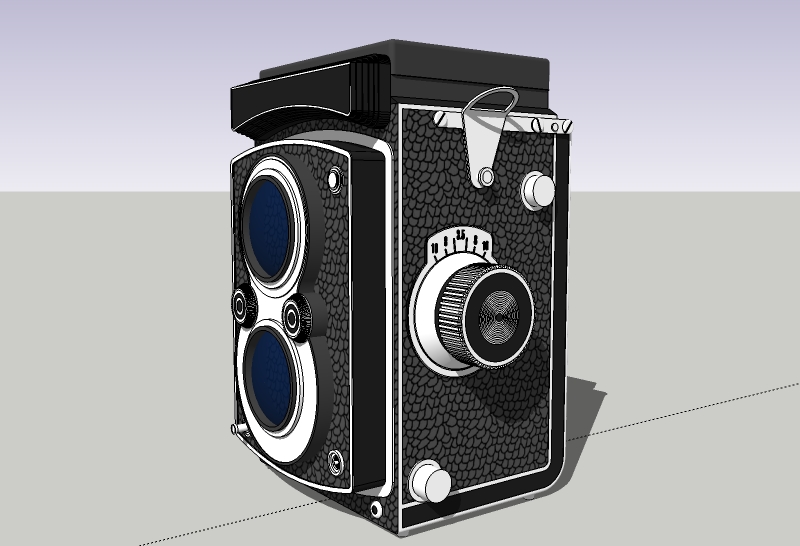
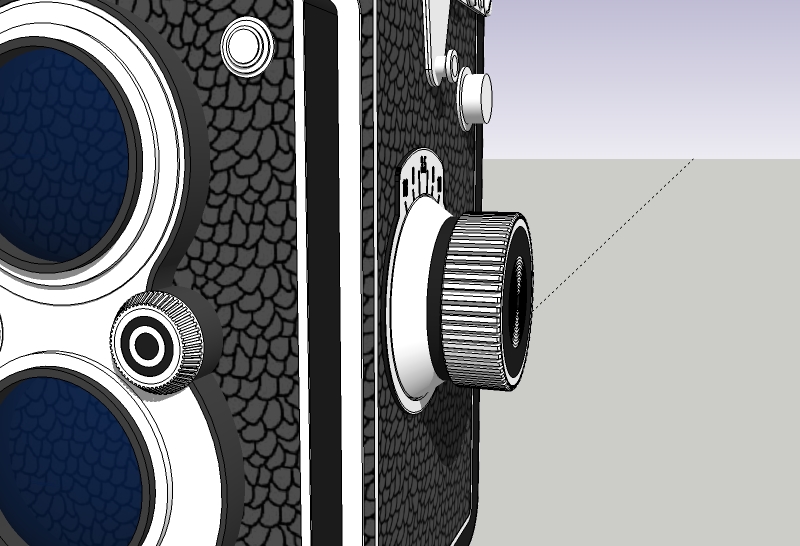
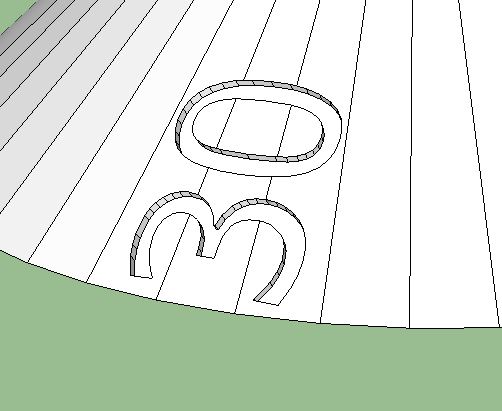
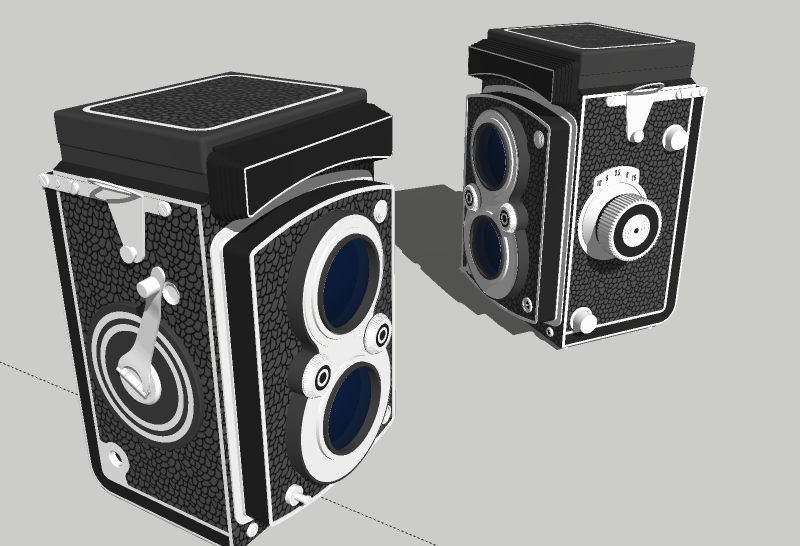
            Focus knob almost complete.

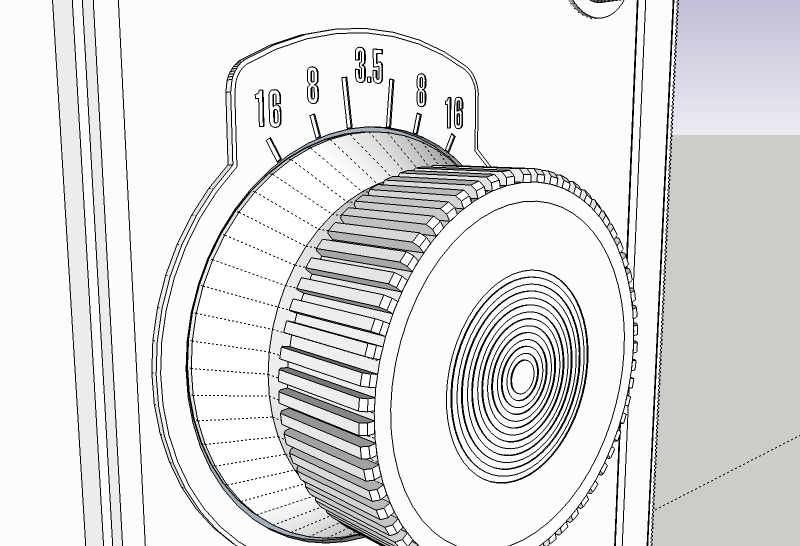
            But I have a problem. I need to put numbers on the angled dial face, between the finger grips and the focal length indicator (the 16,8,3.5) but it is conical. (see second picture).

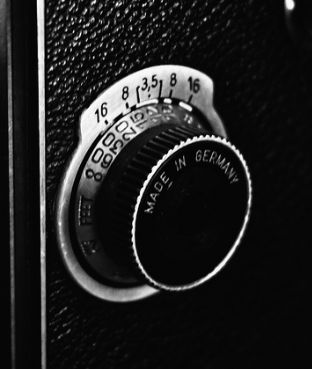
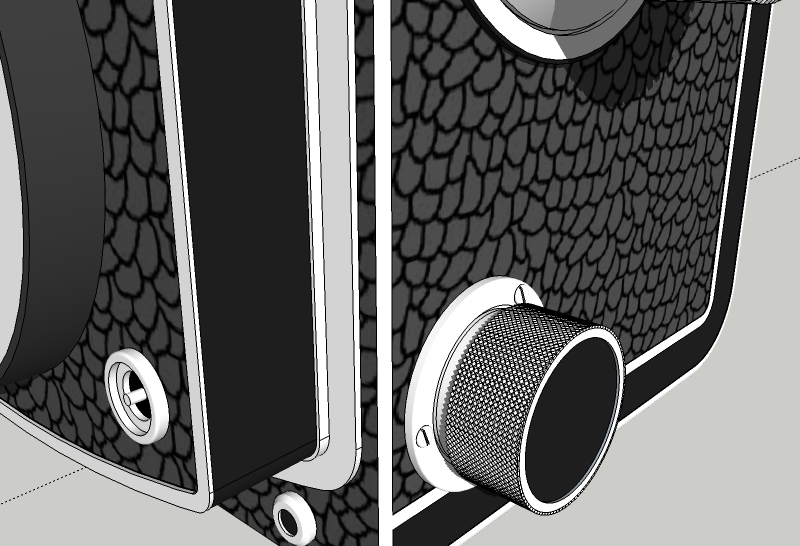
            I can't get regular SU letters to conform no matter what I try as the numbers are so big they cross over 3 faces of the cone due the angle required. (see close-ups from John's links)

            Any suggestions?


            Rollieflex Automat 16.jpg


            Rollieflex Automat 17.jpg


            focus knob.JPG

            See my portfolio at https://delphiscousin.blogspot.com/

            1 Reply Last reply Reply Quote 0
            • soloS Offline
              solo
              last edited by

              Why not create in in PS and put it on as an image and not geometry?

              I see you never modeled anything behind lenses, still getting to it?

              http://www.solos-art.com

              If you see a toilet in your dreams do not use it.

              1 Reply Last reply Reply Quote 0
              • Bryan KB Offline
                Bryan K
                last edited by

                @solo said:

                Why not create in in PS and put it on as an image and not geometry?

                I see you never modeled anything behind lenses, still getting to it?

                I did think about that, but will that work across 3 angled faces or is that irrelevant? Here's a ref pic. And what would be the best way to layout the graphics and what final file should I create? Jpeg?

                Honestly, I've only tried a custom image once and it didn't run out very good, so I really don't know the best way to go about that.

                Rollieflex Automat 18.jpg

                Yeah, the lenses are not finished. I'm completing the sides and then I will do the lenses last. There is still more detail to be added on the lenses, most of it, again, lettering.

                See my portfolio at https://delphiscousin.blogspot.com/

                1 Reply Last reply Reply Quote 0
                • BoxB Offline
                  Box
                  last edited by

                  Using 3d lettering can't you intersect the letters with the facets and remove the excess.

                  1 Reply Last reply Reply Quote 0
                  • Bryan KB Offline
                    Bryan K
                    last edited by

                    @box said:

                    Using 3d lettering can't you intersect the letters with the facets and remove the excess.

                    I did try that, but I'm having trouble with all kinds of things with this model. I think the file is slightly corrupted. In this case, I could not get the letters to rotate properly. It did once, and then would not do it again.

                    But mostly, it's a very odd 3 point rotation and would have to be done for something like 12 numbers. In other words, it would take days, if I can it to work again.

                    Also, the number size spreads across 3 faces.

                    See my portfolio at https://delphiscousin.blogspot.com/

                    1 Reply Last reply Reply Quote 0
                    • BoxB Offline
                      Box
                      last edited by

                      But if you insert the number at the edge of one of the faces it will glue to that face, you should then be able to rotate it once into position, unglue it and scale it through the three faces, then select the three faces and intersect with model, remove the number and you should have the number cut into the surface.

                      1 Reply Last reply Reply Quote 0
                      • Bryan KB Offline
                        Bryan K
                        last edited by

                        @box said:

                        But if you insert the number at the edge of one of the faces it will glue to that face, you should then be able to rotate it once into position, unglue it and scale it through the three faces, then select the three faces and intersect with model, remove the number and you should have the number cut into the surface.

                        Exactly. And that's what I tried to do the first time and for some reason, it worked once and then didn't work again.

                        Like I said, the file or program has some weird issues. It's the same with other very large polygon models I've done. Things just seem to stop working.

                        I even made the focus knob a separate file and worked on it there, but it still had problems.

                        I may try it again and see what happens, but the number will have to be rotated on three axis, for each number because it's a cone.

                        I would rather have them etched into the face as in real life, they are stamped.

                        See my portfolio at https://delphiscousin.blogspot.com/

                        1 Reply Last reply Reply Quote 0
                        • BoxB Offline
                          Box
                          last edited by

                          I don't understand the 3 axis rotate.

                          When you "place" the text it should glue to the face of one of your facets so the only rotation you need would be roughly 90deg to have it reading the right way.

                          And doing it this way allows you to use joint push pull to stamp them or raise them.


                          stamp.jpg

                          1 Reply Last reply Reply Quote 0
                          • Bryan KB Offline
                            Bryan K
                            last edited by

                            @box said:

                            I don't understand the 3 axis rotate.

                            When you "place" the text it should glue to the face of one of your facets so the only rotation you need would be roughly 90deg to have it reading the right way.

                            And doing it this way allows you to use joint push pull to stamp them or raise them.

                            This is exactly what I'm trying to do. Hmm, yet mine won't do this.

                            Cool. Thanks for the help, box. Like I said, I'll try this again.

                            Not sure why it isn't working.

                            Again thanks.

                            See my portfolio at https://delphiscousin.blogspot.com/

                            1 Reply Last reply Reply Quote 0
                            • Bryan KB Offline
                              Bryan K
                              last edited by

                              Update:

                              Got one to work, but in the wrong place. πŸ˜†

                              I think I can make this work, but it's going to be very tedious.

                              Thanks again box. I think that will do it.

                              See my portfolio at https://delphiscousin.blogspot.com/

                              1 Reply Last reply Reply Quote 0
                              • Bryan KB Offline
                                Bryan K
                                last edited by

                                Minor tweaks. Still more details to be added.


                                Rollieflex Automat 19.jpg

                                See my portfolio at https://delphiscousin.blogspot.com/

                                1 Reply Last reply Reply Quote 0
                                • GarethG Offline
                                  Gareth
                                  last edited by

                                  looking good...!!

                                  1 Reply Last reply Reply Quote 0
                                  • Bryan KB Offline
                                    Bryan K
                                    last edited by

                                    Thanks Gareth!

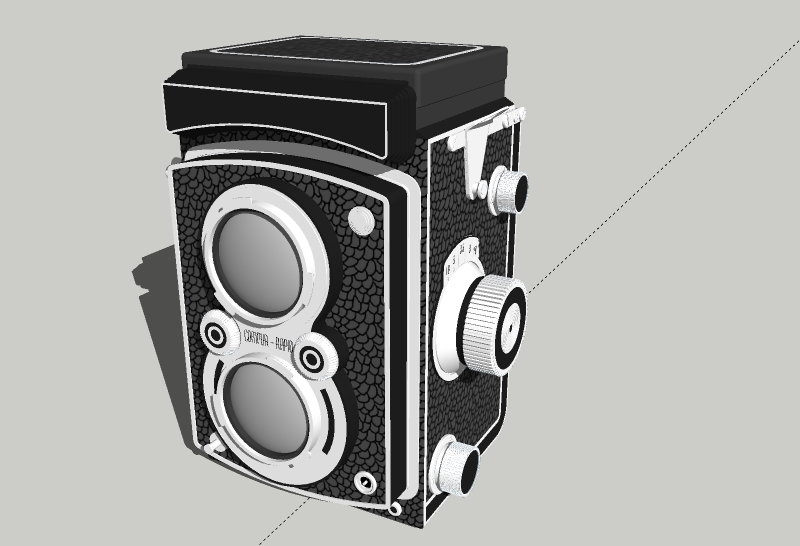
                                    Knurling complete on side knobs. Screws and bezel ring on side knobs also complete.

                                    I think the scale of knurling is a tad smaller than shown in references, but it's the best I can do and I think still pretty darn close.
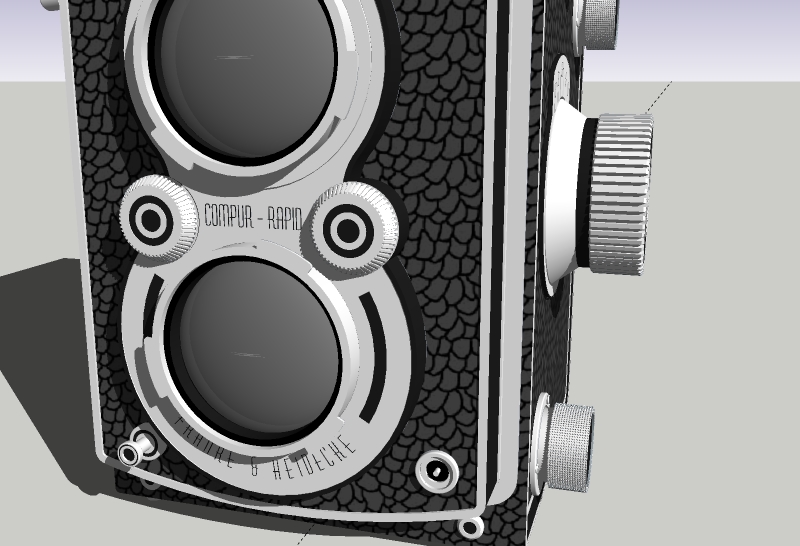

                                    Rollieflex Automat 20.jpg

                                    See my portfolio at https://delphiscousin.blogspot.com/

                                    1 Reply Last reply Reply Quote 0
                                    • Bryan KB Offline
                                      Bryan K
                                      last edited by

                                      More lens detail.


                                      Rollieflex Automat 21.jpg

                                      See my portfolio at https://delphiscousin.blogspot.com/

                                      1 Reply Last reply Reply Quote 0
                                      • Bryan KB Offline
                                        Bryan K
                                        last edited by

                                        More lens front detail.

                                        Arrgghh! I just noticed the lens locking ring is a little more complex than I thought. So what you see right now is not correct.

                                        Also, the font used for the lettering is not the official font. I don't have that font and I doubt anybody but Rollieflex does, so I tried to use something I thought was appropriate from the era.


                                        Rollieflex Automat 22.jpg

                                        See my portfolio at https://delphiscousin.blogspot.com/

                                        1 Reply Last reply Reply Quote 0
                                        • Mike AmosM Offline
                                          Mike Amos
                                          last edited by

                                          The font is close enough the standard of modeling is exceptional and the detail level high. Thanks for showing this step by step, very inspirational and a fantastic production.

                                          1 Reply Last reply Reply Quote 0
                                          • Bryan KB Offline
                                            Bryan K
                                            last edited by

                                            @mike amos said:

                                            The font is close enough the standard of modeling is exceptional and the detail level high. Thanks for showing this step by step, very inspirational and a fantastic production.

                                            Thanks Mike.

                                            There is still quite a bit of detail left to be done. I may have this done by this weekend.

                                            BTW, can anyone point me to a tutorial on how to create material texture and import it in SU? The body textured material I'm using at the moment is not exactly right. The pattern needs to be a lot smaller and the one I'm using has reached its scale down limit.

                                            See my portfolio at https://delphiscousin.blogspot.com/

                                            1 Reply Last reply Reply Quote 0
                                            • 1
                                            • 2
                                            • 3
                                            • 4
                                            • 5
                                            • 2 / 5
                                            • First post
                                              Last post
                                            Buy SketchPlus
                                            Buy SUbD
                                            Buy WrapR
                                            Buy eBook
                                            Buy Modelur
                                            Buy Vertex Tools
                                            Buy SketchCuisine
                                            Buy FormFonts

                                            Advertisement