Adding backgrounds in Photoshop
-
Can anyone help me with pointing me in the right direction to find tutorials or information on how to add background images via Photoshop to interior scenes with windows. I have been using custom backgrounds but it is impossible to manipulate the image to the correct focal length & perspective. I am very new to Photoshop so would appreciate any help.
John
-
Hi, John:
I think what you are asking can be seen in this tutorial- at least for a start. http://www.google.com/url?sa=t&rct=j&q=&esrc=s&source=web&cd=2&cad=rja&ved=0CDEQtwIwAQ&url=http%3A%2F%2Fwww.youtube.com%2Fwatch%3Fv%3DHHsRRLCAOm8&ei=zLESUsyRLoLE2wWhhIDIDg&usg=AFQjCNETD4xuJY5vhGHbRwAF_yUqOVx78w&bvm=bv.50768961,d.b2I
I don't have Photoshop, but that is not relevant. Any image processor can work.I mean this assumes that you want to apply the image to a face in Sketchup. You have to apply it as a texture.
-
Hi Tim
No I probably didn't word my request correctly, what I meant was how I do the background I want to show as seen through the windows of my Sketchup model as a post production process in photoshop. I have seen the tutorial you sent and have used it for such things as signage on buildings etc and can see that it would work for background images too but I think it would be fairly basic. Daniel Tal touches on this topic in his book Rendering in SketchUp, unfortunately it is only a very brief overview. Many thanks for your reply, John
-
Well, John:
Sorry I misunderstood. I am good at that. Hopefully someone else can help you on this. Best regards. -
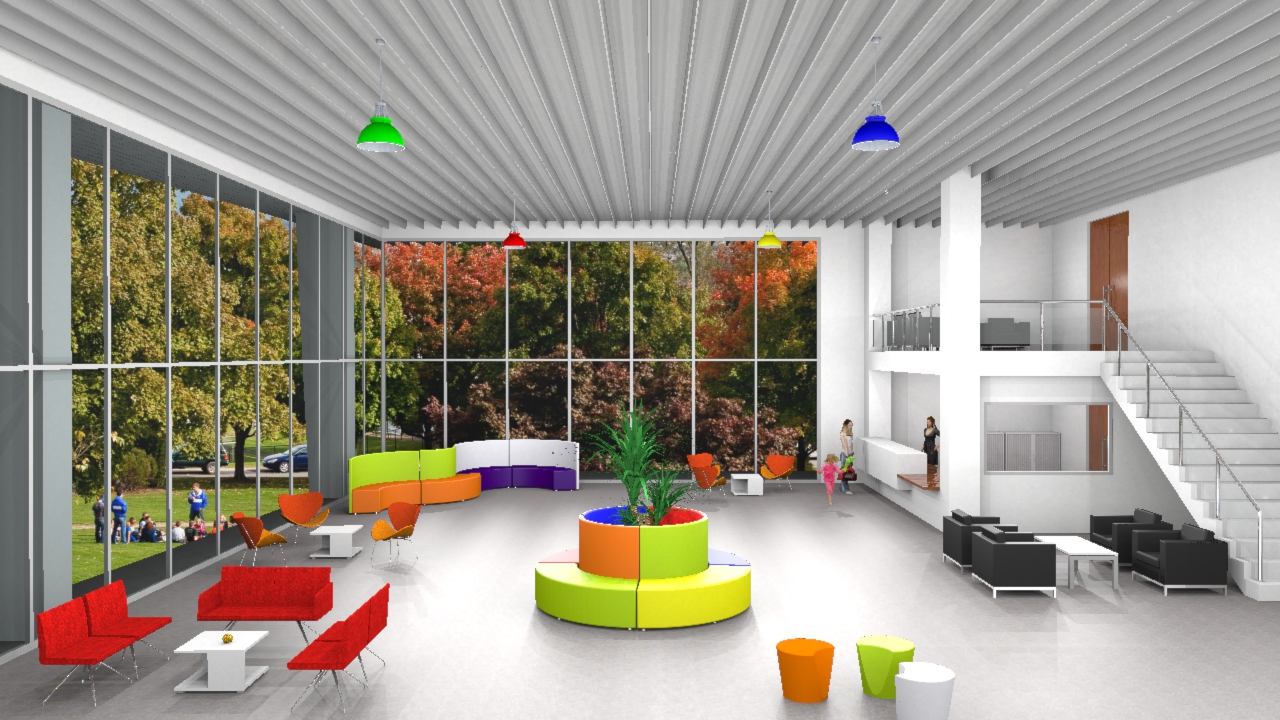
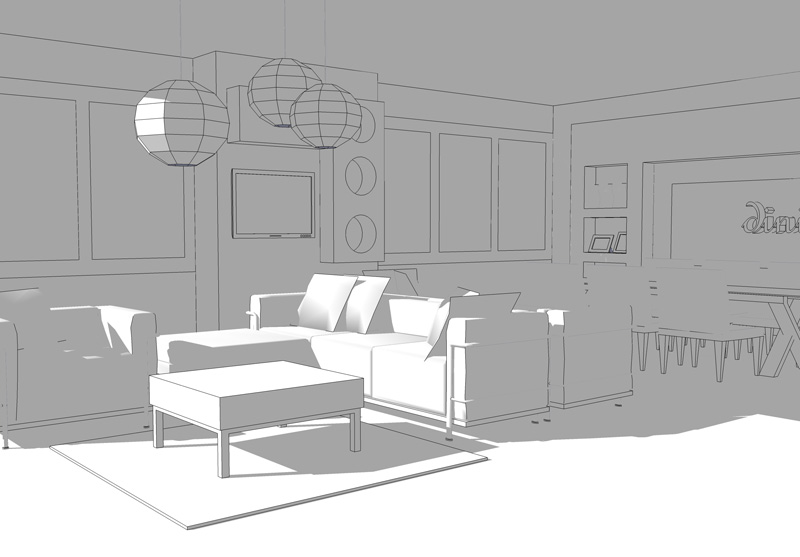
So you need to add a background to a straight SU output (no render) in PS? Something like the image below for example? (the SU's image is B&W while the background is colored)

-
-

Maybe...
I'd love:
sea
cold
grey skies.
But I don't like beer...
Grey is my favourite color btw. -
We don't drink beer. Only Stout....which is black.....like coffee....and you can have one in the morning to wake you up
-
I'm afraid that I could not even drink that black soup. Better a couple of glasses of Prosecco in the morning.

-
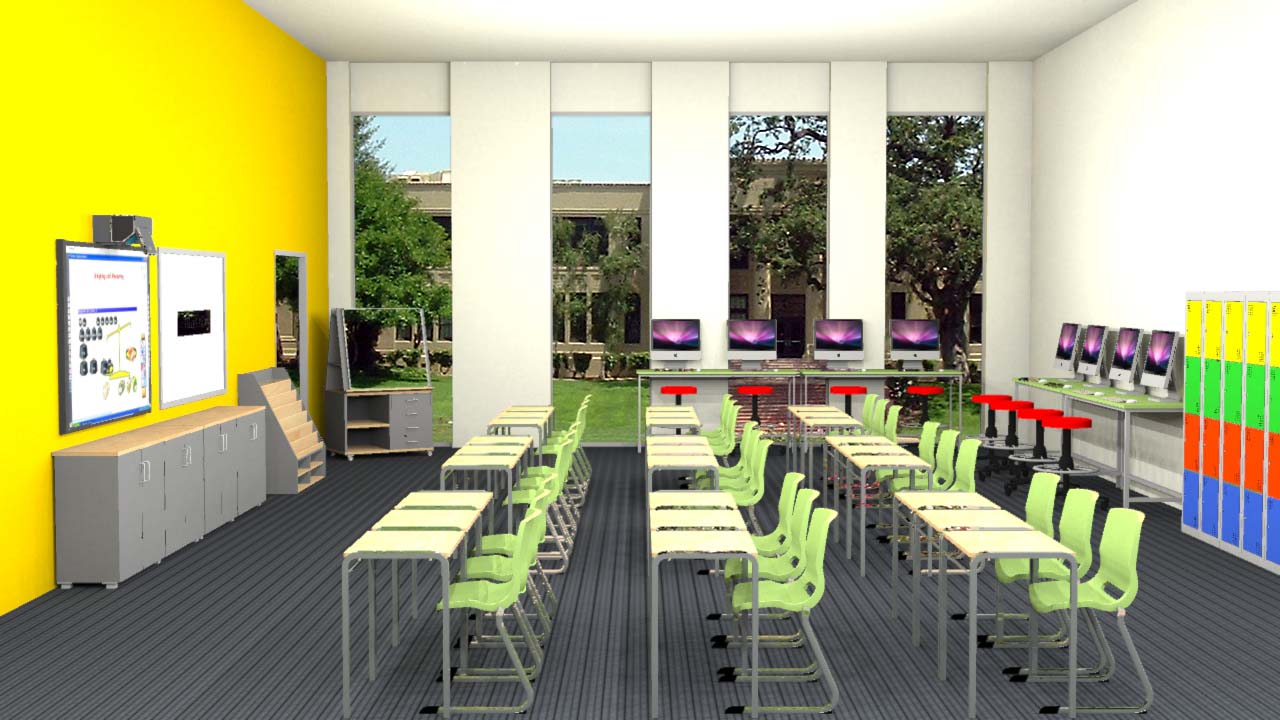
Hi Massimo
Yes except the SU image will be rendered in Shaderlight. I have attached a render I have done using custom background setting as this is fairly typical of the application I need often. Unfortunately with custom backgrounds you can't manipulate them for focal distance or lateral position. I use artificial lighting in my scenes.
Regards
John
-
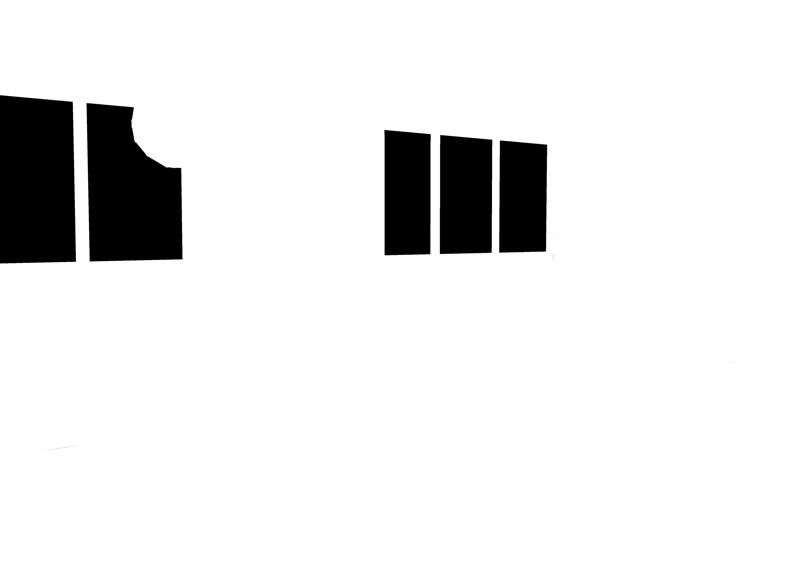
Ok, I'll try an explanation. It's a lot harder to explain than to do.
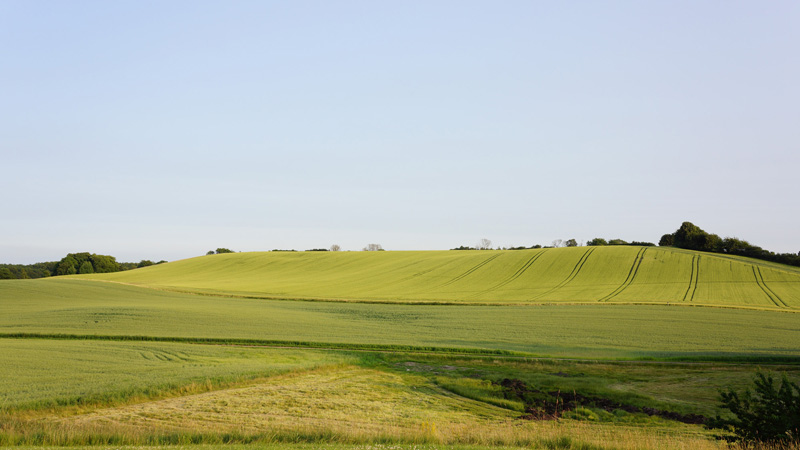
- You need three images like the pictures below:
-the render;
-the mask;
-the background.
I don't know if Shaderlight can render a mask, if not you can use this plugin directly in SU. Of course the render and the mask should have exactly the same size. I suggest to render/export the mask at the double of the size and then shrink it to the correct size. You may need to invert the mask.
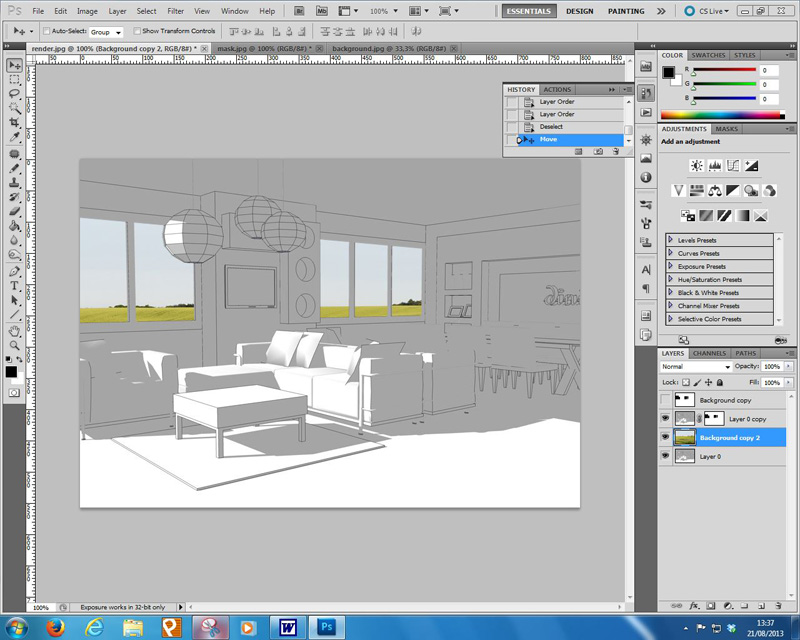
- Open the three images in PS, then go to the mask image -->right click on the layer-->"duplicate layer" and choose the render image as destination. Do the same with the background image.
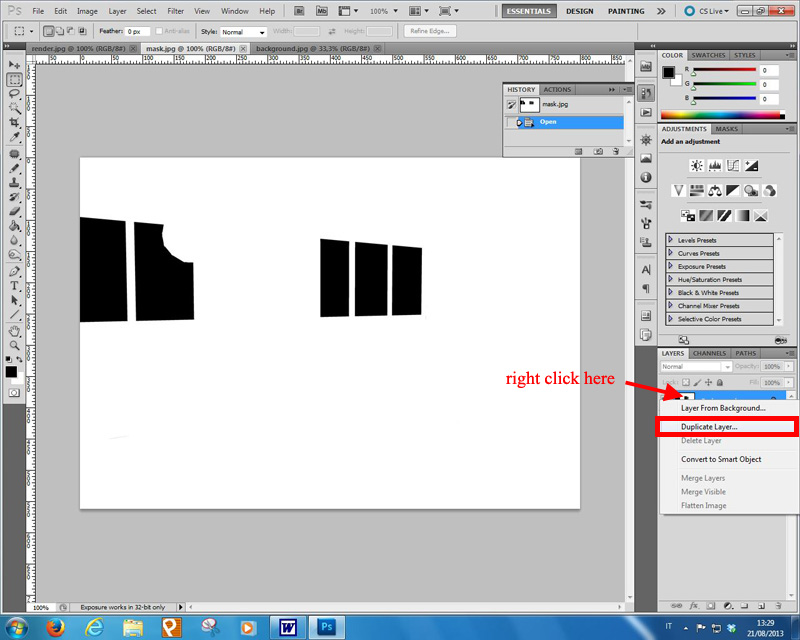
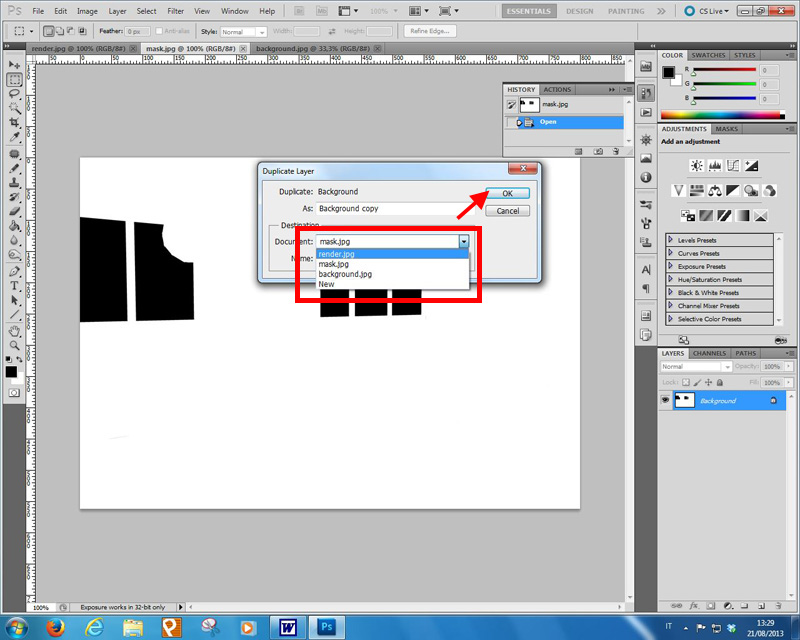
You should have something like that at the end.
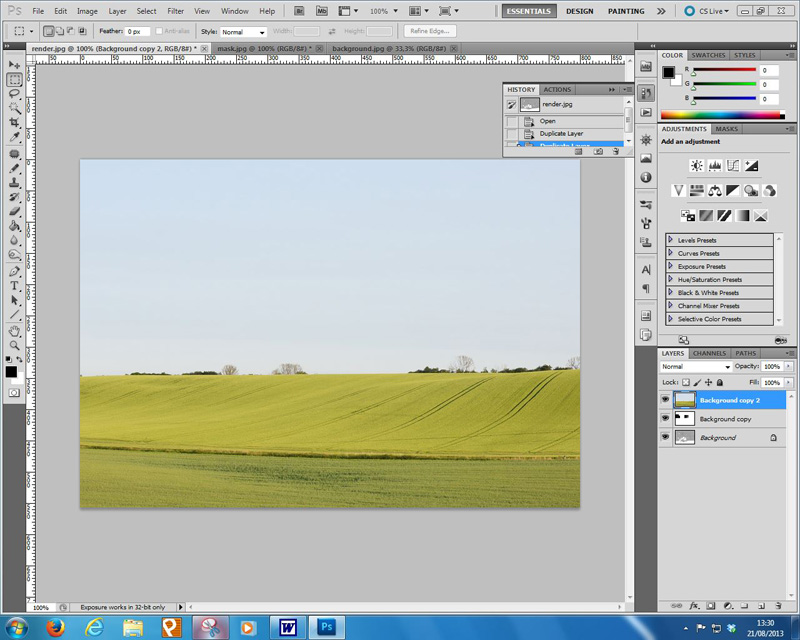
- Double click on render layer and press ok, then select the render layer-->ctrl+J in order to duplicate it.
- Add a mask to the duplicated render layer (see the picture below).
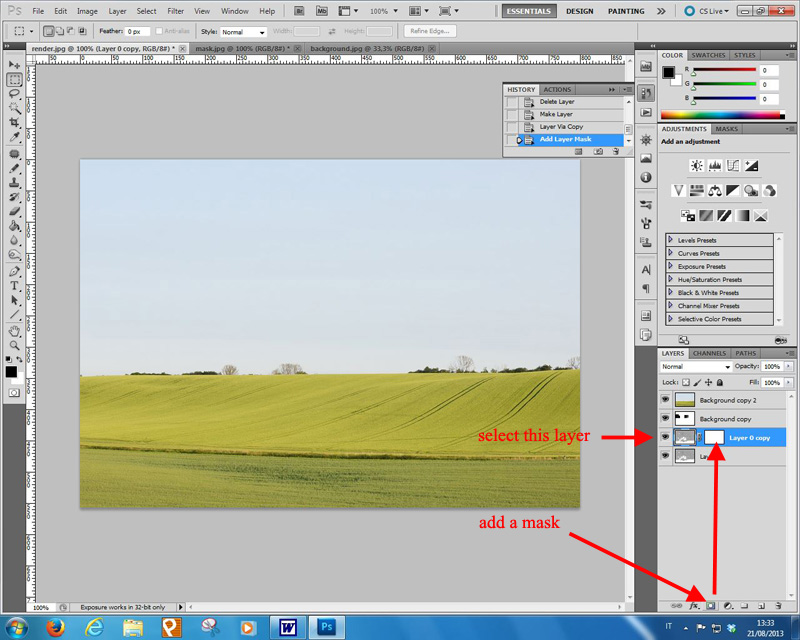
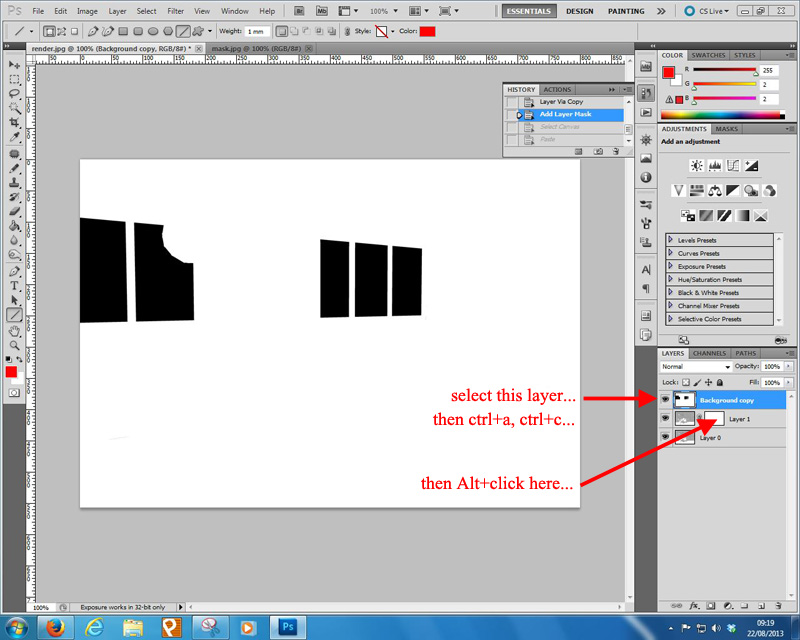
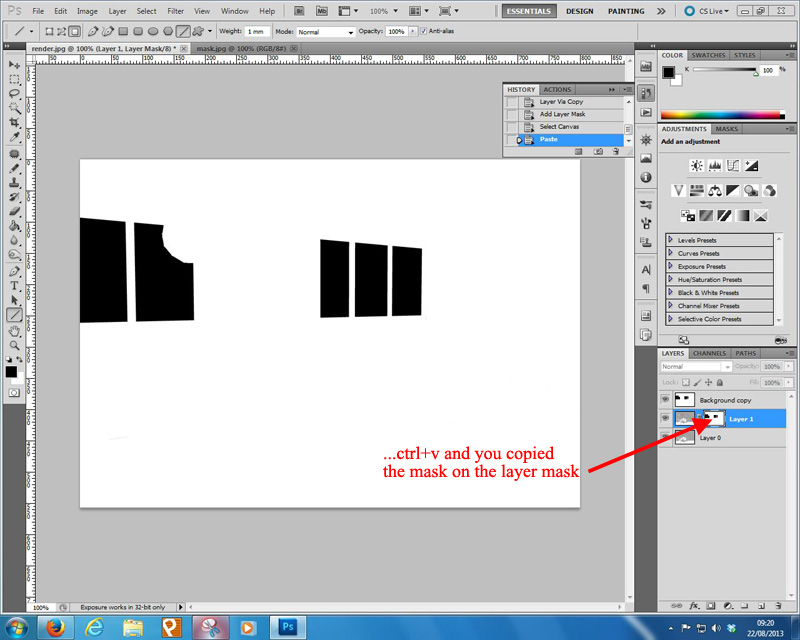
- Select the mask layer, then ctrl+a and ctrl+c then alt+click on the added layer mask and then ctrl+v. With that you copied the mask on the added layer mask.
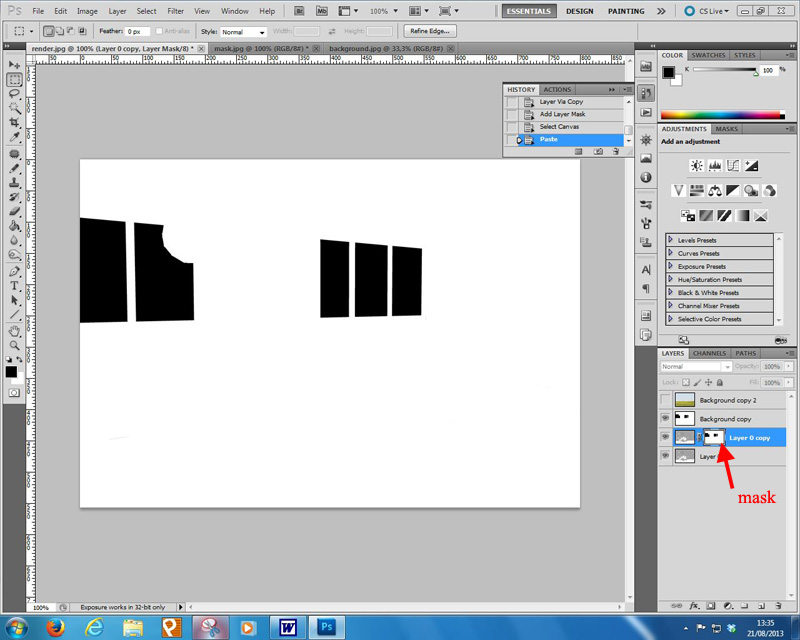
- Now put the layers in the order you see in the picture below, switch off the mask layer (click on the little eye) and move the background layer as needed.
Done.
- You need three images like the pictures below:
-
Massimo
This is what I have been trying to find, excellent instructions I will try this out.
Regards & Thanks
John -
Massimo
I have played around with this and followed your instructions however when I get to the stage of copying the mask to the added layer mask the size of the mask increases from the original mask layer size and I don't know how to resize it to fit. I have just started using Photoshop so it seems I may need to get some tuition. Many thanks for your valuable assistance, Regards John
-
make face-me component with background pic, place and scale it as desired inside SU (make sure you use 'maximum texture size' in preferences). it'd would be easier in your case.
-
This is amazingly simple and I get the results I want - It is great to know there are so many experienced SU people out there willing to share their knowledge, very rare these days. Your help is greatly appreciated, John.
-
@johnbarb said:
...when I get to the stage of copying the mask to the added layer mask the size of the mask increases from the original mask layer size and I don't know how to resize it to fit.
How can that happen? Be sure that the rendered image and the mask image have exactly the same size (width, height and resolution). Check it in PS under image-->image size.
Here are a couple of more detailed steps on how copying the mask.
-
Massimo
I did have the sizings different, have corrected but mask size is still too wide (height is OK) closer than the previous but still not right - as per screen shot. Regards
John -
Well you need to have exactly the same size for the render & mask. So if you use Shaderlight for that, render the mask at the same size (or, better, at a doubled size and then resize it in PS). If you use SU, export the mask at the same size of the render (or, better, at a doubled size and then resize it in PS).
-
Massimo
I discovered what I was doing wrong, I had exported the mask as a 2D jpeg from SU. I rendered this in Shaderlight & the fit is perfect, the only problem is it has masked a couple of surfaces not selected - the mobile whiteboard surface & a jpeg image on the whiteboard on the wall??
Regards
John
Hello! It looks like you're interested in this conversation, but you don't have an account yet.
Getting fed up of having to scroll through the same posts each visit? When you register for an account, you'll always come back to exactly where you were before, and choose to be notified of new replies (either via email, or push notification). You'll also be able to save bookmarks and upvote posts to show your appreciation to other community members.
With your input, this post could be even better 💗
Register Login


Advertisement