Component to cut face ?
-
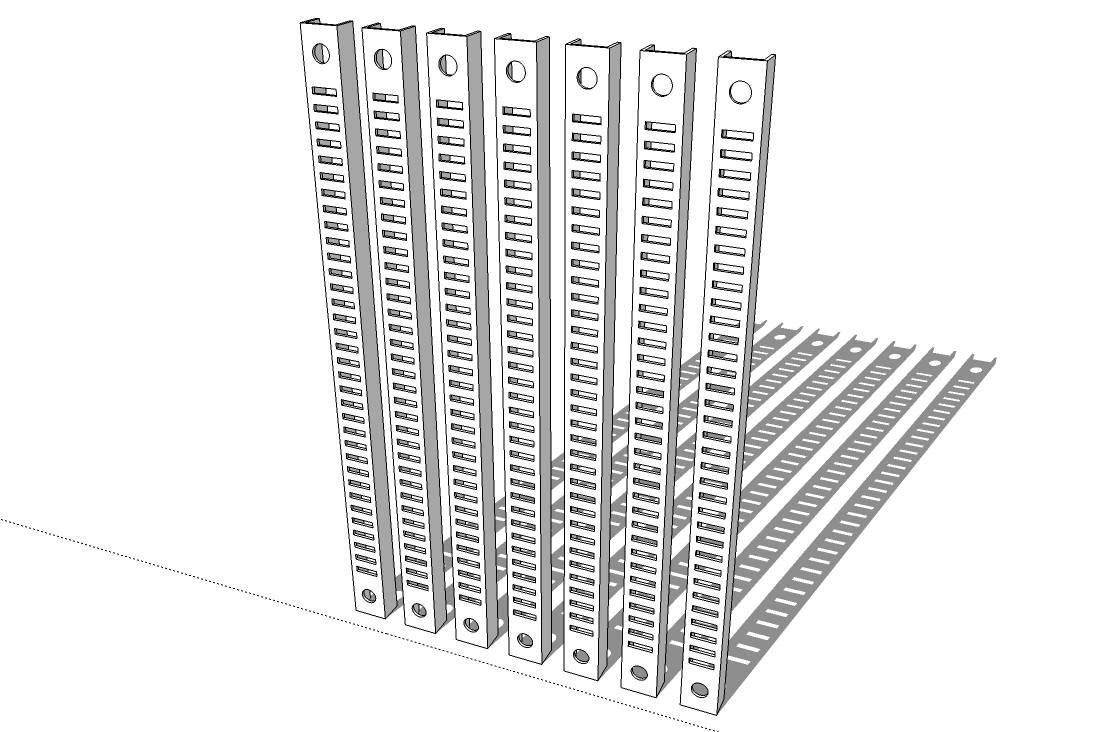
Trying to model a track for an adjustable shelf. Made track, then cut 1st slot.
Made slot a component with "any & cut face" checked.
Then brought in to another track section but it does not cut face.
I'll try to upload file also.
-
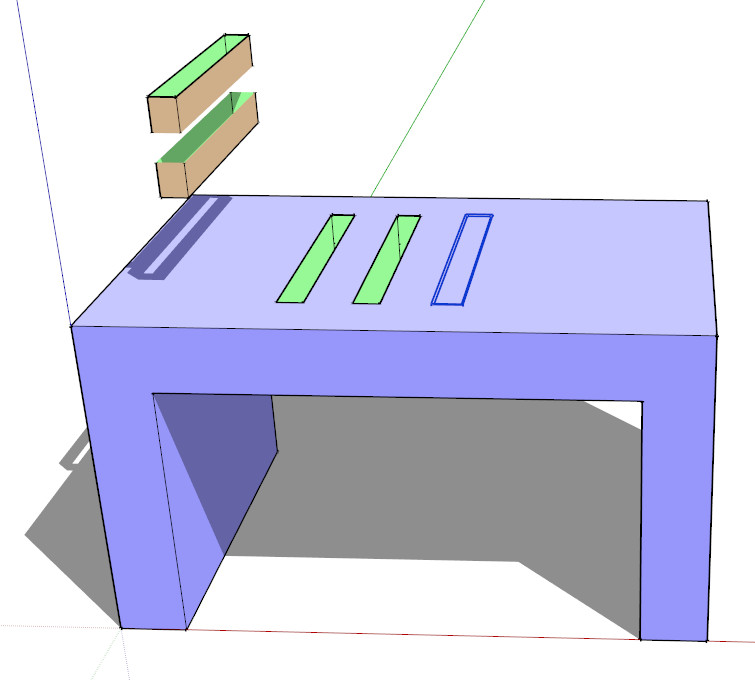
The other components are applied outside the group. They should be applied to the face within the group. The component appears to be made backwards as to the location of the cutting plane. To apply it you have to hide the upper face and apply to the lower face, then cut the upper face hole (it won't cut both faces anyway without use of a plugin by TIG). Or change the location of the axes.
Actually not clear what you did. None of the components are inside the group where they belong. The holes in the face are just holes, without the aid of the cutting component.
-
-
If you'd use components instead of groups, you could get by with only one rectangular hole.

-
Well if I were just modeling this, of course, I would duplicate the rectangle and just push-pull three of them, maybe make a component of the whole for more track, if that is what you want. But to learn use of the cutting component, remember to apply directly to a face ( a "raw" face, not to a component or group that is closed). It will normally only cut one face, unless you are using a plugin to make the second face cut. Drawing the component on the face like you did is a good idea, but getting the axes and cutting plane right can throw people off as they are just learning and eventually it makes perfect sense.
-
Of course a component setup to cut an opening will only do it in a single face so it wouldn't cut through the back side of the channel, either.
-
@pbacot said:
I would duplicate the rectangle and just push-pull three of them, maybe make a component of the whole for more track
That was my original thought.
@unknownuser said:
But to learn use of the cutting component, remember to apply directly to a face ( a "raw" face, not to a component or group that is closed).
Hadn't picked up on that.
@unknownuser said:
Drawing the component on the face like you did is a good idea, but getting the axes and cutting plane right
So when I put the rectangle on the face, and push/pulled downwards, is that what made it backwards ?
Would I have had to push/pull upwards then move the rectangle down to keep every thing on right plane or axes?
@DaveR
How quickly you come up with these good looking examples is amazing. -
Thank you, Danna. You gave me a good start on this one.

-
@danna said:
@pbacot said:
@unknownuser said:
Drawing the component on the face like you did is a good idea, but getting the axes and cutting plane right
So when I put the rectangle on the face, and push/pulled downwards, is that what made it backwards ?
Would I have had to push/pull upwards then move the rectangle down to keep every thing on right plane or axes?
.I don't know exactly why it does that, but you can look at that yourself. Try it over and look at where the axis is at when you context menu "change axes". You need to flip the red arm over then flip the green. Then test the gluing action again. This gluing axes setting is the part that could be clearer. You just have to work with it.
-
I've tried this:
-make cutting hole as component with half hight
-mirror to opposite face-move and one by one -> OK
-move both together -> no cuttingsee screencast...
Any idea whats the reason for this different behaviour?
(model attached for playing)

-
Is the answer to my question hidden in your nice tutorial, Gaieus?
-
Ha, Cotty, at least someone pays attention what's going on outside the forums!

Advertisement


