Generating relief on top of torus
-
@jean lemire said:
Hi Jon, hi folks.
See this SU file for ideas.
Jean: this is what I attempted to do, but I was unable to close up the helix successfully.
Jon
-
@gilles said:
surely Rhino Muhahahahah.
after Jon gets all his issues sorted out, maybe I'll put up a little vid showing a couple of ways

-
@jon bondy said:
I created this in what I assume is the normal fashion: started with a torus, drew a line that wrapped around the torus twice, removed one line segment, created a surface orthogonal to the line end, drew a circle, and used a follow-me to create the "pipe". I then attempted to stitch the ends of that pipe together with a series of manually drawn lines to create triangles. I gather that this attempt failed. The original instructions said to use Skin to stitch the pipe together, but I could not get that to work at all.
So, I cannot see how to fix this helix. And I gather that the original torus also has a defect, but I've not had a chance to tend to that.
Again, any hints would be appreciated.
Jon
it's hard to say where you went wrong but the helix will close.. your latest uploaded drawing has multiple faces on top of each other.. if you're stitching by hand, it's best to go into it with a systematic approach then you just have to be a robot instead of creating a mess.. (but like i said, it's hard to see where you went wrong or why all those extra faces were in there..
personally, i think i've done more than enough hand stitching in the past so i opted for a plugin to close the gap
 ..
..
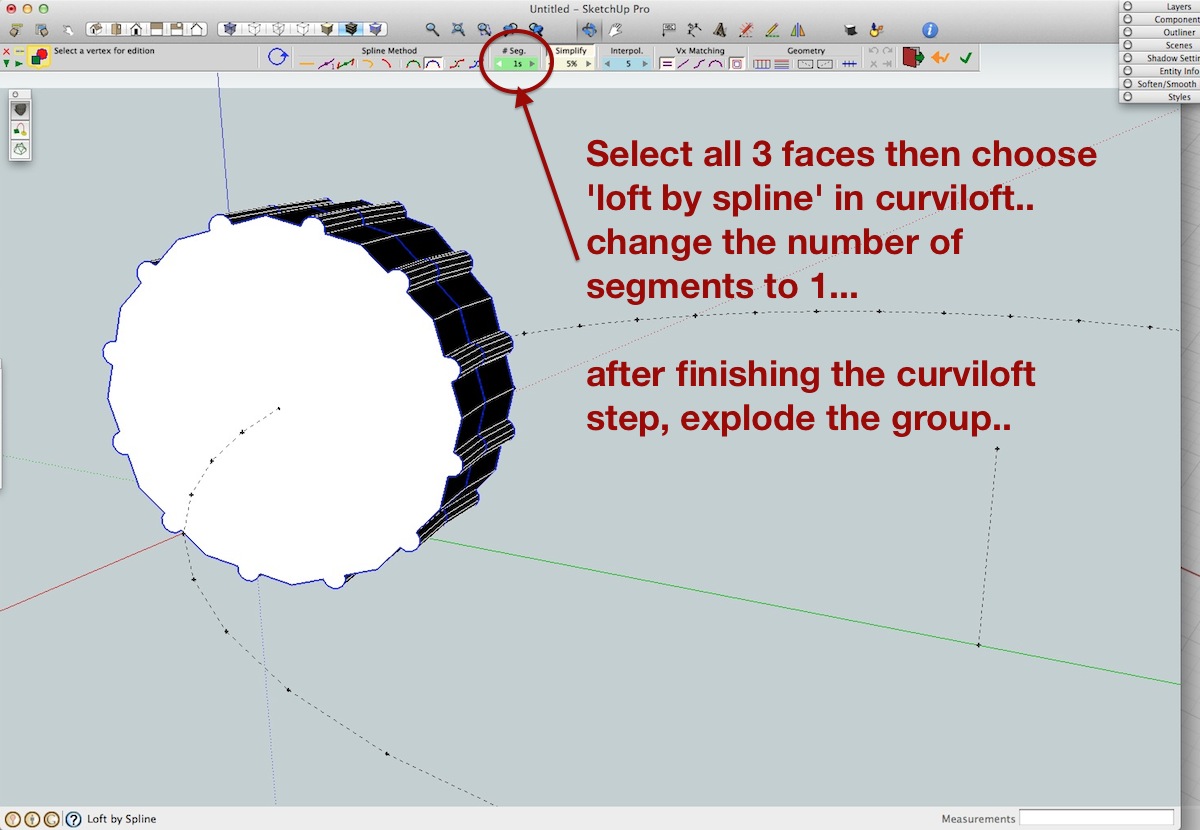
i deleted all the stuff in that segment then selected both raw circles and used curviloft..
http://sketchucation.com/forums/viewtopic.php?t=28586i also deleted the center path line, grouped the helix and it's registering as a solid (no holes or extra faces etc..)
the torus (which is hidden in this model for anyone wondering where it is) looks good to me.. if you're concerned about it not registering as solid, it's because of the circle path line running though the middle of it.. delete that line (or remove it from within the component) and it too will be a solid..
.
-
I tried Gilles approach, and when I got to step 11, the two parts did not line up. I modified the component by re-rotating the top until it looked OK, but I doubt that I got it spot on. The resulting torus looks nice, but is not solid at all. Boy, those explode and group steps take 10-15 minutes!
I was also not sure exactly how I was to do the smoothing in step 12.
Jeff: curviloft made quick work of joining the ends of the pipe together (thanks!), but the resulting group is still not noted as being solid (it just says "Group (1 in model)"). Ironically, I already had curviloft, but I have so many tools that I can't keep track of which to use when!
Thanks for all of the help!
-
the curviloft created segment will be in its own group immediately after using the plugin.. so, you'll have to explode it and get it within the rest of the helix's contex in order to make it one group.. also, make sure the centerline path isn't in the group because that will prevent it from being solid..
a solid group will only have a manifold (water tight) outer shell with no extra geometry floating around inside
-
@jon bondy said:
I tried Gilles approach, and when I got to step 11, the two parts did not line up. I modified the component by re-rotating the top until it looked OK, but I doubt that I got it spot on. The resulting torus looks nice, but is not solid at all. Boy, those explode and group steps take 10-15 minutes!
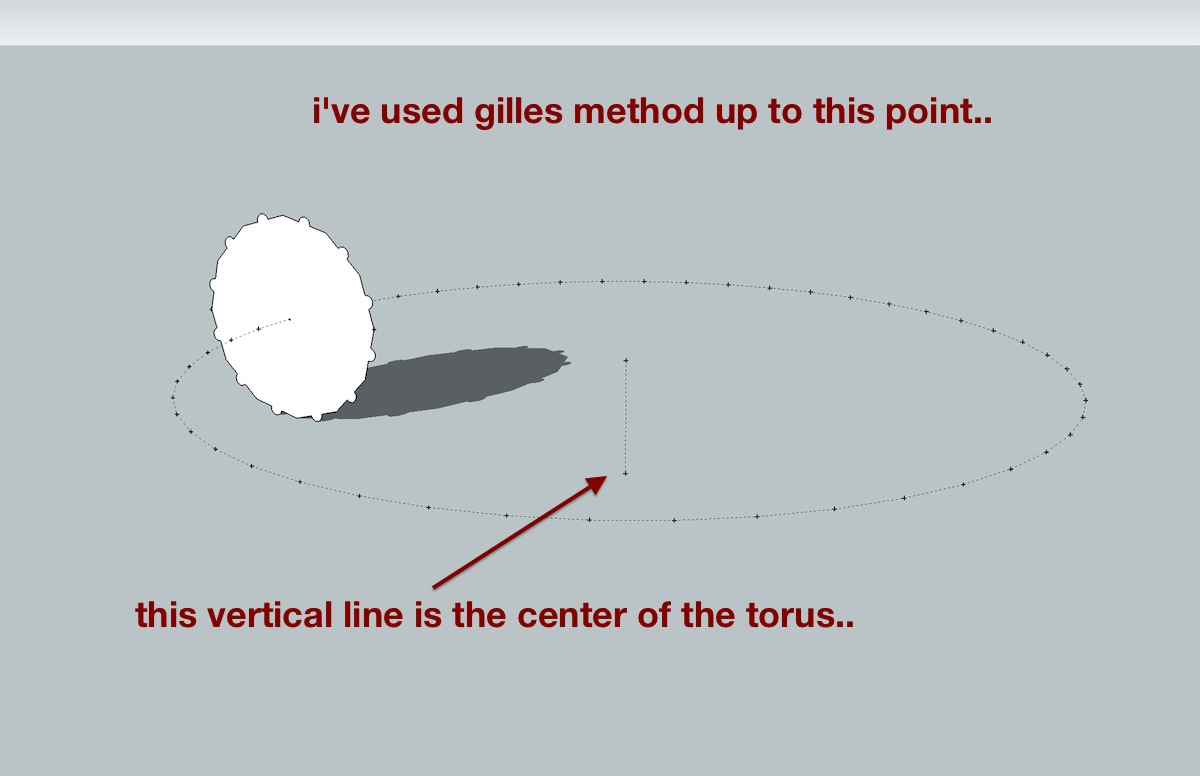
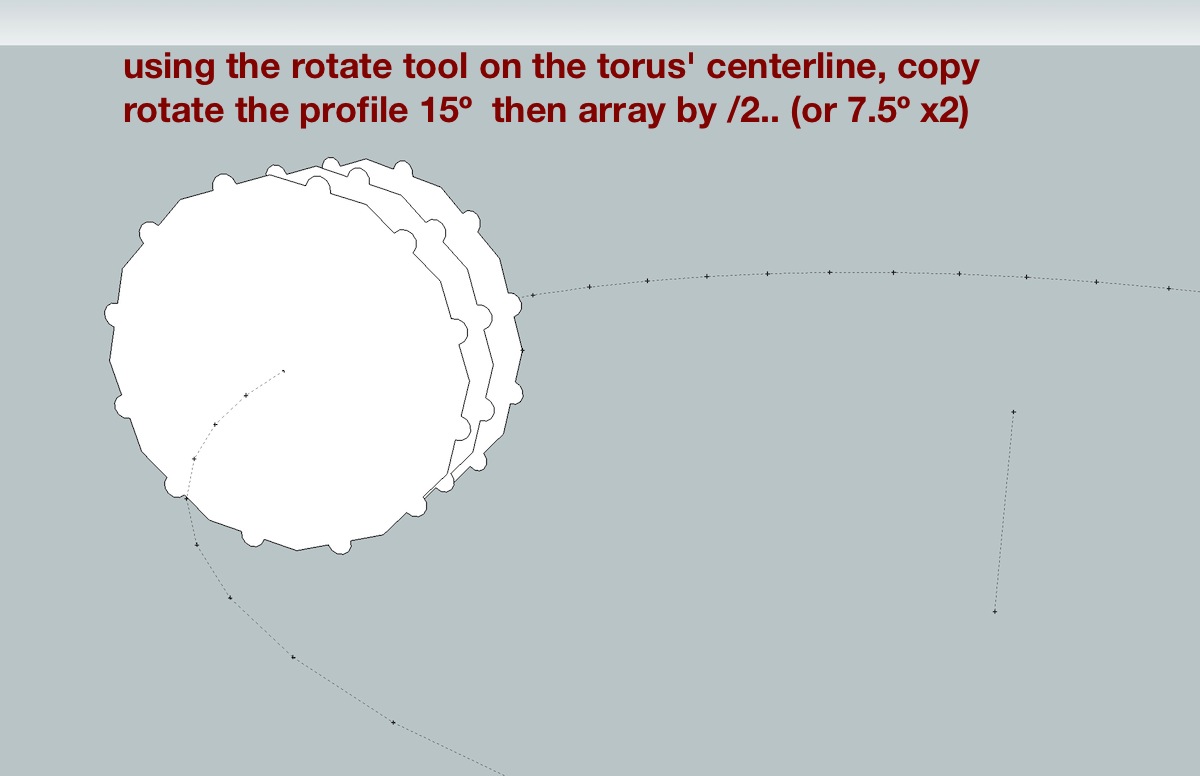
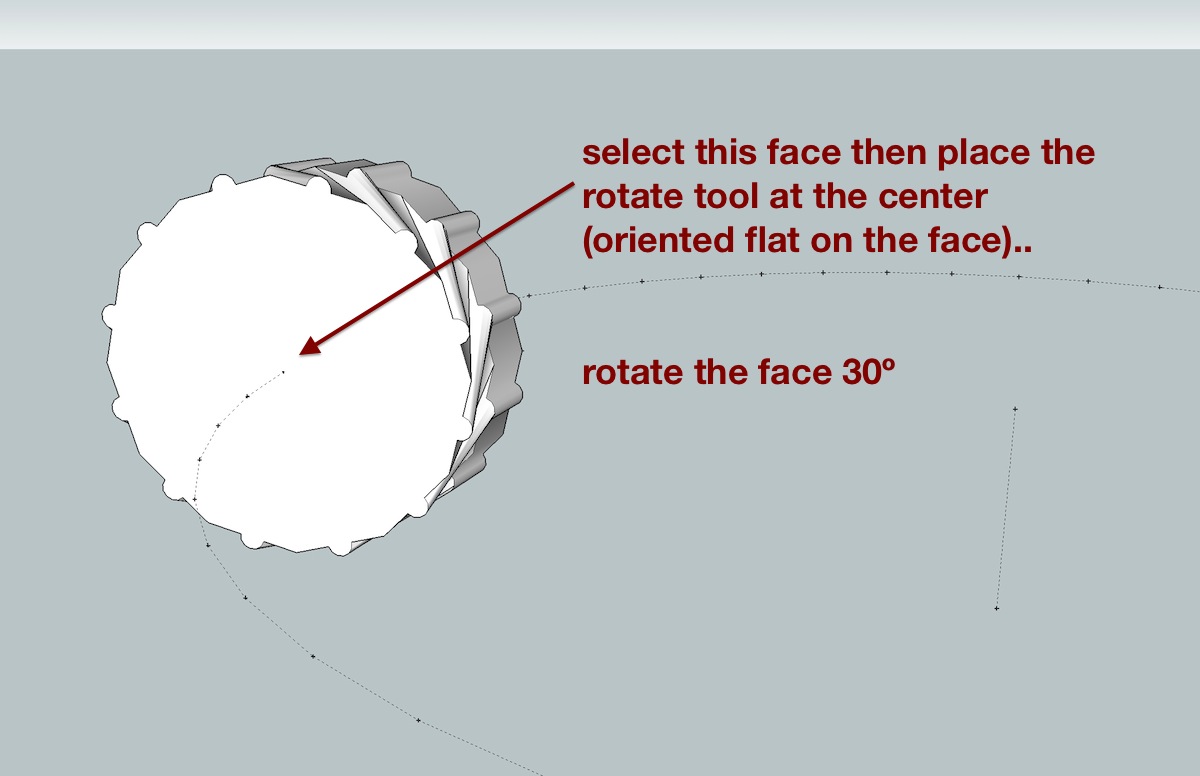
here's a slight variation stolen from gilles' method that might give another way to show what he's done .. this starts at around step 6 of his tutorial..
the number of segments around the torus probably vary between gilles' and this one meaning the angles will be different but it doesn't really matter for the example.... the main circle i'm using for the torus has 48 segments..
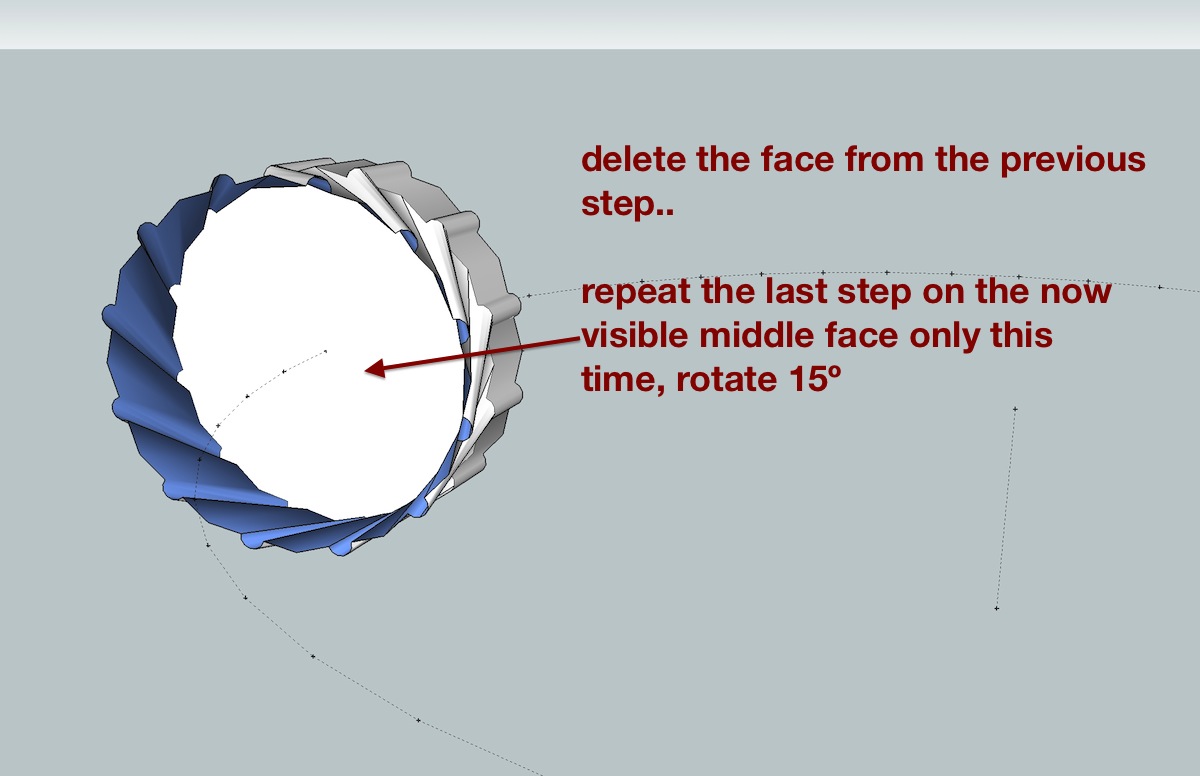
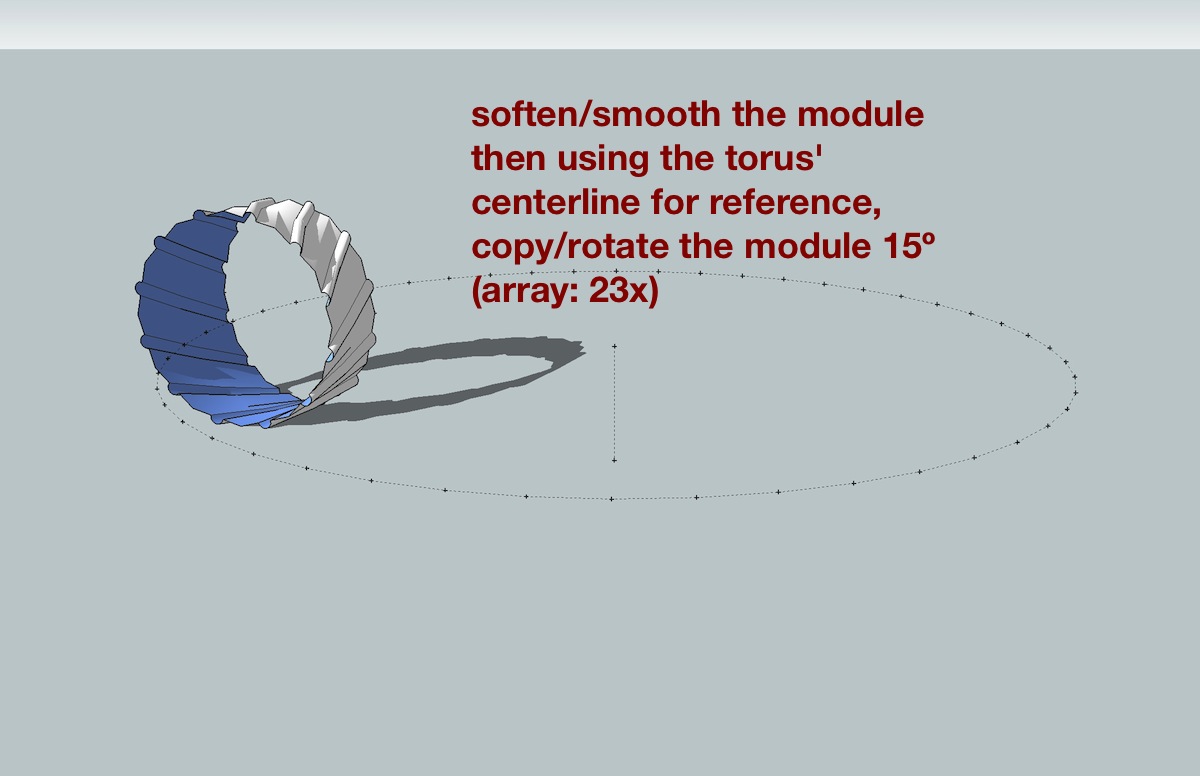
![[edit].. these 3 parts are out of order.. they'll still work this way though ;) [edit].. these 3 parts are out of order.. they'll still work this way though ;)](/uploads/imported_attachments/u7Li_ts7.jpg)
also, you mentioned earlier about not knowing how to do the soften/smooth steps… select all the stuff you want to soften then right-click -> soften/smooth (or via the menus… Window -> Soften Edges
-
i guess in all honesty, the only reason i posted that ^ was so i could seem like i've contributed to the thread prior to posting this
 but...
@gilles said:
surely Rhino Muhahahahah.
here it is.. (first two minutes show one way.. the other 6mins are showing an different (slower but maybe cool to watch too))
and i hope this doesn't come accross as me trying to say something about sketchup vs rhino.. its not meant to be.. i enjoy doing these things in both apps.. reality is, i'd of been more satisfied in a puzzle solving manner if i would of figured out gilles' sketchup method than the puzzle satisfaction obtained from doing it in rhino..
i wish more people would post challenges such as this (not - draw a chair type of challenge.. rather, geometrical puzzles) [[other people like it too.. remember when you posted the 3 circle challenge gilles.. it got attacked by quite a few people in a short amount of time.. a lot of the people around here are just nerdy like that.. in a good way.... and let's not forget about the mini challenge yet to be solved

(it's been 'solved' a couple of times i guess but no one has nailed the lid shut yet.. the solutions to date are quirky sketchup tricks as opposed to true geometrical solutions.. any new takers?
http://sketchucation.com/forums/viewtopic.php?f=15&t=44972.
-
Cool Flow method
 (Moi has the same)
@unknownuser said:
better method for generate the profile?
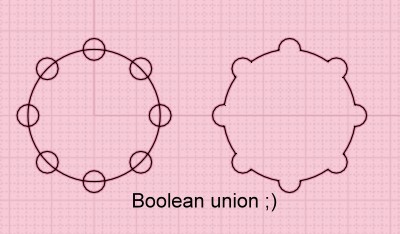
yes : Select all / Boolean Union : one click!

-
[quote="Pilou"
@unknownuser said:
better method for generate the profile?
@unknownuser said:
yes : Select all / Boolean Union : one click!

haha.. nice!
boolean union doesn't do it in rhino but i looked around and there's a curve boolean command which does
thank you -
Some great stuff there Jeff. Exactly what I meant when I said I'd like to see an elegant solution.
-
Sometime Moi 3D, the little brother of Rhino has little tricky things


-
.
another approach using FredoScale and ShapeBender which sort of mimics the 'flow' approach in moi or rhino.
(the shape bender step takes a few minutes to process but it will complete so hang in there
 )
)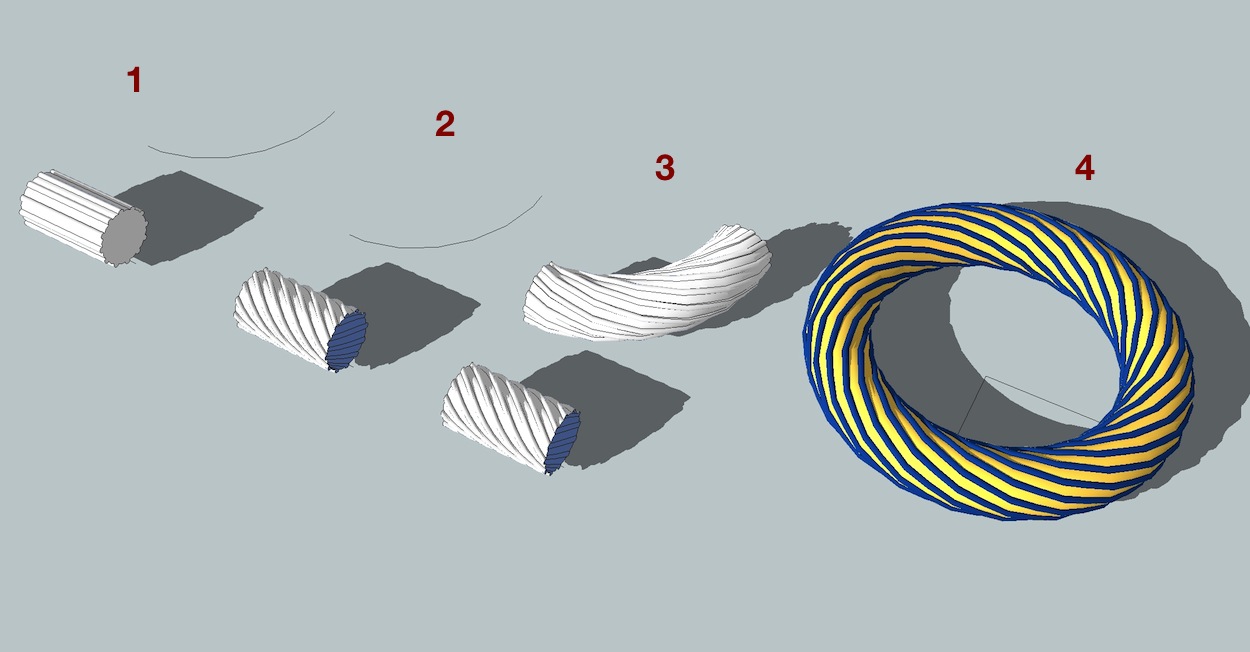
- -- draw the profile shape and push/pull it along the red axis to any length.. draw a straight line underneath the profile..
make a 1/4 circle path being sure that the 'arc' begins and ends at a midpoint of a segment..
2)-- use FredoScale's twisting option to twist the shape 180º
3)-- use ShapeBender to apply the shape to the 1/4 circle
4)-- copy/rotate to form a circle.
Advertisement


