Tiger II Tank Interior
-
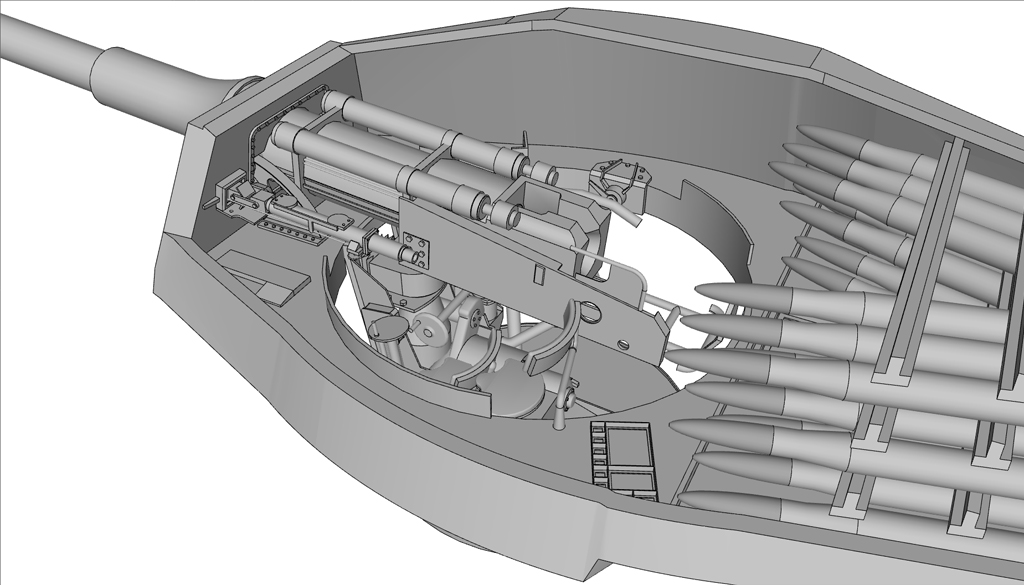
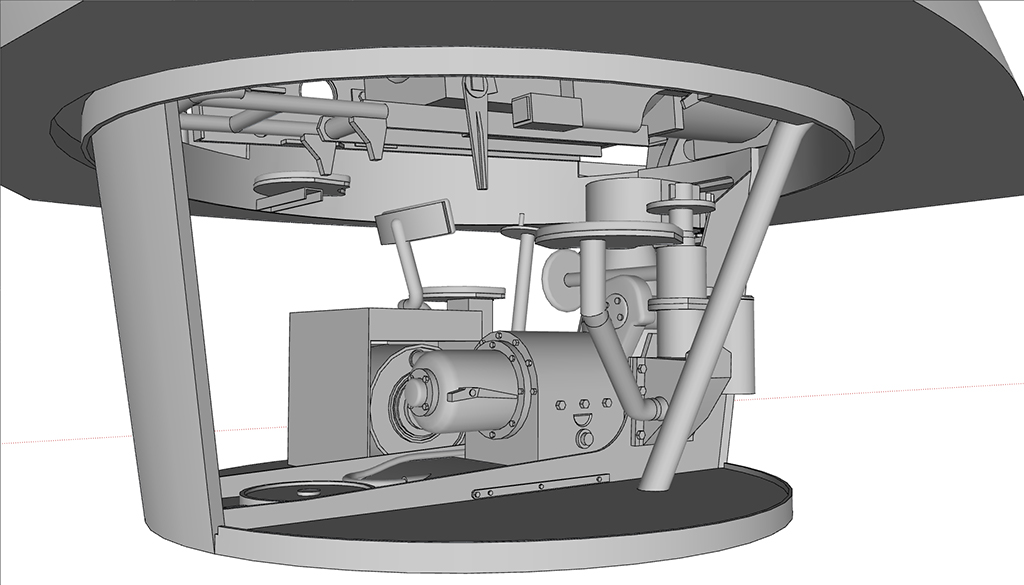
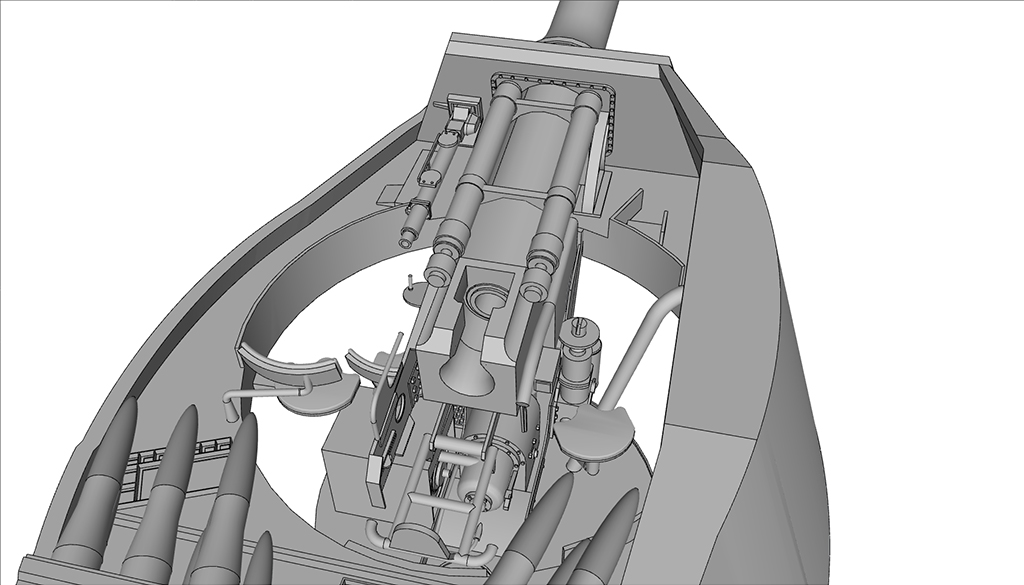
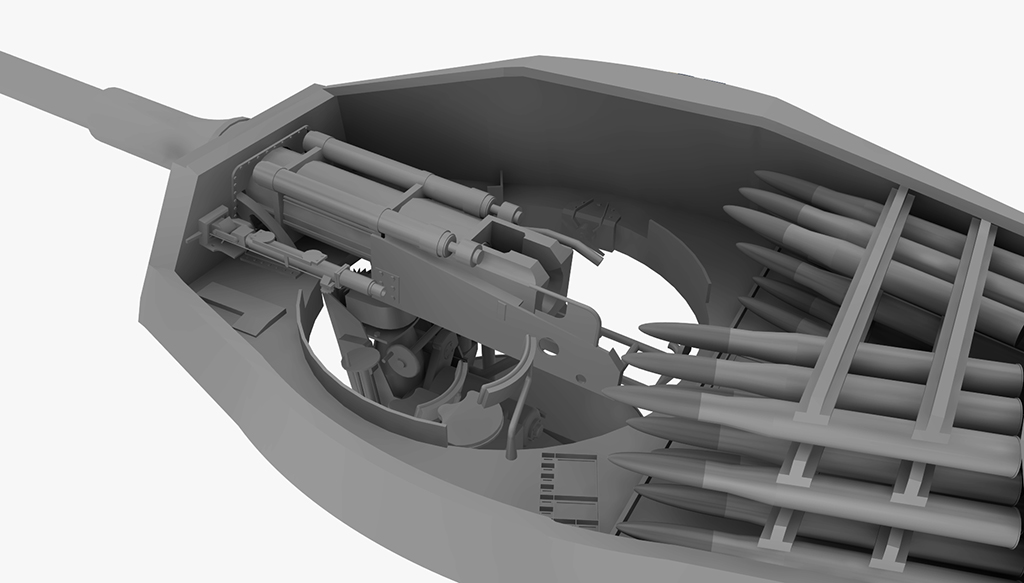
Hi,I have been working on drawing the interior of a WW2 German tank, the Tiger II.
So far the Turret itself is nearly finish, however as long as I'm not bored, I'll continue to add more and more details. The model is semi realistic, meaning that I have included as much of the interior as possible, but as I dont have a Tiger II in my backyard, I have used pictures as resourses, resulting in free hand drawing.
I would like to have shown you some awesome renders, but apparently Podium dont do too well at Clay renders, or I just havent figured that part out yet.
So here are some screenshots from Sketchup itself, atleast untill, I get a better alternative for clay rendering.
I am already working hard on the Hull interior, but it needs so many more details.
-
Great detail Christopher.
-
Very nice.

-
Great stuff, looking forward to updates.
BTW I believe you´ll find this topic intersting: http://forums.sketchucation.com/viewtopic.php?f=81&t=17329&p=173488&hilit=tank+museum#p173488
And just out of curiosity - did you by any chance use these images as a source of info for the turret interior: http://www.williammaloney.com/Aviation/PattonMuseum/TigerIIKingTigerTank/pages/01TigerIIKingTigerTank.htm?
Another great set here: http://jtrowbridge5.smugmug.com/Shrivenham-King-Tiger-COMPLETE/Turret-and-Gun/13395763_rzpTgm#!i=326545805&k=WCWdCBut somehow I think you already know that

-
Very nice, I love detailed models like this
Has it gone BOOM yet? -
Really nice work there, are you going the full monty with hydraulic and electircal services? A very daunting project, going nicely.
-
Great, i like that!
-
Tanks for the memories.
-
I like that
It is great
I like to see the finale -
Thanks for the comments everyone, and the link numbthumb, they are really helpfull!
For the last two days I have been working on the hull, the wheels and the tracks. It wasnt exactly easy finding the necessary information, as I modelled the parts in different files, I was extremely anxious that they wouldnt fit together in the end. But for the pictures and some comments:
I started working on the hull itself, right now it is extremely simple, but yet accurate, with all the proper armor thickness, and holes for the axles.
Buttom of the hull, all this will be covered by not only one, but two floorplates. Visible is some supportbeams, and holes for the axles. Notice the different sizes, instead of having a wheel accatched on each end of the axel, there is only in one end, requiring twice as many of them.
Tracks, Wheels, Suspension and Axles.
Close-up on the wheels, once again, thank you numbthumb.

The tracks consist of two pieces.
Wheels and tracks are put together.
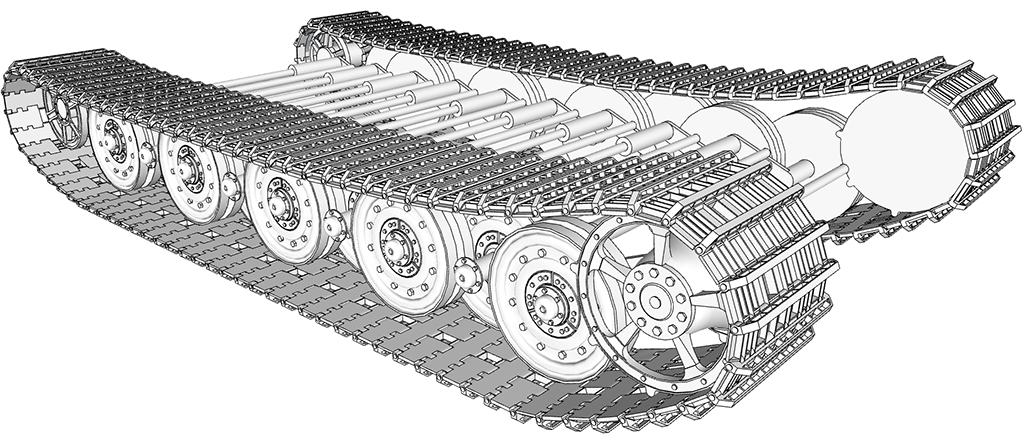
They are finally attached to the hull, along with the suspension and axles.
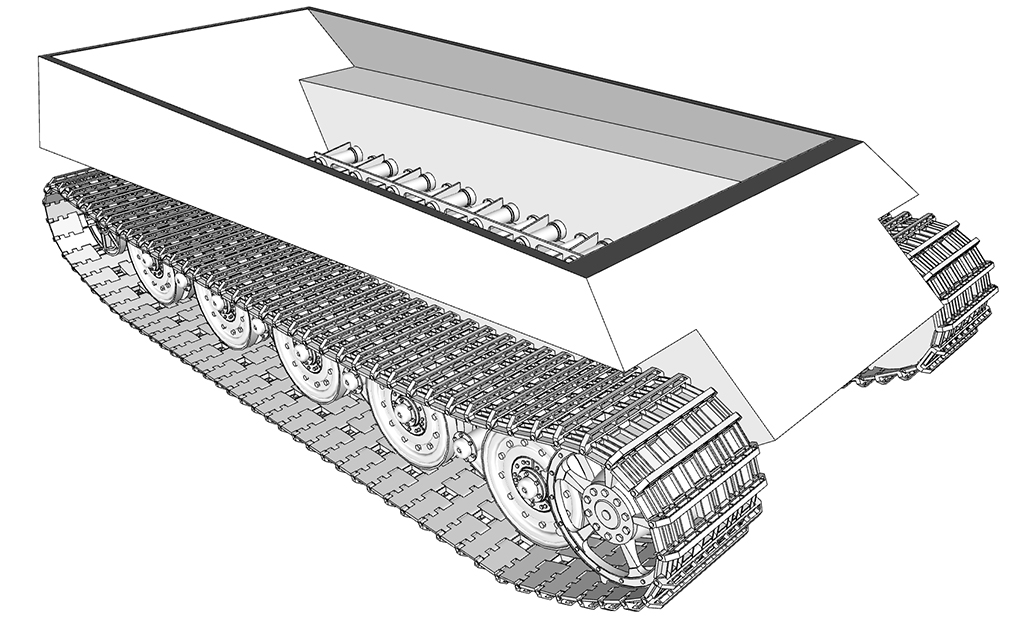
Inside the hull, I'm proud to say that everything fits perfectly in, just a shame that I will soon have to hide it all, but atleast i know its there.

Next stop is the engine!
-
This just keeps getting better and better
The detail is amazing, very impressive. You'll have to do a tutorial on this, I, for one, would very much like to see just how you created this incredible model.
-
Patience, and patience, and success
-
Really coming along very nice
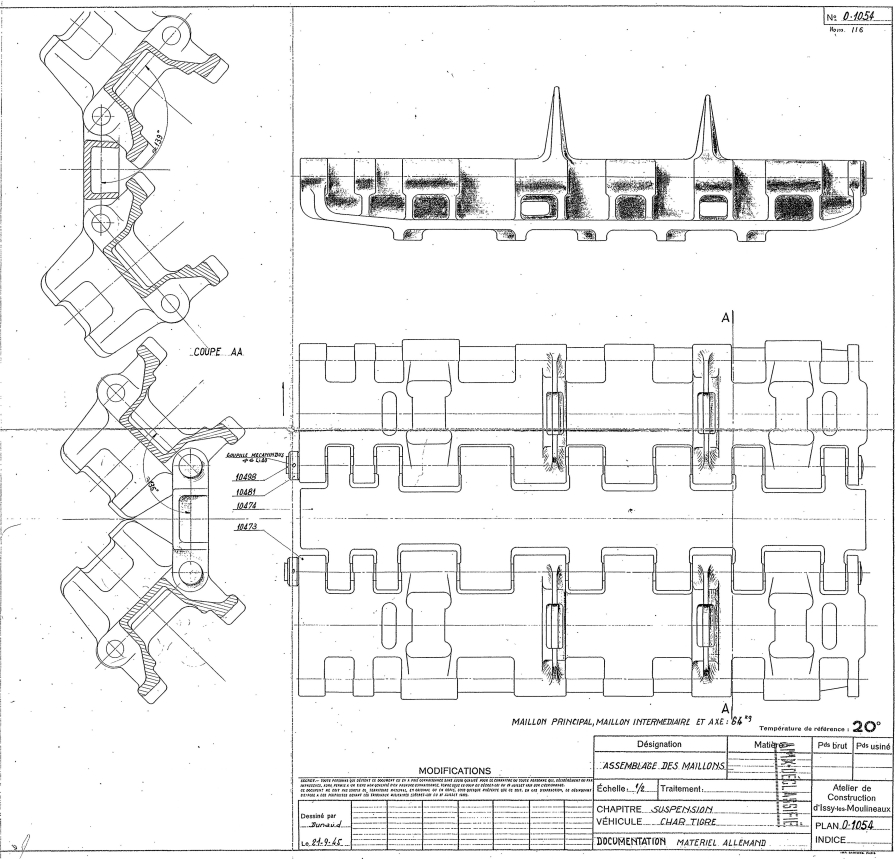
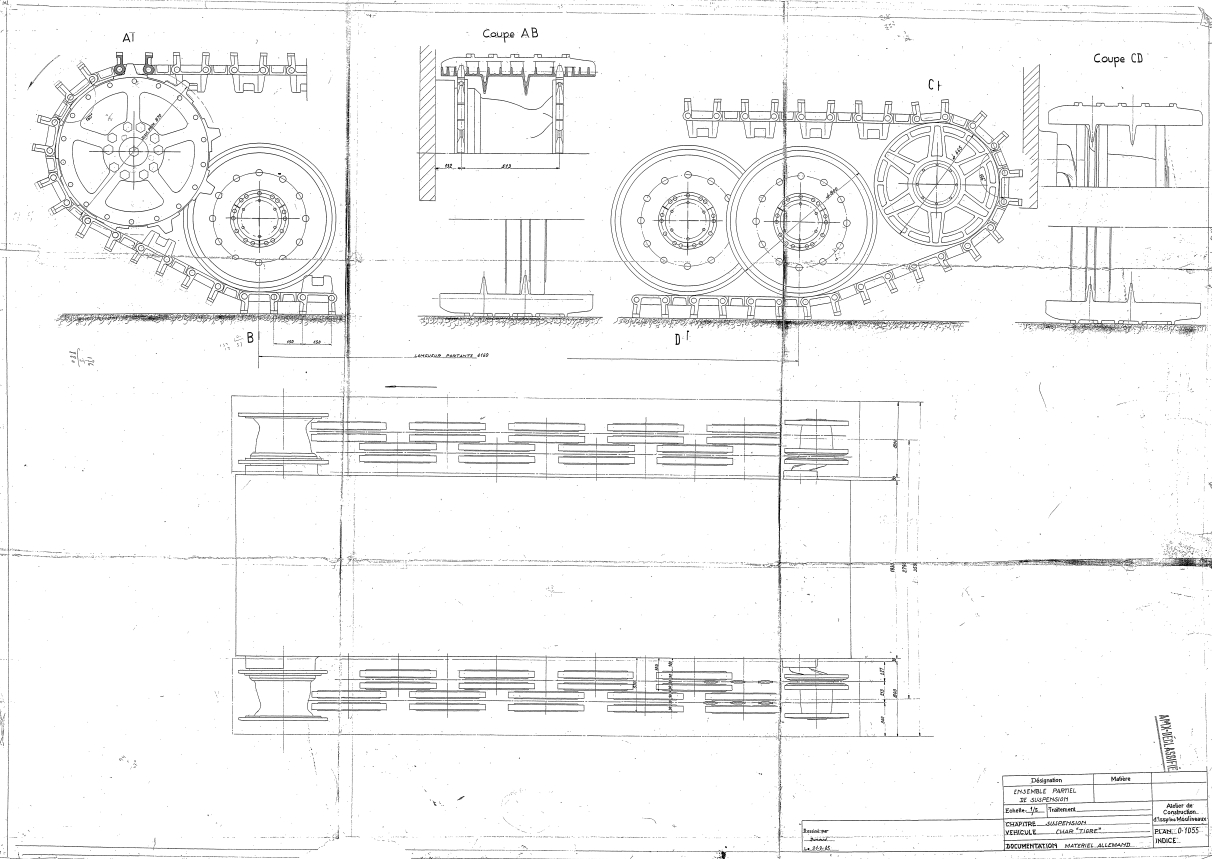
A small suggestion if you don´t mind - the inner surfaces of the tracks are completely smooth, with no guide teeth. The Tiger II was equipped with two types of tracks: 660mm narrow tracks (used for transportation) and (judging from your pics) wider 800mm combat tracks. So you should also scale down the sprocket wheel a little.
And - unless I´m totally mistaken - this type of sprocket wheel should have 9 sprocket teeth (18 in early type, respectively)Here is a little something that could help:
Keep up that great work!
-
Sorry for the late reply Numbthumbt, I om a vacation right now, so im rarely at the pc. Now that is one amaizing source you got right there, once I get home I will redo the tracks to make them more authentic. Now if you dont mind, where do you get those drawings? They are extremely detailed and informative.
Oh and I dont mind suggestions at all, thats how I improve

-
No problem, glad I could help. Take a look at: http://www.panzerbasics.com/index_files/30-resources/french-drawings.htm - a lot of goodies there
Oh, and you´re gonna need a lot of these, too:
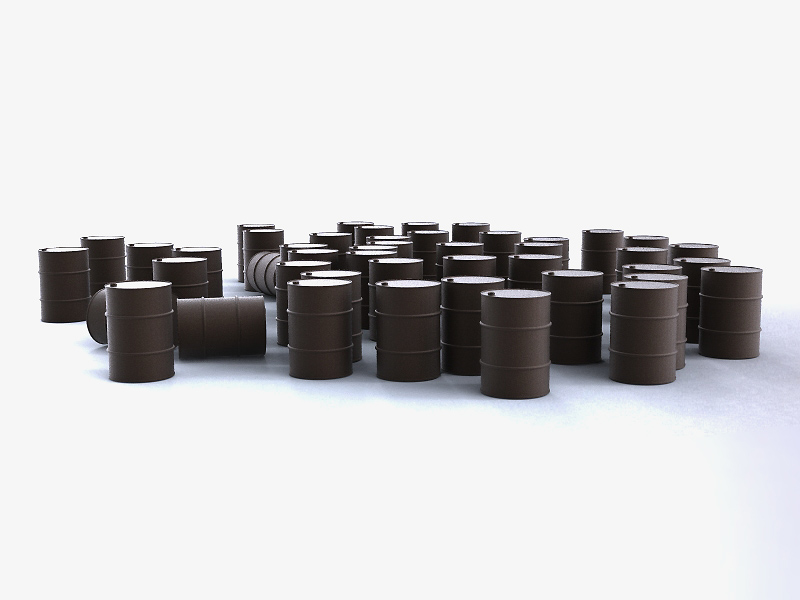
-
On a related topic (oil drums), has anyone got a good blueprint for an oil drum 55 gallon? I have been looking for a while but come up with nothing usable.
-
Very nice model. I enjoy the amount of details. Looking forward to seeing some illustrations of this model completed.
-
Christopher,
Really good model
...........
Do you know about this place ?
Bovington Tank Museum (UK)
http://www.tankmuseum.org/
...........
I believe they have the only working Tiger Tank MK I left in the World.
(Same chassis as a Tiger II Tank ???)
Well worth a visit if you ever get the chance.
They have LOADS of other Tanks and armoured vehicles too- including a King Tiger Tank
............
Tons of videos of the working Tiger Tank on YouTube
eg this one (fast forward to about 1:30)
http://www.youtube.com/watch?v=dR9f6zrh4dM&feature=fvwrel
.............
The Museum might be able to help you out with Drawings / Plans / Photos etc - especially if you show them what you've done so far and where you might be struggling for good info / photos / drawings etc to complete your model.
............
Hope this Helps
Howard L'
- including a King Tiger Tank
-
Just to add to this, the only working example of a Tiger II is at the Musée des Blindés, Saumur, France.
And it´s chassis has more resemblance to the Panther
-
@unknownuser said:
Do you know about this place ?
Bovington Tank Museum (UK)
http://www.tankmuseum.org/Oh! I've been there - lots of fun!
I was really excited about the Tiger Tank.
Hello! It looks like you're interested in this conversation, but you don't have an account yet.
Getting fed up of having to scroll through the same posts each visit? When you register for an account, you'll always come back to exactly where you were before, and choose to be notified of new replies (either via email, or push notification). You'll also be able to save bookmarks and upvote posts to show your appreciation to other community members.
With your input, this post could be even better 💗
Register Login


Advertisement