Problems achieve face along arcs
-
Alright, so I'm definitely new around here, and I've been having trouble with a specific problem. I have 3 arcs, concentric to the y axis. The leftmost point of the arc starts at 2.5mm intervals, the rightmost at 7.5mm intervals, and the radius ascends a similar column of guide points at 5 mm intervals. I allowed sketchup to simply use 12 segments for each arc. What I need is for these to develop faces when I connect the endpoints with lines so that I can make the front section for a ring. I've tried Fullmer's bending plugin with a different pattern to achieve similar results to no avail. It seems that, regardless of what I do, sketchup refuses to make the corresponding object solid. I'm attaching the sketchup file.
And in case I wasn't able to convey myself clearly, the area that I need to make the face occur along the curves, not inside of the arc.
-
Is this what you want ?
-
That is very, very close. However, I'm looking to have the lines preserved. I really think I'm going about this the wrong way.....
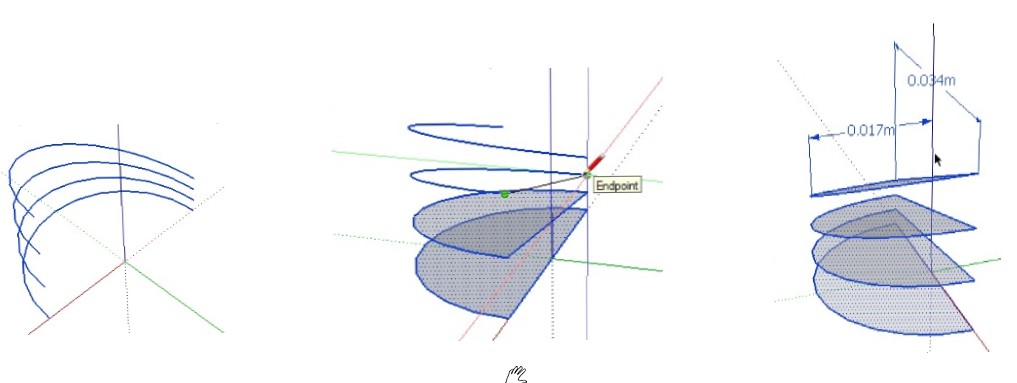
I'm looking to eventually impose this on a ring shape, you see, and chamfer along the lines.... But I'm definitely going about it the wrong way, because ideally the chamfer tapers. Gah! Additionally, the lines need to push outward a total of 1mm.

-
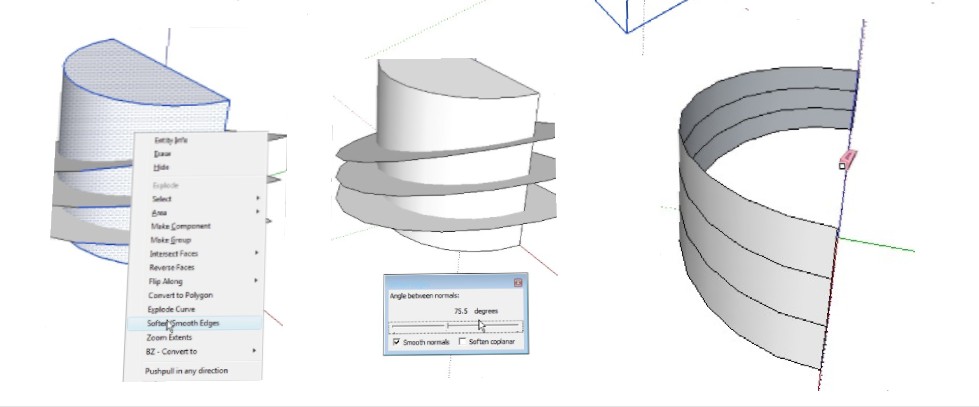
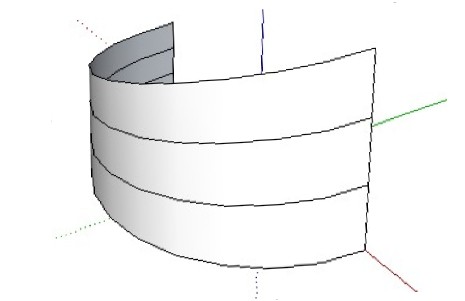
Here's a better explanation, and I managed to do it all manually with a decent number of rough edges...
-
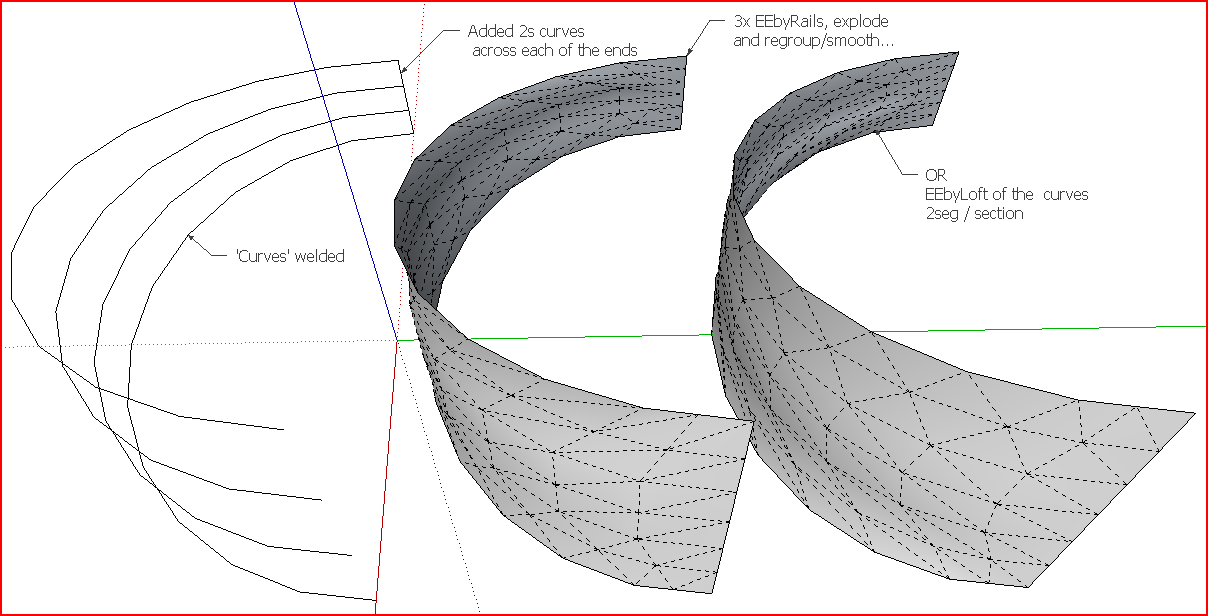
In my example the original curved lines ARE preserved.
I simply moved the grouped mesh away from them for clarity.
The usual last option dialog in EEby... tools - 'Erase Original Curves ?' - the choice is yours...
Exploding the smoothed mesh will then recombine it with those curved lines...
-
edit:
@unmeilleurreve said:Here's a better explanation, and I managed to do it all manually with a decent number of rough edges...
what explanation?
-
Hi folks.
See this SU file for ideas.
I created the model at a 100x scale since SU has some difficulties with very small geometries.
The last step would be to scale down the model by a factor of 0.01.
Just ideas.
-
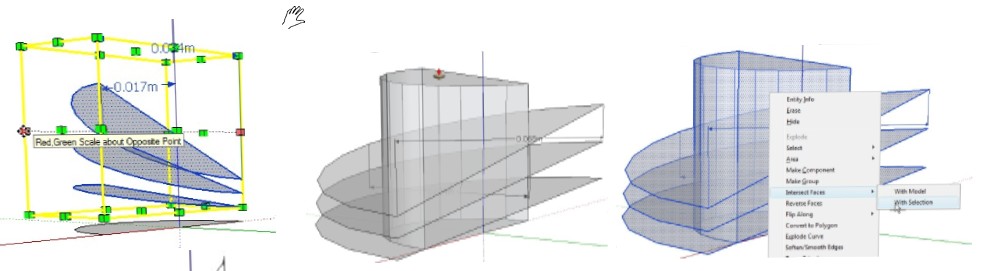
- I uploaded you skp file an open it
- Took line tool closed the 4 areas
- check dimension
- resized top 3 areas
- pushpulled the botttom one
- Context Intersect with selection
- Trim and remeasured
- Tested the volume and smoothed the edges
- Tranpanency mode
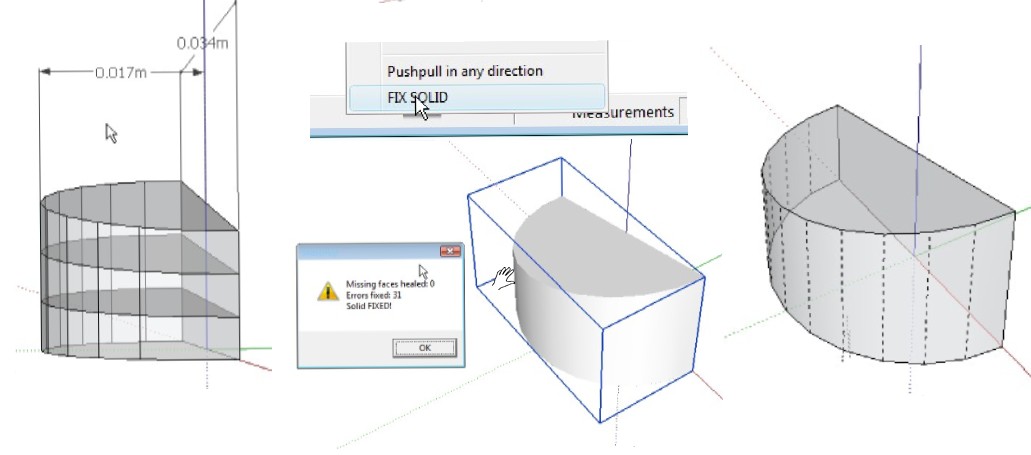
My error was inside material need deleted before runing the test
If makring a ring skin then
10) After push-pull smooth the pull volume
11) Context Intersect with selection
12) Make group then explode, use the erase on back edges
13) Done
I hope this may help?
Hello! It looks like you're interested in this conversation, but you don't have an account yet.
Getting fed up of having to scroll through the same posts each visit? When you register for an account, you'll always come back to exactly where you were before, and choose to be notified of new replies (either via email, or push notification). You'll also be able to save bookmarks and upvote posts to show your appreciation to other community members.
With your input, this post could be even better 💗
Register Login


Advertisement