Mirror object
-
Hi,
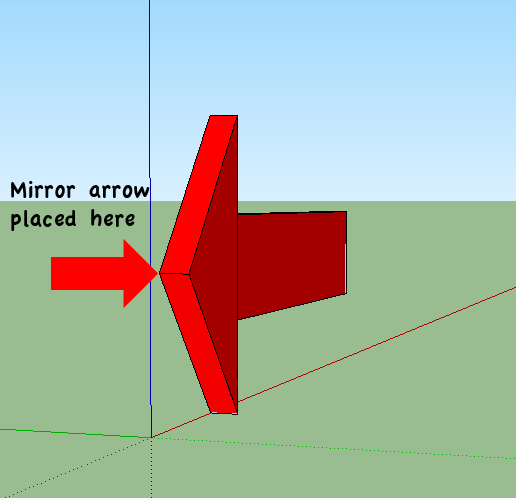
I am using TIGs excellent (thank you) mirror.rb but I am unsure on how it works. I have an object (arrow) and I want to mirror it so the new object is at right-angles to the point of the arrow (see image). Is this possible with mirror ?
thank you

-
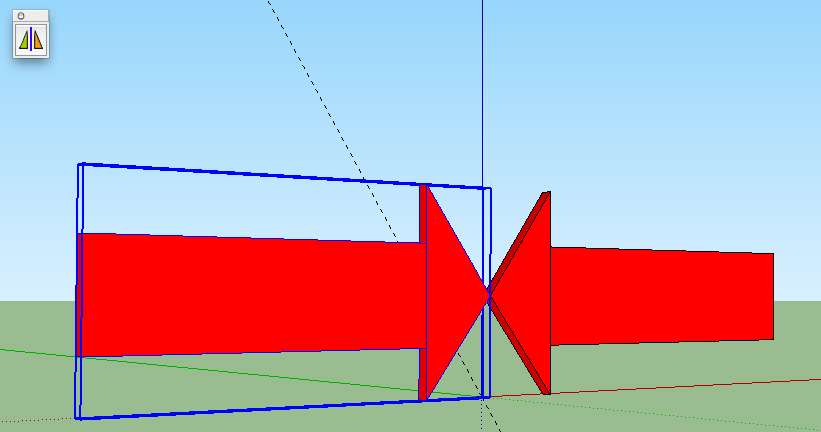
thanks for the help. I do this and end up with the attached.
Select arrow > select mirror and click on point 1 > drop down to base of arrow and click > move up 45 deg and click again
Could you please explain what is happening with the two lines I draw after clicking the object (the one that goes straight down and then the one at 45 degs)
thank you

-
It would be far simpler to use Rotate/Copy.
Select the arrow then orbit so that you are looking down on it. Choose the Rotate tool, place the rotate cursor on the ground so that it turns blue, then lock it in that position by holding down Shift.
Move the cursor to the point of the arrow indicated by your smaller drawn arrow and click once on your mouse.
Press Ctrl once to get a small plus sign next to the cursor (indicating a copy rather than rotation of the original) then click another twice 90° apart...preferably on axis so you get a precise 90° inference.It sound complex the first time, but is very straightforward and takes about two seconds to complete.
-
Use a temporary guideline, then with the mirror tool, click on the numbers in order
-
The guideline is on the ground plane...kinda hard to tell from my picture. I've attached the SKP so you can try it.
...Alan is right of course, but I wanted to show this because in other cases the mirror tool may be easier.
-
thank you d12dozr. Your skp works fine (of course) so now I can see where I am going wrong.
[Alan your signature reminds me that I proposed to my wife at Formby point many years ago.]
Still unsure what the two lines do when you draw them after clicking a start point with the mirror tool selected. I have played around with it for ages but can't seem to work out the rules of it.
thanks again (much appreciated)
-
@susteve said:
Still unsure what the two lines do when you draw them after clicking a start point with the mirror tool selected. I have played around with it for ages but can't seem to work out the rules of it.
thanks again (much appreciated)
the lines define the plane of the mirror.. literally, think of putting a real mirror in your sketchup drawing.. the first line of the mirror plugin tells where to put the bottom (for all intents and purposes of this visual) edge of the mirror and the second line represents the adjacent edge..
-
thanks Jeff, playing around with it again after seeing d12dozr's skp revelation and now I can see how it works. Thinking about it like a real mirror helps me visualise it better - thank you
-
@susteve said:
[Alan your signature reminds me that I proposed to my wife at Formby point many years ago.]
You wouldn't have wanted to repeat that today, Steve. I took the pooch for a walk on the beach this morning...bloody freezing and blowing a gale.
 .
. -
-
Jean,
In your second example (scene 5) how do you set the rotation using the guide line?Peter
-
Hi Peter, hi folks.
See this page in SketchUp help:
http://support.google.com/sketchup/bin/answer.py?hl=en&answer=94897
Just ideas.
-
@jean lemire said:
Hi Peter, hi folks.
See this page in SketchUp help:
http://support.google.com/sketchup/bin/answer.py?hl=en&answer=94897
Just ideas.
Doh!
 Thanks Jean. I am sure I've done that before but left the method unused for too long.
Peter
Advertisement


