From SketchUp to Reality
-
 WOW
WOWGot to say this is really impressive !! I love how clean the work is ! Good luck with finishing it and living in it!
How are the outer rocks of the chimney held in place ? I have the impression they are not only held by concrete .
Cheers!
-
where is the stonehenge? I don't know, but I know that somebody can create a lot of beautiful things with stones.
keep up dale thumb up . -
Juan, Elisel, Jaryn
Thanks for the encouragement.
Amongst the moments of excitement, there are moments when I question my sanity.
But on a piece like this, there is so much personal involvement when you have shovelled the sand and collected the stone, everything has a story.
Anyway, for the final on the fireplace, the exterior stone completed.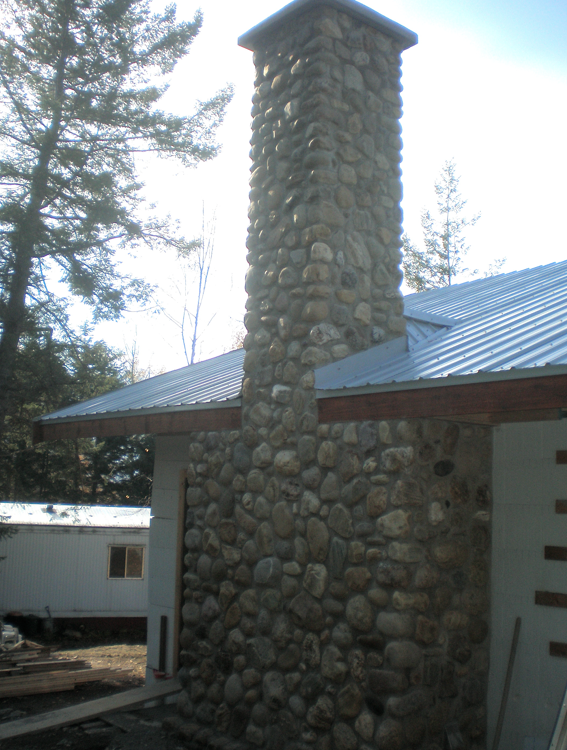
And the first fire, a tribute to the mason and accompanied with a nice glass of red wine.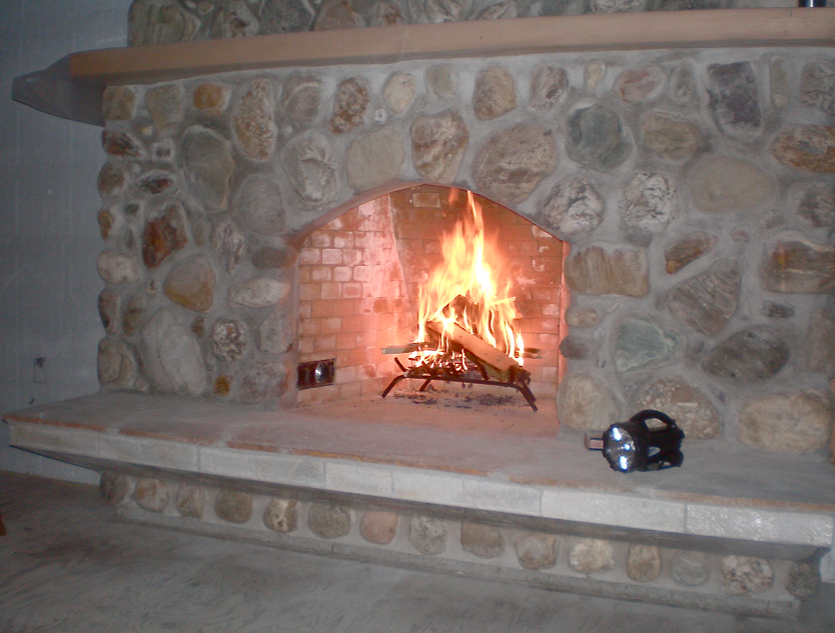
-
In Finland, it has also been customary to have a little "first fire" celebration. Traditionally all the smoke from the fireplace comes in until the master mason has been given his vodka. Then he goes up on the roof and drops a little stone in the chimney to break the thin glass he has placed there.
Good luck to your project
Anssi
-
Anssi
Our mason told us this exact ritual, although apparently the schnapps in Germany had to be accompanied by the monies owing, or the glass remained. -
We got a spell of great weather at the end of the fireplace construction, so we managed to get the steel roofing on as well.
Unloading the pallets.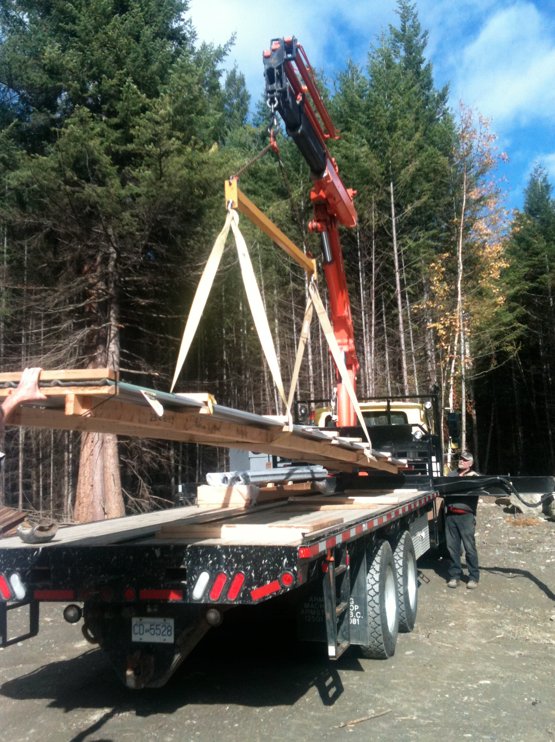
Flashing detail.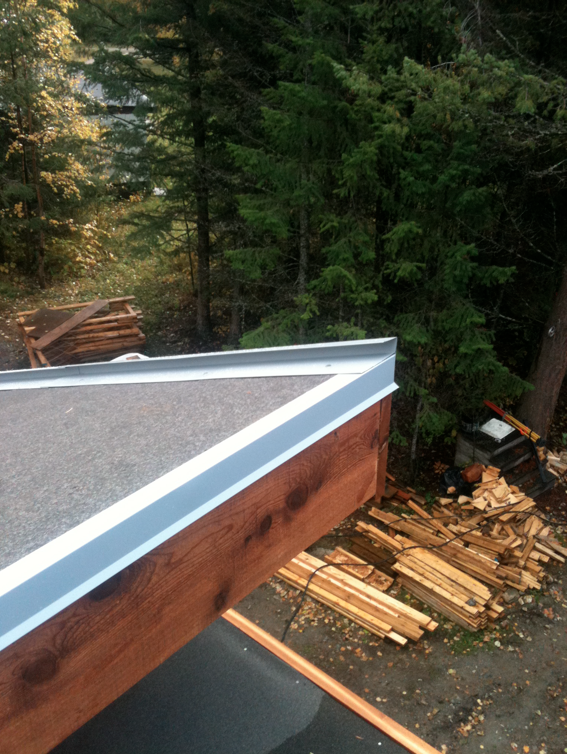
Laying the steel.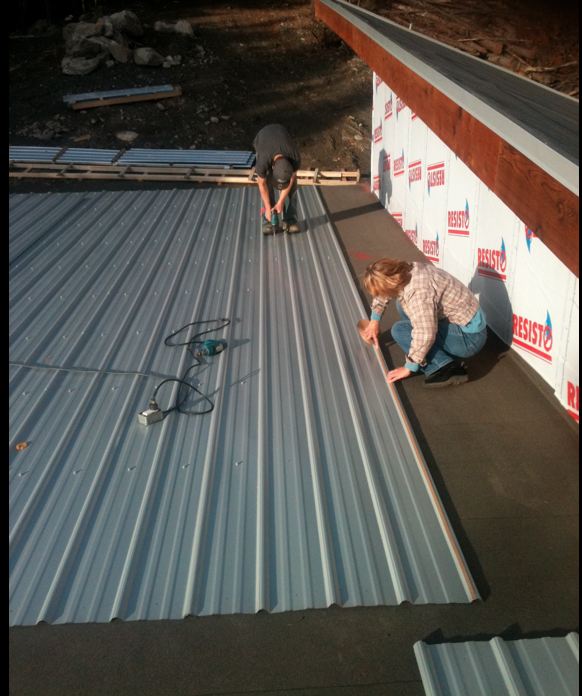
-
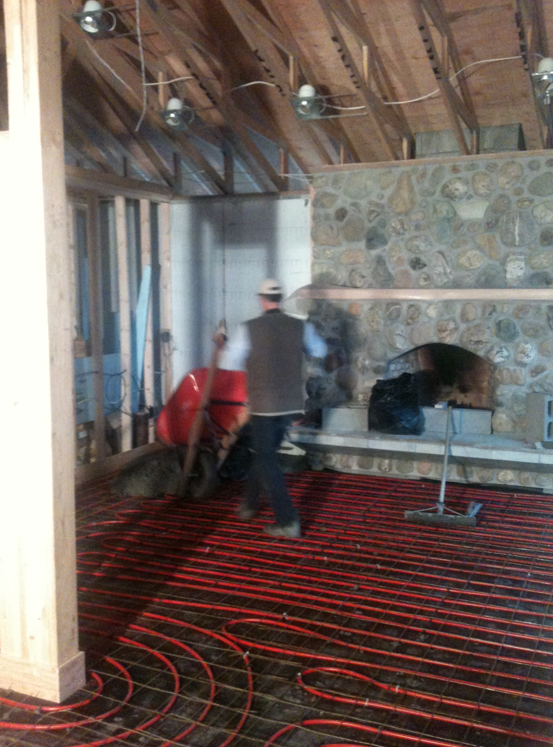
Yesterday was a big day, as with the main floor hydronic pipes in place we poured the upper floor.
-
This house has had its share of wildlife incidents.
On the way back from picking up our plumbing fixtures we saw this wolf on the highway.
Maybe these are good omens.


-
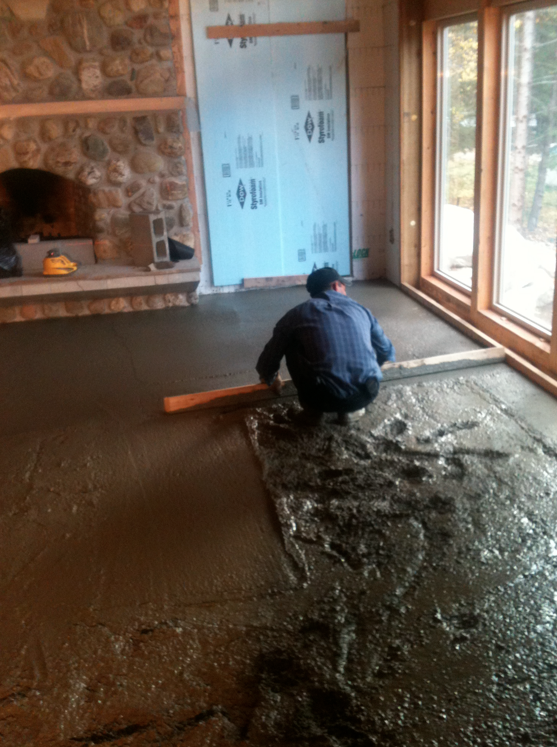
We did a gridwork of 2'x2' cuts with a diamond saw in the concrete floor,
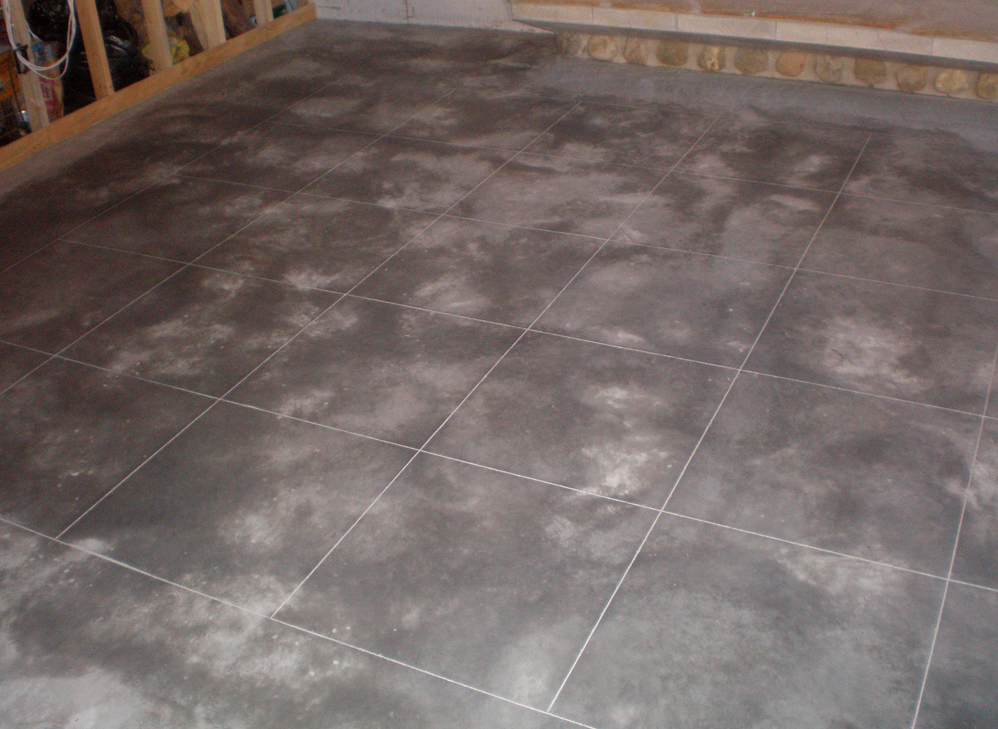
And then applied a Padre brown Scofield acid stain yesterday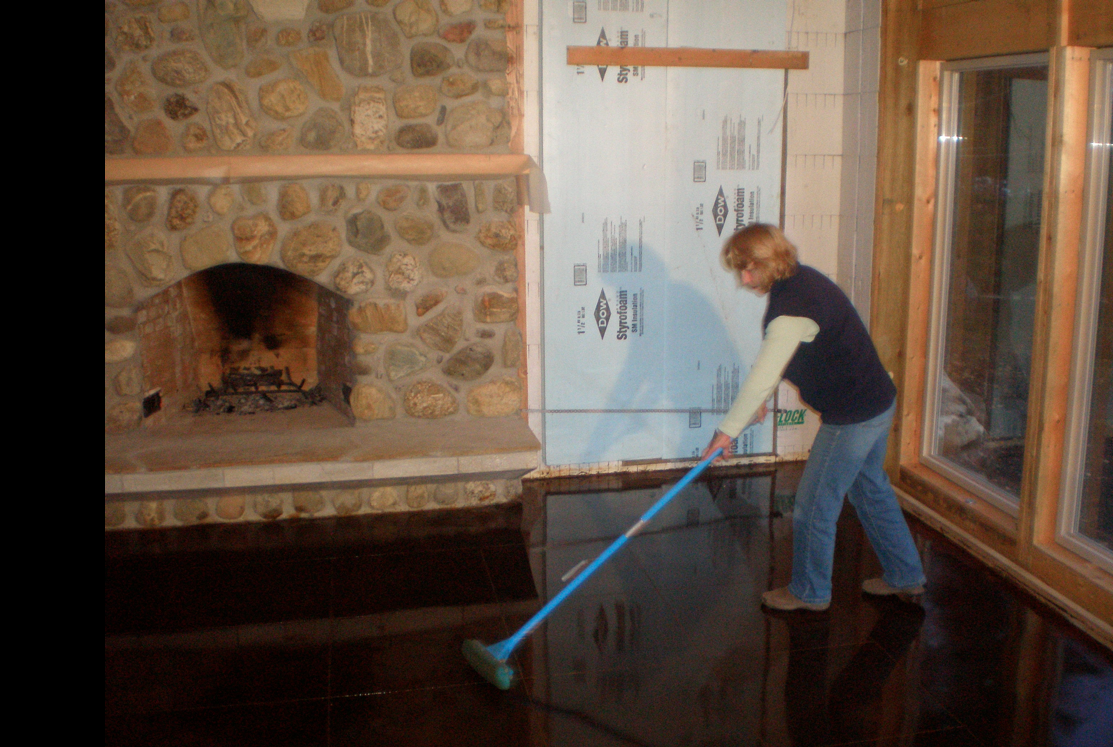
And washed it down last evening.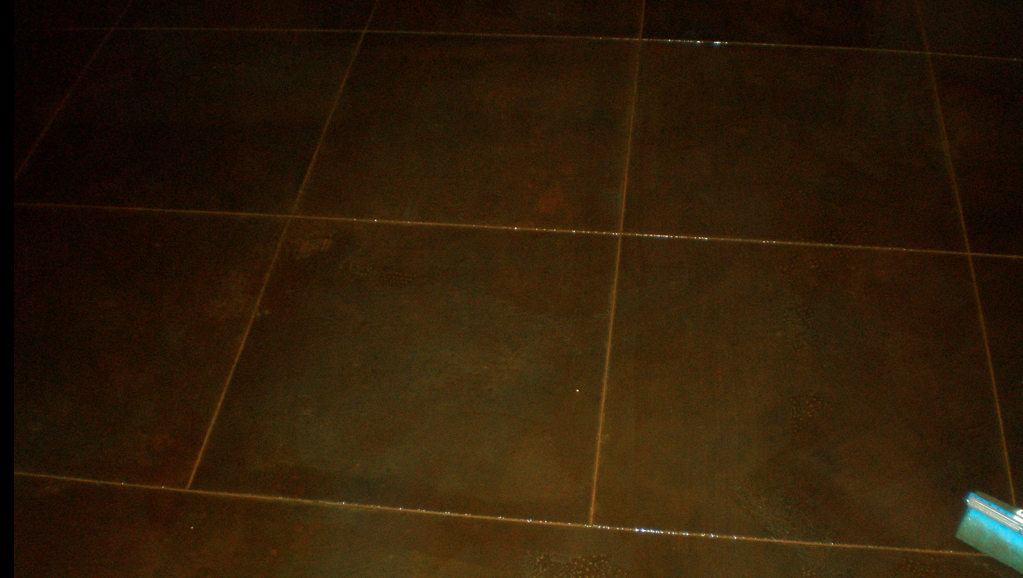
The recommendation is to let the concrete cur for at least 14 days, but I have found you get a deeper richer color if you stain quite quickly after placement.
The color doesn't really show its potential until the clear finish is applied, and I am waiting until I can warm the floor with the hydronics before I do that, which should be complete today.
Cheers! -
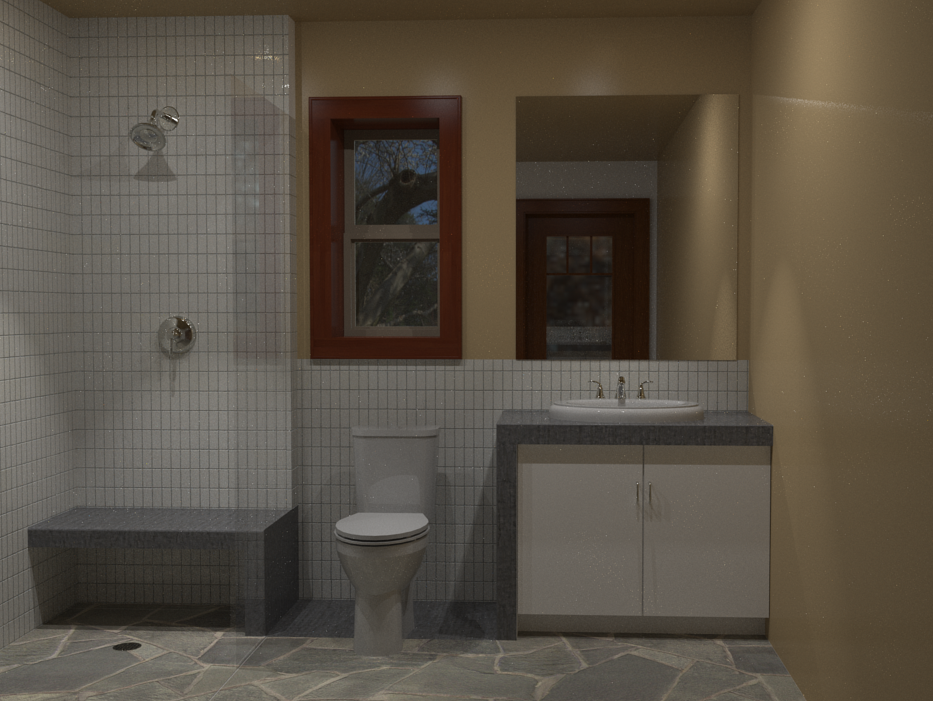
Another from SketchUp to Reality shot, or how I work things out with skp.
We would like to put in a concrete counter top in the small main floor guest bath, and we would like it to wrap down, come across the floor, and come up to form a bench in the shower.
I modeled it in skp and rendered in Thea, so we could play with the idea.
Why I love SketchUp (and Thea).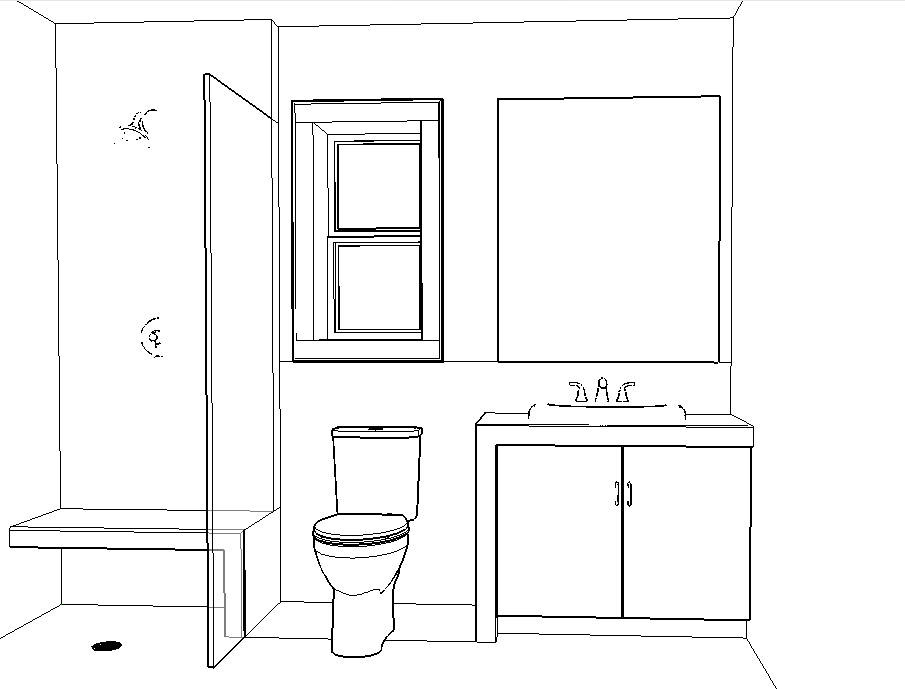
-
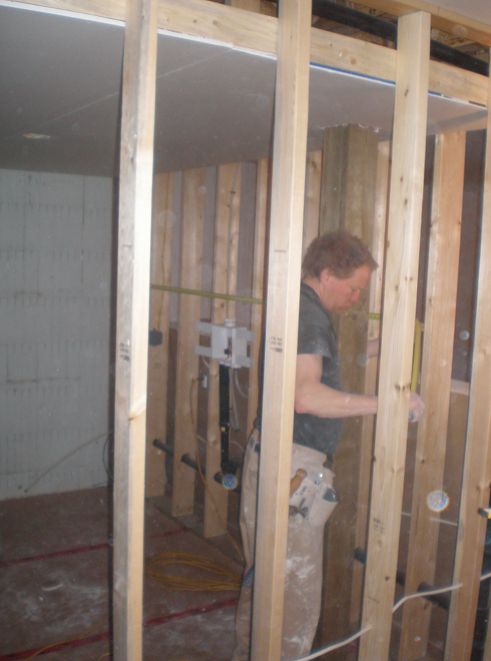
We're in the slogging process now, with things like electrical and plumbing rough in completions, all the hydronics completed and in place, final little framing bits, and insulation and vapour barrier.
Not the stuff that is greatly photogenic, but part of the process.
Framing and electrical rough in.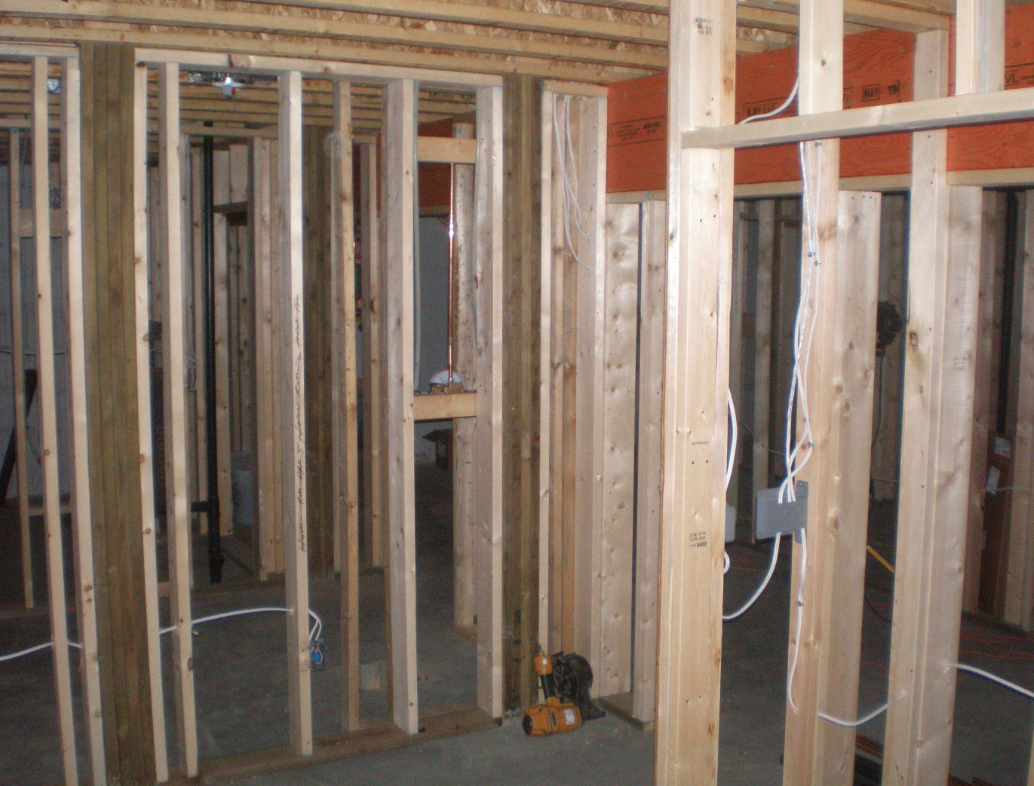
Temporary stairs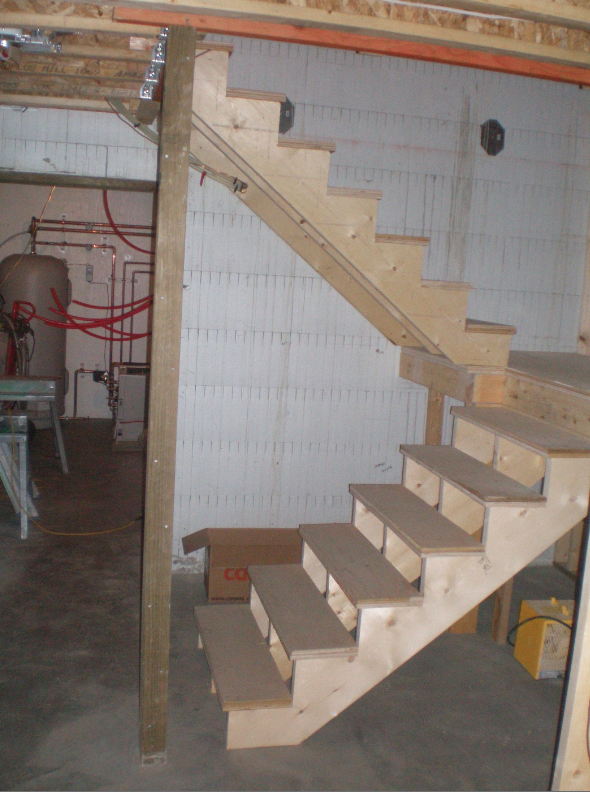
Geo-exchange unit in and running. House is warm with only two small zones on.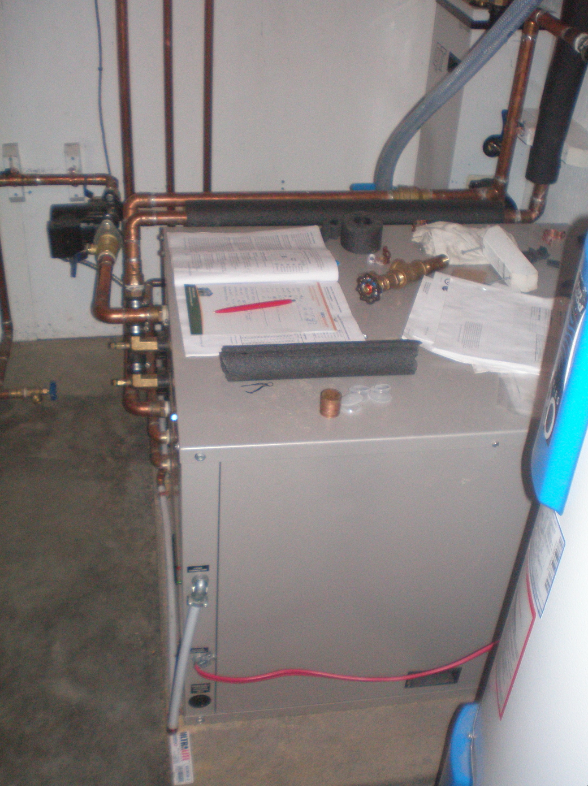
Insulation to R-44 in the roof, and everything above the ICF walls will have a staggered stud system with a combination of R-22 and R-12. Although this photo doesn't show it, all the headers are also insulated.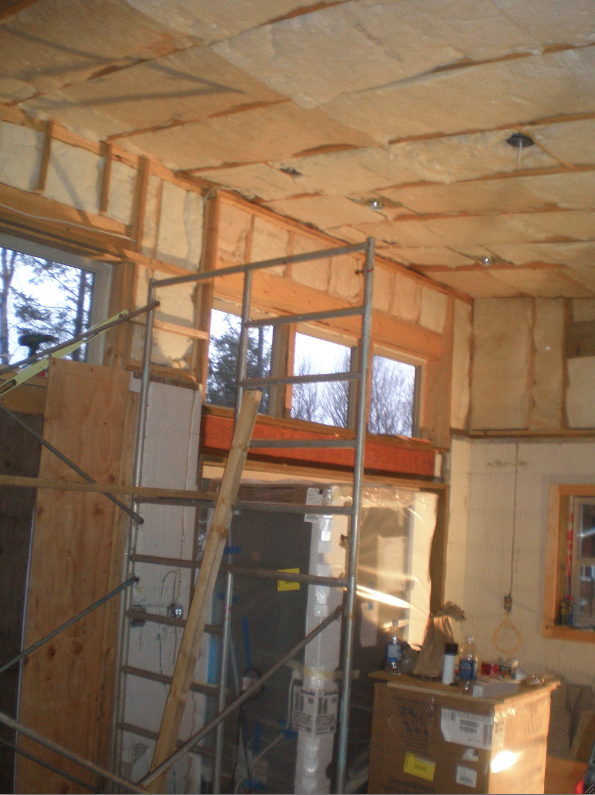
This is the point where everything seems like it's taking too long, but I know I'm just impatient to move in the tools and start to do the finish work. So we just keep on plodding along!
Cheers -
Dear Dale,
Excuse me for not coming back earlier to watch the progress of the building.
I just have read all the five pages and 71 posts of this thread!!
It was quite difficult to follow because of the technical language of construction. At the same time it was nicely instructive and exciting as a true story.
It's amazing the work you have done. 
We can easily imagine how you will live in harmony with the house. Making a home is perhaps the oldest thing in the world but that no one does anymore, except you.

- I had particularly be attracted by your kitchen project: original and beautiful.
- I had loved the house made for birds: like a reduction as strong and neat of the big one.
I have been surprised all along by the techniques used in the building process and by some design principles that I have never seen applied at home.
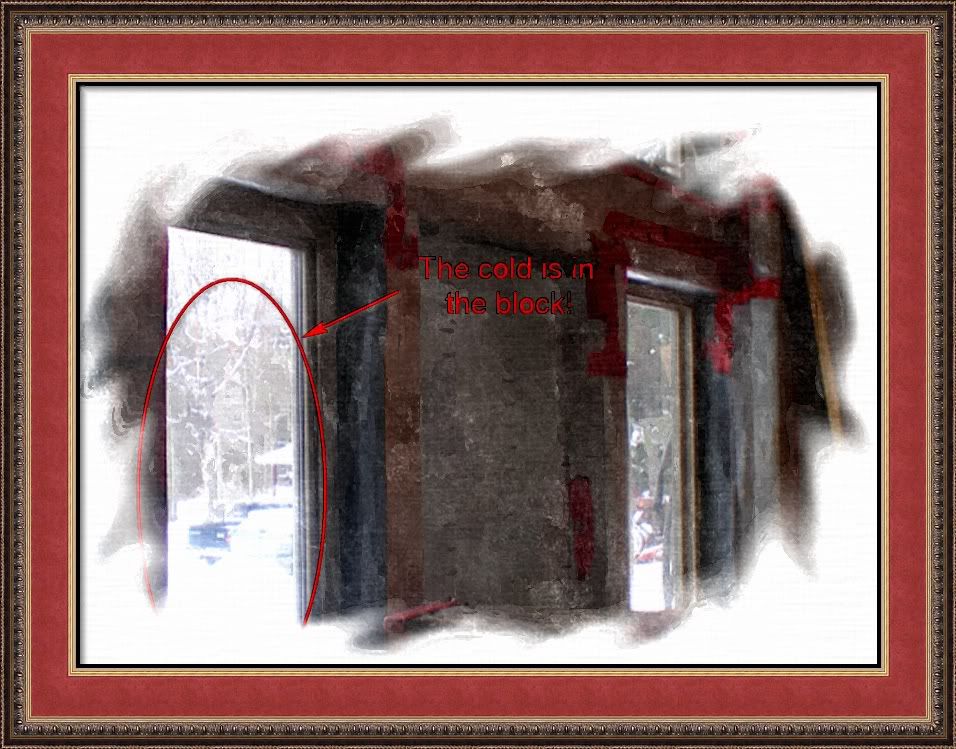
As I believe to understand, the key word is this:
"We Can Get down to -40 here"
All these techniques are playing in the fight against the cold!-
The Quad-Lock system like Lego to make a perfectly insulated walls:
"Quad-Lock has the highest available insulation" " A Quad-Lock building is Ultra Energy-Efficient because of continuous EPS Insulation" -
Everything above the ICF walls: the upper floors are made with wood, also well known as a good insulator. I never see that melting for the walls here. Why walls are not completely done with icf?
-
"The ground source Geo-exchange system was a big project"
An incredible project I would say! Pipes under the ground:
"We put in 1800 lineal feet (548 m) which required us to dig trenches about 6'(1.8 m) deep x 10'(3 m)",
and how many lineal feet of pipes have you put inside the concrete floors..?
You had to strongly believe in this technique to invest such efforts and money ! May be I have to consider this at home? -
The insulated roof covered with galvanized sheet metal rather than tiles, I presume to withstand the snow and allow it to slip.
-
by the end, the incredible nice construction of the fire place, built almost like a separate building. the chimney built outside the house (I don't know why: don't you lost some warm by this way ?). I only find strange you haven't installed an insert as heat recovery.
About the technique "to acid stain the floors" I've never seen this practiced at home. It sounds quite simple, beautiful and cheap.
What I also find human and beautiful with your story is that everything is underlain by the arrival of winter. It's a race against time.
"Winter strikes hard and fast here, and I am really pushing to not get caught."Dear Dale and Judy, what you do is great and I wish you all the best in your house and the land surrounding it.
very friendly as you know,
simon. -
From dreams to reality!

-
Hello Simon
It is always a pleasure to have your input.
You make some very good points, and one, about why walls aren't done completely with ICF is one of those choices that you make on a building.
The reason I chose this route is that it there are two complications with any of the walls that rise above the roof on this building. The first is there are lots of windows in them, and because of the groupings of windows particularly the front Living room (steeper pitch) section it ends up mostly windows. In a situation like this it is really important to get the concrete to completely flow around and encase the window. In some of the small spaces that I had to deal with this would hve been next to impossible.
The second is concrete lintels. These are the "beams" that run over the windows. Again given their size, and the amount of reinforcing steel required, as they are holding the roof loads, it makes them very difficult to do.
Having said that in retrospect, I would most probably have brought the wall at the front of the Kitchen up, if I were to do it again, as there would have been enough room around the windows to have done this, and it would have saved some complex framing.
The pipes within the floor are run at 6" intervals in most of the house, and 12 in areas that we didn't want a lot of heat.
There is well over 3000 lineal ft (914 m) of pipes in the floor.(at about 70 cents per foot)
This is recommended when using the geoexchange system, because the warmer the water returns to the machine, the more efficient the machine is. Given the efficiency of the machine, and the cost of electricity, I expect to recover the difference in cost over the system I would have put in in 4 years.
The fireplace actually has a layer of 2" styrofoam which connects to the exterior Quadlock, and encases the fireplace between the rough in concrete blocks and the finished stone.
WE had to argue quite hard to be allowed to do this as code does not allow combustible material within 1" (2.5cm) of the fireplace. At the closest point the styrofoam is 2' (.61m) away from the firebox, so I don't think this would burn. I won't deny though that having the full masonry in the house would have been better. Although we look at several different interior locations, in the end this worked better for us.
We tried several different placements of the fireplace, but in the end.
I am currently designing a house for a client that will be Quadlock (#21 Quadlock house I believe)
and I will be adjusting things from what I learned from this one.We are awaiting the drywallers, and I can say this thread will get quite active at that point, as I will move my woodshop into the house and start building the doors, cabinets, and millwork.
That in my mind is truly where the fun begins.Cheers Simon and Pilou and thanks for the kind thoughts.
PS Simon... Been to any good concerts lately?
-
Dear Dale,
So nice to meet you again

Thank you for your precise explanations. They help to participate to your project (you are a bit too far to lend you my arms )
The reasons you had made the upper floors in wood are very instructive ++ Can we say that the concept of passive house(Passivhaus in German) is maintained by this way?This is something I like deeply in my inside to understand and ear explanations about architectural (and mechanical) choices. May be in another life I would had been an architect!! This probably come from my family consisting of a line of building engineers.
The most famous of them was my great-grandfather from my father side, Armand Considère which was one of the inventors and great promoter of reinforced concrete construction...here are some links dedicated to him:
Armand Considère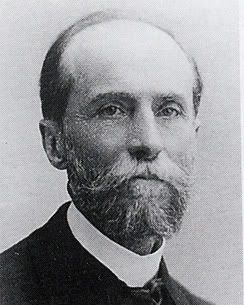
http://en.structurae.de/photos/index.cfm?JD=62
http://www.planete-tp.com/article.php3?id_article=1282
[url]http://fr.wikipedia.org/wiki/Armand_Considère[/url]And here is a beautiful family picture which shows him accompanied with his daughters (one is my grand mother
)
[url=http://i274.photobucket.com/albums/jj245/Spendauballet/generalPicts/MretMellesConsidere_enbateau.jpg:19p3sf3o]

[/url:19p3sf3o]@unknownuser said:
PS Simon... Been to any good concerts lately?
Here is my last one, dedicated to you
[url=http://i274.photobucket.com/albums/jj245/Spendauballet/generalPicts/2011-11-21_201358.jpg:19p3sf3o]

[/url:19p3sf3o]
[url:19p3sf3o]http://forums.sketchucation.com/viewtopic.php?f=179&t=21899&p=367194#p367194[/url:19p3sf3o]++ simon
-
Well, after buttoning of the poly vapour barrier, and sealing all the seams with Tuck Tape, (actually the nice tapework is Judy's, I did the 'Frankentape').
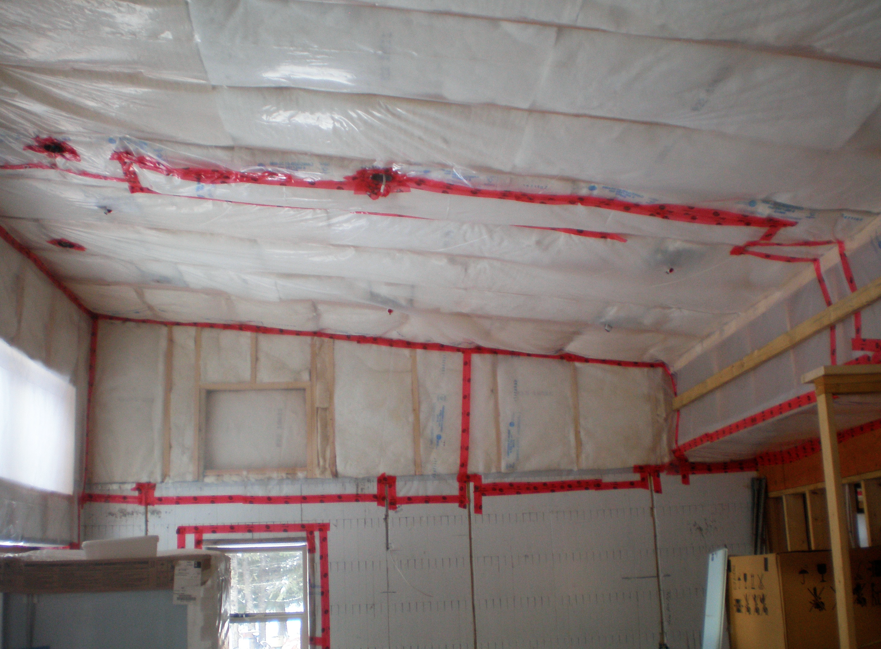
Windows are time consuming.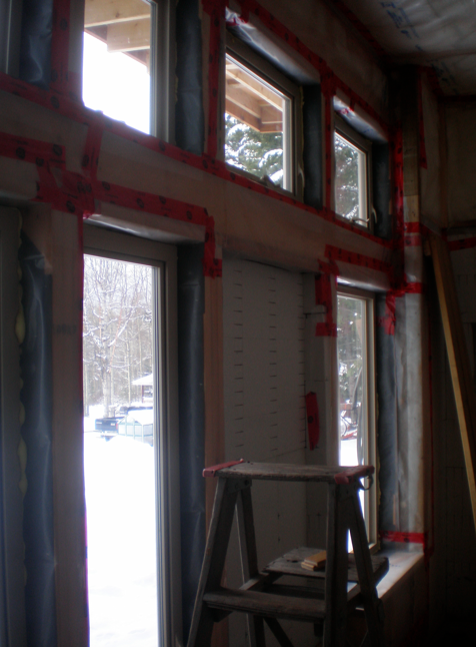
But the nice thing about building your own place, is you can at least have some nice ambience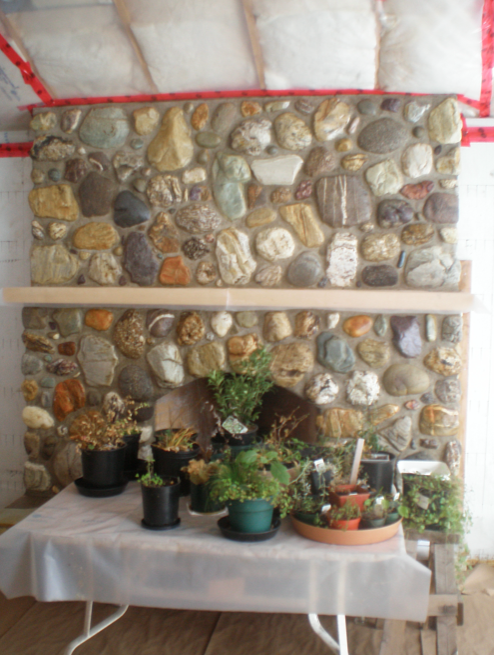
Well the truth is the plants have been living on the downstairs windowsill, and Jude moved them up to clear the way for the drywallers.
This picture does show the fireplace stonework after Judy cleaned it with muratic acid, and put a finish on, which really brings out the character of the stone. -
But at last.... The drywallers, (Todd and Tim) are on the roll
This is a really small town in the mountains, 2 hours from the nearest major centre, so having a real drywall tradesman like Todd is just pure luck.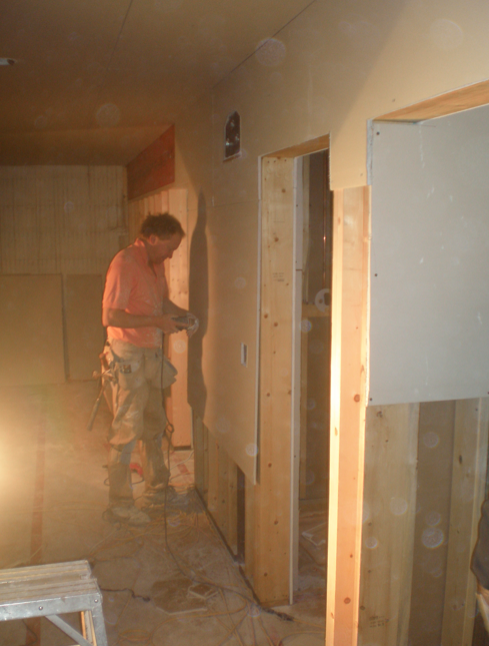
They are a really heads down, nose to the grindstone team.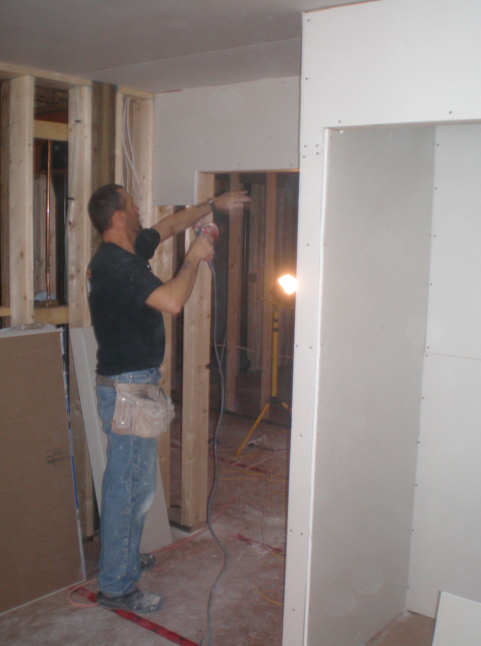
-
Meanwhile, upstairs on the main floor Jude and I are laying the stone floor.
First we prepped the bathroom by laying down a skim coat of concrete to the top of the hydronic pipes, unfortunately I forgot to take a picture of this.
Then we lay down a rubber shower pan which clamps directly into the drain. WE put a pan throughout the whole room, as we don't want a curb at the shower entrance, just a level walk-in.
Then place aluminum expanded metal lath on the pan to help reinforce the mortar.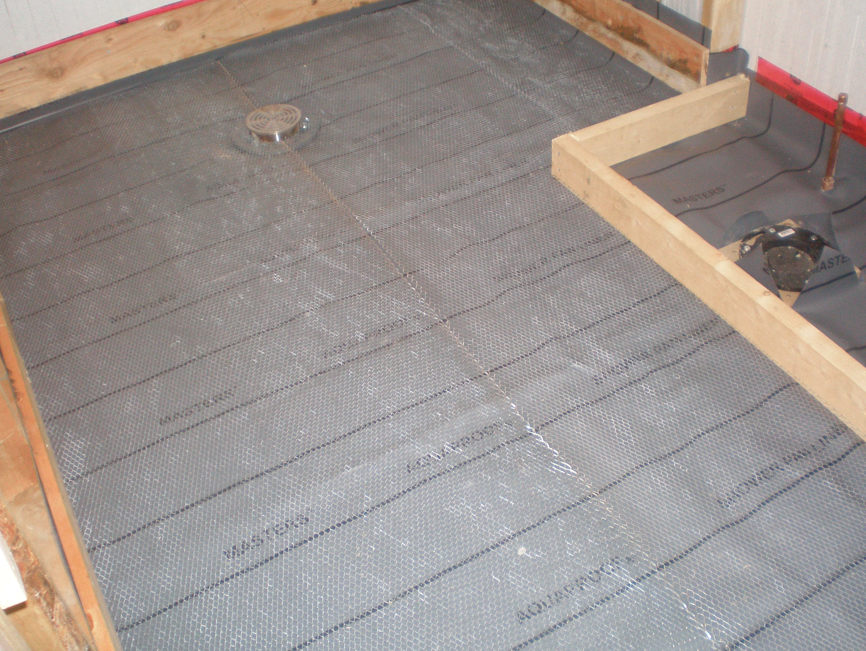
The start the stonework.
The stone is a silver mica, about 1/2" (1.3 cm) thick. I have already burnt out one diamond blade that I use to cut it because it is so extremely hard. The full floor depth is 2"(5.1 cm)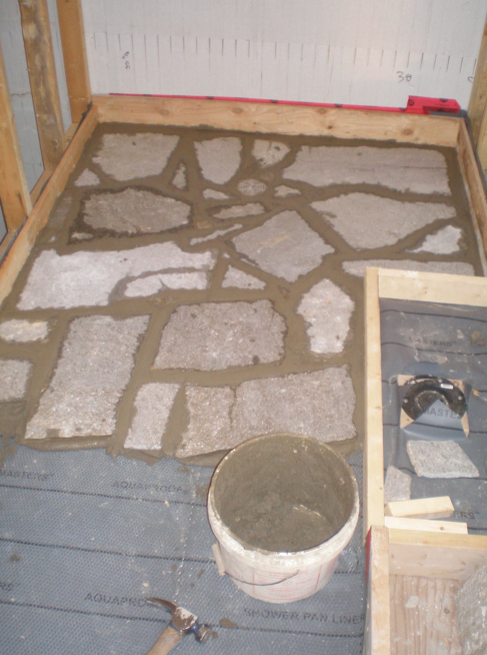
Then when it has set overnight Judy cleans it with muratic acid to get the excess mortar off, and washes it down.
-
The stonework will be in the small guest bath (with the shower), the master ensuite, and the kitchen.
Each floor has a thermocoupler sensor that connects to a programable thermostat which will allow us to set the temperature of the floor.
In the areas other than the shower, there is no rubber pan, so the lath is place over the hydronic pipe, and the stones laid directly.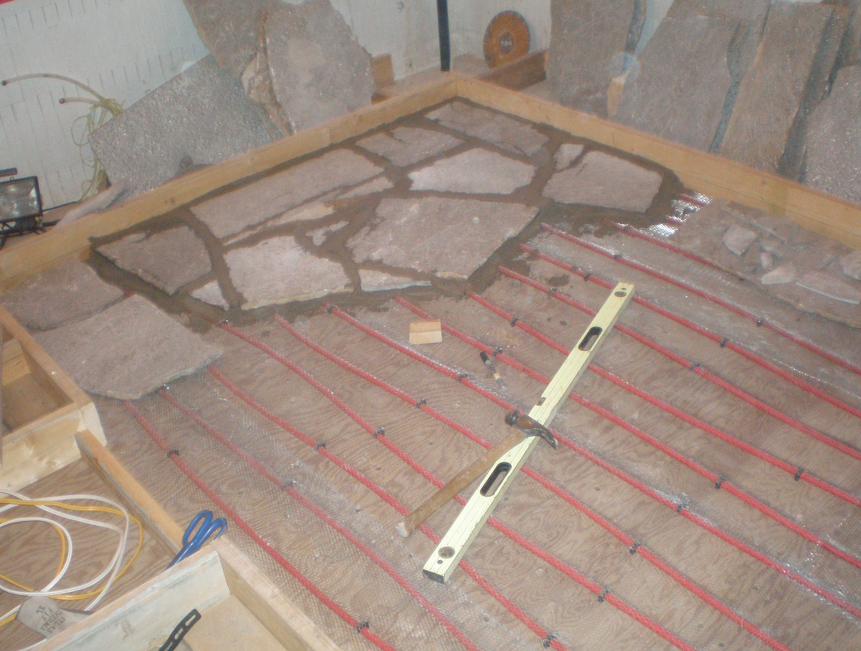
Me laying stone.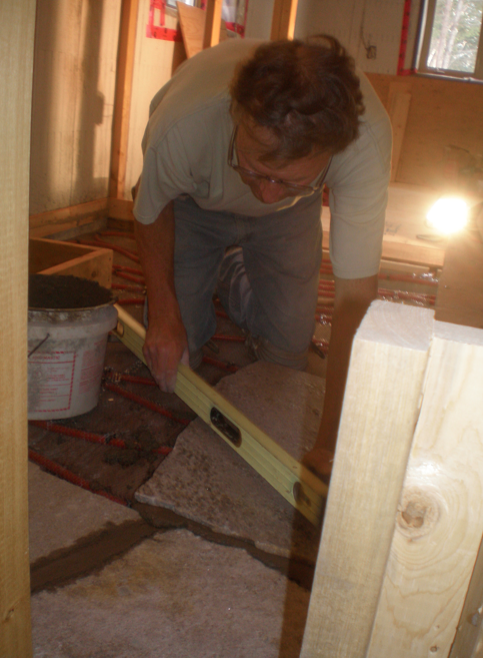
And if I go out to make another mix of mortar, Judy just keeps going.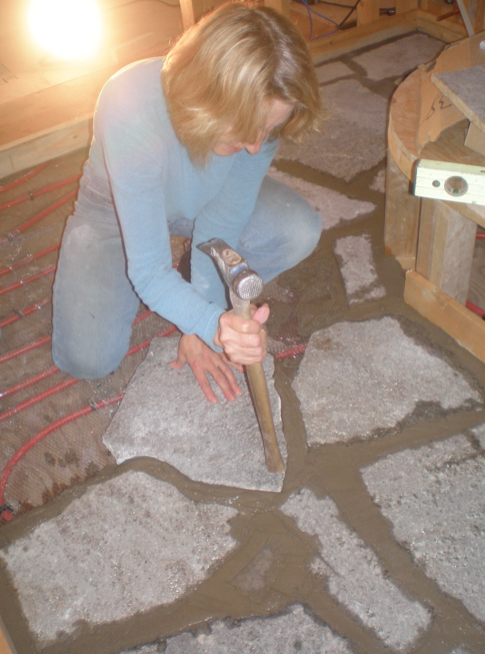
Each of the bathrooms took a full day, with cleaning the next morning, and the kitchen will take about 3 days.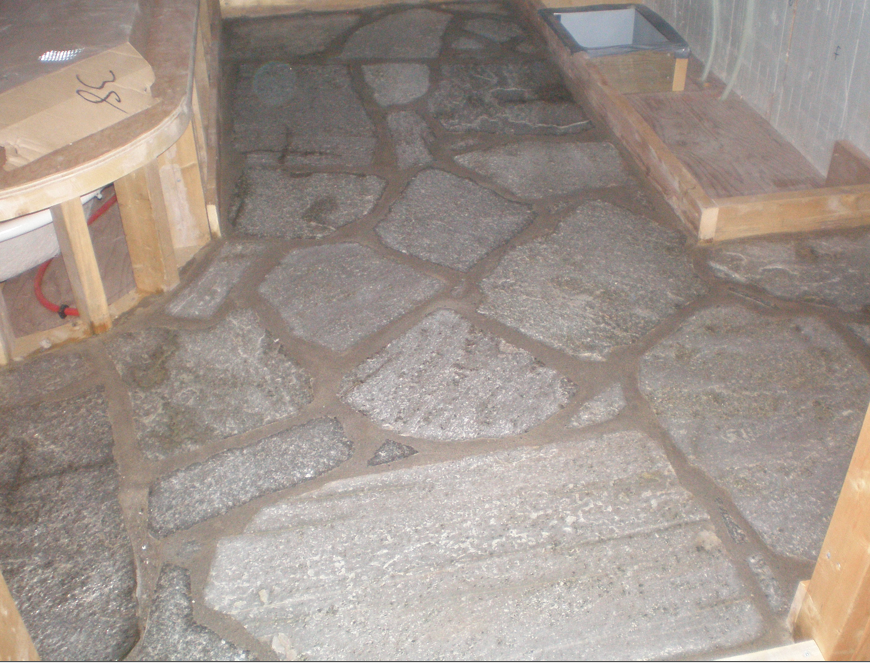
So it's back to work on the kitchen.
Cheers
(Oh and yes that is a laundry chute in the top right of the last photo) -
Dear Dale and Judy,
Things are really going on!!
Each step is carried out with great attention to detail, in a spirit of perfection. It's so pleasant to watch
I continue to be amazed by all the techniques that you implement..
-I didnd't know we could revive the stones with Muriatic acid (Historically called muriatic acid, and spirits of salt, hydrochloric acid was produced from vitriol (sulfuric acid) and common salt. The earliest suggested discovery of hydrochloric acid is attributed to the alchemist Jabir ibn Hayyan (c. 800 AD).- "we lay down a rubber shower pan which clamps directly into the drain."
- "Then place aluminum expanded metal lath on the pan to help reinforce the mortar."
- "Each floor has a thermocoupler sensor that connects to a programable thermostat which will allow us to set the temperature of the floor." nice..
- "(Oh and yes that is a laundry chute in the top right of the last photo)" that is top
Oh! and now that's it: The cold is arrived


Have you win the race, or does some works are lost under snow for this season?
Cheers,
Simon. - "we lay down a rubber shower pan which clamps directly into the drain."
Hello! It looks like you're interested in this conversation, but you don't have an account yet.
Getting fed up of having to scroll through the same posts each visit? When you register for an account, you'll always come back to exactly where you were before, and choose to be notified of new replies (either via email, or push notification). You'll also be able to save bookmarks and upvote posts to show your appreciation to other community members.
With your input, this post could be even better 💗
Register Login


Advertisement