From SketchUp to Reality
-
Dale,
This looks it will be a very interesting thread. Will you keep posting updates?
Mike
-
Hi Mike
I am planning on updating regularly. We are actually just finished framing, so I have a lot of posting to do to catch up,and of course then there is the actual act of building.
So I'll be adding regularly.
Cheers -
That's great Dale. Looking forward to 'keeping an eye on the build' ..... a bit like building inspections but virtual ..... its been a while since I was 'on the road' doing that kind of work

-
I was about to do the same ... Unfortunately the property was no longer for sale ...

-
I wish all the best for you project! Been there, done that... (actually my project introduced SU and wonderful world of rendering for me). If you or your wife ever get exhausted, remember that you can always hire some labor and take some leisure time with your wife - it's better than hitting your head to the wall.
-
Dale, very nice. I'm going to follow your project with great interest.
How did you find the ICFs to set up? My wife and I have talked about using them but around here, most of the contractors prefer to pour conventional walls or set block. they don't seem to know about the ICF walls so they don't want to use them.
-
Hi, Dale:
I wish you good fortune in this bold undertaking.
What is the recommended height interval for concrete placement for the ICF system? This looks like it would be a very effective basement wall construction. -
This is a good example of SU as BIM for the rest of us

Thanks for sharing -
Fascinating process. Can't wait to see more Dale! What a fantastic accomplishment, to design and build your own home. I hope to one day do the same.

-
Thanks for the kind words and encouragement!
I have had a few PM's on the ICF system, so I'll chat about it for a bit.
I have experience with 2 systems, Quadlock, and Arxx. I am most fond of Quadlock, but that is for two reasons:
I've used it on 19 projects, so it is the one I am most familiar with.
It ships as 1'x 4' flat panels, and you put the panels together with nylon ties. Other systems like Arxx ship already put together, and components like corners are already assembled.
For me this may be a disadvantage as I tend to work in remote areas, so shipping is more efficient with flat panels, rather than blocks with 8" of space between them.
And secondly if one of the corner components is damaged in shipping, I am at a stand still until I get another shipped. With Quadlock, since I assemble the panels, this can't happen.
In the end all the ICF systems I have seen used do there job well, so it is mostly a matter of preference.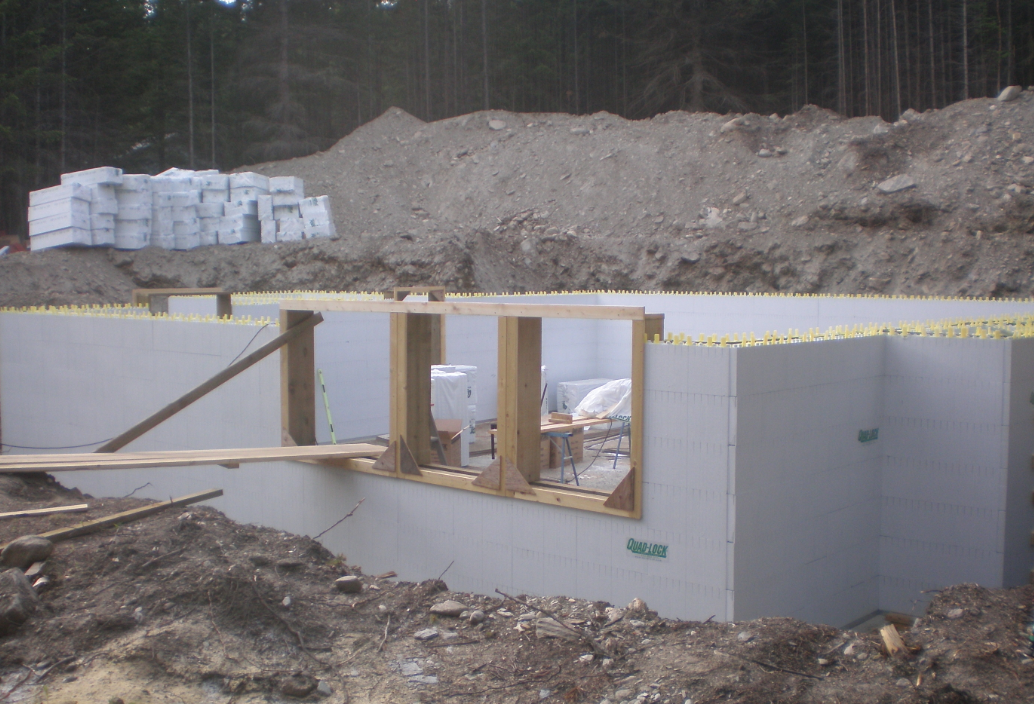
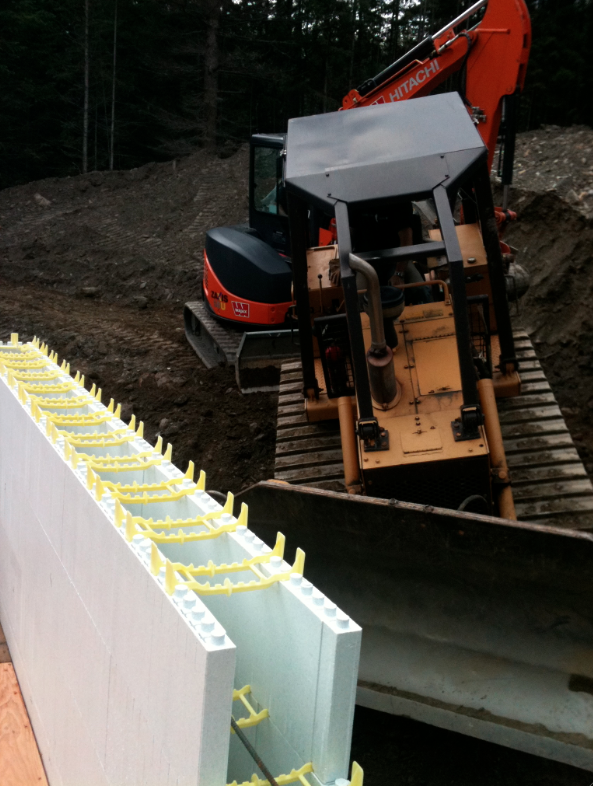
In the photo above, you can see the yellow nylon ties on the top row of ICF, and the system I use for window rough bucks.
The bucks are 2x12, with a 1/2" plywood strip added to build the 11 1/4" 2x12 out to the actual 12" thickness of the ICF wall. Then you case these with 1x4's which are also screwed to the wall ties preventing blowout.
The sill of the bucks are 2-2x4's that have a space left open in the middle so that you can be sure you are getting the concrete to completely fill the forms under the windows.
The concrete wells up into this space, and you trowel it off. This also serves to embed the buck which remains in place to fasten windows to. -
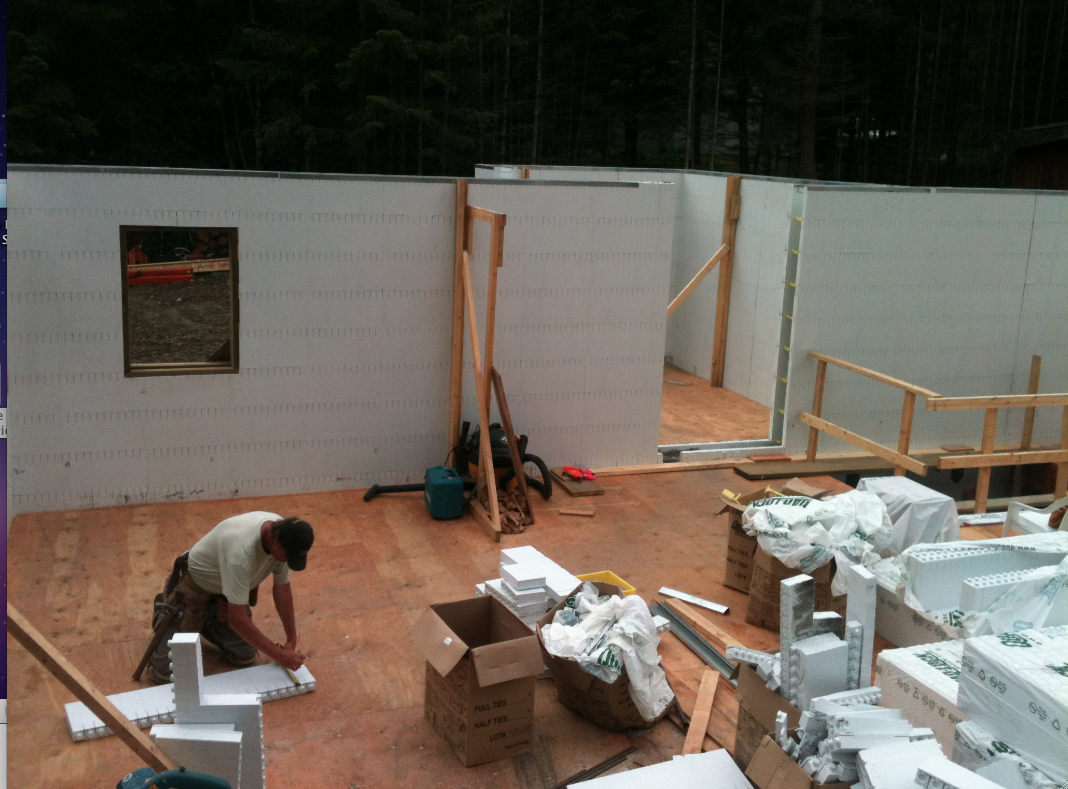
The ICF systems are really like playing with Leggo, on an adult scale.It took Judy and I about a week to form and brace the foundation level forms.
This time could be cut way down on a simple rectangular building, but we had several "T" walls for our entrance way, and fireplace foundation, so this slows you down.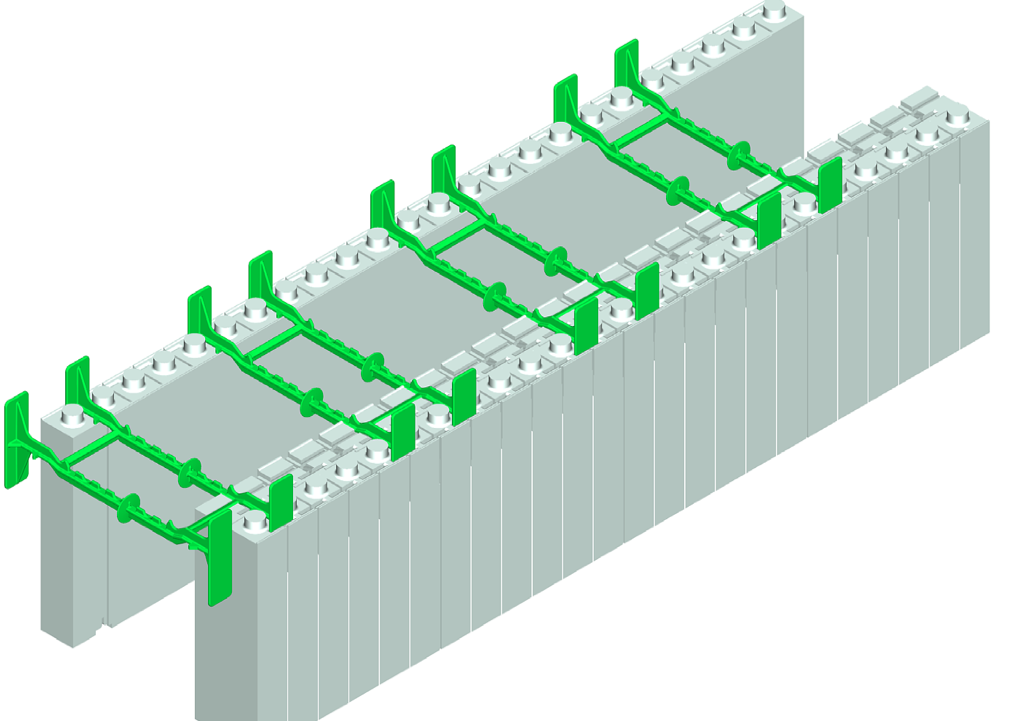
This is a shot of quadlock and ties. This particular panel setup has a 2" ICF panel on one side, and a 4" on the other for greater insulation value. The ties can be ordered to allow for a 6",8",10", or 12" concrete thickness.
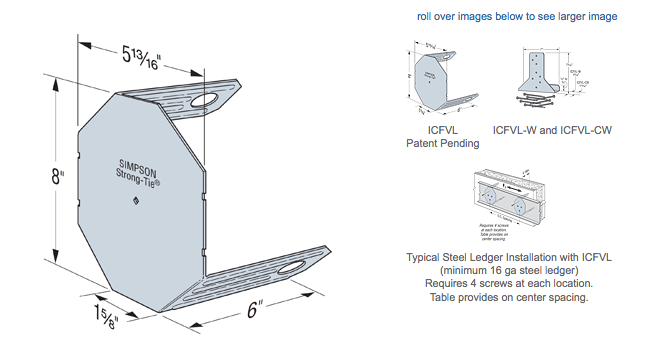
To make the building more energy efficient, I cast in Simpson Strong Tie ICFVL hangers, so that I would be able to hang my floor inside the wall and have no exposed (air leaking) rim joist.
These are complete engineered systems that you slot in through the styrofoam and then pour in place. Then you bolt your rim joist to these.
-
But this is also all about SketchUp and so we didn't arrive at this design without going through others. Attached below is one of the early designs, as you can see a totally different building.
We both really liked this one, but it seemed a bit much for just the two of us, so we scaled down and went back to the modeling board.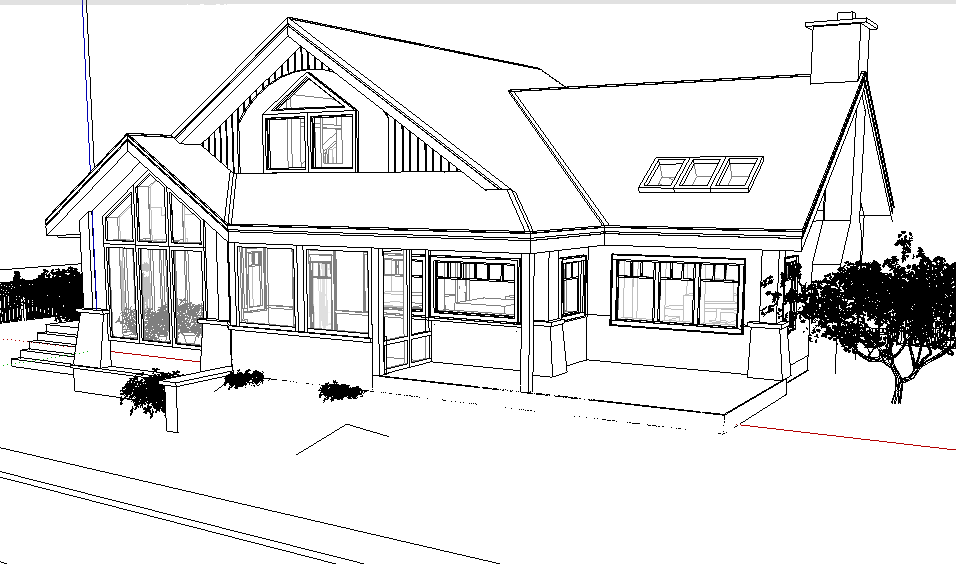
Here, one of my early forays with Thea.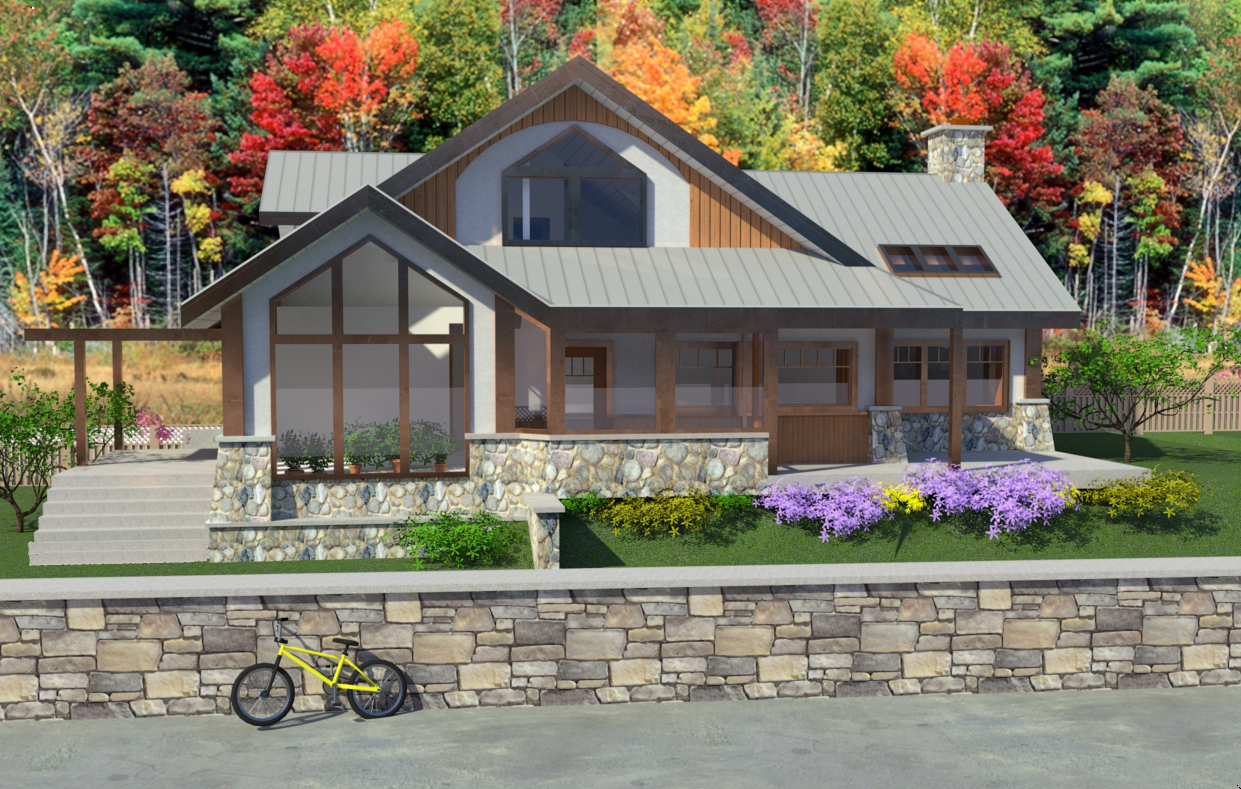
-
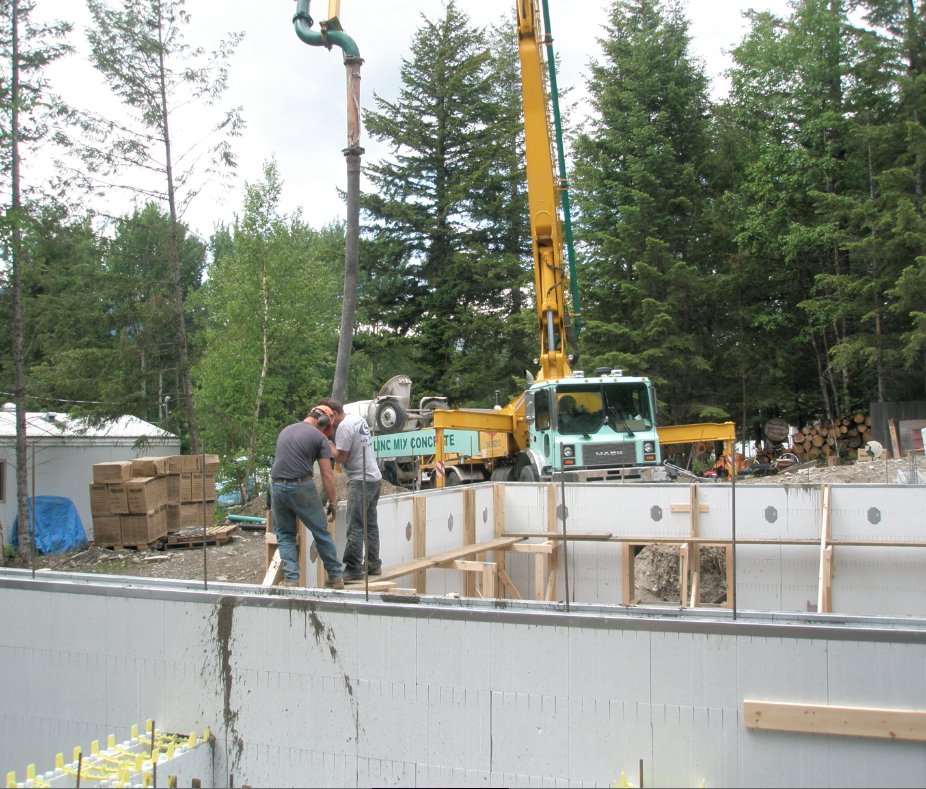
Concrete pump truck in action pouring the lower floor (foundation). We poured to about a foot (304 mm) over the cast in strong ties. This allowed us to frame the main floor, and have a platform to work from for the second floor.
-
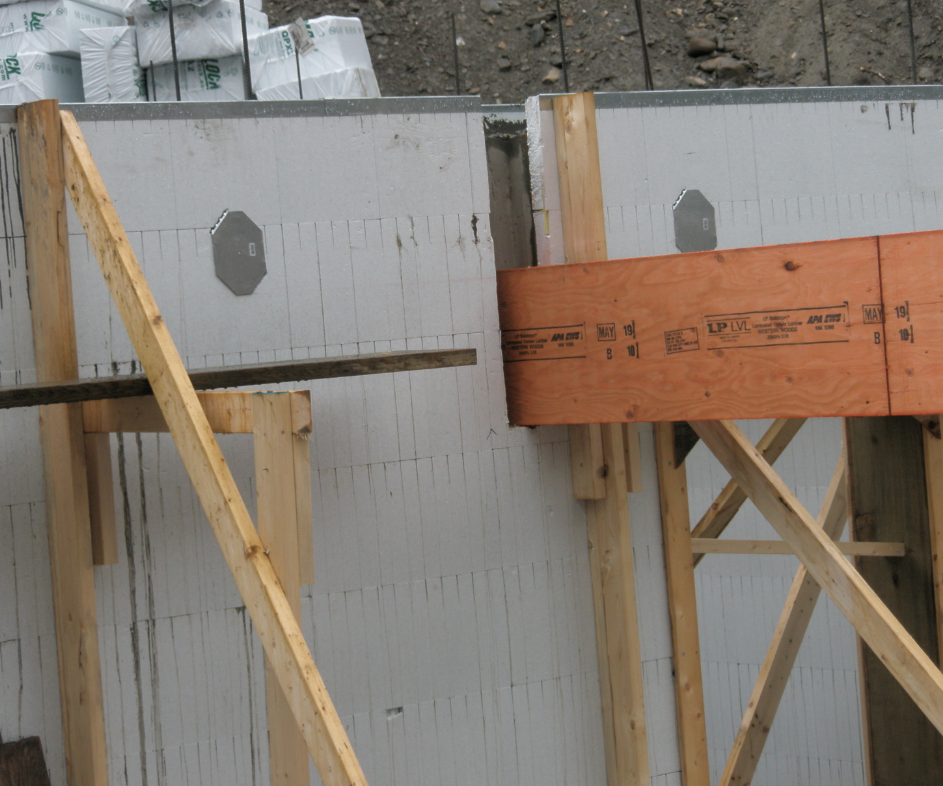
Placing the main LVL beam in the cast in beam pocket. It is a 3 ply 14" LVL.
We are really taking advantage of mass in this house, so there will be in floor hydronics on both floors, with a 2" acid stained concrete floor for most of the main floor, with some areas of stone. This will all be fed by a ground source Geo-exchange system.
The load on this beam is fairly significant, with the floor loads coming in at 50,070 lbs (22,711 Kg)
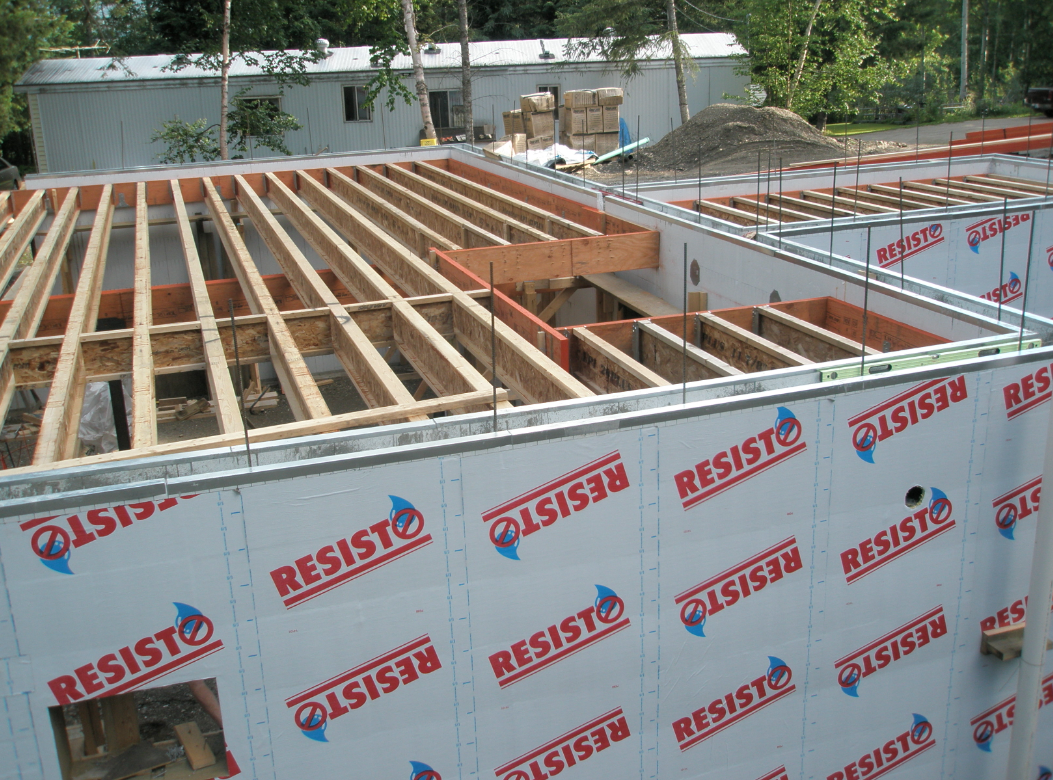
The first photo also shows the Resisto peel and stick foundation coating in place, which laps down over the footing.
-
So with the beam in place we are unloading the TJI floor joists in this photo. The LVL is a drop beam so that electrical and plumbing can run in the joist cavity. The TJI's are full span, as were the rim joists which the hang off of with joist hangers.
Somehow Judy and I managed to manhandle these 34'(10.36 m)long beasts into place.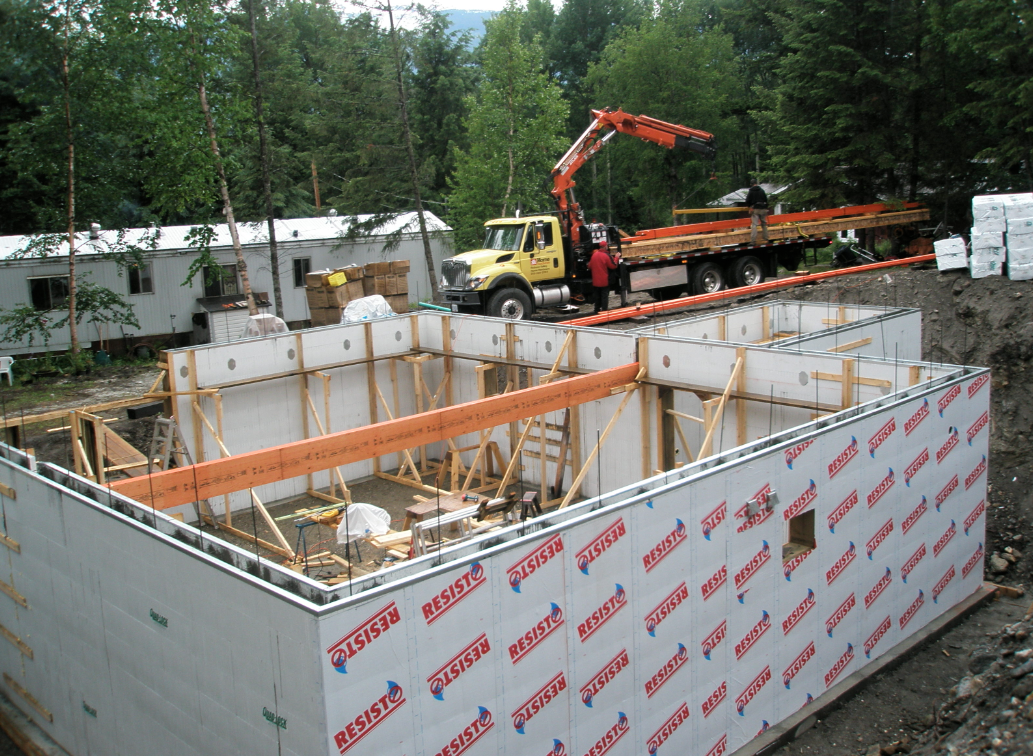
-
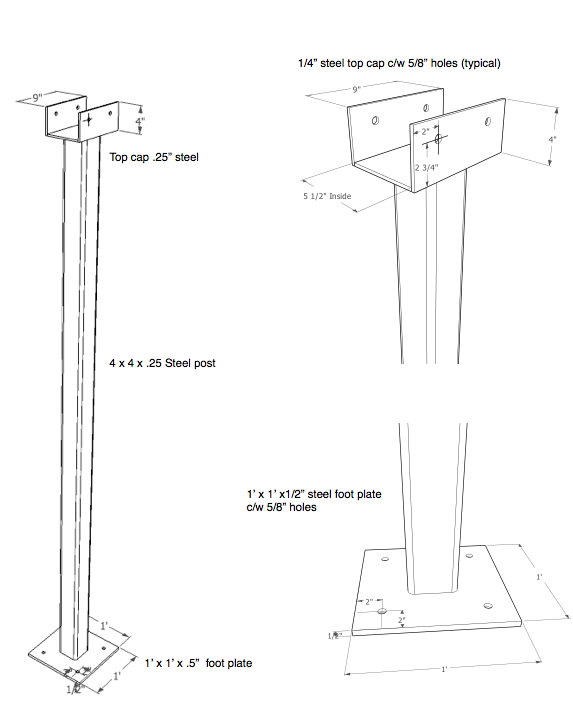
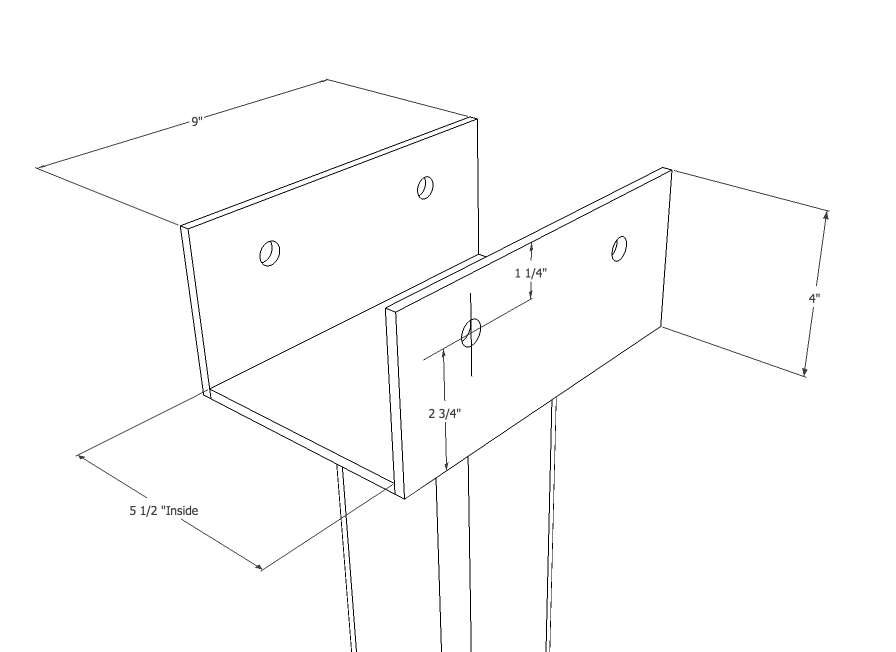
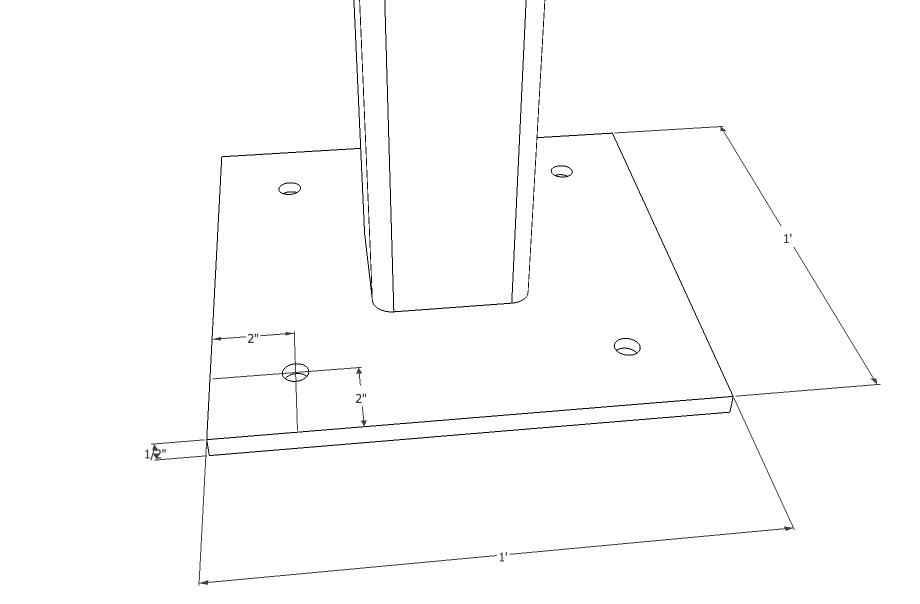
Once again SketchUp to the rescue, as with a floor load that is that heavy, it is not easy to find a pre-made telepost that can stand that load.
So I SketchUpped the post and emailed it to my structural engineer. He made a few changes to bolt hole locations, and we had a local fabricator build it.
-
Looks like this will be interesting to follow. Two comments, based on our experience:
- Gophers seem to love the styrofoam in the ICFs. Maybe the Resisto will keep them out, but I wish the product was available with a hardware cloth covering. If you haven't buried your footings, you could still cover the foam. On the other hand, you mention that you've used ICFs on 18 projects. Have gophers plagued the owners of these houses?
- If you're going to acid stain the floors, remember that everything that happens to the concrete between now and then will telegraph through the stain. Cover the floors, preferably with something like 1/8" masonite. If that's too expensive, a couple of layers of paper, and keep up with all the tears that will occur between now and staining.
-
@llaves said:
Looks like this will be interesting to follow. Two comments, based on our experience:
- Gophers seem to love the styrofoam in the ICFs. Maybe the Resisto will keep them out, but I wish the product was available with a hardware cloth covering. If you haven't buried your footings, you could still cover the foam. On the other hand, you mention that you've used ICFs on 18 projects. Have gophers plagued the owners of these houses?
- If you're going to acid stain the floors, remember that everything that happens to the concrete between now and then will telegraph through the stain. Cover the floors, preferably with something like 1/8" masonite. If that's too expensive, a couple of layers of paper, and keep up with all the tears that will occur between now and staining.
This is interesting about gophers. There are no gophers to speak of in this area, so it is a problem I haven't had to deal with, but could be very important if you are in an area that does.
And as for the floors, I couldn't agree more. We usually put down two layers of untreated building paper tuck taped at the seams,(tuck taped to each other, not the concrete as this will end up as stripes) and keep up with the tears.
It doesn't matter how much you berate the tradesmen, caring for you floor just isn't a priority. -
In the oddball things that happen on the jobsite department:
We let the foundation reach a 7 day compressive strength, and did a bit of back filling to make it easier to get in to the building. The site is on an ancient creek bed, and has lots of very large rocks.
The cat hit a large flat sloped rock, and side slipped down stopping with the blade about 1/2" from the styrofoam wall.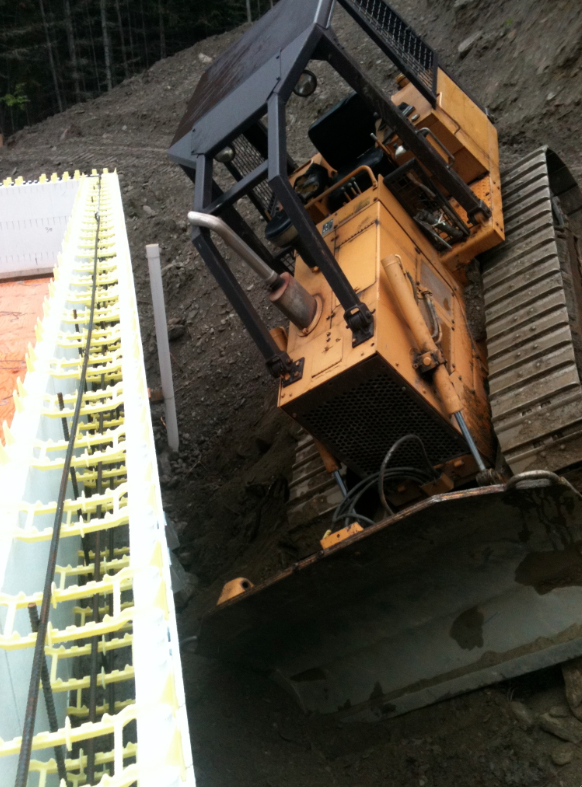
Our neighbour has a little excavator so we got him to come over and help extricate the cat avaoiding a "cat tastrophy"
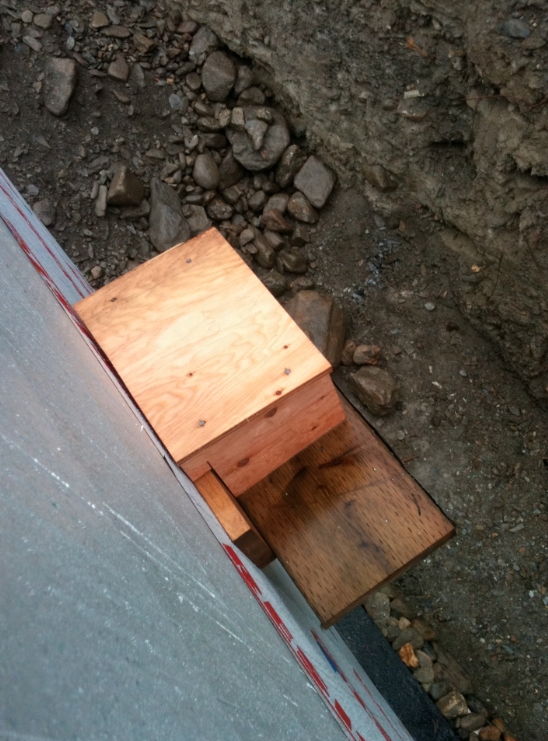
Just before backfilling we discovered a nest of Juncos in the dirt bank of the excavation. We built the a little styrofoam nest, and a plywood condo, and hung it off the Quadlock wall just above where the nest had been in the bank. It took the adult birds a couple of hours, but they eventually found the nestlings, and stated feeding them until they fledged and flew.

-
The floor is 11 7/8 TJI's, which as I mentioned we joist hung from the ledger LVLs spanning over top of the main beam. Then we put down a 3/4" (19mm) t&g subfloor and the second floor Quadlock walls up.


Advertisement