Magic wand
-
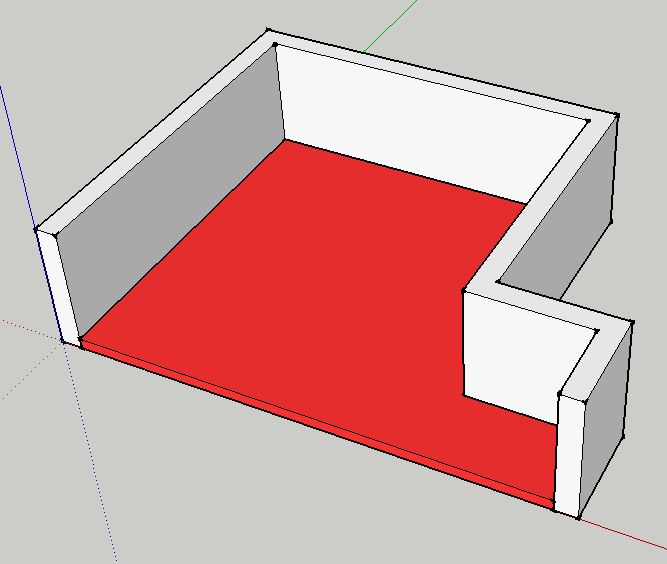
Is there a quick method or possibly a plugin that is capable of creating a (floor) group like the red slab in the attachment from the surrounding grouped boundary (wall) objects with ideally a single click?
This layout is fairly simple, but the solution may also have to cope with door openings into other rooms.
-
Best before you give the floor a thickness... click on its face to select it [x2 to select it and its edges and x3 to include all connected geometry too - which would include the walls!]
Now Group it [shortcut key is the quickest but its also on menu and context-menu].
The new group is added containing the face and its edges, any edges shared with other faces remaining in the model will have been duplicated.
If you select the group and get Entity Info you can rename the group a 'Floor1' or whatever.
If you are going to replicate that floor several times make it into a component rather than a group as then editing one edits all instances...
If we assume that you have some thickness already made you can group the top face as the 'floor', then click on the bottom face and group that and select it and Edit>Cut.
It now on the clipboard; edit the original floor-group and use Edit>PasteInPlace and the bottom face/edges are added to that group; to tidy up explode the inserted group so all of the floor-group's geometry is in one 'context'...
Alternatively you could just erase the bottom face and edit the initial floor-group and pushpull it to the previous floor slab's thickness so now the whole floor is now replicated inside the group.
It's not 'one-click' BUT it's only a few clicks... -
Thanks Tig, just needed a little lateral thinking.

The workflow I was using was to create the walls with dline.rb, which obviously doesn't create the floor slab, I was then telling myself I needed to trace the room boundary.
 Using what you have suggested it is easy enough to open the wall group, redraw one of the inner edges of the wall to create the face that forms the floor. Select the face WITHOUT the boundary edges and edit>cut. If you select the face AND boundaries the edit>cut will destroy the original geometry. Close the wall group and then paste in place to create the floor which can then be pushpulled, grouped & layered as required.
Hello! It looks like you're interested in this conversation, but you don't have an account yet.
Getting fed up of having to scroll through the same posts each visit? When you register for an account, you'll always come back to exactly where you were before, and choose to be notified of new replies (either via email, or push notification). You'll also be able to save bookmarks and upvote posts to show your appreciation to other community members.
With your input, this post could be even better 💗
Register Login


Advertisement