Face to Grid/Mesh/Something
-
Hey guys,
Could someone point me in the right direction for 2 things please;If i make any shaped 2D face and I want to turn that into a mesh to use the sculpt tool or sand box, how do i do this? (for the creation of mounded Garden beds)
I dont want the excess faces that can come with the use of 'from contours' in Sandbox tools.Also... in an attempt to make another any shaped 2d face in to a square shaped mesh (ideally set width) with the potential of using lattice maker (or something of that sort)to create gaps between the squares (for the creation of paving)
I understand this could be drawn... but I have a vegie patch that needs tending at some point during the day...Id appeciate any help...
-
Using the Sandbox tool, select From Scratch, set the grid spacing by typing say,2' and enter. You will see it in the VCB display. Then click in the model space where you want to start. Drag in the x or y direction on the xy plane and you will see tick marks. Click to set one extent, then move cursor 90degrees to this and see the grid mesh expand. Click down again to set the grid.
Click on the grid it turns blue, right click Edit Group. Go to top menu and select the Smoove tool, type in radius of influence say 4' for a two foot grid. Enter. Now use the smoove tool by left clicking down on the grid. You will see yellow highlights. Pull up in the blue direction. Use Shift to modify it downward.Sculpt Tool by -BTM will work on this also. But this plugin can also work on a mesh in any orientation from vertical to horizontal, whereas Sandbox is designed for horizontal terrain modeling. You of course can tilt the geometry with the protractor tool.
Also, you can make the sandbox grid over any amorphous 2d shape you wish.
Does this answer your questions?
-
Thanks for the reply mitcorb
I'll be a bit more specific
If I want to have the mesh only within the example shape though (no overlapping) how would I do that?Ive managed to use the shape shown along with 'edge tools - split faces' plugin to create a square mesh easily enough, and I found the lattice-izer has the potential to do what I was after from there, except it seems to vary from not working to randomly deleting lines and faces and worked once... The Lattice maker does what I want except it leaves those (coplanar?) lines
I was hoping there was a plugin where I could click any face and it'd turn it into a specified mesh...?
-
There is a Grid plugin. You can do your 2d shape, impose the grid, intersect and trim outside the shape. You can multicopy double lines to represent grooves or joints across the 2d shape and trim the excess after intersecting.
TIG has a workplane plugin that may be helpful. I have not practiced with this enough.
I am still looking around for that plugin idea you mentioned. If I see it, I will let you know. I suggest maybe you check the SUcation Plugins Index. The red button link at the top of the Index Page. Also, Ruby Library Depot, and Smustard. These are the ones I am most familiar with.
Other people are certainly welcome to chime in here.
How about Quadrilateralizer, just published by TIG? -
Justo, you can achieve what you want with the drape tool from sand box tools, watch the TIN_Planter file that you can download from SuWiki site
https://sites.google.com/site/sagesuwiki/files/files-tutorials -
I managed to work that out but didnt hit the submit... haha
didnt know that site existed...
Thanks CharevirJust need to sort the paving one out...
i managed to drape a 'from scratch' grid over specific garden bed faces... so that basically works... although, can edges be locked so they dont rise with the smoove tool? (so it doesnt pull higher than a path - i hope that makes sense)
-
Justo
It maybe worth while to check out the soap, skin and bubble plug in at http://www.tensile-structures.de/sb_software.html
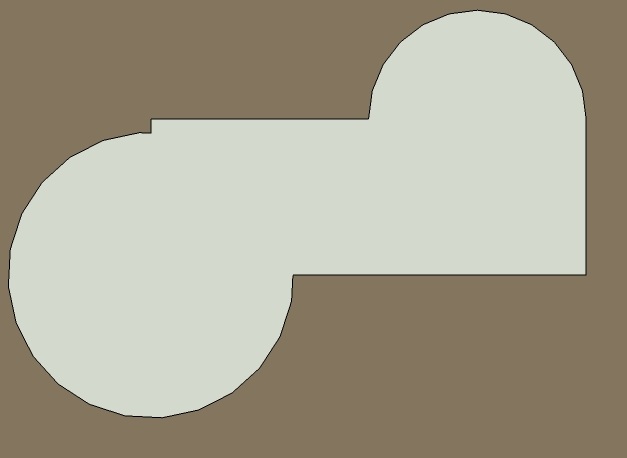
It would help if you post your model . Otherwise we have to draw from your jpg but have no dimensions
-
SKB fist cut

-
Thanks mac1
model - ill keep that in mind for next time.
I ran soap skin worked well first time... but something happened between then and now... and whenever I try to use the bubble part it goes in the negative direction (withouth me setting the '-' value) as a curiousity I used the sculpt 'bulge' tool on the face and it went in the opposite direction as well. I tried backing up and reversing face and going through again and same problem...
-
Sorry Soap skin Bubble for it to 'rise' i have to have a negative value entered into the pressure...
Sculpt tool I have to hold shift (reverse) to make it riseim assuming a file has gone reversed??
-
In the picture, the faces are all reversed/grey. Is this the cause of the negative action?
-
-
mitcorb - for that shape... i actually had it working perfectly the other day when I first saw the suggestion for soap skin bubble (in thinking back though I dont remember how I got it to work...). Then at some point yesterday I was playing about with other shapes and it started going the other way, so I thought the face must have been reversed so i flipped and tried again, with no luck. I put a negative pressure on it and it did what i wanted to do...
I think some file must have changed for z axis to be reversed? or something.... i have no idea
Jean - Thanks, sand box works for it, although to have the edges locked so they dont rise, soap box work a little better for mounded garden beds...
-
ok... im getting somewhere... the soap skin bubble creates the mesh as a reversed face irrespective of how the original face is...
-
so... if i create the skin on the z=0 axis, its creates a reversed skin...
i then created one above 0 and it creates a skin the right way up...
just incase someone cares
-
I have question on this same topic. I think it was mentioned but never answered on this thread.
I design paver patios and landscape construction. I start with the property layout, house, and patio area. After that, the yard is all one plane. I've used the soap skin plugin to turn it into a grid. i'm using the smoove tool. My question is, how can i adjust grades on the yard while making sure that where the yard and patio meet stays locked at the same elevation?
-
In this case, you should not use the smoove tool but the stamp tool. That would make sure that horizontal areas remain horizontal. There is one caveat however: you cannot use verticals in your "stamp". Like retaining walls and such. But since those would have some thickness anyway, that small offset is already enough for the stamp tool.
-
this one can be useful too.
http://forums.sketchucation.com/viewtopic.php?t=2102#p10503 -
So, if i understand this correctly, I should be making the yard grad first then making the patio shape and stamping it down on the existing terrain.
-
Something like that. Although the surrounding terrain may need some tweaking (the smoove tool is okay for that - or even better would be to get a site survey and make the terrain from contours).
Here is a rough example how a stamp should look like - notice that I avoided using the real steps for the staircase as that would not work with the stamp tool. You can add them on that "slope".
Hello! It looks like you're interested in this conversation, but you don't have an account yet.
Getting fed up of having to scroll through the same posts each visit? When you register for an account, you'll always come back to exactly where you were before, and choose to be notified of new replies (either via email, or push notification). You'll also be able to save bookmarks and upvote posts to show your appreciation to other community members.
With your input, this post could be even better 💗
Register Login


Advertisement