[Tutorial] Textured tiles with displacement
-
Petite explication pour créer une texture tuile en utilisant le canal Displacement de VRay for Sketchup :
Little explanation for creating a texture tile using the channel of Displacement VRay for SketchUp:En premier récupérer ceci
First get this: http://forums.sketchucation.com/download/file.php?id=4851&mode=view
ou page 3 de ce topic
http://forums.sketchucation.com/viewtopic.php?f=18&t=241&hilit=projection&start=30Puis suivre tout simplement l'image suivante
Then simply follow the image below:
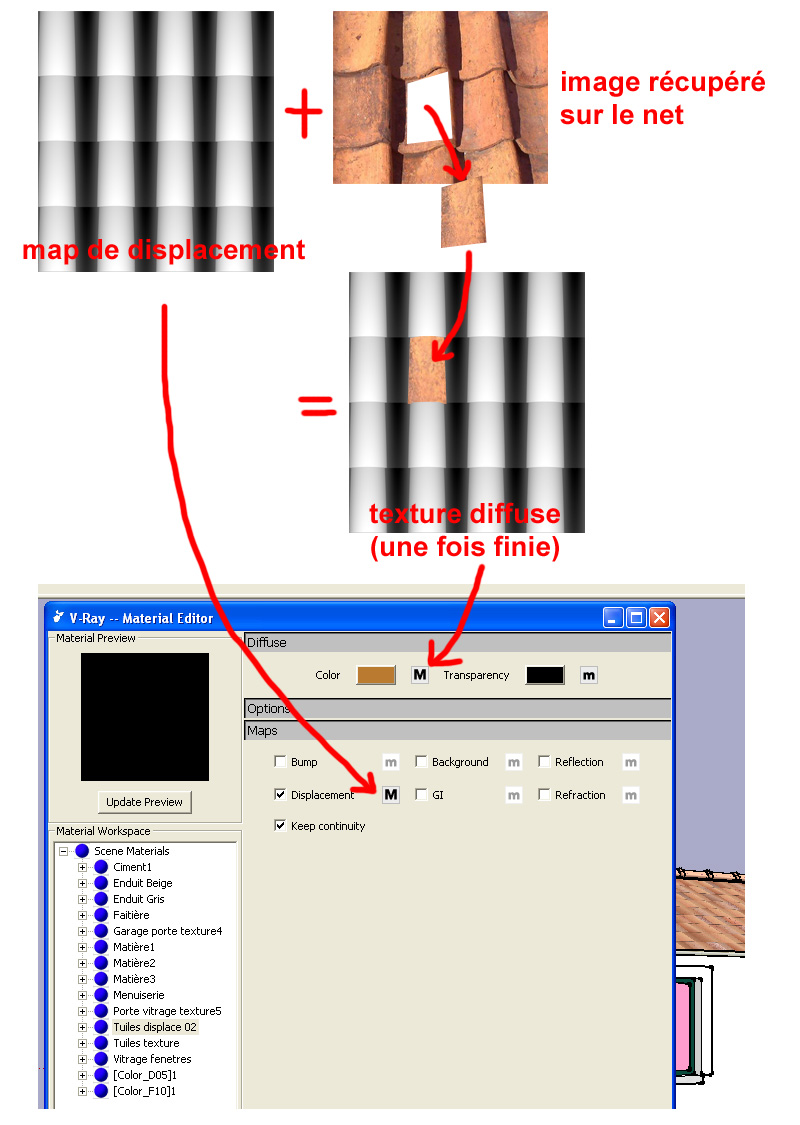
(remplir aussi les noirs de la texture)
Ne pas oublier de grouper la surface et de selectionner tout l'objet avant de poser la texture
Do not forget to bundle the surface and select the whole object before applying the texture
, indispensable!!!!!.
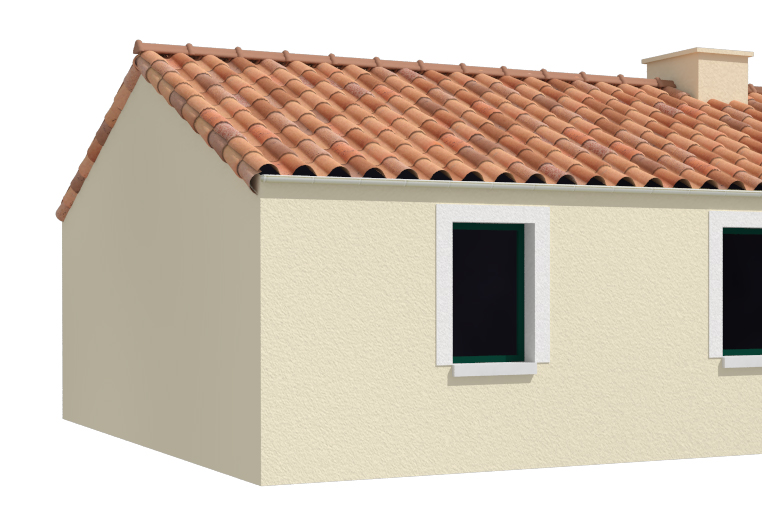
Vous devrier obtenir quelque chose comme ça
you get something like that:
-
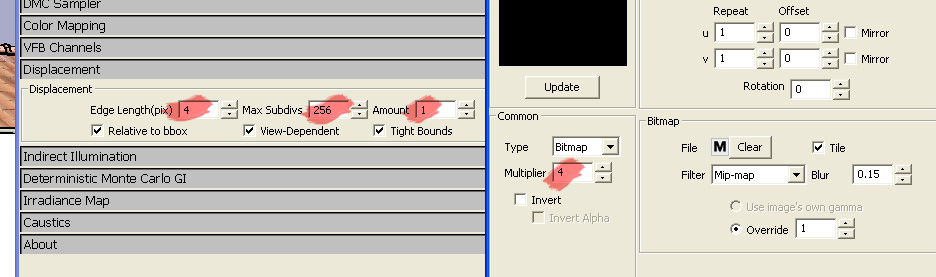
That looks very nice. What is the displacement amount in the options menu? Do you change any of the other options - edge length, max subdivisions? It would be good to know the values you use.
Thanks
-Andy -
The multiplier would have to have been changed, as a multiplier of 1.0 means 1" displacement. A nice trick to set up displacement for metric values is setting the global multiplier so that the local values relate to your model units. If you work in mm then use 1.0 / 25.4
-
I did not change the value unless the multiplier.
And I blur the displacement map.
I work in cm.
My values :
Hello! It looks like you're interested in this conversation, but you don't have an account yet.
Getting fed up of having to scroll through the same posts each visit? When you register for an account, you'll always come back to exactly where you were before, and choose to be notified of new replies (either via email, or push notification). You'll also be able to save bookmarks and upvote posts to show your appreciation to other community members.
With your input, this post could be even better 💗
Register Login


Advertisement