Fancy script on a curved surface.
-
I am drawing a very detailed model of the Canadian Silver Dart, which first flew in 1909. I have access to original drawings and photos as well as access and many photos of the true replica that flew for the centennial last year.
The fuel tank (see photo) is a tapered cylinder with a fancy scripted "Curtis" on both sides.
I can create a flat text in either SU or some other app.
But how do I wrap it onto the tank?

I remember seeing this somewhere but can't find it (haven't looked that hard to be truthful).
If anyone's interested, I can post photos of the replica and my SU model, which is only the engine and auxiliaries so far.

-
I would create a material of the image of the text and then apply it. An alternative could be to use a different application to create vector lines from the edges of the text in DXF or DWG format. Import the file into SU and use Shape Bender to bend the text to the curve of the tank. the former would likely have less impact on file size that the latter. It is less work, too. If you haven't got the DXF/DWG import option you could trace the edges of the text after importing it as an image.
-
Hi,
Pick a high-resolution photo of the signature. Remove everything except the signature with a Photo editor. Save it as a transparent PNG. Import it into Inkskape and vectorize it. Safe it as DXF.
Import this DXF into Sketchup, ungroup it, and make a face. Then push/pull the face through the cylinder. Intersect it and remove the rest.
Charly

-
Charly2008, thanks. But that is a hard way to do it, and I've done it that way many times before. I don't use imported PNG's, but thick extruded 3D lettering. The main problem is when you intersect the 2 surfaces, the main (canvas) surface tends to breakup around tiny edges, or some do not intersect, creating a massive fix-it job. But it does work. It also works better if the lettering is a group. Then after the intersect, you just need to delete the group.
And many thanks for the work you did in answering this question.
Failing an answer to the way below, that is how I have to do it.
What I'm looking for; is a description of how to wrap an image around an irregular shape. In the old Google SU forum some time back, was how to put the Coca-Cola logo onto a coke bottle shape. It's quite elegant and does not involve a messy intersect/deletion/fix.
-
It is not about a Coke bottle, but anyway... http://forums.sketchucation.com/viewtopic.php?f=15&t=13564&p=100523&hilit=wrap+label#p100523
-
I'm sure it involved projecting an image as a material on the surface as I suggested before.
-
Thanks guys. Consider this topic closed.
I looked at all the suggested options, but I could not wrap my head around them when it came to texturizing and scaling. Just seemed too complicated (or unexplained) for what I needed to do.
I ended up doing it the "hard way", as I figured, very similar to Charly's way.
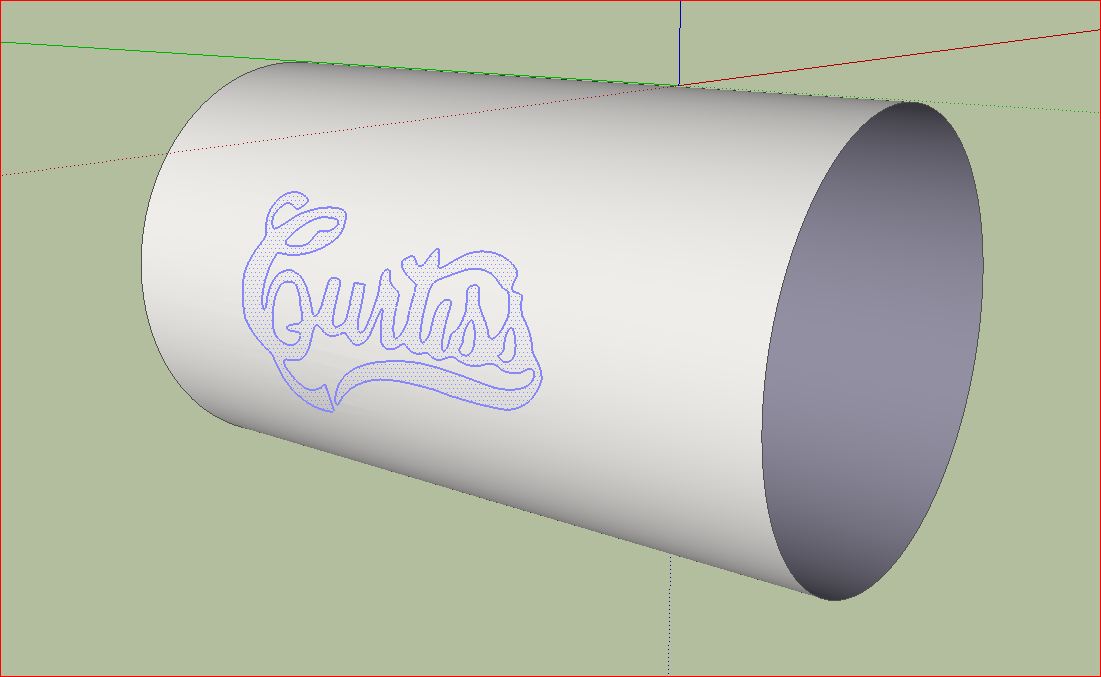
First I traced the logo and made a component of the tracing. (I needed 2 sides) That alone took 2 hours.
Then I placed the logo comp beside the tank comp in its correct alignment, both sides.Note: to make it quicker and avoid disaster, I Clipboarded the tank and logos, then placed them (shift-P) in a second SU to work on. I also changed the black tank to white to see what I was doing.
Then I extruded the comp into the tank.
I selected the tanks surface and Intersected with model.
Hiding the comp, the logo was imprinted on the tank, but with a few minor "tears". Fewer than I expected.
I fixed the tears and and hid all the logos outlines.
Then I painted the logo gold(ish) and the tank black, and done.Another Clipboard of only the tank, and back in the main SU I deleted the old tank comp, then Shift-P to bring the logo'ed tank back into its correct position. All told, under an hour.
I attach a pic of the result. (Yes, I know the logo looks larger than the real thing, but I'm not gonna change it)

-
Looks like that worked for you.
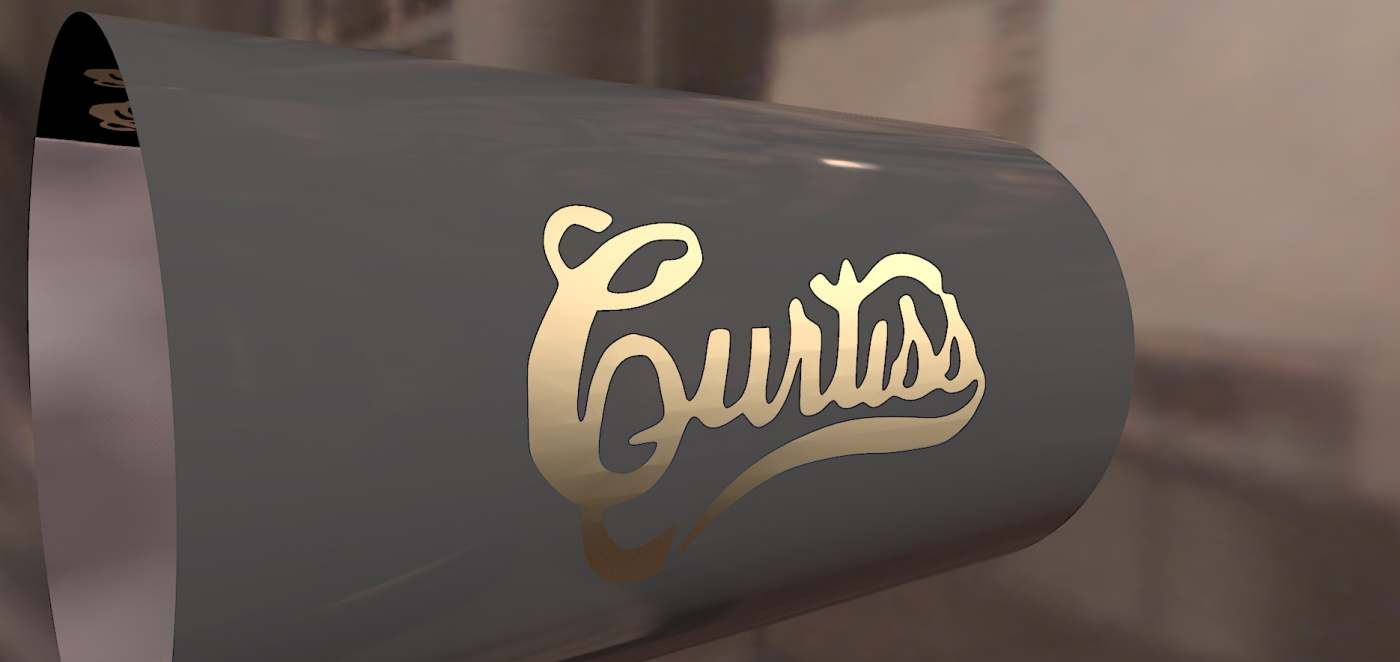
For those who come along later looking to do a similar thing, I'll post this image to show that it can be done quite easily using an image as a material.

No need to trace the logo and go through those gymnastics. It took me longer to find a Curtiss logo and prepare it in PS than it did to apply it to the curved surface. It isn't the exact logo the OP was looking for but the idea is the same.
-
Yes Dave, That's true however you also need to make sure that the projected image texture will blend seamlessly with the rest of the texturing all over the tank and especially in a rendering software that is not 100% certain. Of course, if the whole thing is textured with one, single image (say with Whaat' UV Tools), it can be done easily.
Nonetheless if this solution worked, I would definitely prefer it over the meticulous one which can also "crumple" the mesh when rendered as we have seen numerous times.
-
Csaba, I tend to agree with you. In the case of the image I used, the original was black text on a white field. I inverted the image and then painted the text with a gold color. That image isn't large enough to cover the entire cylindrical surface on the model so I created a, for want of a better term rectangular face on the surface sized appropriately for the logo. The region outside that rectangle was painted black. Certainly if this were going to end up going through the rendering stage in some other application, one could quickly create a material large enough to cover the entire cylinder and even create a bump map if needed for rivets or other surface details.
-
@dave r said:
Looks like that worked for you.
For those who come along later looking to do a similar thing, I'll post this image to show that it can be done quite easily using an image as a material.
No need to trace the logo and go through those gymnastics. It took me longer to find a Curtiss logo and prepare it in PS than it did to apply it to the curved surface. It isn't the exact logo the OP was looking for but the idea is the same.
My problem with using a texture render is that I've never done that before, and I really don't have the time, nor patience these days to play. Same reason I have not upgraded to SU-8, and this time I want too (compared to V-7).
I would really like to know where you got an original Curtiss logo, not just you sending it to me. The logo on the Silver Dart replica tank was an artists rendition from an old photo, and I used a photo of that, at an angle no less, to trace and make my logo, trying to correct for parallax. It's "ok" but not great. It will do for this project.
I appreciate all the help posted here, and I will keep it for "next time".
-
To be honest, I think the time it would take to learn how to work with the applying a texture, at least in this case, and doing it would be less than the time spent tracing the logo and all the rest of the work involved in creating it as you did.
As to where I got the logo, Google is your friend. I just did a search for Curtiss logo. It was the first hit in an image search.
-
Thanks, Dave.
Hello! It looks like you're interested in this conversation, but you don't have an account yet.
Getting fed up of having to scroll through the same posts each visit? When you register for an account, you'll always come back to exactly where you were before, and choose to be notified of new replies (either via email, or push notification). You'll also be able to save bookmarks and upvote posts to show your appreciation to other community members.
With your input, this post could be even better 💗
Register Login


Advertisement