Modeling a meniscus difficulty
-
How to, in Sketchup?
I created a wineglass and added a surface to create the liquid. The only way I could think of to create the meniscus was to draw a bezier radius at the intersection of the liquid plane and the glass surface and then use the "follow me" tool around the edge. That went well - but when I applied SD&S, it created little "dents" at certain intersections which creates issues when the object is rendered.
Any suggestions on how to get around this, or how to create a better model in sketchup to avid this issue?


-
@escapeartist said:
How to, in Sketchup?
I created a wineglass and added a surface to create the liquid. The only way I could think of to create the meniscus was to draw a bezier radius at the intersection of the liquid plane and the glass surface and then use the "follow me" tool around the edge. That went well - but when I applied SD&S, it created little "dents" at certain intersections which creates issues when the object is rendered.
Any suggestions on how to get around this, or how to create a better model in sketchup to avid this issue?
My guess is that the follow-me tool didn't create a perfect connection to the edge of the glass, and when you applied SD&S, the edge of your meniscus pulled away from the glass at every point that failed to connect.
Instead of the follow-me tool, make a flat surface that connects to the glass all the way around, then make a concentric circle inside that surface with the offset tool and pull it down with the move tool. That will make a meniscus that's properly attached, and it will generate less geometry if you SD&S it...
-
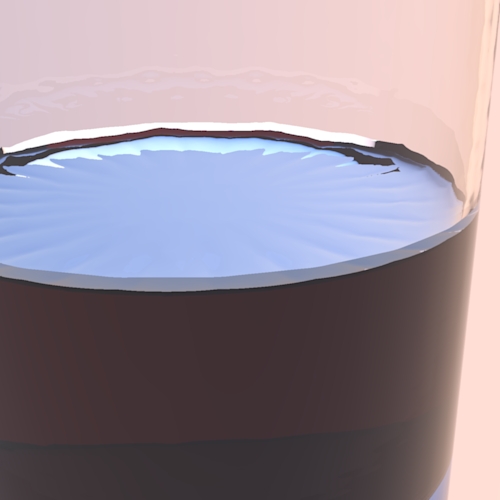
I tried your suggestion following the same path as I did for the previous model. Create shape, "lathe" around axis, and add liquid surface. I used offset and created a second ring a short distance from the glass edge and pulled the large surface down. After applying SD&S it looks much nicer in Sketchup, but upon rendering I get what you see below.
What do you think of trying something like: More segments in the circle used for the lathe "follow me" path to create a more detailed shape, or a larger model initially and then shrinking it? I'm open to ideas...
-
i might be wrong about the steps you're taking but try it without subdividing..
it looks like you're subdividing the surfaces but not really accomplishing anything other than increasing the poly count.

[could be wrong of course but judging by the images you've posted so far...]
-
Jeff,
I'm not sure how to go about creating a smoother transition in the meniscus to the glass other than SD&S. Perhaps I'm running up against the limitations of Sketchup for this particular operation. I'd like to use a smaller poly count, but unfortunately with the rendering engine I'm using, (AFAIK, in my limited knowledge anyway...) Kerkythea offers no method of smoothing other than vertex weld and loop subdivision along with a "smooth" setting - all of which were applied to both models in the screenshots above - so almost all of the geometry and smoothing needs to be done in Sketchup before exporting to the rendering software.
Maybe I'm misunderstanding the direction you are pointing? I'm all ears for ideas!
-
to me, it looks like your selecting the wine glass and then clicking on the second icon in whaat's subdivide and smooth.
if that's the case, you're not smoothing anything, you're just doing the same thing as the example i posted above.. dividing the area into smaller pieces but not moving any of the actual vertices/geometry around.
i'm not familiar with any of the kerkythea setting you're talking about so maybe someone else can comment on that..i'm just talking about the sketchup screenshot you've posted..
if kerky takes the newly created lines from the sds operation and actually moves them around then it actually sounds ok. but again, i'm unfamiliar with the app so hopefully someone can clear thing up for you instead of adding to the confusion like me

[add]
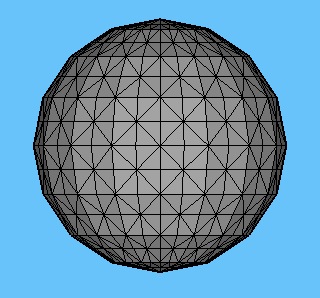
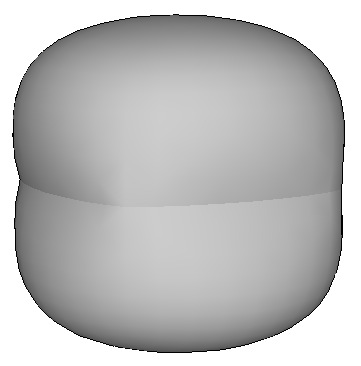
here's a sphere:

same sphere that's been subdivided via sds's 2nd icon: (notice it's not any smoother.. just more lines)
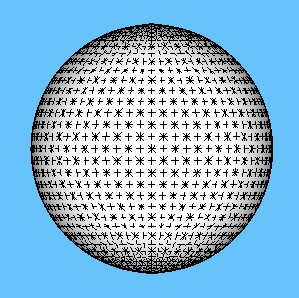
same sphere that's been subdivided and smoothed: (it's more/less round now)
-
I see what you were saying... No, I'm definitely using the first function, the "ball in the box" icon in SD&S. It does add a lot of geometry though.
-
@escapeartist said:
I see what you were saying... No, I'm definitely using the first function, the "ball in the box" icon in SD&S. It does add a lot of geometry though.
One of the things that you can do after the Subdivide & Smooth operation is to manually remove unnecessary geometry that was created in areas that remain flat, like the surface of the liquid in the glass.
Otherwise, there are lots of rendering experts on this board (I'm not one of them), so I'd recommend that you upload your model and have one of them give it a look.
-
@escapeartist said:
I see what you were saying... No, I'm definitely using the first function, the "ball in the box" icon in SD&S. It does add a lot of geometry though.
ok then.
i think the problem is that you're drawing the glass and wine together and then subdividing it as one.. it's causing a similar problem as trying to subdivide a cube that has a plane inside..[example]
this:
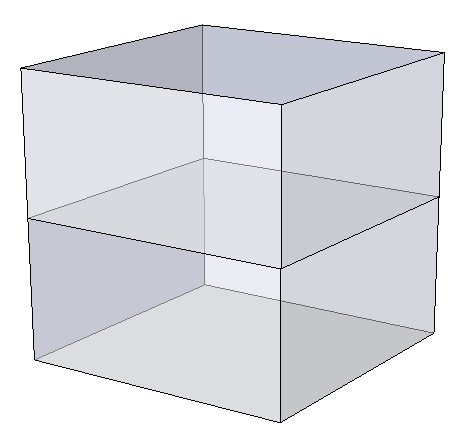
leads to this:
try subdividing the glass first then adding the wine/meniscus after. you probably won't have to subdivide the wine.. just draw the profile of the surface and meniscus and followme it according to one of the newly subdivided lines on the glass.
try rendering this skp to see if it helps.. it actually looks a lot like the first example you posted but i'm just curious now.
.
-
I'll absolutely try your suggestions, these sound like great ideas. I'm unfortunately on the road using a linux laptop that refuses to let me run Sketchup, so I'll have to wait until I get home in a few days.
-
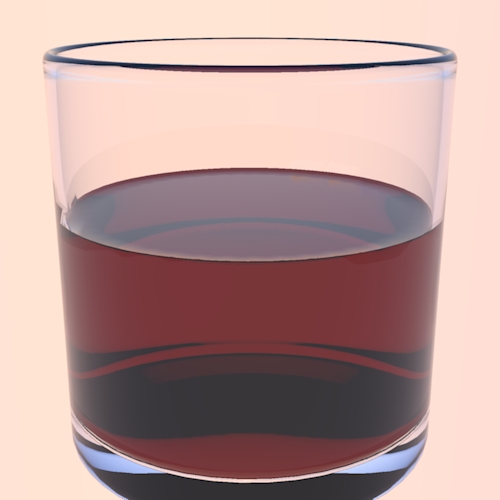
OK, I tried a couple of variations on both suggestions to see what would work. I believe it has resulted in a quite respectable, but not perfect, meniscus. This is definitely a Sketchup limitation, it's more suited to to the mechanical rather than the organic, but can do a passing representation with some futzing. There are very minor flaws at the junction of the liquid and glass, but unless the fluid/glass intersection is the focus of your work, I don't think it's so noticeable.
Anyway, here's the steps I took if anyone would like to do something similar:
- Create the glass
- Smooth the glass with SD&S
- View hidden geometry
- Use the pencil tool on the planar edges, at the liquid's level you want, to create the surface
- Select the liquid and create a component
- Open the component and use the SD&S crease tool on each segment of the edge
- Now, start creating the meniscus by using the tool to create two concentric rings on the surface, one very close to the edge, and one a slightly greater distance to the center. If you look at a meniscus, it appears much thinner and has a larger radius as it approaches the edge than it does towards the center.
- Select the inner surface and the first ring and pull it straight down using the tool whatever distance looks good to you
- Now select only the center surface and pull it down a shorter amount than the previous.
- Apply SD&S to all surfaces in the liquid surface group
- When SD&S gets done, explode the component. When I made this particular model, I had to re-attach every other vertex of the liquid's edge to the surface of the glass. Making the model about 10x larger than life size will help a lot in seeing and moving the verticies, and making the hidden geometry visible will help too.
- Export and render.
I used Kerkythea and applied a basic dielectric glass to the glass model and the liquid, changed the liquid color to red in order to see the meniscus better, and changed the liquid's index of refraction to 1.3 (water). Results are below.
Thanks for the help!
-
what a weird coincidence. I was just in the process of modeling a goldfish bowl and was trying to figure out how to model/render the water as opposed to the bowl. Cuz it just wasn't working for me.!
Thanks for the TUT!
-
@escapeartist said:
OK, I tried a couple of variations on both suggestions to see what would work.
Excellent results! Persistence pays off...

-
@unknownuser said:
what a weird coincidence. I was just in the process of modeling a goldfish bowl and was trying to figure out how to model/render the water as opposed to the bowl. Cuz it just wasn't working for me.!
Thanks for the TUT!
Made my day reading that it helped out, glad to be of assistance. Thanks again to everyone for the suggestions.
EDIT: I'd be happy to make a video of it, what software does everyone use to make those neat video tuts? Is it free?
Hello! It looks like you're interested in this conversation, but you don't have an account yet.
Getting fed up of having to scroll through the same posts each visit? When you register for an account, you'll always come back to exactly where you were before, and choose to be notified of new replies (either via email, or push notification). You'll also be able to save bookmarks and upvote posts to show your appreciation to other community members.
With your input, this post could be even better 💗
Register Login


Advertisement