Silvershadow's eye candy 1: The river runs thru it
-
@silver_shadow said:
:idea: ....comments are welcome...

Hi Silver,
I followed your directions above and, after some fooling around, was able to duplicate your cobbles paved on a contoured surface. I did notice a couple of things to keep in mind for future projects: 1. The amplitude of the curved surface can't be very big (difference between high and low points) or the cobbles fall off. 2. The distance between the substrate and the cobbles must be minimized or the cobbles bounce when they hit and end up all over the place.
Thanks for the tut,
Tom -
yea i know. try this too
copy your site to a new drawing. rotate it to be not so steep.
Maybe you can try boxing it in also so nothing gets spilled. Try to divide the areas to controll groups and if it works, just remove the dividers afterwards. (just a thought )
) -
@solo said:
I cannot seem to locate it but I once remember talk about a 'Greeble' script, my thinking was that this too could be a solution.
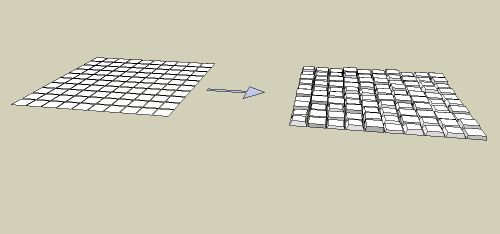
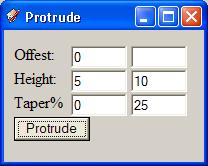
However Silver you certainly used SP in a very creative way.It's not well documemented, but protrude can offset, protrude, and taper faces. Leave the second column blank unless you want a random number btween the range.

This model was produced using these inputs:

-
%(#BF0000)[STAGE 2
 LIGHTING
Hi guys. Im moving now into stage 2 of my model.
but before i start i want to know, because we are having this discussion.
What is better for setting up light. Using sketchup's sun angles,or using multiple lights
omnis and rectangulars. I am not sure what the professional line prefer to use,
skylights stand alone, omni and rectangular lights. Im just asking in general, not specific sketchup only but in the modelling industry, what will be the best results you will get ]
] -
Wow, this is amazing! Thank you silvershadow for the generosity of your time in putting these together. I can't wait to try some of these out. You are very talented!
-
yea im also a big fan of only using sky alone.. but i kind of like the omni and rec light also. The thing is.. but thats just me.. ive seen most professional people uses sometimes just this, omnis and rec lights. But then again, using sky, makes the model looks more realistic and not like its sitting on a set.
-
@silver_shadow said:
What is better for setting up light. Using sketchup's sun angles,or using multiple lights
omnis and rectangulars. I am not sure what the professional line prefer to use,
skylights stand alone, omni and rectangular lights. Im just asking in general, not specific sketchup only but in the modelling industry, what will be the best results you will get
The professional ones using the dinosaur packages (Max, Maya, etc...) would prefer a combo with additional directional/fill lights, as that would give full control over light setup.
Sometimes they need exactly 'that' ray of sun light hitting that exact spot of the model.Personally I love to use Sky only and to see how far that brings me,because it would be closest to seeing reality. But that's from an architects standpoint.
Ask a graphical (3D) designer, and he will want to fine tune additional light sources to obtain exactly the effect he wants. -
True. It's 'the eye of the Beholder'.
You can pick the images that were created by an architect from the ones created by a graphical artist.Different approach. -
Hey silver_shadow, you've got some amazing SU models.
Keep up the good work!
-
Might make a fine "community project". People run this one through the renderer of their choice, we bundle the renders, and send them to Google HQ. Message: we need high poly support. Of course, they could go: no, you don't, you're doing great without it.

-
thanx, i have build a lot of nice stuff but never finished it, kinda lost interest or don't have the time to finish it...its actually amazing i finished building this model lol
-
lovely

-
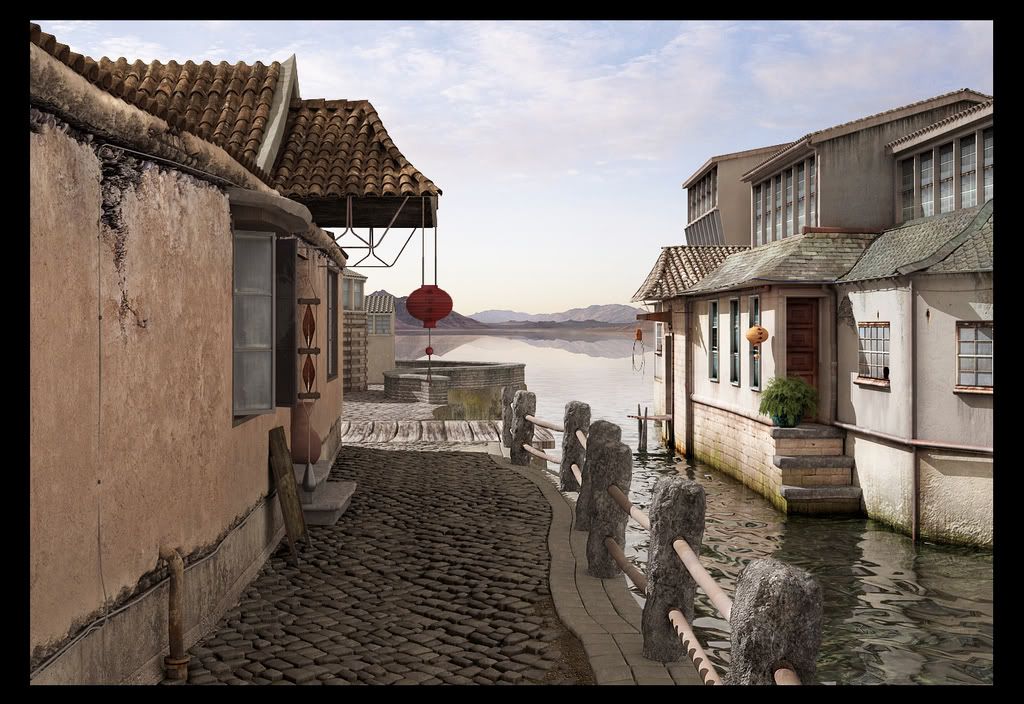
[color=#BF0000]here you go guys. Hope you like it
The only photoshop work that went into it was a colour correction and a bit of burning and lighting..

-
Very, very nice.

-
this is truely amazing, silver_shadow

-
fabulous!
-
Gobsmacked
 very nice! great eye for detail
-
hee hee i have textured this just for you HFM hee hee
-
Jacques, that render is fantastic. What a great demonstration of what can be achieved with SketchUp and some good skills.
Which program did you use to render this?
I would love to know how you manage to texture parts of this like the building to the right with the green algae just above the water line. Also the left of the image, the damage stucco on the building. Do you find these textures then manipulate them in PS to fit?
-
thanx, how can one make a file that show a range of images moving from one side to the other kinda like flash like little thumbnails. If anyone knows, i really want to know because i really want to make something like this
Hello! It looks like you're interested in this conversation, but you don't have an account yet.
Getting fed up of having to scroll through the same posts each visit? When you register for an account, you'll always come back to exactly where you were before, and choose to be notified of new replies (either via email, or push notification). You'll also be able to save bookmarks and upvote posts to show your appreciation to other community members.
With your input, this post could be even better 💗
Register LoginAdvertisement


