Depth Maps from SU
-
I'd love to see SU export depth maps for applying post-process focal length blurring and other effects- I'm sure it can't be too hard as SU already recognises depth with regard to orbiting and zooming.
To be honest, I'd expect to see an integrated render engine before this one is even considered.
Jackson
-
It does support depth masks, if you know the "secret."
Of course, this is only useful if you are exporting your 2D image from SU itself, not if you are using a third-party renderer (most of which will generate depth masks, in my experience).
--Lewis
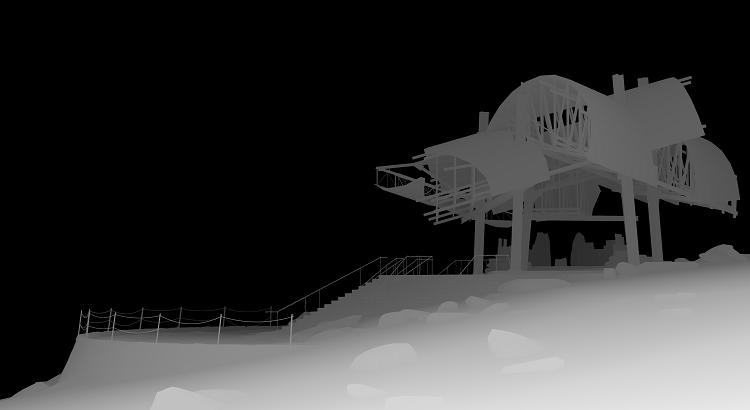
(Ok--I'm just being ridiculously mysterious...the "secret" is a Style/Scene combo that uses Fog, whacked-out shadow settings, amd monochrome face rendering...you create the depth mask effect by opening a new Channel in Photoshop and pasting the saved grayscale file into it...then you can use the mask to control intensity of various bitmap editing operations based on distance from the camera. I've been using this successfully since SU6 came out, and I could do it with SU5 with somewhat more difficulty using the Fog Ruby script.)
poster-Lewis Wadsworth
-
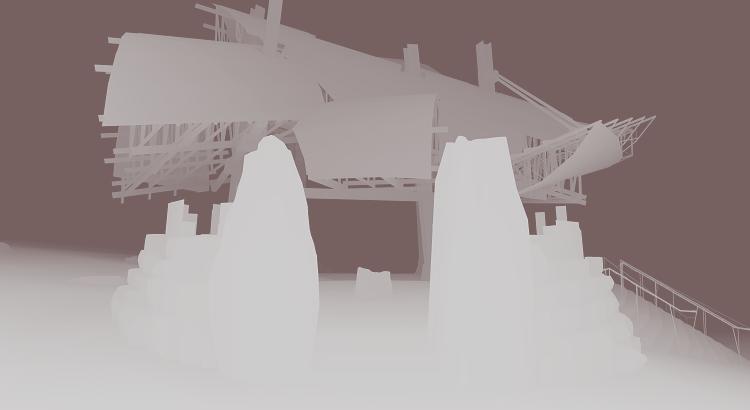
Here's another depth mask. (The funny tint has to do with this damn Vista computer they gave me at work, which doesn't have Photoshop. I shrunk the TIFF down and resaved it as a JPG using Paint, and it now has a vaguely pink look. It should be grayscale like the original and the previously posted one.)
I actually am planning on posting the completed rendering set in the gallery once the image-hosting saga is resolved.
Are you interested, Jackson, in having me post a copy of the Style/Scene combo that does this?
--Lewis
poster-Lewis Wadsworth
-
way to go Lewis... I knew there was a good reason to keep you around...
mind making a tut for that buddy?
awesome power thinking...
-
@unknownuser said:
way to go Lewis... I knew there was a good reason to keep you around...
mind making a tut for that buddy?
awesome power thinking...
I'll try to write one tonight...I'll need a functioning copy of Photoshop.
--Lewis
poster-Lewis Wadsworth
-
Lewis,
That is one of the best example of lateral SU thinking I've seen! Using fog to create depths maps- you genius!
Yes, can you post the style/shadow settings you used for these please? I was overjoyed when I realised I could use PS's lens blur filter to post-process Vue's renders- it's own focal length blurring is extremely time-hungry and more importantly absolutely CR*P. I'd love to try the same with SU renders.
You've made my day,
Jackson -
I'll post both the settings and a tutorial as soon as I can, Jackson. I'm a little crippled here working with a computer that has no real bitmap editor. I just demanded that the IT people buy me a copy of Photoshop CS3 XT for my work computer (one of my job titles here is Technology Adviser, so I should have the technology I need, don't you think?)
poster-Lewis Wadsworth
-
CS3 has a working demo... temp fix...
-
@unknownuser said:
CS3 has a working demo... temp fix...
I actually had to ask a principal to order them to install SketchUp 6 on my computer, so I try not to push my luck...don't worry, I'll get something done soon...I have my own license to PS CS3 XT on my home computer.
poster-Lewis Wadsworth
-
Jackson,
I think this should do it for settings...you can play with the fog (a black fog!) Distance cutin/cutoff to tweak the depth impact. Notice the shadow settings: shadows are NOT on, date and time are inconsequential, it's the sliders that matter...essentially they completely flatten shading. Otherwise this is pretty simple.
I'll get a full tutorial written tonight.
--Lewis
poster-Lewis Wadsworth
-
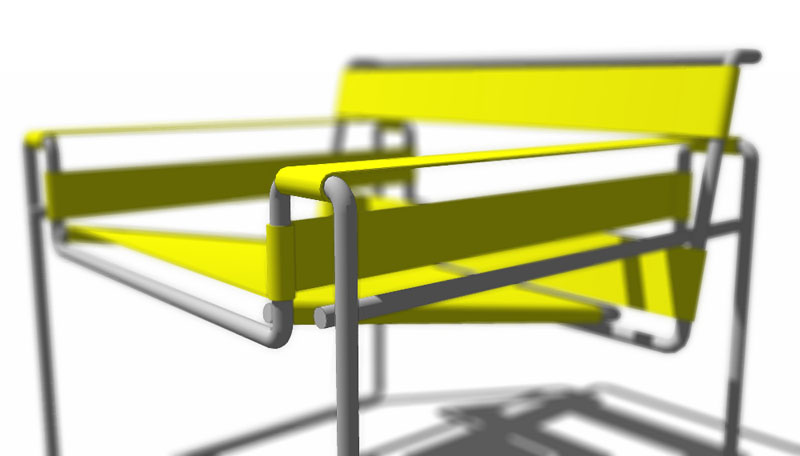
Aw, Lewis you beat me to it. I worked them out for myself using fog, no shadows, edges not displayed and hidden line render.
This is a PS CS2 lens blurred SU image I just did- very happy with the results!
Many many thanks for this brilliant tip,
Jacksonp.s. expect to see a LOT of lens blurred SU renders from now on

-
Glad to help...I wrote something about this in the old SketchUp forums, and no one except jenujacob seemed interested, or else (I assumed) they had already figured it out.
--Lewis
poster-Lewis Wadsworth
-
Lewis,
I definitely missed that one or I would've been all over it. Unfortunately I suppose not that many have PhotoShop CS so that's why it may not have widespread appeal.
Jackson
-
It should work with any version of Photoshop that has a Channels palette...which would be all of them. I think it might work on the GIMP and related software like Cinepaint, as well, since I believe there is multi-channel support there too. But I don't think the watered-down Photoshop copies, like Photodeluxe and so forth, can use it.
poster-Lewis Wadsworth
-
Sorry, I just meant with regard to PS CS' depth of field lens blur filter.
Jackson
-
I'm sort of old school Photoshop...Gausian Blur forever! But I also use this depth mask with adjustment layers, principally Hue/Saturation and Levels, to create the kind of "atmospheric perspective" fading effect that I used to do with watercolors or tempera, in the old analog days of painting.
poster-Lewis Wadsworth
-
Isn't the EPIX format for Piranesi basically a depth map export too? Haven't tried it myself, but I thought that one of the files exported looked similar to what you have achieved.
Kelly
poster-kdjanz
-
@kdjanz said:
Isn't the EPIX format for Piranesi basically a depth map export too? Haven't tried it myself, but I thought that one of the files exported looked similar to what you have achieved.
Kelly
I think you are correct...the EPIX format includes a z-pixel which indicates depth. Photoshop is much more common than Piranesi, though, so this hopefully will help people with PS licenses achieve depth-based manipulations with 2D exports from SU6. The third party renderers and modelers that I have used...Max, VRay, and Blender...will happily generate a true depth map, though, that can be used in conjunction with photorealistic renders from those packages.
poster-Lewis Wadsworth
-
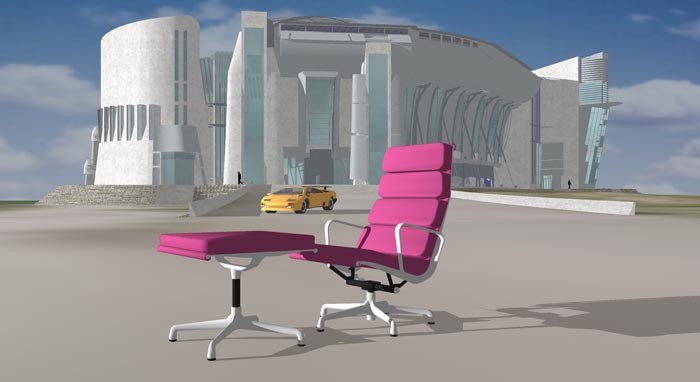
I was writing up a tutorial on this, as Kris requested, and I noticed (in the file I made to demonstrate this effect) a kind of bug I hadn't seen in previous renderings using this techique.
Look at the original image here, direct 2D export (originally a TIFF) from SU6:
Now look at this screenshot of the depth mask mode:
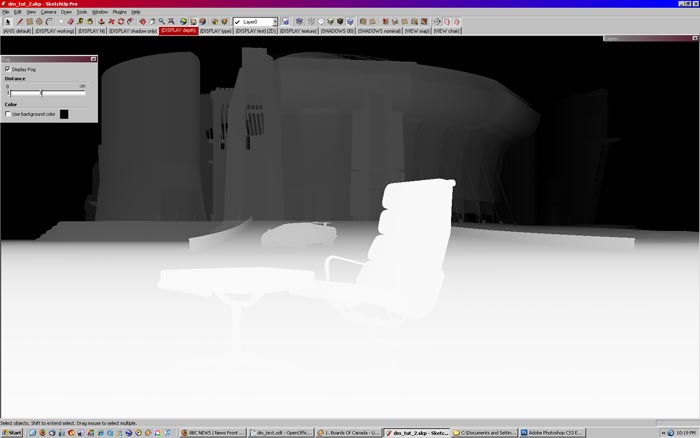
This is what the depth mask looks like when exported-2D:
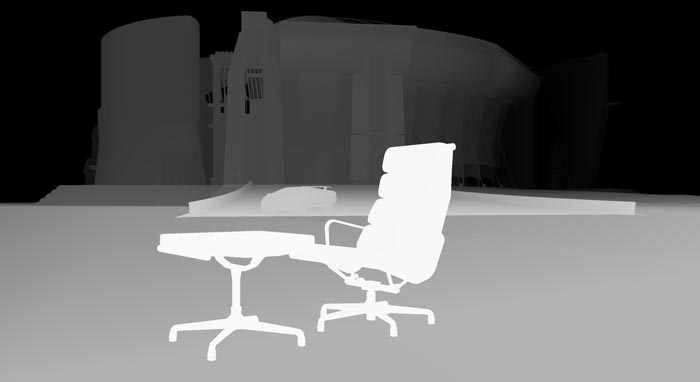
Obviously the terrain that the chair is sitting on is not showing the proper "depth" shading: it should start out white at the chair, and then shade to grey as it approaches the ramp that the car is sitting on. But it starts a darker grey than the ramp, and stays that way.
It doesn't really impact the final result, where I used the lens blur filter in Photoshop and the depth mask as the target:
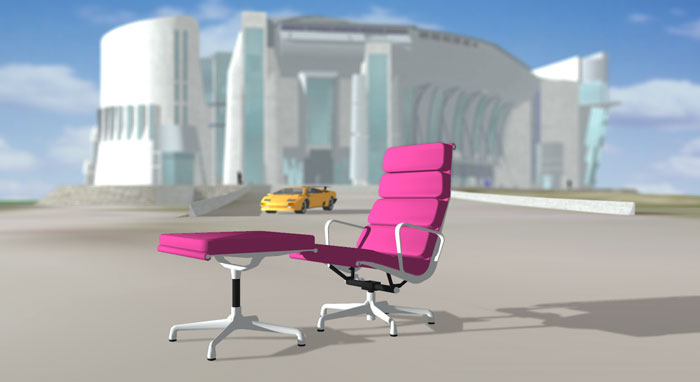
except that the foreground chair shadow and the terrain textures are seemingly blurred more than they reasonably should be.
Jackson (or anyone else trying this), while you're playing with this technique, could you keep track of where this kind of error in 2D export occurs? Please let me know. I have several other models where this does not occur, and the depth mask exports to bitmap exactly as it appears on screen.
--Lewis
poster-Lewis Wadsworth
-
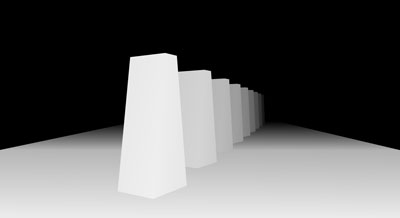
I've figured out that if you really want to see how a fog-derived Depth Mask is really going to Export 2D, turn off hardware acceleration under Preferences. Big planes orientated near the horizontal seem to be subject to some odd streaking and abrupt shading changes that do not effect vertical surfaces. It's nothing that couldn't be corrected in Photoshop, but it does make this a little less acceptable a substitute for true Depth Map support in SketchUp. Oh well. Should I still write up a tutorial?
http://www.sketchucation.com/scf/download.php?id=1501poster-Lewis Wadsworth
Hello! It looks like you're interested in this conversation, but you don't have an account yet.
Getting fed up of having to scroll through the same posts each visit? When you register for an account, you'll always come back to exactly where you were before, and choose to be notified of new replies (either via email, or push notification). You'll also be able to save bookmarks and upvote posts to show your appreciation to other community members.
With your input, this post could be even better 💗
Register LoginAdvertisement


