Medeek Wall Plugin
-
good idea to leave the deprecated products in place so if someone is drawing an as-is, they can use them to represent it.
wondering how complex it is to add new/old components - if this is something only you can do, or if you have some key mapping points on components which could be dropped into the plugin component folder and some text updates to reflect the component anchors, default sizes, rotation point relative to x-y, etc etc. as a means of expanding.
-
I had the same thought when I thought about removing the old hardware, so yes, keeping them in the plugin is probably the right thing to do for now.
With some components I could make thing user extendable and allow for uploading custom components however with these type of prefabricated shear walls it is a bit more complicated since they are "trimmable" and they need to carefully setup/modeled so that my logic can deal with them in a systematic and predictable fashion.
-
Version 2.8.9 - 06.05.2022
- Added a "resolution" parameter into the General tab of the Global Settings for adjusting the smoothness of annotation text.
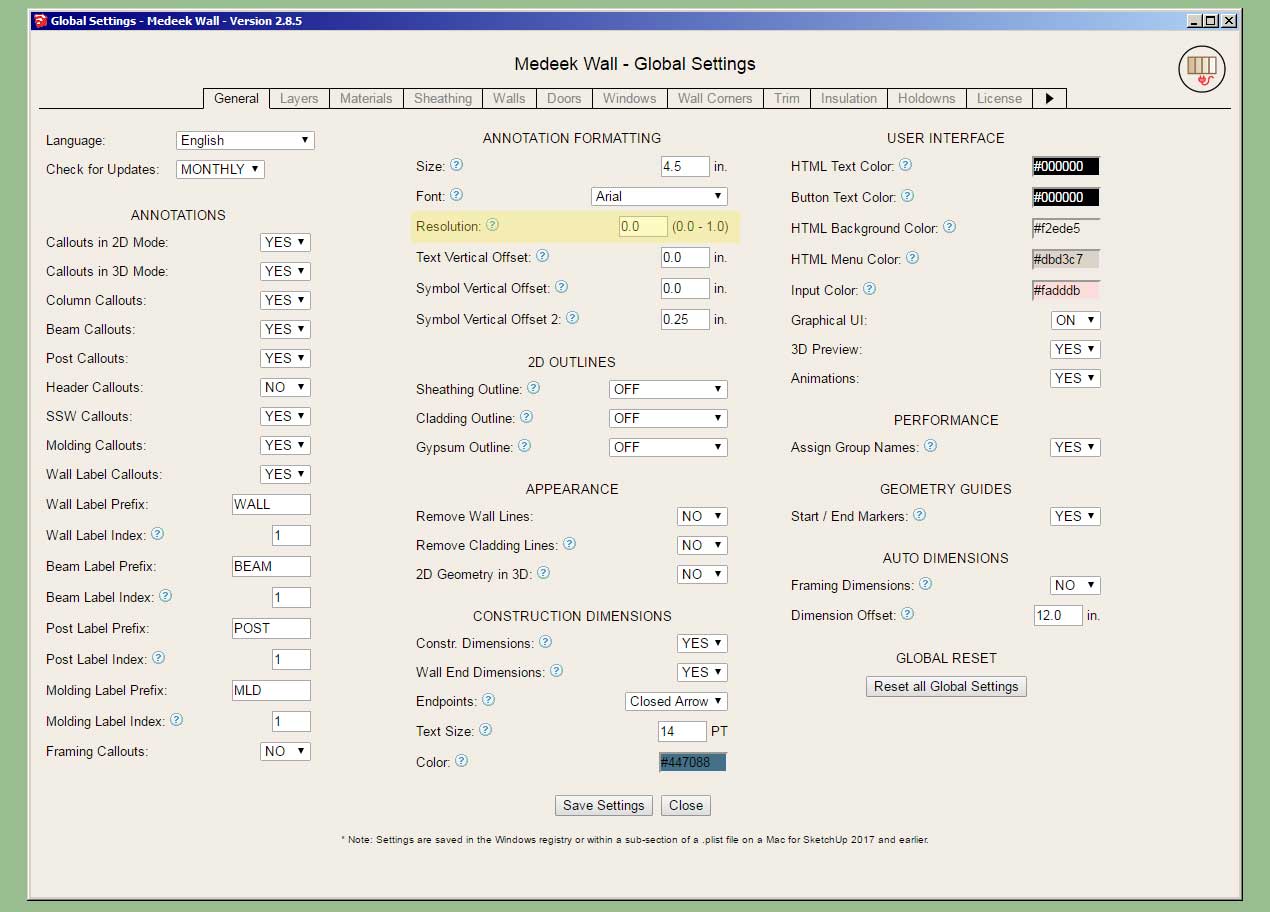
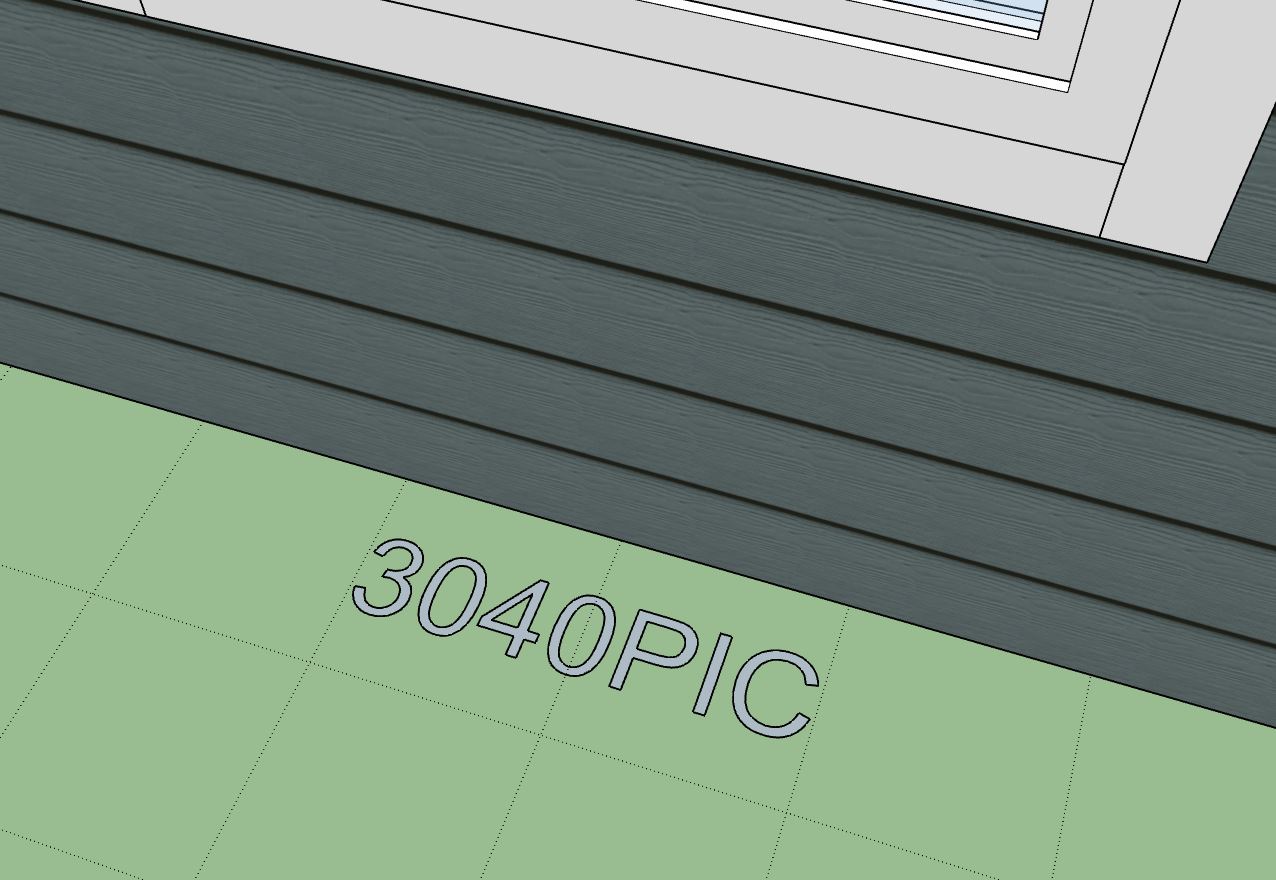
By default this parameter is set to 0.5 which may be a bit choppy/pixelated for some. For maximum smoothness set this parameter to zero (as shown above).
-
Version 2.8.9 - 06.05.2022
- Added a "resolution" parameter into the General tab of the Global Settings for adjusting the smoothness of annotation text.


By default this parameter is set to 0.5 which may be a bit choppy/pixelated for some. For maximum smoothness set this parameter to zero (as shown above).
-
Version 2.8.9b - 06.06.2022
- Fixed a bug with trimmer studs for garage doors.
!!!! CRITICAL BUG FIX !!!!
Note that if you are using more than two trimmer studs on your garage doors you will get an error and your garage door will not be drawn. Update to this latest version to fix this bug with the garage door module.This bug has existed for some time and I was probably not aware of it or made aware of it until today because most garage doors don't use more than two trimmers/jack studs. However, it is still strange to me how long it was able to slip by unnoticed.
-
Tutorial 30 - Double Brick Walls (9:32 min.)
-
I've decided to kick off the holiday in style and offer a new mdkBIM promotion for the rest of the month of July:

Note: There will be no rainchecks on this promotion and there will also be no discounts on subscription licenses or permanent licenses purchased separately.
-
Version 2.9.0 - 07.07.2022
- Added the following window types to the window module: Double Hung, Twin Double Hung, Triple Double Hung.
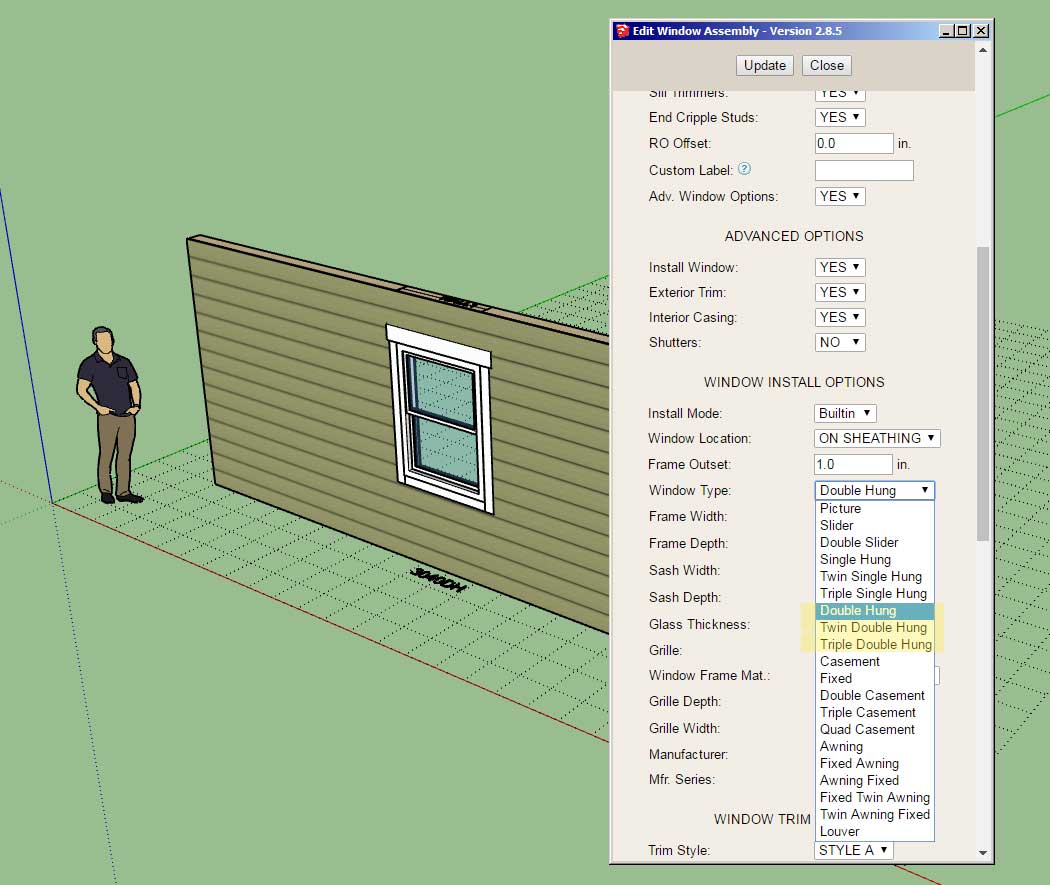
Technically these windows are no different (geometrically) than the single hung variants however the callout indicates that they are "double" hung instead of "single" hung. This addition was per customer request.
-
Version 2.9.1 - 07.08.2022
- Added additional grille options for windows and doors.
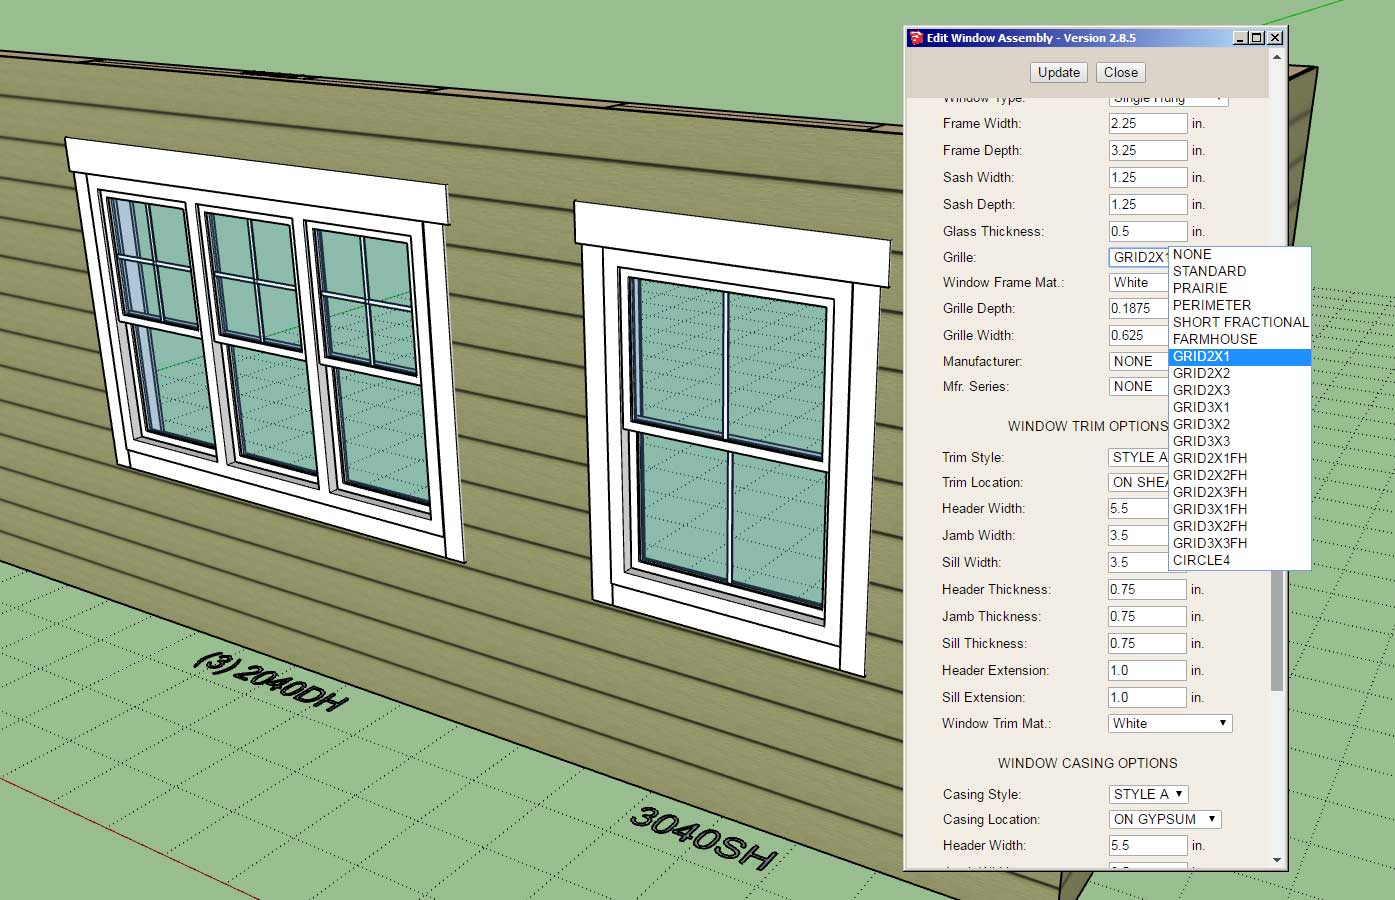
The additional grille options are all GRID options. The "FH" appending the window grille options stands for "Farm House". When this option is chosen the grille is only installed in the top window of a single or double hung type window.
-
Version 2.9.2 - 07.24.2022
- Added one additional raised header configuration for windows and doors.
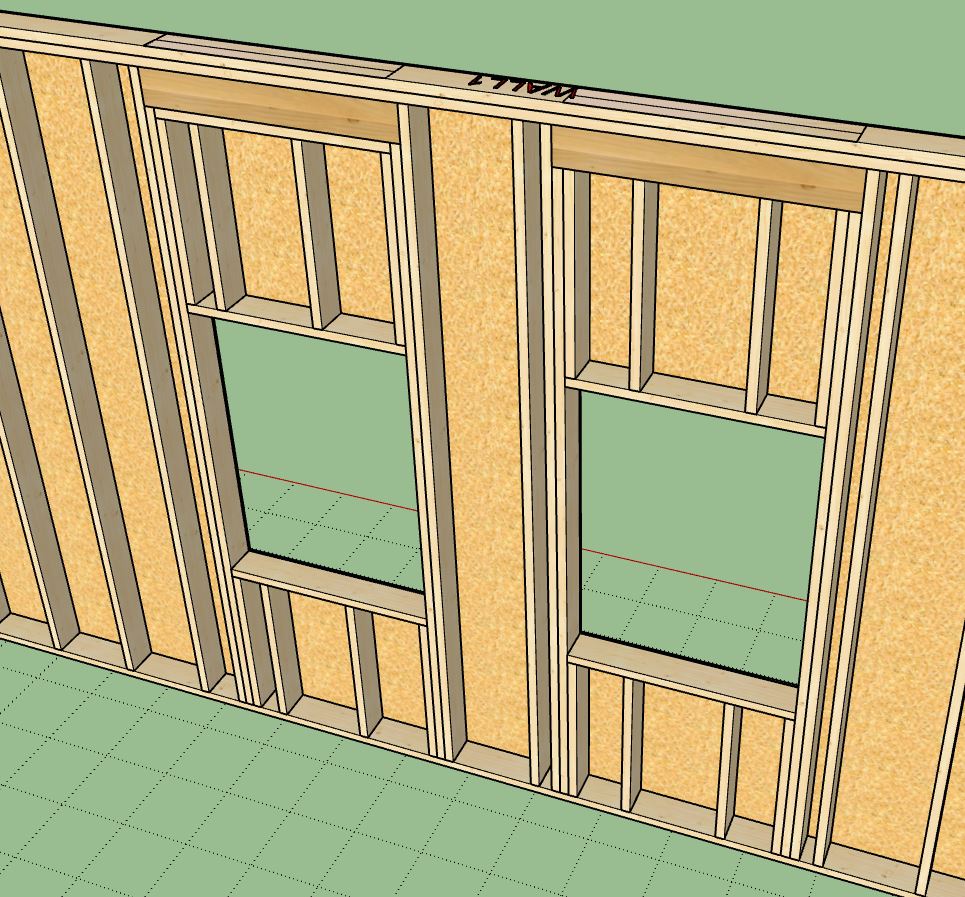
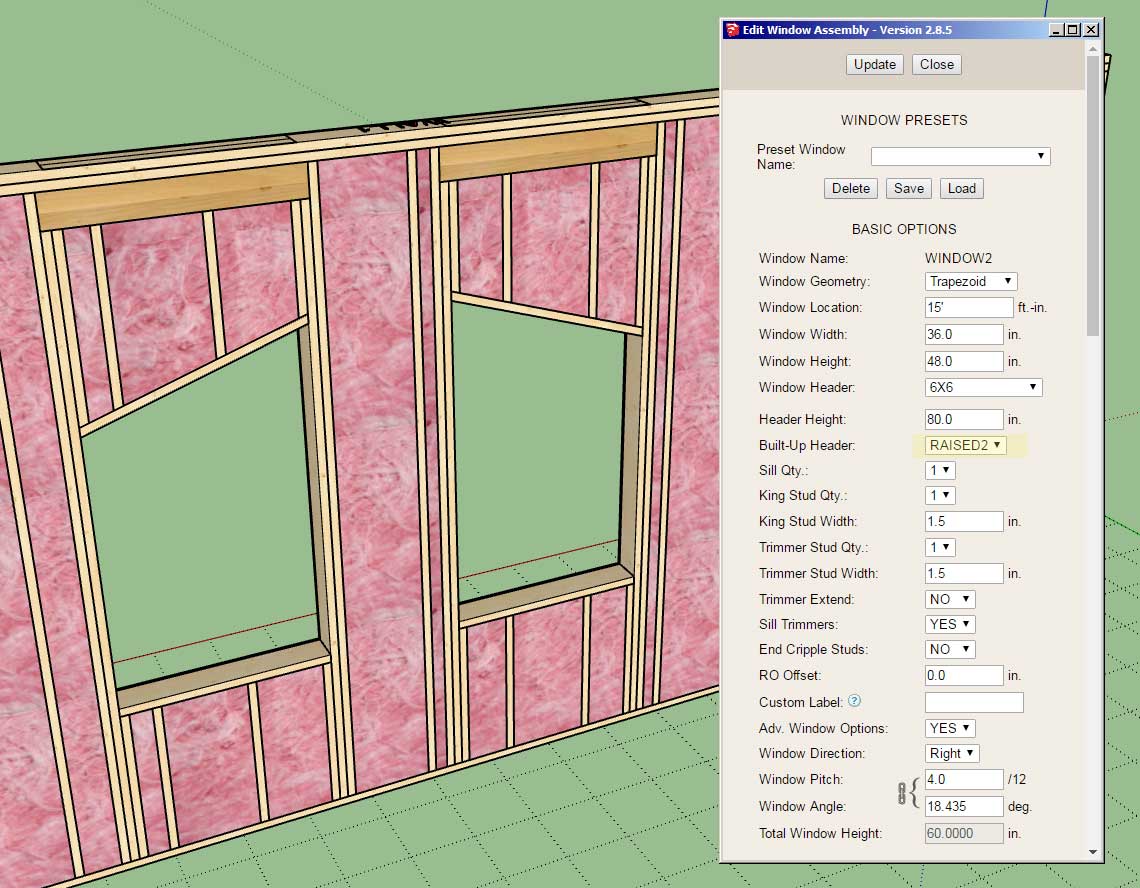
The "RAISED2" configuration removes the plate directly below the header. This update per customer request.
-
Version 2.9.3 - 07.29.2022
- Enabled independent control of exterior and interior stud depths for staggered stud walls (rectangular only).
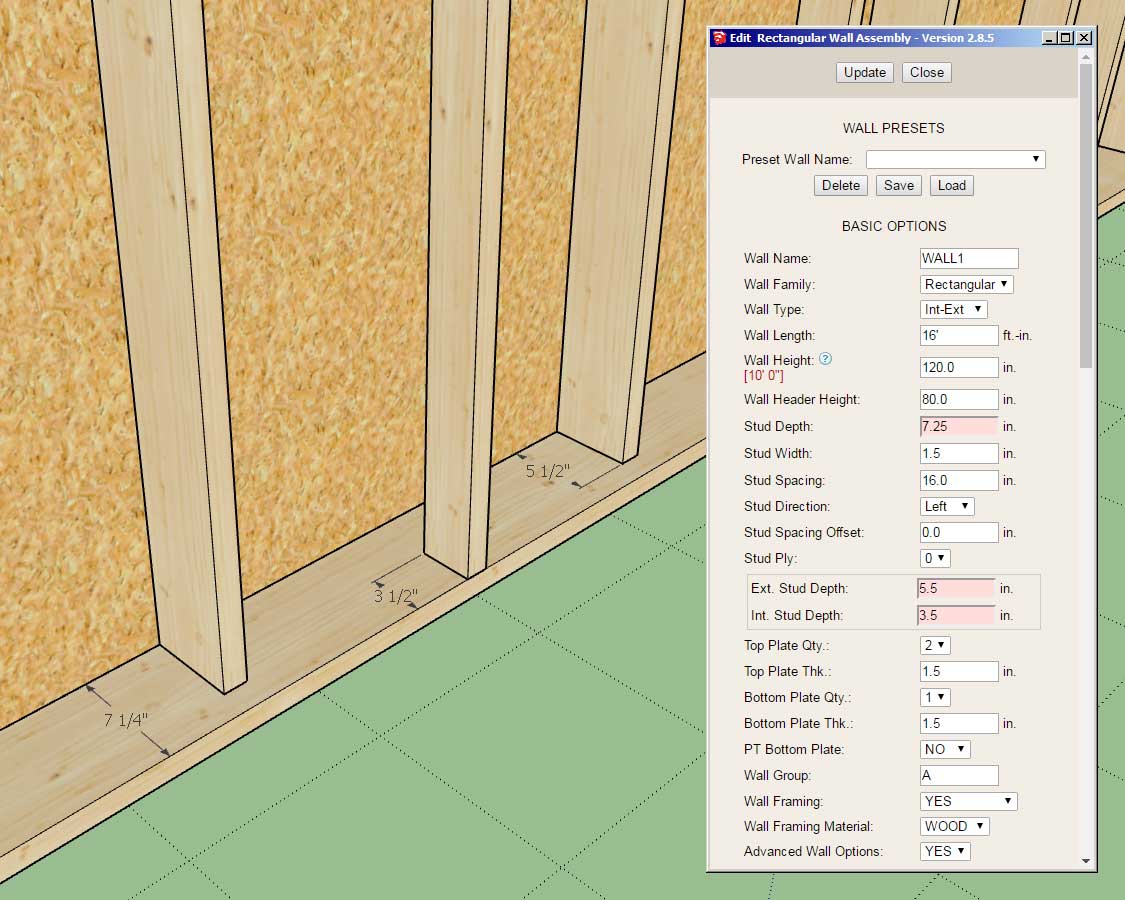
Previously staggered studs were auto-calculated and one could not independently control the stud depth for the exterior and interior studs. This latest update allows for granular control of the stud depths and makes the staggered stud feature more flexible and useful.
-
After some further thought to window and door casings (interior trim) I realized it would be useful to enable a system whereby the user could essentially create their own profiles and add them into the plugin (library folder) themselves.
I will probably include some pre-added profiles like the 365 and a few other common ones, but this way it will be much more flexible for the user and customizable.

I will start with the door casings first and then add this feature to the window module after.
-
First look at custom casings:


Notice that when CUSTOM casing is specified for the Casing Style, the edit or draw menu will provide a preview of the profile as shown.
Now I need to work on enabling this for arched doors and also updating the global settings with this new option.
-
Version 2.9.4 - 08.05.2022
- Enabled CUSTOM door casings for rectangular doors.
- Added a thumbnail preview into the edit and draw door menus showing the custom casing profiles.
- Added a thumbnail preview into the Door tab of the Global Settings and added the custom profile parameter.
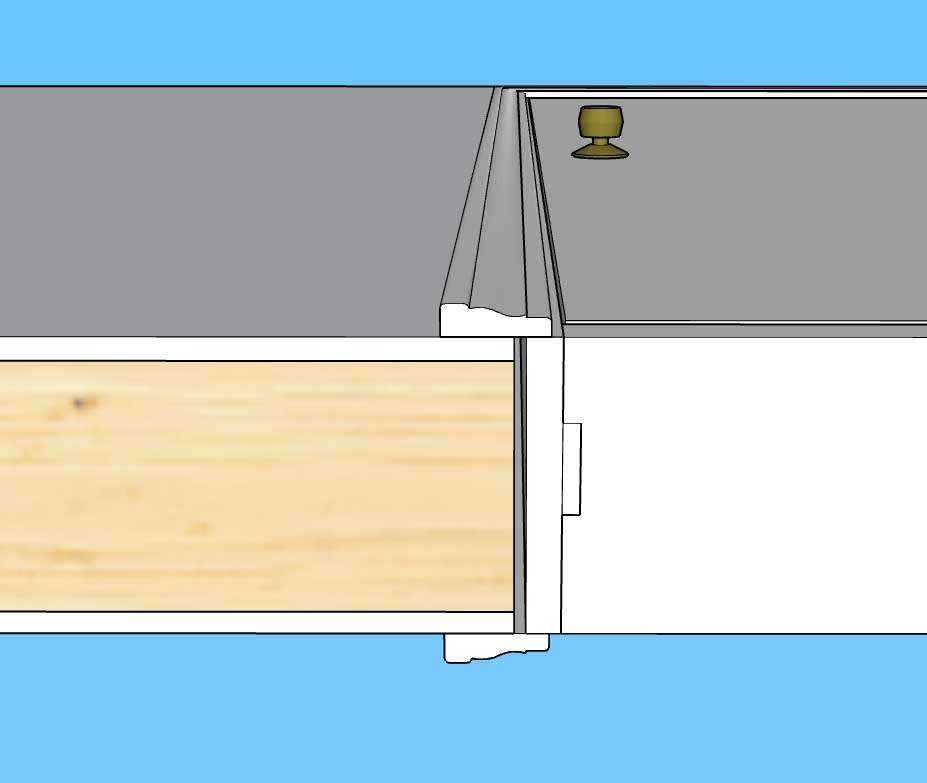
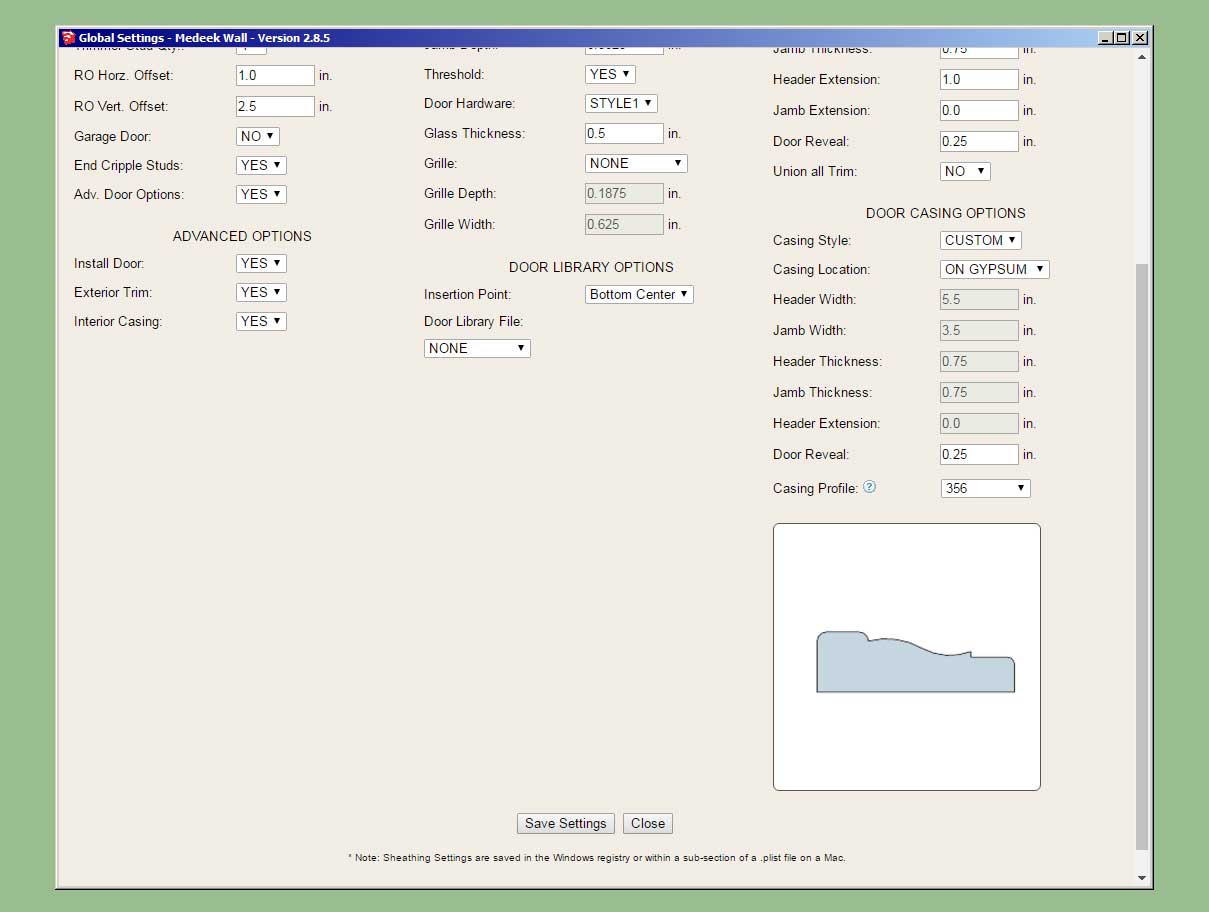
Additional profiles can be added into the "casings" sub-folder of the "library" folder within the plugin folder. Placement of the profile is important, so best practice is to open one of the two examples within this sub-folder and duplicate its positioning and grouping.
I will still need to enable this feature for arched doors and all window types, so much more work is yet to be done in this regard. It seems there is never a lack of work when it comes to this plugin.
-
Version 2.9.5 - 08.06.2022
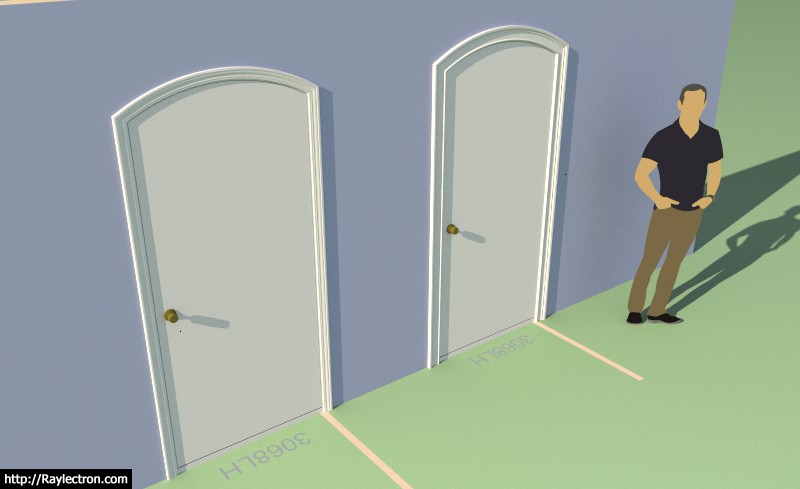
- Enabled CUSTOM door casings for arched doors.
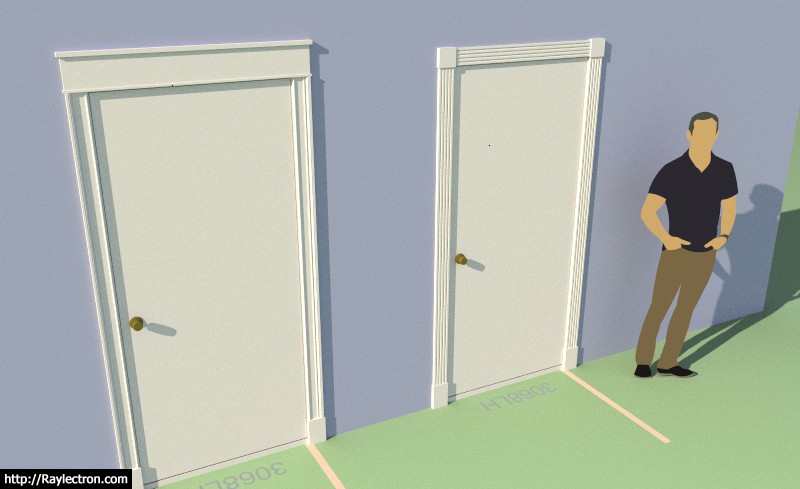
- Added CUSTOM D and CUSTOM F door casing options for rectangular doors.
-
Version 2.9.6 - 08.07.2022
- Added STYLE G and CUSTOM G casing options for rectangular doors.
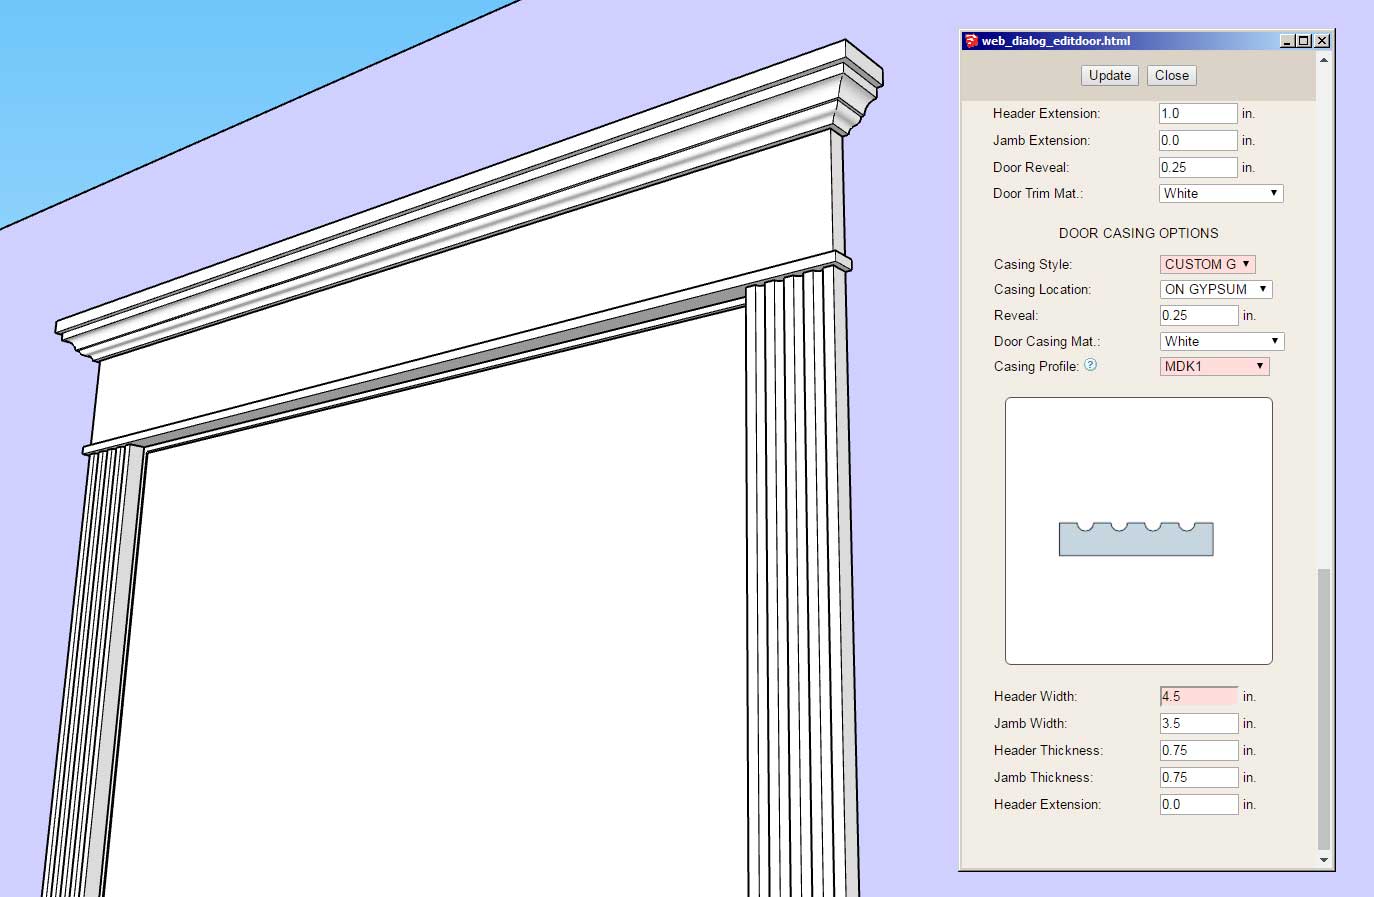
I had to add in these two styles since they are used in our own home. I think I have finally beaten this horse to death but if there are any other styles you feel should be added please feel free to contact me or post them here.
The profile for the upper molding is found in the "system" sub-folder of the "library" folder. It can be edited and customized by the user. The file name is: CM_HEADER.skp
-
First look at Style G applied to a window:

-
Version 2.9.7 - 08.09.2022
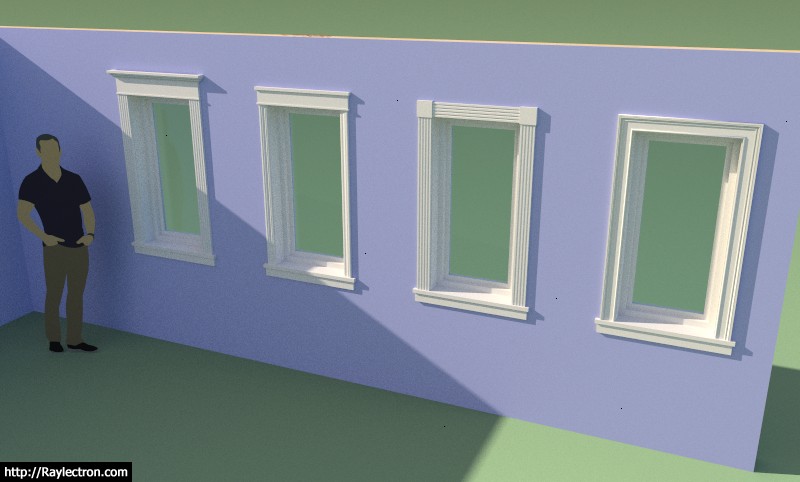
- Enabled the following CUSTOM casings for rectangular windows: CUSTOM, CUSTOM D, CUSTOM F, CUSTOM G.
- Added a thumbnail preview into the edit and draw window menus showing the custom casing profiles.
- Added a thumbnail preview into the Window tab of the Global Settings and added the custom profile parameter.
- Added a STYLE G casing option for rectangular windows.
- Fixed a compatibility bug with CUSTOM door casings.
-
Version 2.9.8 - 08.13.2022
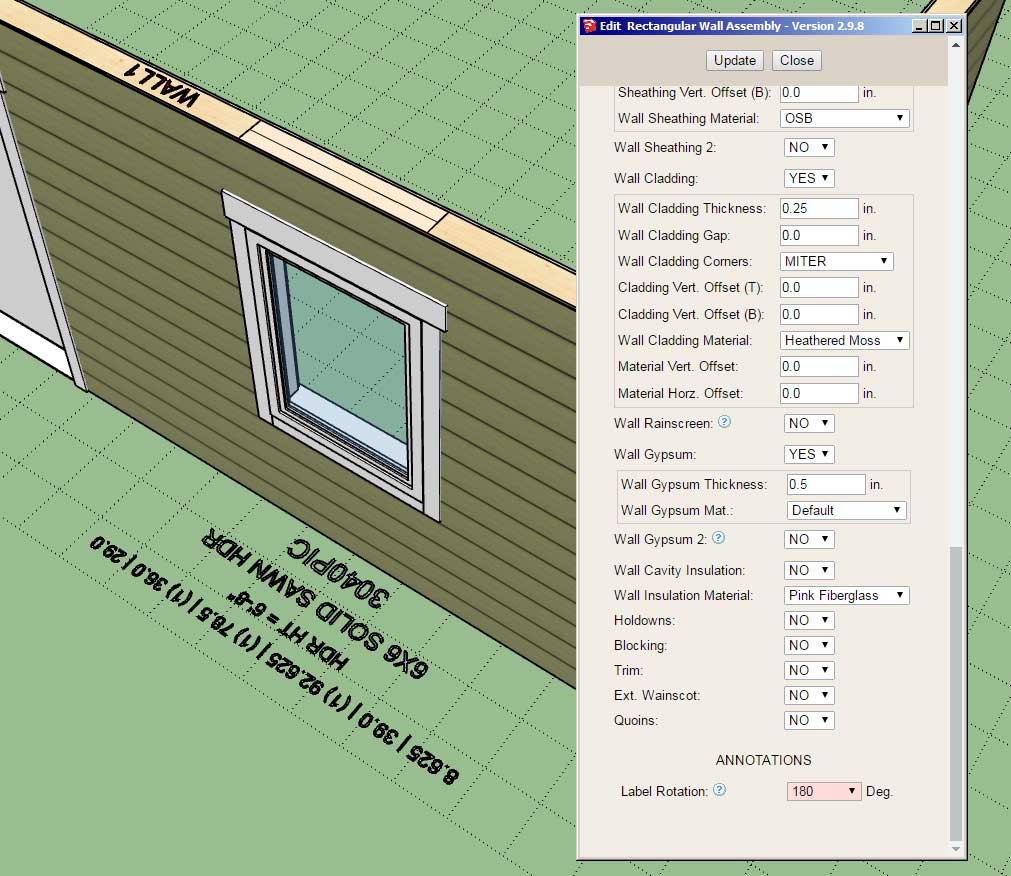
- Added a "Label Rotation" parameter for all wall types (0 or 180 degrees).
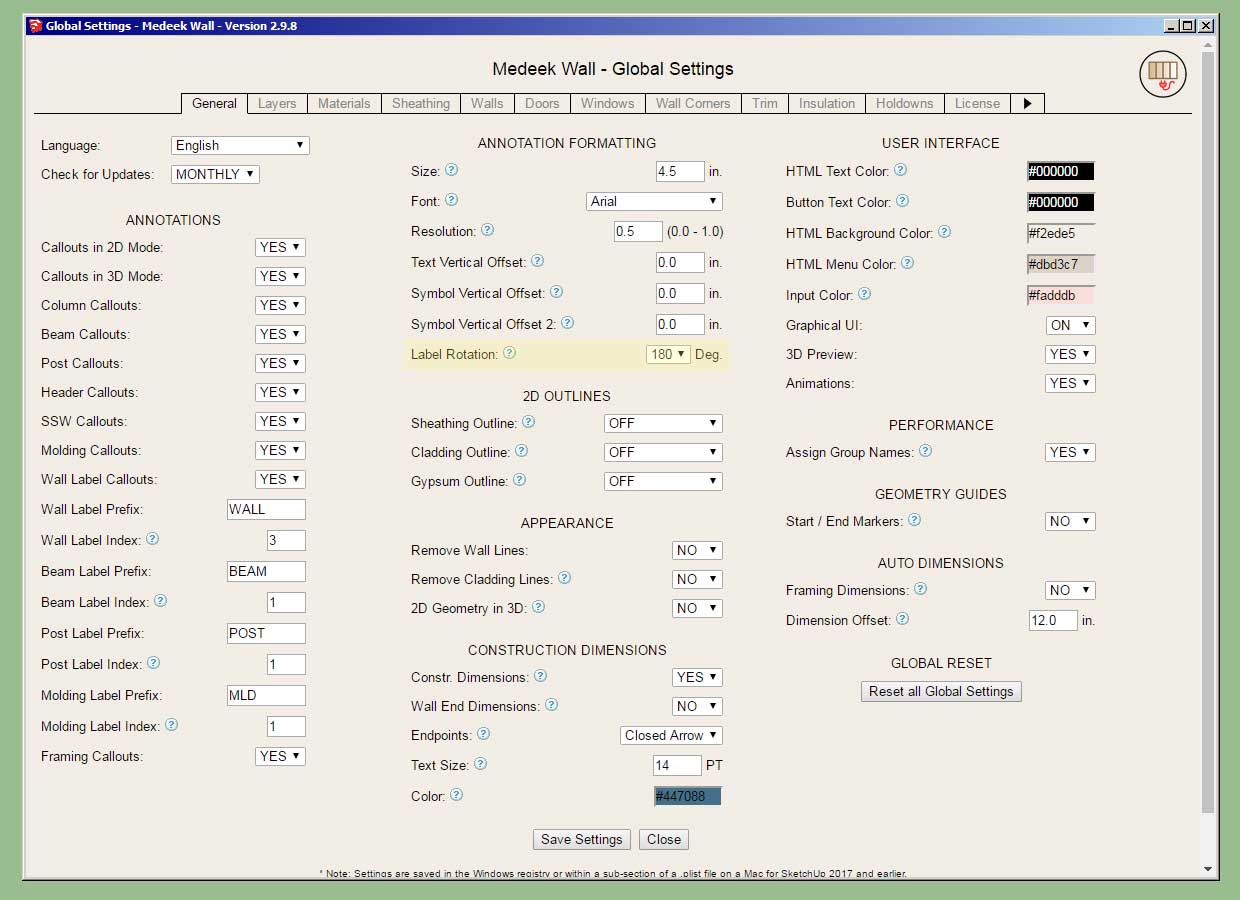
- Added a default "Label Rotation" parameter into the General tab of the Global Settings.
-
Tutorial 31 - Custom Window and Door Casings (15:42 min.)
It's crazy to think that about seven years ago I started these plugins (Oct. 2015) and really had no idea where this might go. With the SketchUp API I've managed to turn SketchUp into a program or environment where you can automatically generate architectural geometry that would normally take a program like Revit or Chief Architect. The API along with the full Ruby language essentially makes it possible to customize SketchUp in just about any way possible, which is what makes it so powerful and fun to tinker with.
Thank-you SketchUp and all the people along the way who created this amazing 3D drawing environment and for me a programmer's paradise.
Advertisement


