[Plugin] GKWare Cabinet Maker
-
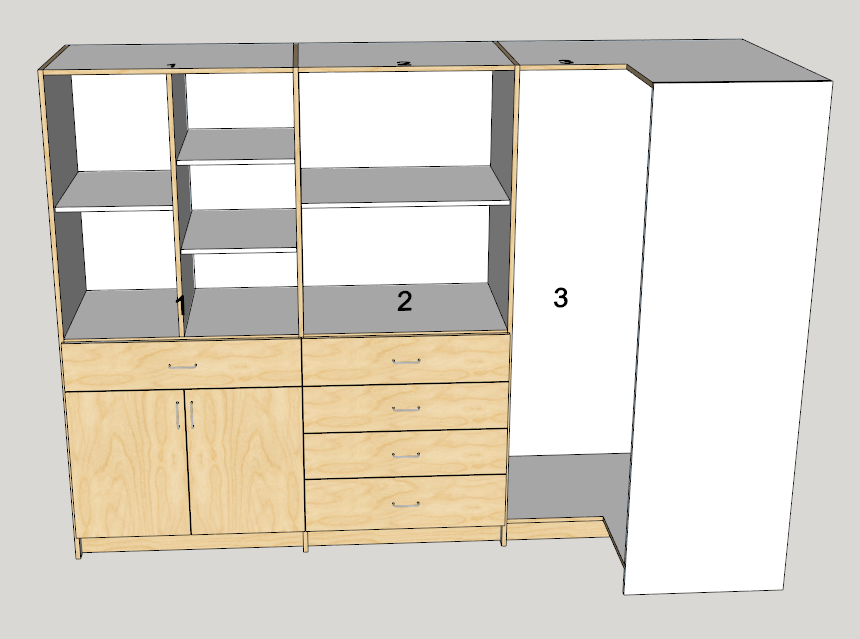
There are a number of closet styles that can be simply created without complicated merging. In this case I adjusted left and right gaps for ALL cabinets by 1/2 the case thickness. Sides go to floor. I omited left side for Cabinets 2 and 3.
-
Now we need Cutmaster to support double sided machining.
-
There are some situations where the back side of a part needs machining. Personally with CNC I would avoid it as much as possible. Having said that there are situations that could benefit from it.
The nesting that cutmaster produces will always machine the left side of common panels. The right side will go into it's own folder and not be a nest. Additionally the outside shape of the part will be in layer that will have it's name appended with an underscore signifying that the polyline is for reference only.
Second side machining means you will have to set aside parts that need second side machining after the nest is complete. Then you will have to load the correct second side DXF and position the part correctly on the CNC.
So there is a lot that can go wrong and that is why I would try to avoid it.
-
Hello,
would there be a way to add this kind of door profile?
or
I thougth about it, and I guess there are 2 difficulties:
- the door profiles are all for framed door, so I suppose the magic behind your "add door profile" process won't work with this. But maybe is there something to do with "panel profiles" you mention in the manual? but I don't see any panel profile in "door profile.skp"
- there should be some kind of specific process capable of adaptating the number of groove regarding the door size.
Using a simple texture would be easier I guess, with the problem of having to create different texture for each case (wood type, color, orientation).
br,
-
I can't see adding a door like this. However I am starting to work on doors and will be adding an optional bead for Shaker style doors.
-
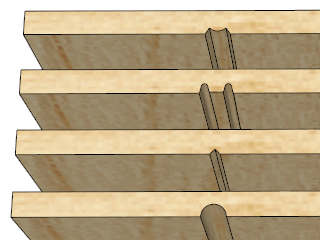
I've added 4 default Panel Bead Profiles and an option for Bead Spacing and a check box for Dead Center. Beading will follow the grain and will work for 5 piece Shaker and Slab.
From top to bottom these are called Standard, Smooth, V Groove and Half Round.
Bead Spacing
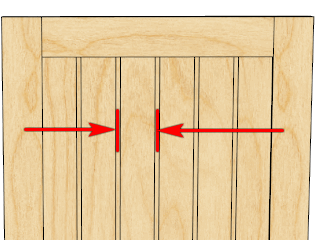
Dead Center
-
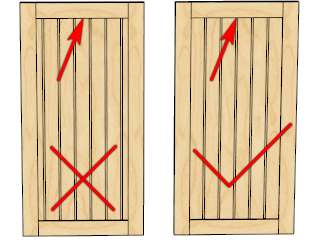
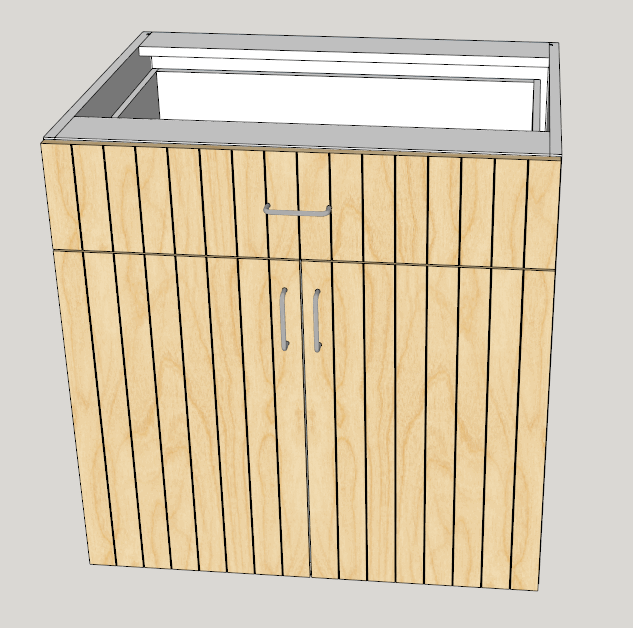
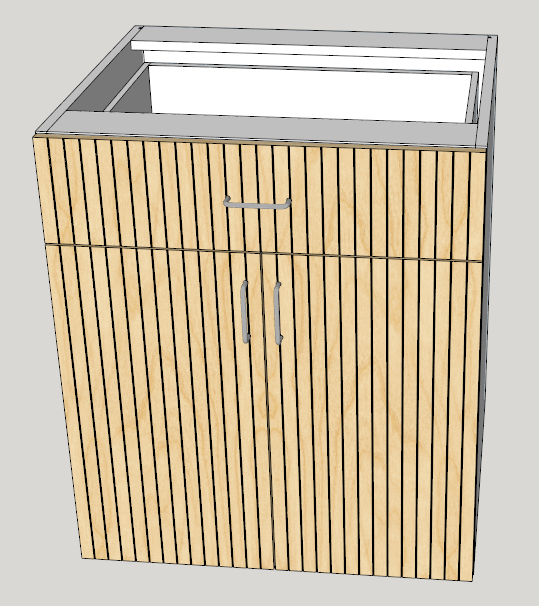
Cabmaker now gives you a tool to help you choose door sizes for beaded doors.
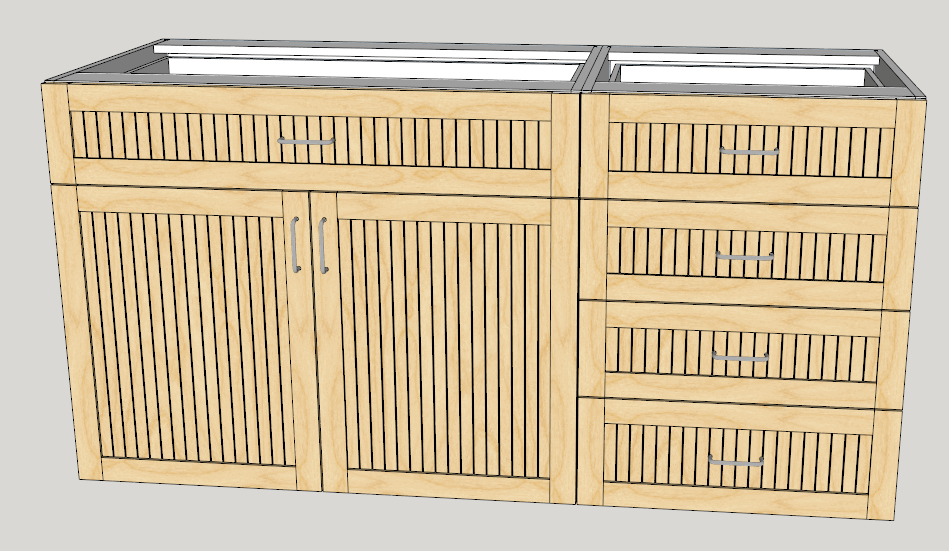
As you can see if you choose a bead spacing and cabinet width like this it won't look very good. This spacing is 50 mm and the cabinet width is 700.
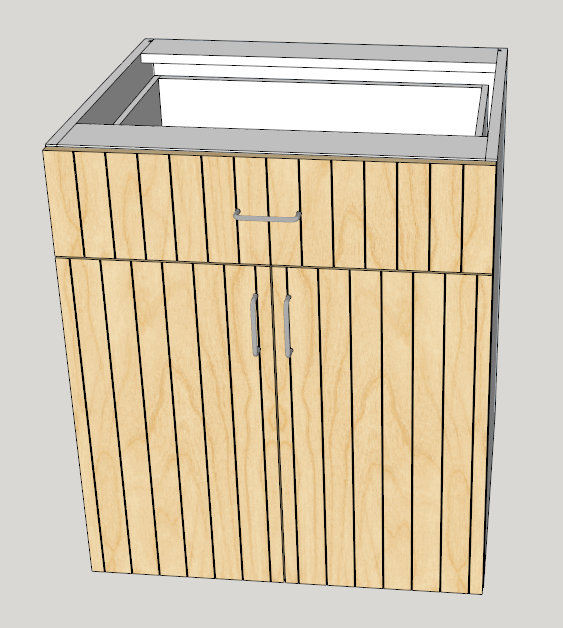
If the width is changed to 800 mm then it works.
Or if the width is left at 700 and the spacing is changed to 25 then it works.
-
The next major version 4 of CabMaker is awaiting Sketchup 2019.
PLEASE note:
-
Licensed users running CabMaker 2 can upgrade to CabMaker 3 with a 25% discount. This discount will end when CabMaker 4 comes out.
-
Licensed users of CabMaker 3 who have purchased a license within 3 months of CabMaker 4 release will receive a free upgrade to CabMaker 4 upon request.
Lots of new features.
- Top and Bottom hangers now edged differently
- Added bead board for plain doors and for Shaker doors
- Moved Oven Panel section under Context Help over to additional
- Added Handle Height for Top Section of Tall cabinets
- Handle Override wasn't working for Drawers. Fixed
- Added drawer - 2 handles when wider:
- Added horizontal offset for handles
- Added Door Style drop down for Finished Panels and Finished Backs.
- Added 1 to 4 panels wide for - Finished Panels, Finished Backs, Doors, Top Doors and Mid Doors
- Added mid rail heights for - Finished Panels, Finished Backs, Doors, Top Doors and Mid Doors
- Added button that makes a copied cabinet unique
Doors with multiple panels and Finished sides configured independently from doors.
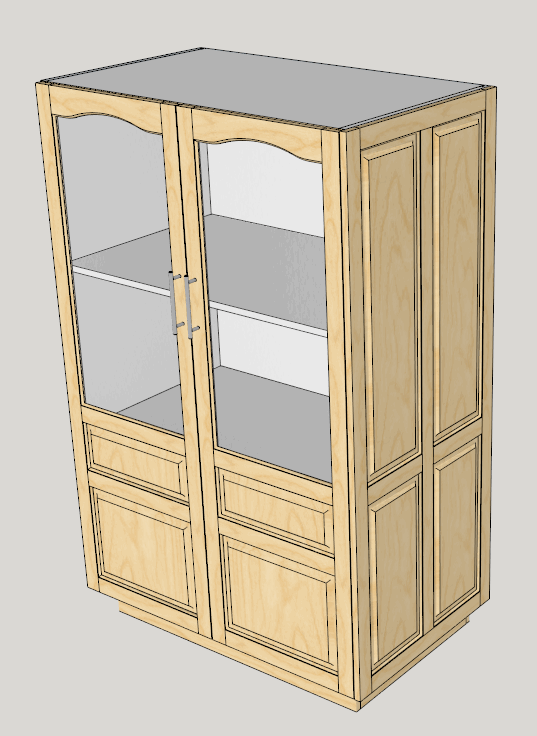
Finished backs - great for kitchen islands etc.
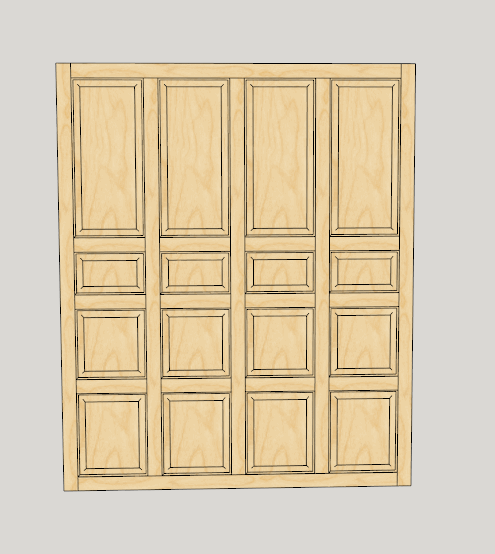
-
-
CabMaker 3.0.135 and CutMaster 3.0.1.85 are now available on my website.
These will be the last updates for Major version 3CabMaker 4.0.136 will be available later this week along with modifications to pricing. The 25% discount for CabMaker 2 users upgrading to CabMaker 3 will end once CabMaker 4 is released.
-
CabMaker 4.0.136 is now available from my website.
Lots of new features.
- Top and Bottom hangers now edged differently
- Added bead board for plain doors and for Shaker doors
- Moved Oven Panel section under Context Help over to additional
- Added Handle Height for Top Section of Tall cabinets
- Handle Override wasn't working for Drawers. Fixed
- Added drawer - 2 handles when wider:
- Added horizontal offset for handles
- Added Door Style drop down for Finished Panels and Finished Backs.
- Added 1 to 4 panels wide for - Finished Panels, Finished Backs, Doors, Top Doors and Mid Doors
- Added 1 to 4 panels high for - Finished Panels, Finished Backs, Doors, Top Doors and Mid Doors. This option is enabled only when the first mid rail height is set to 0.
- Added mid rail heights for - Finished Panels, Finished Backs, Doors, Top Doors and Mid Doors
- Added button that makes a copied cabinet unique
- Added Handle Offset per cabinet
- Added ability to save Door image. Images are now used by all Door and Drawer drop downs
- Now honoring file name case for DXF
- Added glass2
- Background color is pale blue for all overrides (-1) values
-
CabMaker 4.0.138 is now available.
- Kick Ht Override sending wrong meta data for pullouts over to cutmaster. Fixed
- Side by side pulouts sending wrong door information over to cutmaster. Fixed
- Creating a new library without any files causes CabMaker to not use "Save" or "Save As". Fixed
- DXF export was adding too much to the undo stack. Fixed
- Hinged top and hinged bottom doors had pull in wrong position. Fixed
- Top Section door not honoring number of rows. Fixed
- Additional panels for Shaker doors sometimes has a raised panel. Fixed
- Added lateral adjustment to finished panels (doors)
- Set Lateral adjustment to negative side thickness and turn off side for door to replace side.
-
CabMaker 4.0.141 is now available along with CutMaster 3.0.1.87
Version 4.0.141 – Jun 9, 2018
- Materials editor check boxes are now showing the color.
- Shaker style doors second panel not clearing second panel raised panel. Fixed
- Added extend bottom in rules for microwave cabinets.
- Side thickness now can be different from rest of case.
Version 4.0.140 – May 9, 2018 - You can now adjust the position of Dimensions at a Cabinet Level.
- Face Frame construction points not correct for corner cabinets. Fixed
- Corner Cabinets dimension outline not accurate. Fixed.
-
CabMaker
Version 4.0.142 – Jun 23, 2019- Added middle leg check boxes cabinet parameter.
CutMaster
Version 4.0.1.88 Jun 23, 2019- Drawer layer names no longer can have spaces. Now converted to underscores.
- Drawer layer names now show in applicable machining section.
- Added machining section for drawer bottoms pocket screws.
- Added comment / purpose for each machining section.
Please note that starting with CabMaker 4.0.142 you require CutMaster 4
CutMaster 2.0.1.57 was released on Oct 24, 2017
Major version CutMaster 3 first came out 20 months ago. -
CabMaker 4.0.144 is now available.
Version 4.0.144 – Jun 30, 2019- Added Elevation Dimensioning.
- Added optional Dual Dimensions so inches and mm will both display.
- Added cabinet dimension overrides. You can now disable dimensions for a given
cabinet.
Version 4.0.143 – Jun 27, 2019
- Modified startup code to guarantee that required folders exist.
- Added automatic Backup and Restore for config folder.
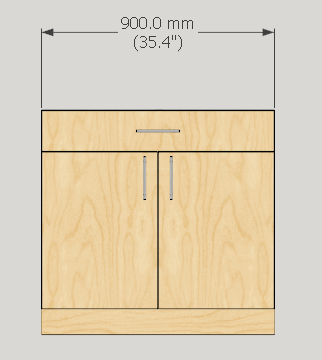
Here is dual elevation dimensions
Override the PROJECT dimensions at the cabinet level or leave as -1 to use PROJECT settings. A value of 0 will turn off dimensions for the current cabinet.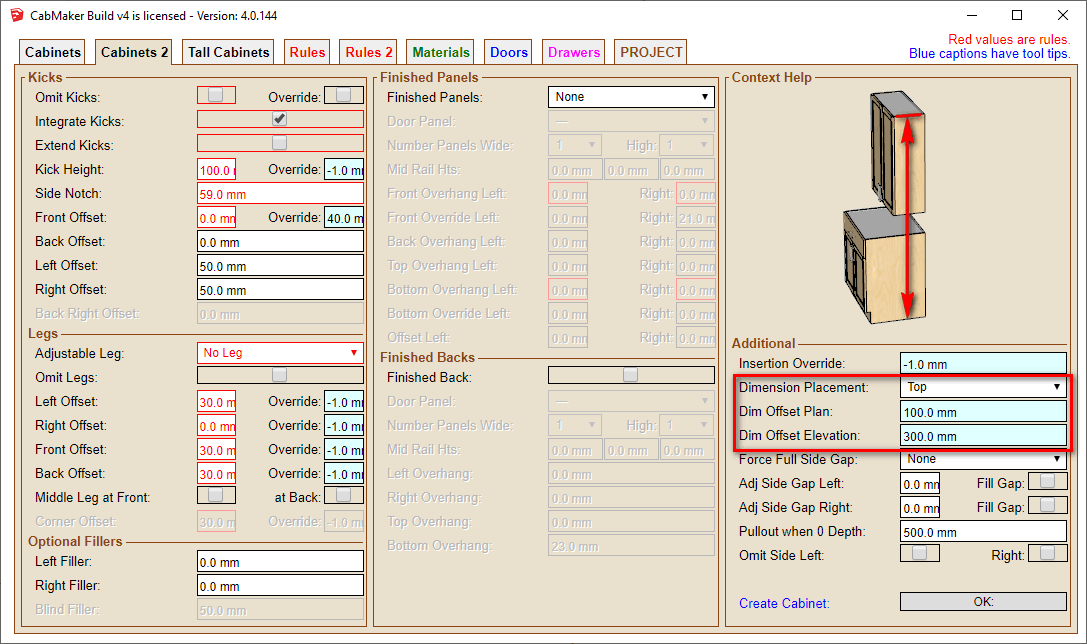
-
I will be releasing CabMaker 5 later today. This is because Sketchup 19.2 has just been released. CabMaker 5 will only be available at Sketchucation and on my web site.
All CabMaker 4 licensed users are entitled to a free CabMaker 5 license.
Trimble has at least 4 bugs in their Extension manager so I will only provide an extension link with cabmaker 4 on the Extension Warehouse.
-
Sketchup puts up a message "there is one extension ready to be updated" even though I have turned off "Allow checking for updates". This message only shows up if you have internet access.
-
Sketchup puts up the message even though the Extension Warehouse has an OLDER version. Essentially Sketchup isn't checking version numbers
-
Sketchup's Extension Manager wants you to click Manage and then Update. When you click Update then Sketchup deletes CabMaker 4
-
After Sketchup deletes CabMaker 4 it fails to install. This is not a true update - it is a delete and install with no rollback on failure.
My recommendation is to ignore the message and to NOT run Update. At least the annoying message disappears after a couple of seconds.
BTW - Trimble has told me they can't do anything about it. Essentially they aren't helping.
-
-
I cant get the Sketchup Plugin to work.
I have downloaded the trial version and created an account. I wish to use the DXF exporter.
However, when I try to use the DXF export function in SU there is a prompt that I need to sign in using my username, login and "Hardware". I know the two first since I just registered, but I figure I need to write something in the "Hardware" field.Help??
BR
Stefan
-
For now leave the hardware field blank. If you have issues then email me directly via CabMaker32 and I will help you.
-
CabMaker 5 is available from my web site and from Sketchucation.
Version 5.0.146 – Jul 22, 2019
- Added Finished Panels section in PROJECT tab.
- Modified Frame section in Rules tab.
- Added Clear Number in PROJECT tab.
- Added Reverse (per cabinet) for dimensioning. works better for back to back island cabinets.
- Created 32 metric templates complete with images.
- Fixed Top Overhang Override coming from Rules.
- Added auto load Finder or Windows Explorer.
- Modified configs first time through, reports, animate, browser etc.
- Alternate storage is now enforced as the default.
-
I have added 32 Imperial Templates and 32 Metric Templates examples to the web site for free download.
Additionally I have cleaned up material and door templates.Does anyone want other template examples such as drawer systems?
-
The 5th version is realy quicker than the 3, that's nice
Advertisement


