Loft curved face with Curviloft
-
Hi,
I have no problem. It works with Skinning of shapes without a crease.
Charly
Gnomon Tower_Loft face_12-15-10.skp
-
@charly2008 said:
Hi,
I have no problem. It works with Skinning of shapes without a crease.
Charly
??
those are the curves from the file i uploaded.try it with the .skp in the original post.
(but it's weird that you changed the name of my file to match that of the original post??)[and also notice that it's still wrong.. there is a hump near the top seam.. not super noticeable in this exact file but if you exaggerate the shape's radii, you'll see the hump easier]
regardless, using curviloft on these curves is a bad idea.. notice the resulting surface has actually been divided into 4 separate surfaces which is where the kinks and folds come from (especially because you don't have much control over where those surface divisions will occur.. it's better to divide it yourself into 4 sided surfaces prior to surfacing)
look at this file for a more simplistic look at the problem..
5sides_vs_4sides.skp -
Sorry Jeff, that was not intended.
@unknownuser said:
(but it's weird that you changed the name of my file to match that of the original post??)
Charly
-
@unknownuser said:
probably the best tool for this job (well, the best tool as you have your curves set up right now) is soap skin bubble:
Or better Ferrari architecture plug !

-
@unknownuser said:
the problem is that this shape that you're trying to fill has more than 4 sides.. 5+ sides just isn't going to work out (and your shape actually has 7 sides once you examine it a bit further..
probably the best tool for this job (well, the best tool as you have your curves set up right now) is soap skin bubble:
http://www.tensile-structures.de/sb_software.html
[/attachment]The Tensile-Structure plug-in is one of the scripts I tried. I haven't found any detailed operating instructions for any of them. So my understanding of the theory and limitations is limited. The only video for CurviLoft demonstrated the Loft By Spline method. The Skinning method is the only approach that worked at all.
One thing that may cause the scripts to fail is the Jekyll/Hyde personality of the curved lines. They were drawn as ellipses, and then cut to fit the model. But when I edit the group and select the outline, Entity Info sometimes reports 48 edges, and other times reports one curve. Sometimes CurviLoft would select the whole outline with one click, and other times I had to select each major segment individually. What's up with that?
-
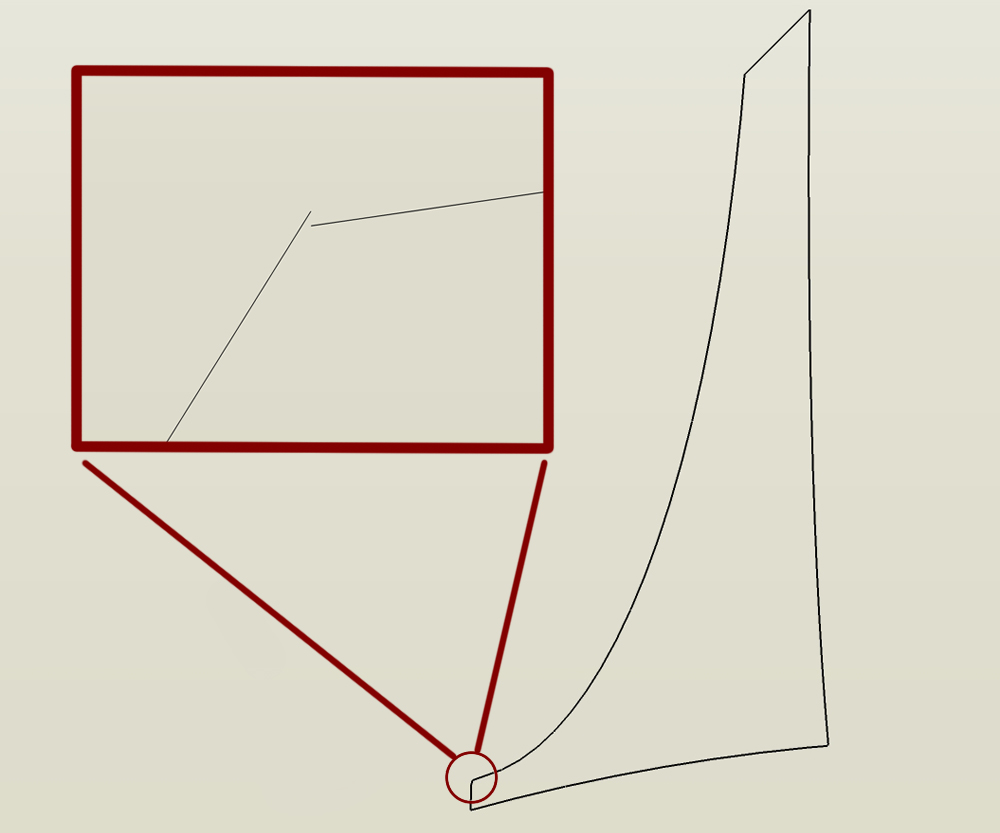
well, the reason you're having problems with the selection is that there's a small break in the loop as shown in this picture...
re: user manuals for plugins..
i dunno, these guys write rubies .. not instruction manuals
they get their thrill or fix or whatever you want to call it from coding but writing a manual is a lot of work for which i don't imagine they have much desire/motivation to produce.. if they were $50+ plugins which would maybe allow for a team to write the manual then sure, i guess it might make more sense..[but then again, the most detailed instruction manual in the world wouldn't have done much good in this case]
-
the following is only sort of related to the original post but since i started talking about the 4 sided surfaces...
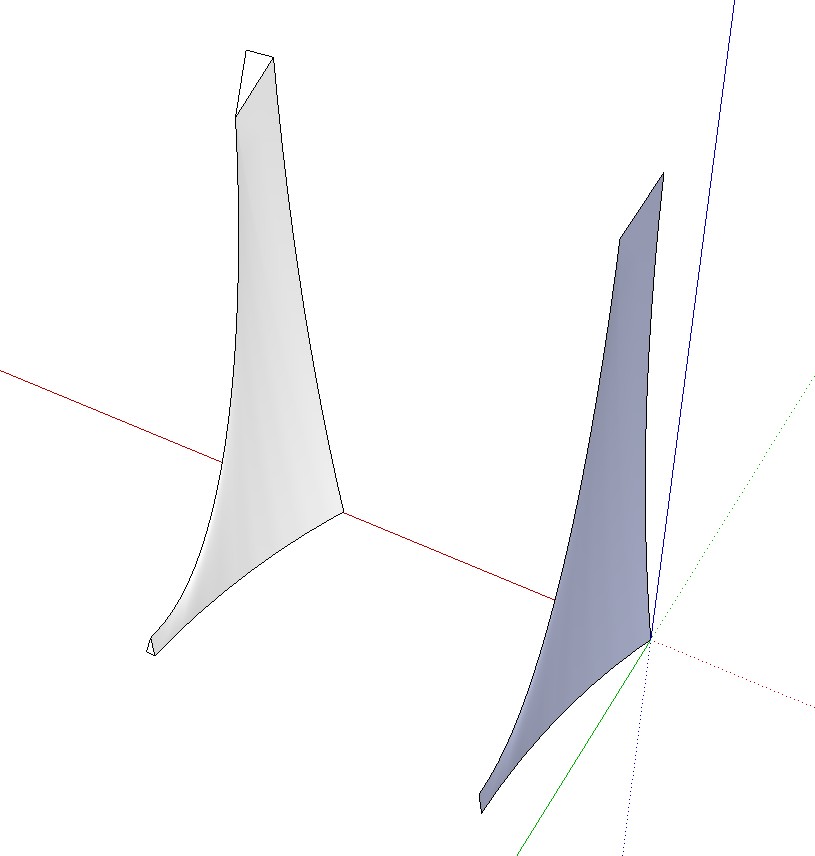
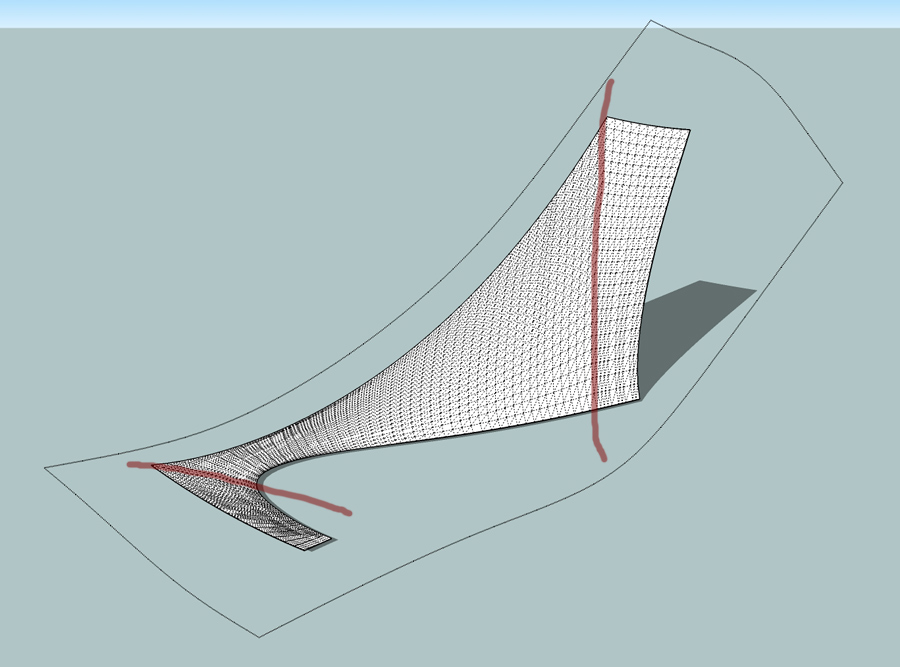
here's this thing that i've been wanting to build:

the curves defining the back look like this: (which sort of reminds me of the shape in the original post)
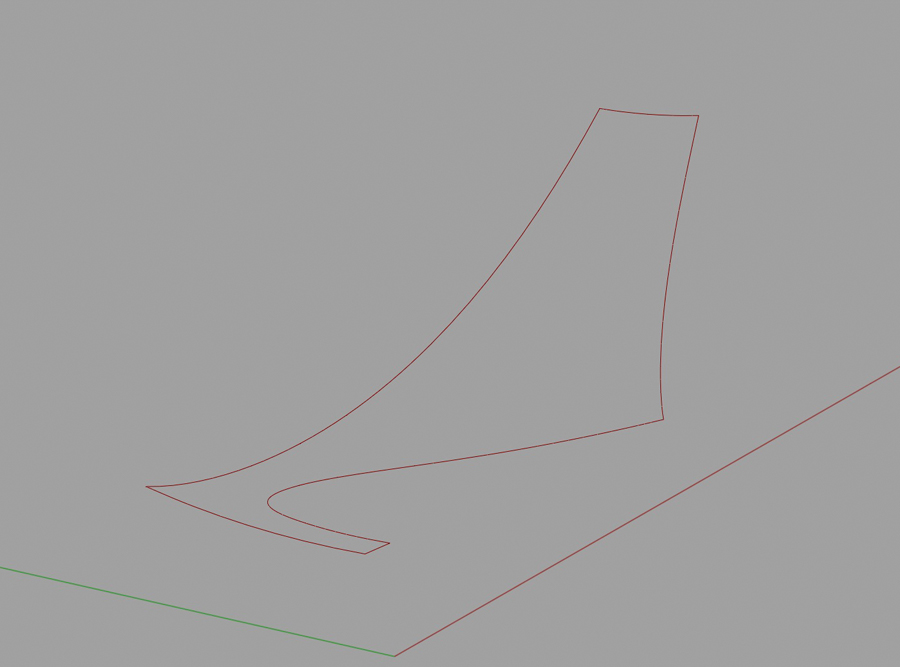
since it's more than 4 curves, a curve network wouldn't work so i either have to divide it into 4 sided parts or use a patch.. soapSkin&bubble seems to be the closest thing sketchup has to a patch. (but i haven't tried the ferrari plug that pilou posted)
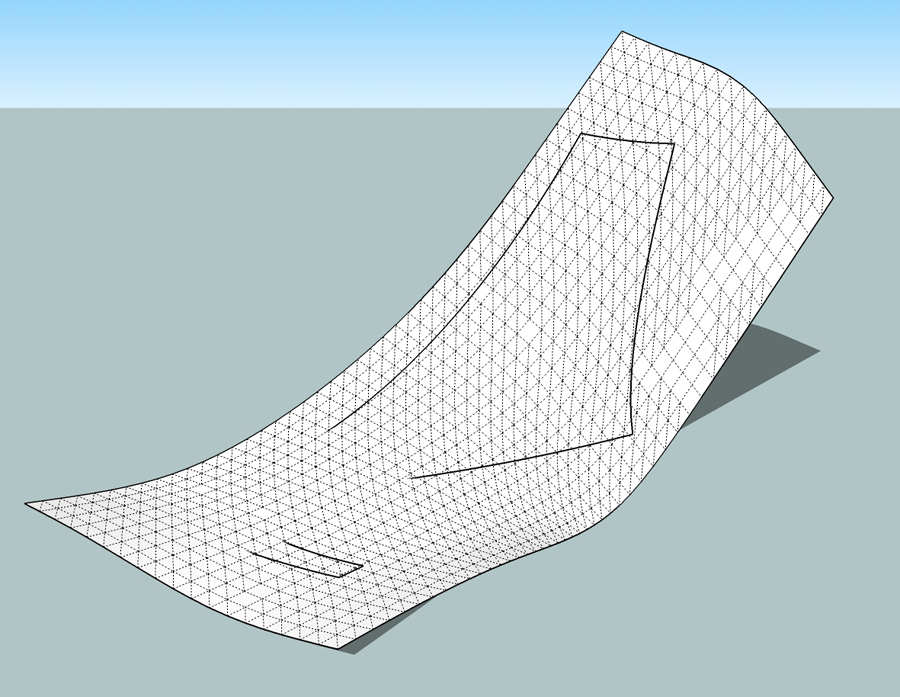
this is the surface patch:
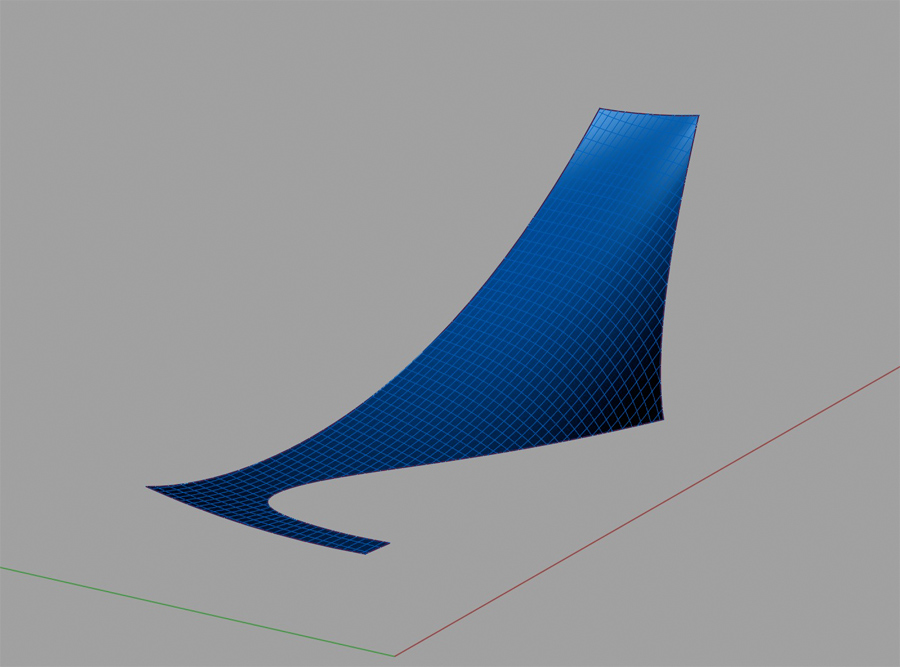
the thing to understand is that patch is still a 4 sided surface.. it's just that it's been trimmed by the six curves outlining the shape.. this is how the patch + it's trimmed portions look:
curviloft (and TIG's extrude edges) is suited to draw the untrimmed surface in the above pictures (the one defined by 4 curves)..it's not suited to simply fill in the 6 edges and if you try to do it anyway, it's going to chop the 6 edged surface into 4 edge surfaces that it can deal with.. (fwiw, if you try to use tools similar to curviloft in other software, it won't even permit the command to run as you're giving it bad input)
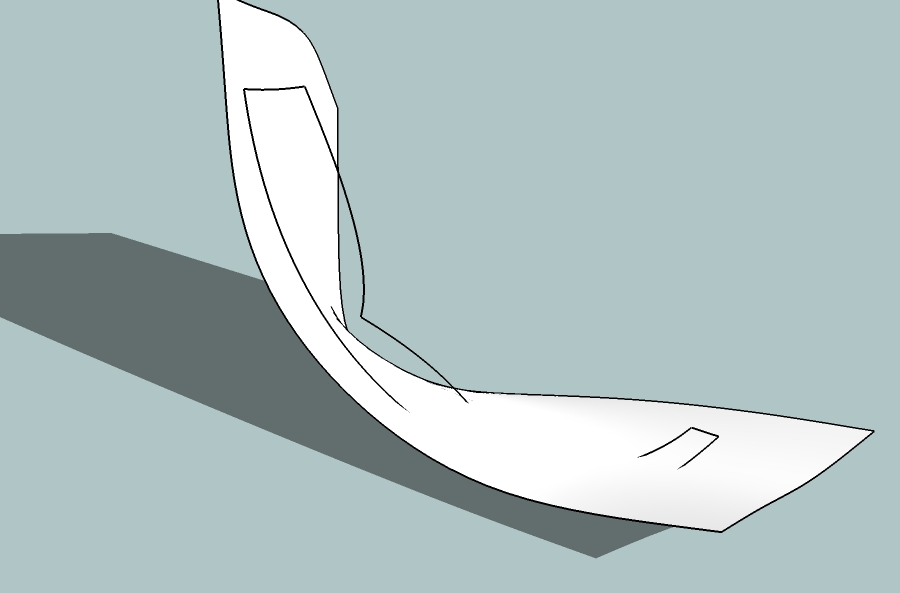
i brought the edges into sketchup.. this is what happens when you run curviloft on the 6 edges.. notice the resulting surface has been divided into three 4 sided surface (and there are 2 kinks where these surfaces meet making the drawing unusable)
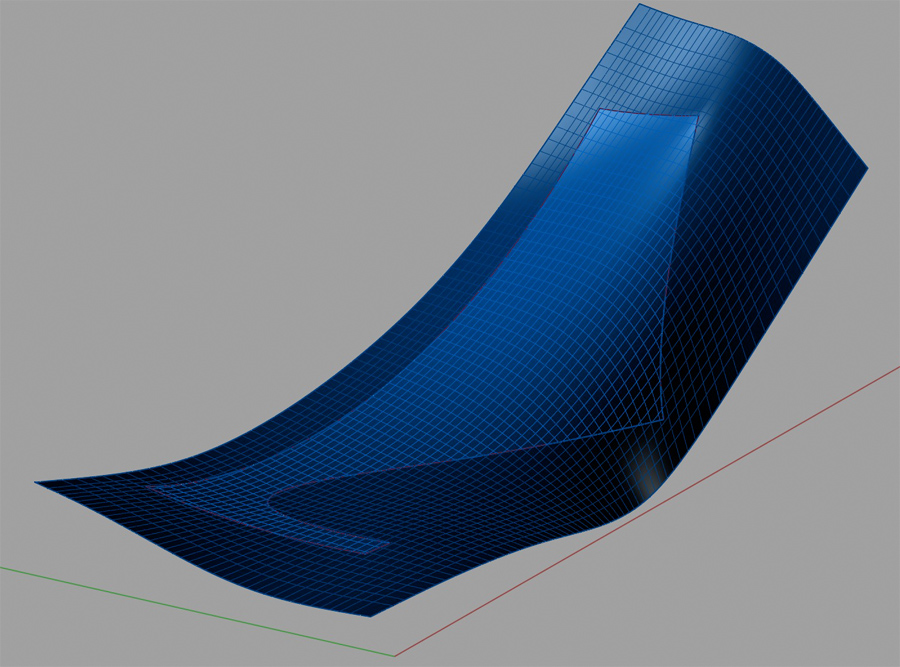
this is cuviloft on the outer edges which is great input for curviloft and results in a clean mesh..
however, the surface isn't passing through the 6 edges.. this angle will show the error better..
in this instance (as well as dealing with the original post), soap skin & bubble handles the surface best.. [though i hesitate posting this because soapskin is a horrible go to for this type of stuff.. in this exact case, it's made out to be decent but there are other examples i could post of why using a tension based surfacer is a bad idea)
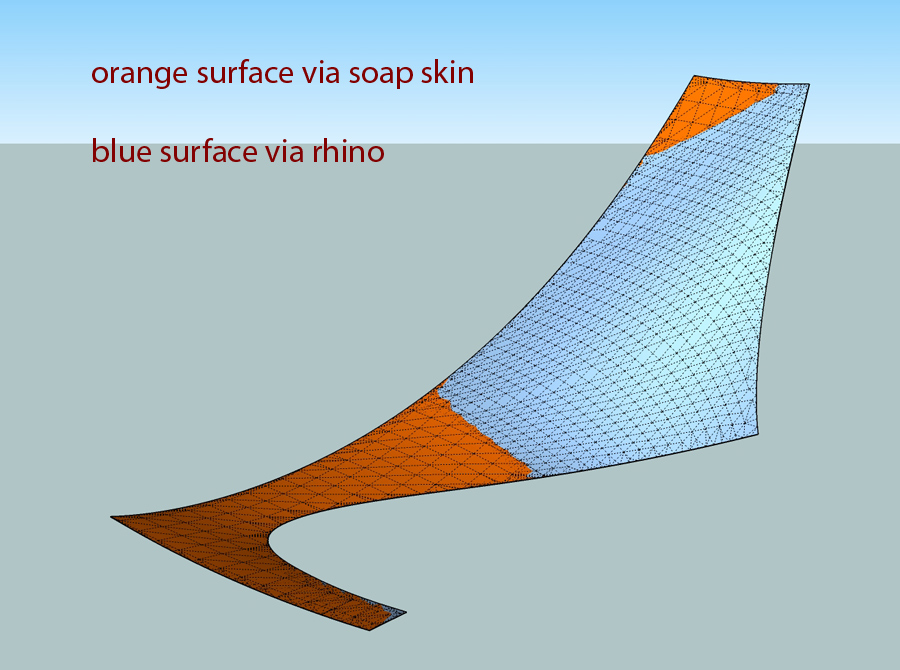
..looking from the other side with x-ray on, you'll see that soapskin isn't quite right..
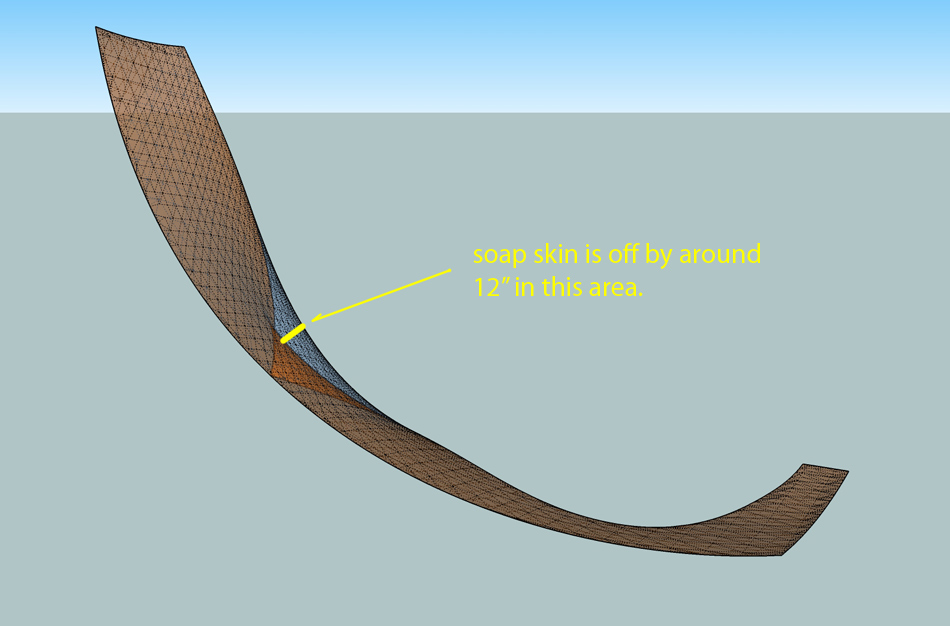
..and, if i loosen the tension on the skin in order to get closer to that portion of the rhino surface, the error will multiply on the bottom part (the visible orange shown in the previous picture). i would really need to be able to loosen tension on some parts of the soap skin and tighten the tension on others in order to actually edit the surface to it's proper shape.. impossible to do with soapskin & bubble.
anyway, i think it'd be very nice to have a true patch tool in sketchup but to have one that functions similar to rhino's might be asking way too much of sketchup and/or the coders..
thomthom is working on a bezier patch but i'm not quite sure if it's going to function as shown in pics 1-3. (encompassing 4 sided surface which is then trimmed to the desired edges).i guess i'm rambling on about nothing here but i felt like talking about it anyway
-
Jeff, thanks for the semi-tutorial. I didn't know the Loft and Skin scripts were limited to four sided figures. That little piece of information may make the process much easier next time. Apparently, the Sandbox tool automatically divided the surface into four-sided sections. Which may be why it worked better than the other scripts.
I also wasn't aware that one corner was not connected. Because of the Loft selection glitch noted above, I used the "Weld" script repeatedly to combine all the selected edges into one entity. Apparently it didn't work as I imagined it would, to join all corners.
Anyway, now that I have---more or less successfully---used the Sandbox tool to create a skin, I still have some Artifact Edges to deal with. At certain angles the skin wrinkles display an edge as shown in the first image below. In the second image, the wrinkles seem to be on a single Face, so why does one have an Edge? (the grid on the face is an artifact of the screenshot and image compression)
My question now is, how can I get rid of (or hide) the Artifact Edge? I can see it, but I can't select it.


-
@unknownuser said:
re: user manuals for plugins..
i dunno, these guys write rubies .. not instruction manuals
they get their thrill or fix or whatever you want to call it from coding but writing a manual is a lot of work for which i don't imagine they have much desire/motivation to produce.. if they were $50+ plugins which would maybe allow for a team to write the manual then sure, i guess it might make more sense..Ugh... manuals...
 thinks back in dread of Vertex Tools' manual They are incredible tedious and boring things to do.
  Dreading the work ahead for Bezier Surface. But they are valuable resources for users and needs to be there for commercial products.
Quad and Tri patches is what computers like best and is the most predictable method for modelling. Bezier Surface will only work with Quad and Tri patches, but you assemble sets of patches into one surface. Just like 3dsMax's Patch modelling (and similar apps). So one always has to workout how you need to divide the surface into appropriate patches.
[flash=640,385:t58edwaa]http://www.youtube.com/v/cIsd3xZJfZw?fs=1&hl=en_US[/flash:t58edwaa]
[flash=640,505:t58edwaa]http://www.youtube.com/v/n31wkLX0oGw?fs=1&hl=en_US[/flash:t58edwaa]
-

Hello there ^^
Newbie here and rescue needed
Does anyone ever create snail shell in sketchup as attached ?
I need to adjust the size of the head (for the speaker) of shell and keep the snail shell body in that size..
but i dunno how to do it (especially when i import the file from STL it become small pieces)..or i need create the new one.. ?
(hope not) If somebody here ever adjust it, kindly share how to do it..

Many thanks,
T
Hello! It looks like you're interested in this conversation, but you don't have an account yet.
Getting fed up of having to scroll through the same posts each visit? When you register for an account, you'll always come back to exactly where you were before, and choose to be notified of new replies (either via email, or push notification). You'll also be able to save bookmarks and upvote posts to show your appreciation to other community members.
With your input, this post could be even better 💗
Register Login


Advertisement