Nested dynamic components
-
Hi Sketchucation, it's been a while since I've been here the last time.
Today I started using dynamic components because this seemed usefull to me for my purposes but soon I experienced some problems.
Basically I like to do something like pulling out a drawer out of a drawer out of a drawer with the interact tool.
Do I have to nest in this example the 3rd drawer component in the 2nd drawer component and the 2nd drawer component in the 1st?
But then I have to acess first each sub component to be able to apply the interact tool which is unpracticall.
Is there an other way? Is there some video which could helpe me - I have not found one.
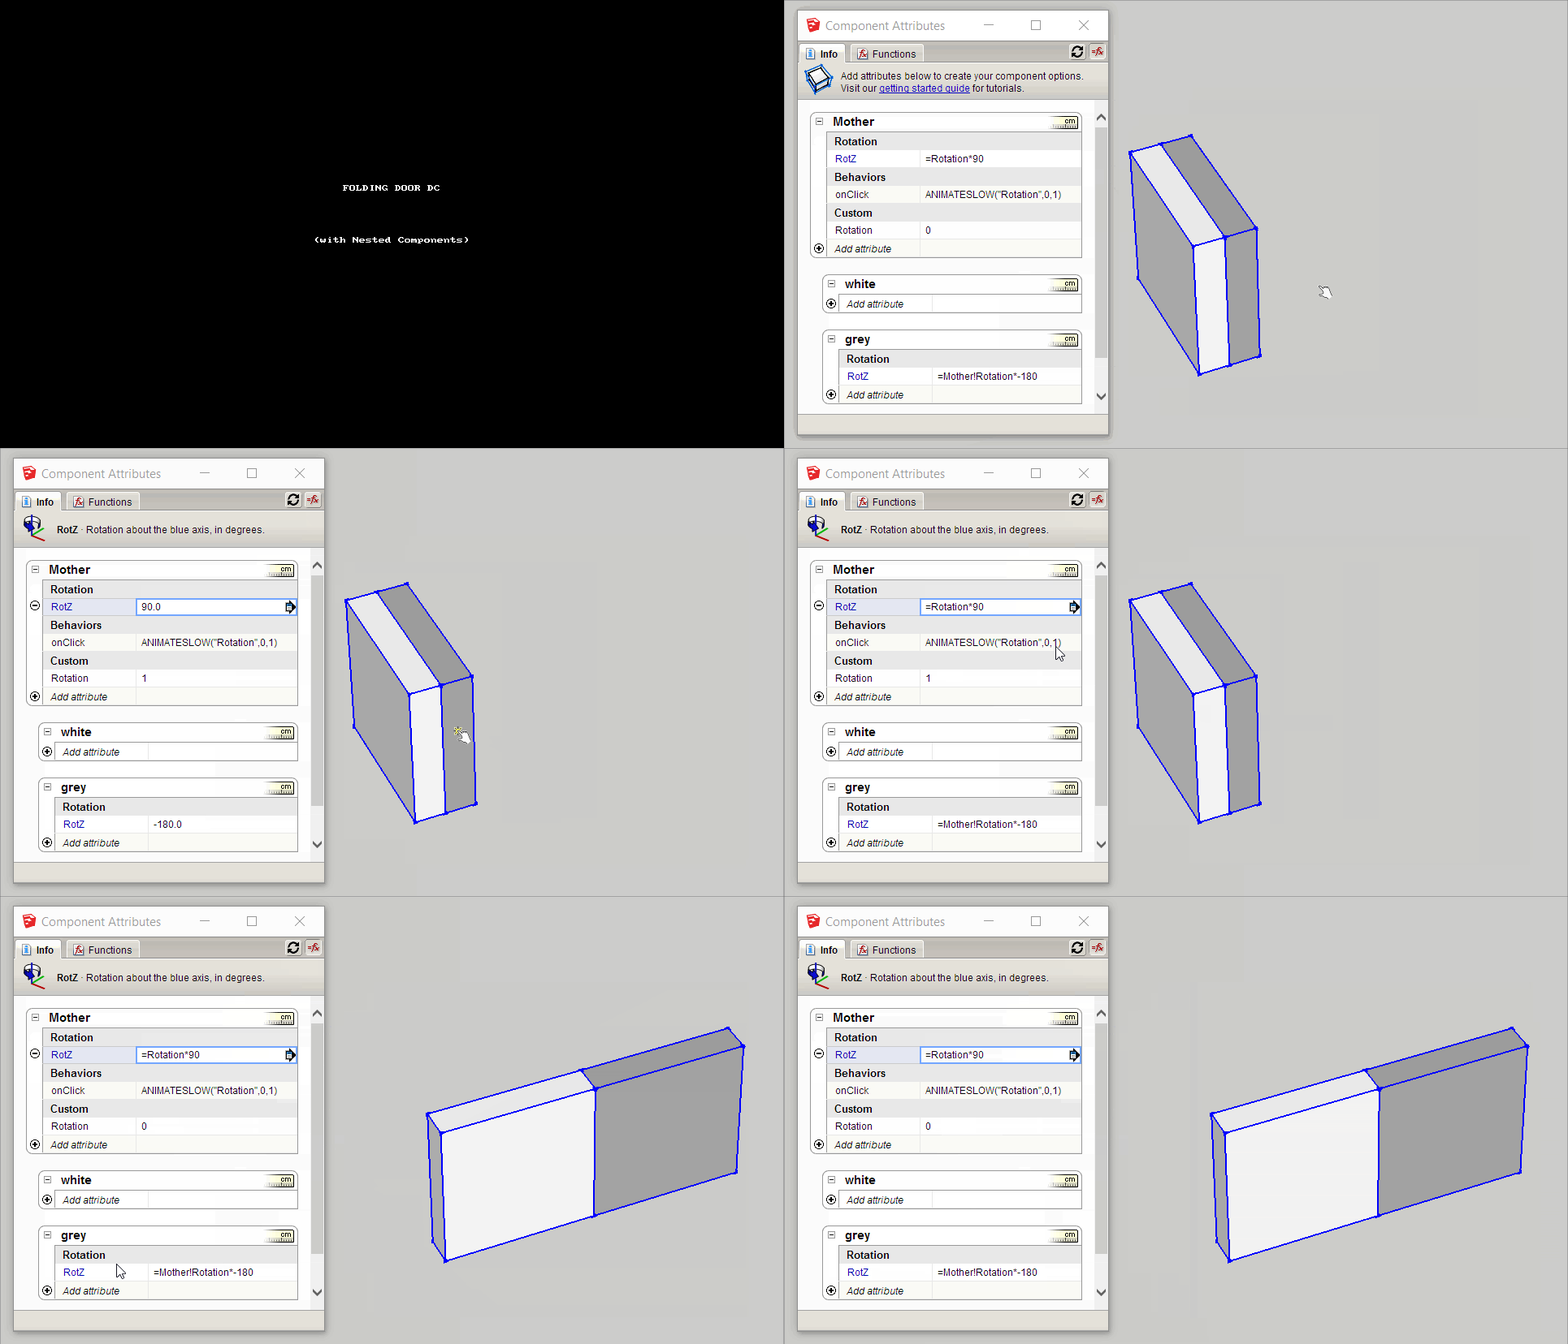
Actually I don't want to pull drawers out of drawers. I would like to do what you see on the picture.
The numbers represent a sequence of states. Think of it as a sort of shower door which step by step builds up a shover room. I want to do each step by using dynamic componants and the interact tool.
-
You have to write something like this:
Onclick=Animateslow("Drawer",0,1,2,3)
This will animate a Custom Variable called drawer: It will start at 0, then animate to 1, then 2 and finally 3 where another click will animate from 3 to 1.
Then there will be many ways to make that Custom variable "Drawer" be inserted in your formulas to make your drawers animate one at a time.
-
Thank you for your answer.
As I understand it your suggestion is only working for a single component.
I am a big noob in math and programming. But I think Onclick=Animateslow("Drawer",0,1,2,3) only applies for a single component.
At least I understand how I can controle the behaviour of a single componant with Onclick=Animateslow("Drawer",0,1,2,3).
But my problem is that I have two components which should move ( do something)together (at certain steps) at the same time.
-
JQL is correct.
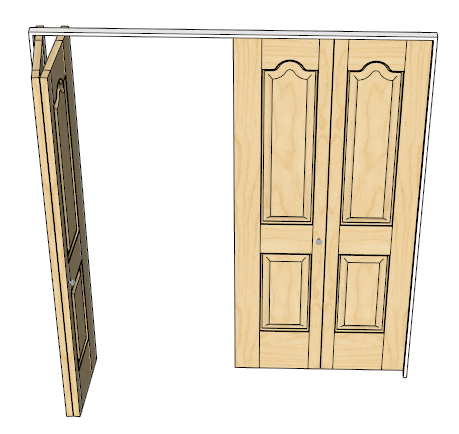
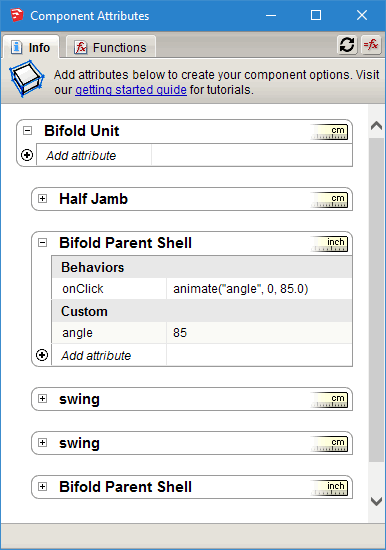
For example I have bifold doors that open and close. There is 1 click event for each bifold pair. The click event is performed on 1 bifold panel. The other panel moves in conjunction with the control panel.
These doors are created from scratch using Ruby.
-
The idea is that you can inherit the "Drawer" attribute from nested component into the next.
When the onclick function is in the 3 stage, the something happens in a context that has inherited that attribute.
-
Well,ääääähhhhh??!
But isn't there a fancy mathematical formula (picture)for component 2 in need, to change position in conjunction with component 1?
Component 1 is just simply moving around axis z between 0° and 85° - which is relatively simple. I can understand that.
But to make component 2 to move in the specif intended conjunction with component 1 there is this mathematical formula needed(something trigonometric)
I wish I'd be less tupid.
 Thanks for handling me.
-
There is a formula for that wich envolves trigonometry but if you simply want to do that you can nest component 2 inside component one and it becomes much easier. Place the component's axis where you want your hinges to be... Then explore a bit and ask again if you need.
-
You might ask why so many nested levels. The right hand pair of bifolds are a copy (mirrored) of the left hand pair. The axis for the left most panel is the pivot point. So I made sure that it was in the center of the panel (thickness wise) and a couple of inches over from the end. That way the bifold pretty much acts like a real one. The other reason you need to nest at least 1 additional level is so the math survives moving and rotating the entire bifold.
Essentially the nest level that contains the formula isn't affected when I move and rotate the entire door assembly into position.
-
@jql said:
... component's axis where you want your hinges to be
@garry k said:
the axis for the left most panel is the pivot point
Aahh! That's the thing. I did not set the axis.
(After some playing with the axis I also figured -angle values regarding axis rotations are clockwise and + angle values are counterclockwise.)
However to have to open each component, in order to "manually" control the whole motion sequence step by step is not as "sexy" as to use some sophisticated equation to do the whole job at once.
Thanks guys!
-
I still have problems after setting the axes which I can not explain myself.
I've created a mother component in which I've nested two sub components of the same shape.
The mother component can rotate between -90° and 0. One of the nested components can also rotate (around it's own set axis) between -90° and 0
As long as I do not rotate the mother component the nested component just does what is should do which is rotating between 0° and -90°.
But the problem starts as soon as I have rotated the mother component to -90°. When the mother component is rotated at -90° the nested component is behaving strangly. Instead of rotating to -90° and 0° it is sort of jumping to -90° and then bouncing fast back.
I don't have a clue.
-
-
JQL
If you copy, paste and rotate this DC and then use interact then it bounces back to the same plane as the original.
You need to nest it one level deeper.
-
Thanks Garry!
I know that but I thought I was giving away too much in one time and this doesn't help learning. I was hoping that issue could be something asked later by anyone interested or even better, the issue could be solved alone.
A step at a time, each step requiring the next...
There are even more issues there waiting to be found.
-
Thanks for the help JQL! I really appreciat it. (unfortunately I can't open your file with my SU Pro 2014) However I understand nuts.
I have already a problem to understand what it means when you use symbols like ! and * in
=Mother!Rotation-90*
or
RotZ = Rotation*90A principial logical problem which I have is that in my understanding the white component is only moving around axis z but the grey component is moving around axis z AND is sliding at the same time on axis x.
But there is nowhere something refering to - change position on axis x - for the grey component. There is only RotZ = other!Rotation-90* - It does not seem reasonable to me that this is enough when the grey component is ALSO MOVING on axis x.
-
Have you gone through this
Notice the axis:
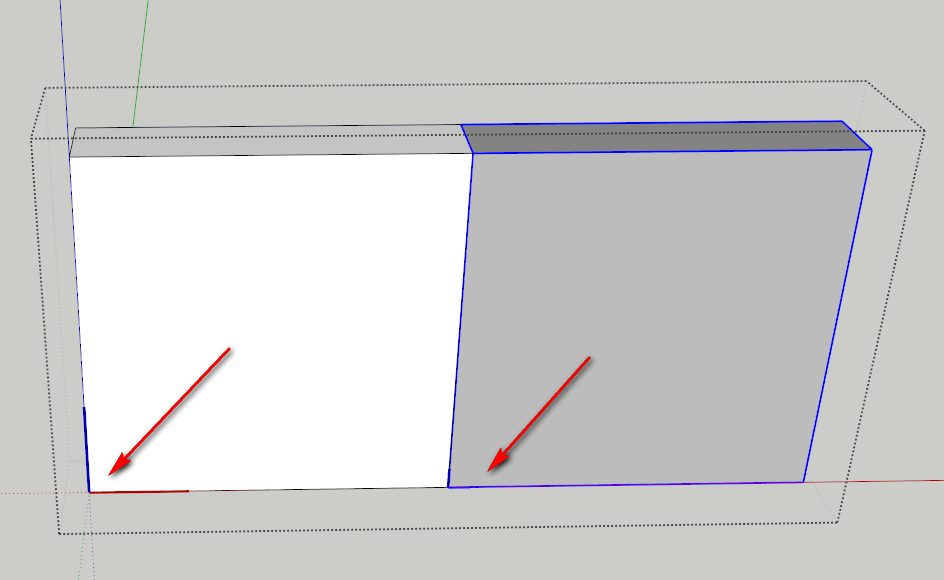
And here is the formula. Think of it this way
The top most component (Mother) gets rotated 90 which rotates both the grey and the white panels.
Then rotate the gray one -180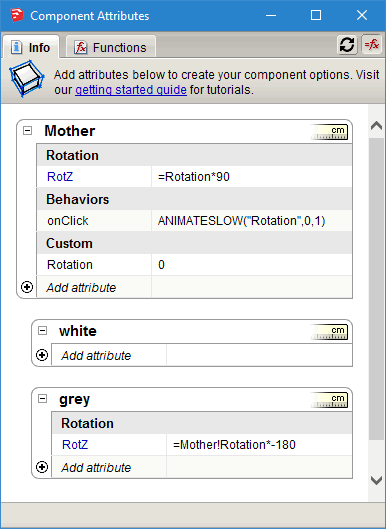
-
Mother!Rotation refers to Rotation variable in Mother (should be named state)
On Click sets Mother!Rotation to either 0 or 1
RotZ formula Rotation*90 will be 0 when the state is 0 or 90 when the state is 1
RotZ in grey panel also references the variable Mother!Rotation and therefore it's value is either 0 or -180Pretty simple actually
-
As Garry says, you have to learn the basics first.
Mother!Rotation is the "Rotation" attribute defined in "Mother" component. The idea is that you can reference attributes that exist in parent components or components nested in the same level.
When you want to do that, you simply click on the attribute you want to use, from the ones being shown:
1 - Edit the formula for RotZ inside the grey component;
2 - Start by typing "=";
3 - Then click on Mother's "Rotation" attribute;
4 - And sketchup will autocomplete "Mother!Rotation" inside the formula. -
Garry, I'm know about your plugins but I'm not familiar with them as I never tested them...
When you say that you're creating your DC's from ruby, are you creating them from scratch from there or are you picking up some existing component template and filling it with stuff using ruby?
-
It is all Ruby (except for door handles).
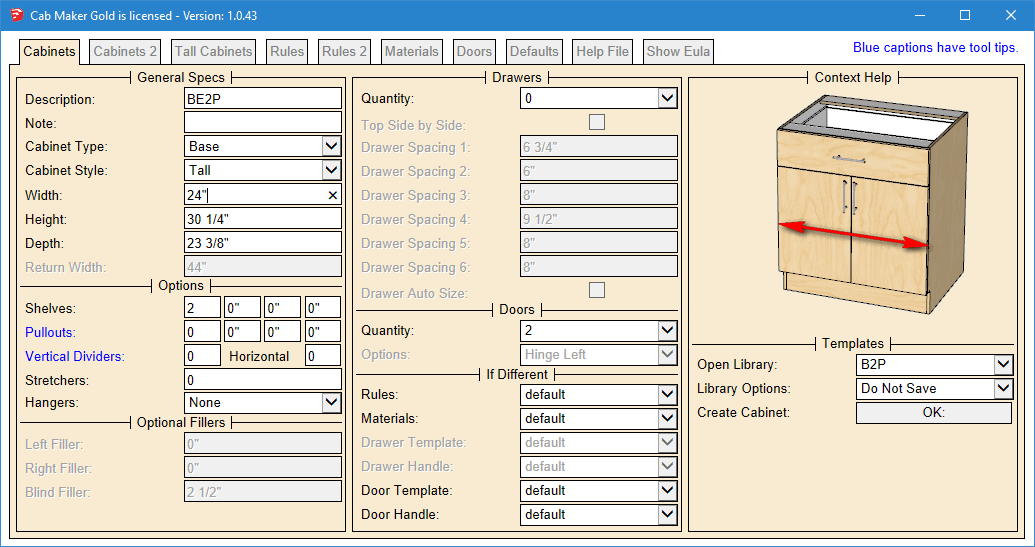
I have web dialogs for parameters. Cab Maker for instance has 8 tabs and around 240 graphics which change for each parameter. Lots of enabling / disabling of parameters depending upon what you select. Choose a library template (just a small text file) and I go read in the data and update the web dialog.
I think it is a much better work flow and the resulting skp is kept down in size. This way you can have 100's of choices for textures but I only load in the ones you want to use. This also means that most of the parameters are virtually infinitely sizeable and can be combined many many ways.
The only place that I use dynamic attributes is for doors opening / closing and drawers opening / closing.
-
That's really cool Garry! I'm amazed at what you achieved there. And it seems you have the same thing for doors and windows?
Advertisement
