Messy bumps for non-square shapes in vray
-
Hi guys, I have a problem that haunts me from the moment I upgraded from Sketchup 13/vray 1.x to versions above, and has been reproduced with different Sketchup + Vray versions in several computers, so the assumption is that is not a version combination bug, or a faulty installation, or any hardware issue whatsoever, but a simple setting that I fail to find and is bugging me to death.
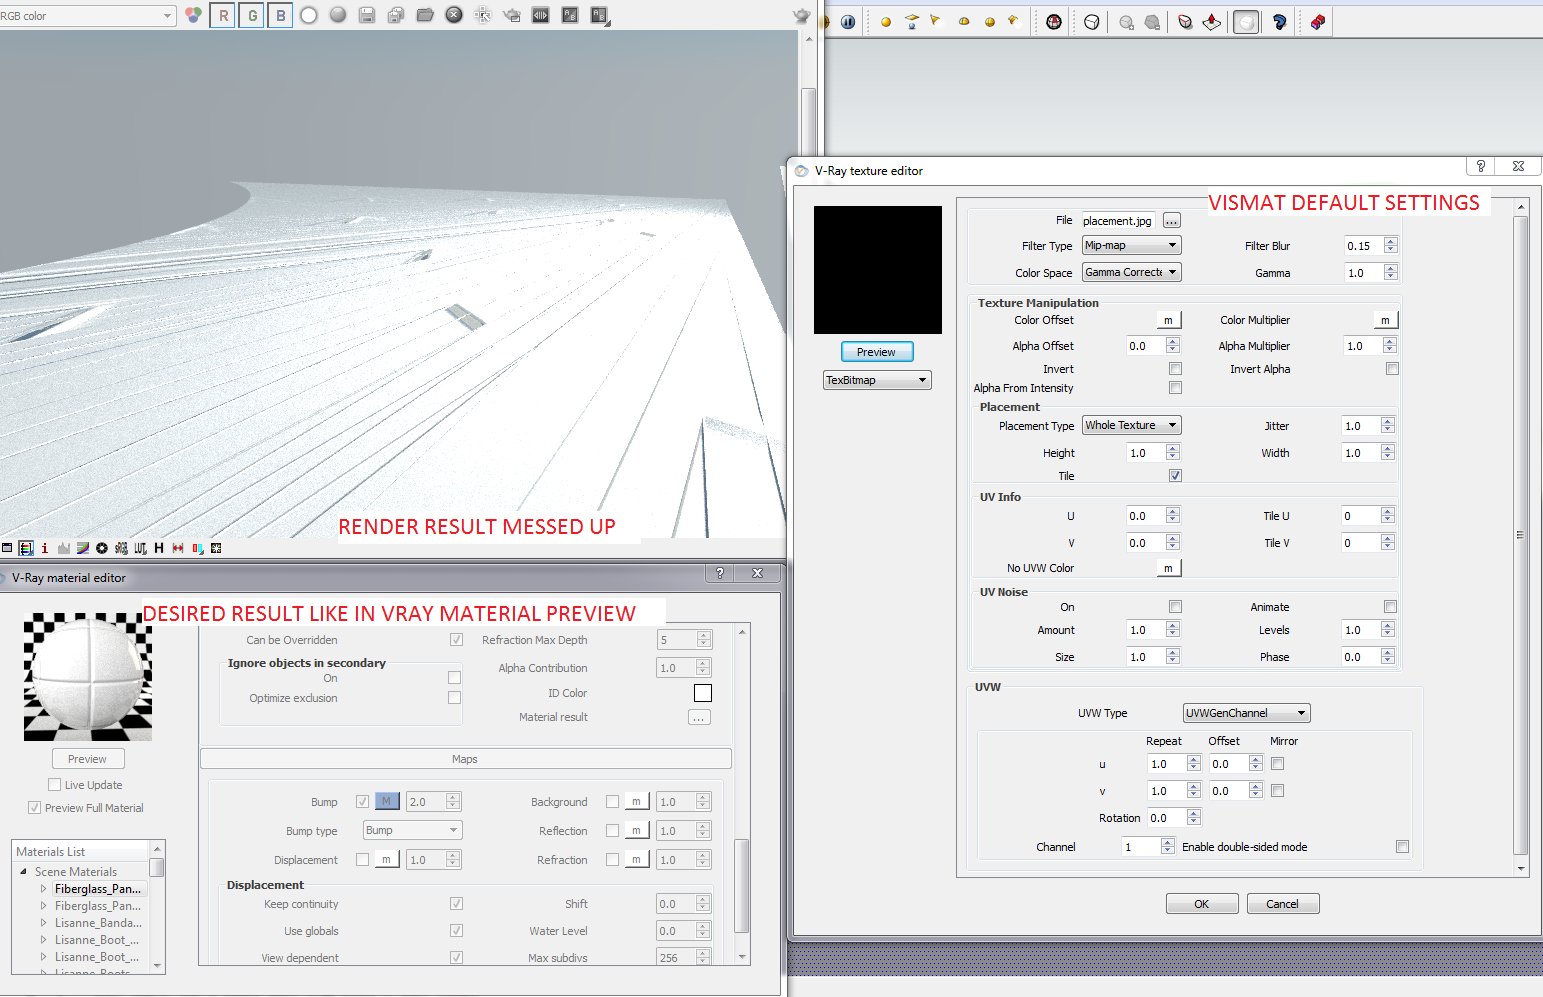
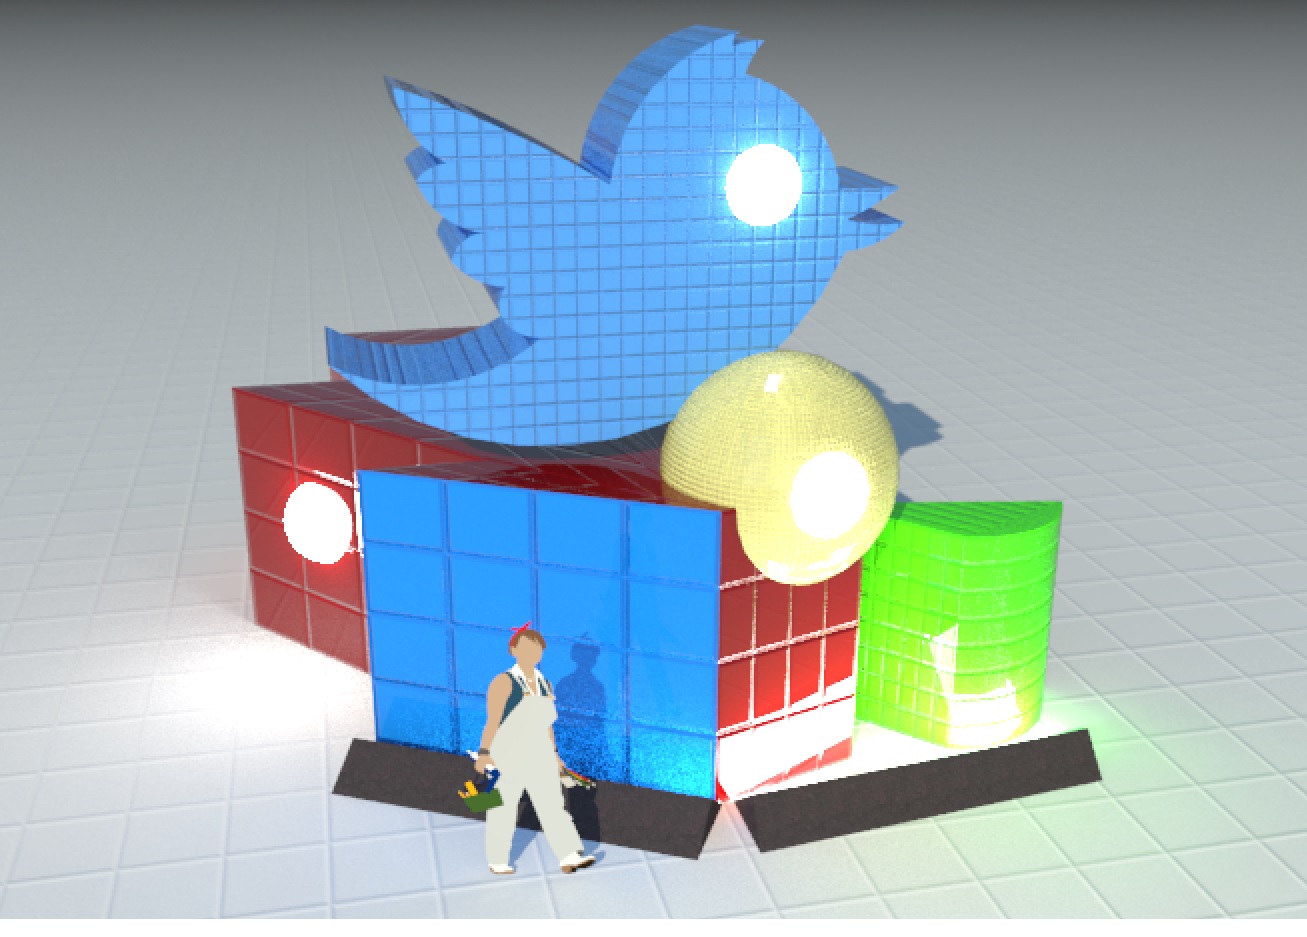
In the screenshot labeled as view1, we can see how I have a custom shape and adjacent are a square and a circle i have created for testing purposes.
In the screenshot labeled as render1, we can see the rendering result. The material applied to all the shapes is the same, and while we can see how it renders perfectly in the rectangular shape, it is a complete mess when I try to apply it any shape that is not strictly rectangular.
Obviously I guess the problem is that the bump map is trying to accommodate to the shape perimeter, which is not the case ( i do not want that effect ) and causing the subsequent mess.
For the record, I cannot for the life of me to fine the proper setup where in old versions i would select a face and be able to see the option TEXTURE which as selected would offer the option to untick the PROJECTED box which solved sometimes position/shape problems with textures in the past.
Any advice would be greatly appreciated, I know there must be some stupid tick/untick thingie here but I am not able to find it.
RL.


-
Are you using a simple bump map or displacement? I've seen issues with Displacement that looks similar to what you have. The solution was to sub-divide the face into smaller portions. The other possibility is that there is no Sketchup Diffused texture for Vray to scale off of.
Robert
-
@rspierenburg said:
Are you using a simple bump map or displacement? I've seen issues with Displacement that looks similar to what you have. The solution was to sub-divide the face into smaller portions. The other possibility is that there is no Sketchup Diffused texture for Vray to scale off of.
Robert
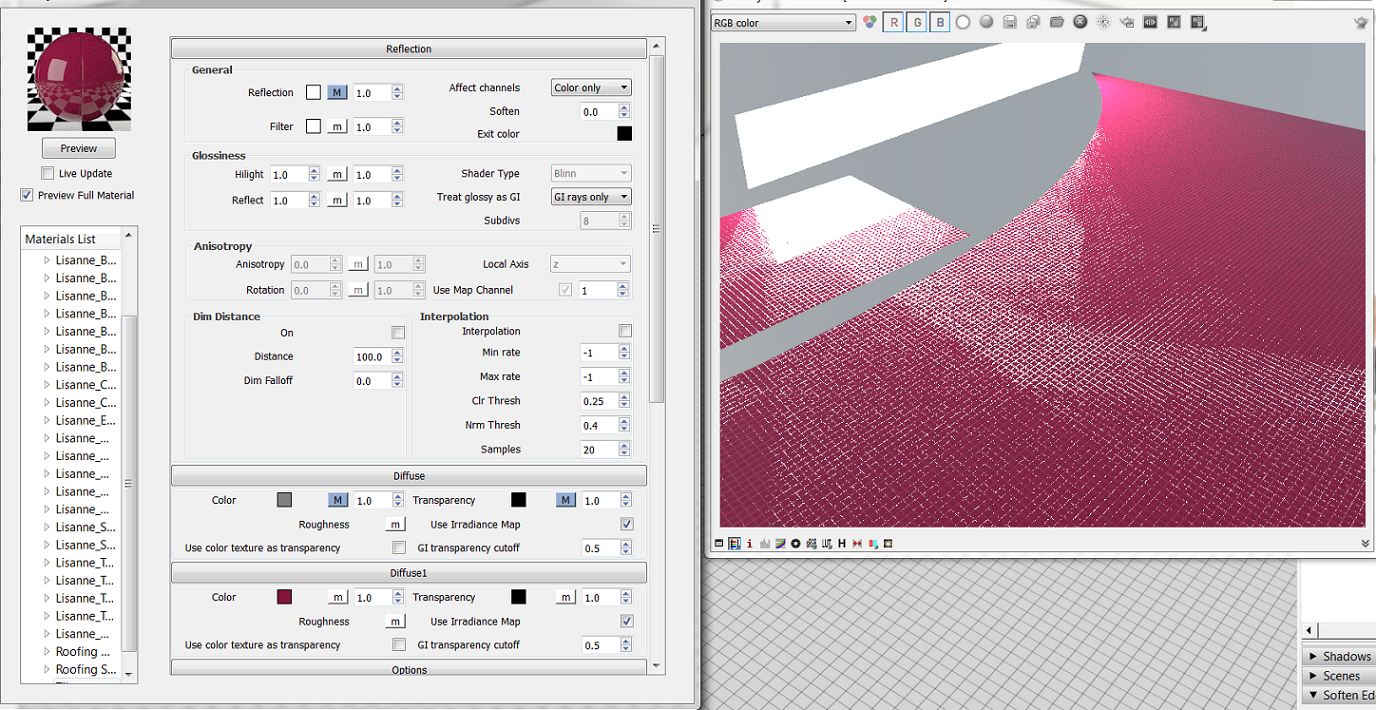
Hi Robert, thanks for the answer. I am using a simple bump without any displacement whatsoever, here I attach another screenie to clarify things further with another similar example.
I have also tried to create a dummy white texture to apply to the diffused field, without positive results.
RL.
-
Ok. My guess is that the bumpmap cannot figure out the UV mapping. Here is what you need to try.
Create two diffuse layers.
Diffuse Layer 1 -> Set it to TextBitmap and load in the same bitmap you have for your bump
-> Go the M in transparency and set it to TexAColor - in the color box set it to whiteDiffuse Layer 2 -> Set this up as you have your current texture.
Basically whats going to happen is Sketchup is going to see the first Diffuse Layer, you use this to layout your texture properly complete with scale and direction etc.
Vray sees the first diffuse layer as 100% transparent so renderwise it is ignored. What it does, however, is it lets Vray line up your bump map with your first diffuse layer.
Not sure if this is clear or not. If you are still having issues let me know and I will try to add some screen shots.
Rob
-
@rspierenburg said:
Ok. My guess is that the bumpmap cannot figure out the UV mapping. Here is what you need to try.
Create two diffuse layers.
Diffuse Layer 1 -> Set it to TextBitmap and load in the same bitmap you have for your bump
-> Go the M in transparency and set it to TexAColor - in the color box set it to whiteDiffuse Layer 2 -> Set this up as you have your current texture.
Basically whats going to happen is Sketchup is going to see the first Diffuse Layer, you use this to layout your texture properly complete with scale and direction etc.
Vray sees the first diffuse layer as 100% transparent so renderwise it is ignored. What it does, however, is it lets Vray line up your bump map with your first diffuse layer.
Not sure if this is clear or not. If you are still having issues let me know and I will try to add some screen shots.
Rob
Hi Rob, thanks for the answer.
After following your instructions, what I've got as result is just the same faulty scenario, but with the bump lines obviously more accentuated (due to using the same texture both in the diffuse(1) and the bump).
RL.
-
Check out the attached material. Let me know if this helps. You can check out how it was made. When I get home a little later I will post screen shots to explain.
Rob
-
@rspierenburg said:
Check out the attached material. Let me know if this helps. You can check out how it was made. When I get home a little later I will post screen shots to explain.
Rob
Hi Rob,
I have just tried the same scene with your material and it worked properly, here I attach the screenshot.
Unfortunately it just provides a temporary fix, as in an elaborated scene there can be dozens of materials with bump/displacement applied, and creating custom materials for all these would be kind of a heavy extra task, I was actually thinking that was perhaps a setting that I was missing UVW-related.
Anyway for small works and quick renders the workaround will work OK, I am curious why in your material the trick worked while when I tried to reproduce it, failed causing the same problem.
Thanks again for your support.
RL.
-
For some reason my attached picture didn't work last time (perhaps size issues), trying once more.
RL.
-
Here are some screen shots to help highlight what I've done. I agree that its a pain, but the other solution would be to use a pre-colored texture for the main diffuse bitmap and then create a greyscale bumpmap from that colored texture and use it.
Here are some screenshots that highlight the required steps to take.
Rob
If you are still having issues, you can pack your version of the material and upload it and I can take a look at it.


-
Hey Rob.
Will do as I arrive home at night, thanks for the time you are taking to explain me this )
RL.
-
Hi again.
I think I have found a solution that avoids having to execute any extra steps at the time of creating our materials.
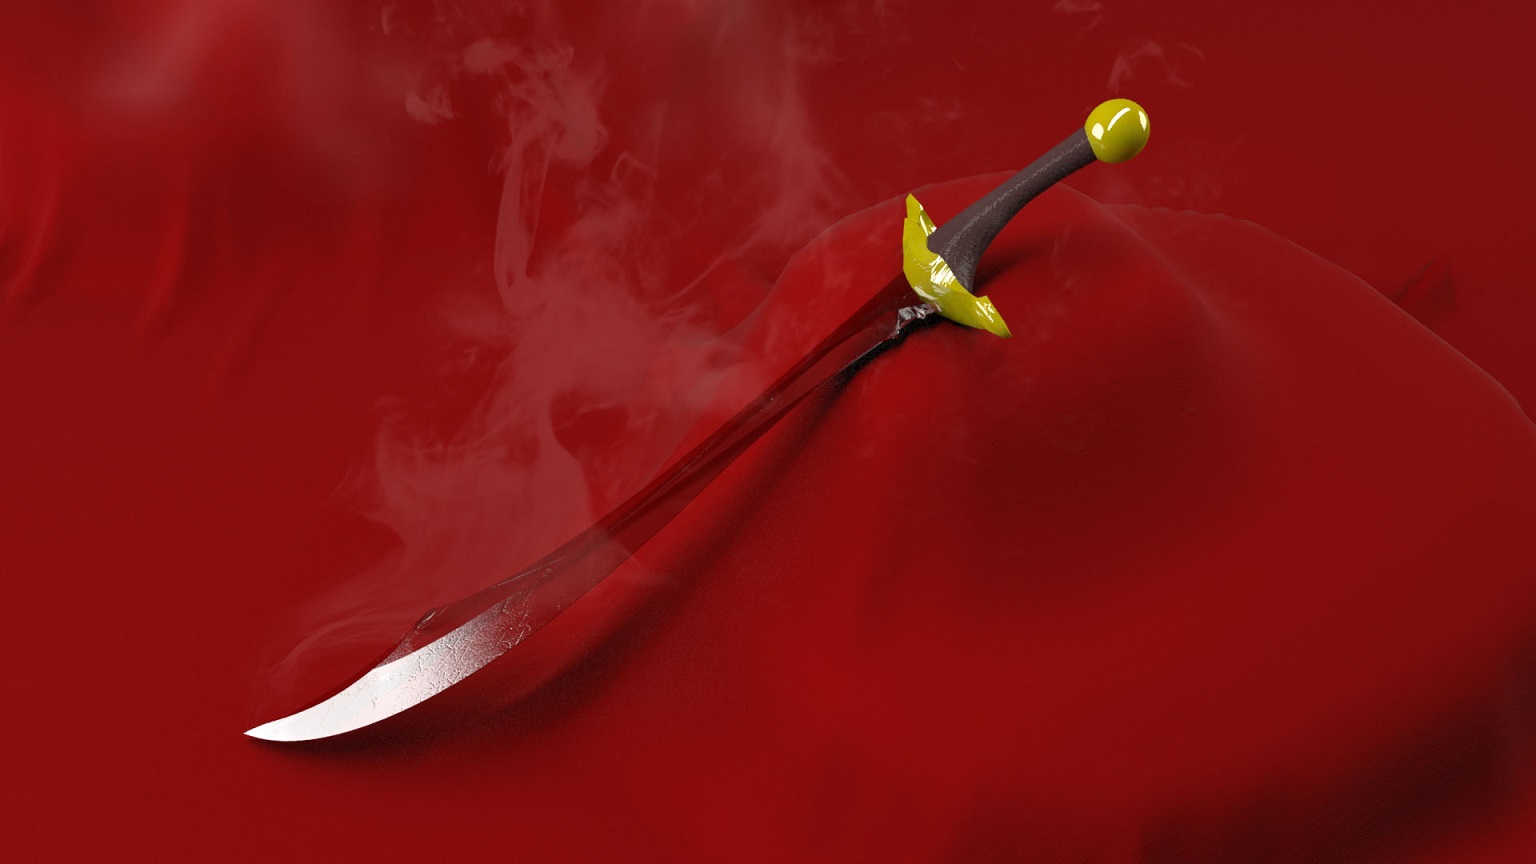
Honestly I was a bit fed up with this issue (like I said, was dragging it from long ago) and decided to take a rest from Sketchyp and give a try to 3ds Max since I used to work with it in the past and I still can model quite effectively there. After updating a few things, I found to my despair that I had the same problem! No need to say this got to my nerves, so I decided to go a bit deeper into the source of the trouble.
Now, I haven't tried yet in Sketchup, but in 3ds Max, the problem was not so difficult to solve after all. Having in account that the issue was mostly in the UVW maps (after trying Mental Ray, also unsuccessfully was quite sure that the problem was not in VRay, I also tried to update my GPU drivers to no avail), so it occurred to me to apply a Modify panel > Modifier List > UVW Map to the meshes and polygons I was working with, with instantly positive results.
I even had a couple hours to draft this scimitar and throw a quick render, sharing it with ya all since I am really happy that I did overcome this problem

Special thanks to Rob for all the effort in explaining me alternate solutions!
Will try if the fix work in Sketchup and report here for future reference if anyone else has this same problem.
RL.
-
Hi Rob,
As promised, I did the check with your technique, and to be fair I was not doing it right the first time.
Here I uploaded two screenies, all materials are using the same bump with different colors in diffuse, I have changed some bump accent and repeat texture but just for the sake of the original being too big so it was clearer for the test this way.
So there are some curious results.
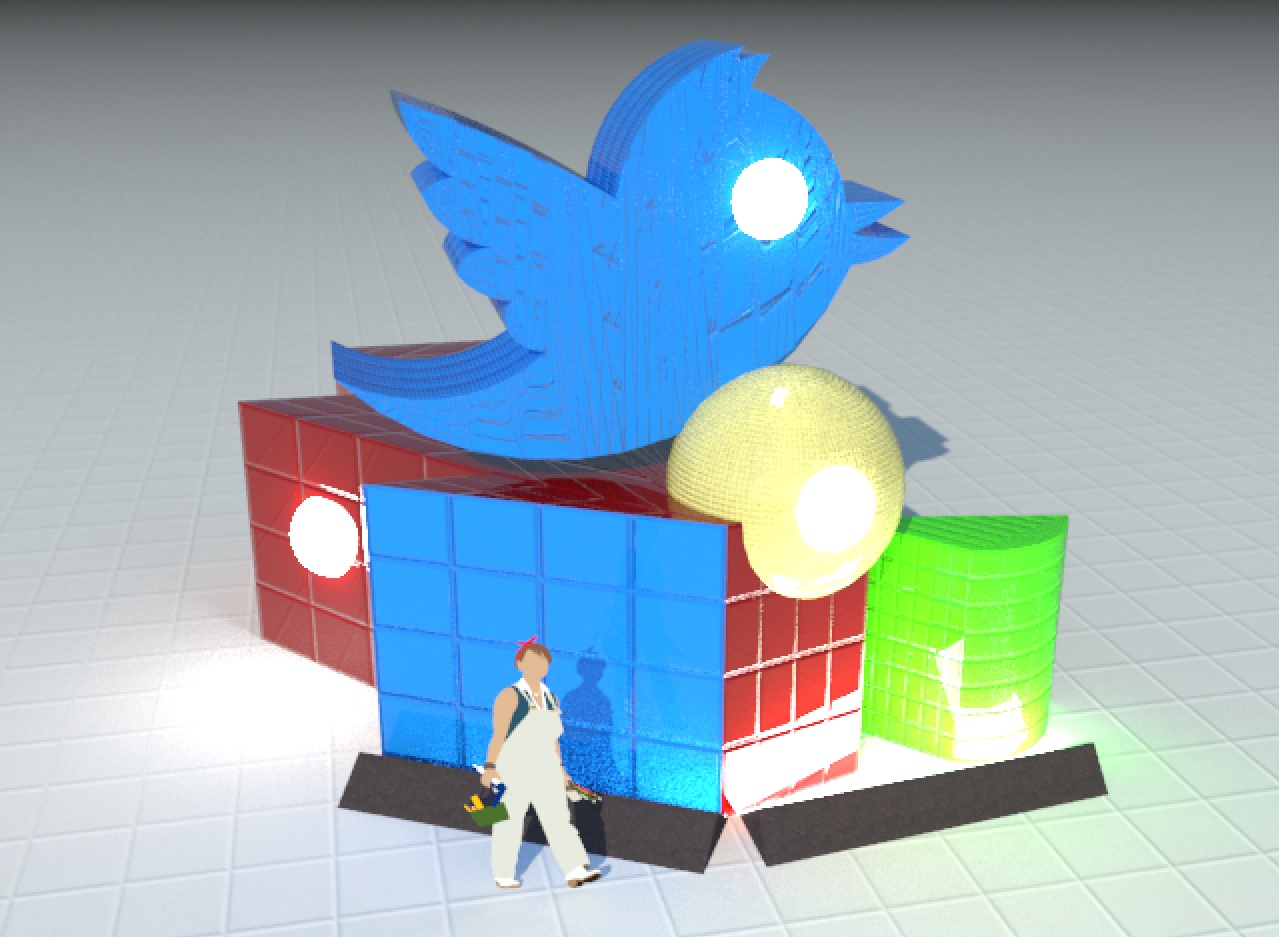
The first screenie shows clearly where the mess comes up, I made that twitter shape using just the curved angles tool plus a final pull to give volume. Curious thing is, that the inner side of the tail looks showing a quite ok bump (on a second thought and checking both render results, it looks quite different on the second one), and even more mysterious, the green element on the right also has a curved angle + couple straight lines + pull and it does not display a messed UVW map.
In here I followed your technique, and as it can be seen the results are positive.
I would like if possible though, to avoid this kind of fixes and get to the heart of the problem. Looks like after some curved shapes + pulling the element, this looses/messes with the UVW map somehow. The question is:
Is there any way in Sketchup to apply a UVW redraw to an element of our scene out of the box (without any plugin)?.
Thanks,
RL.
-
Couple more details to mention.
a) Not sure why I do not get the TEXTURE option in the menu after right-clicking the faces, I only get it in the front blue face (indicated in the screenshot).
b) It is curious that even though having applied the same texture (bump details in the screenie), the bump (+ diffuse since is the "fixed" material) appear so different in two sides that have not so different area, 5.13m2 for the square and 4.68m2 for the bird.
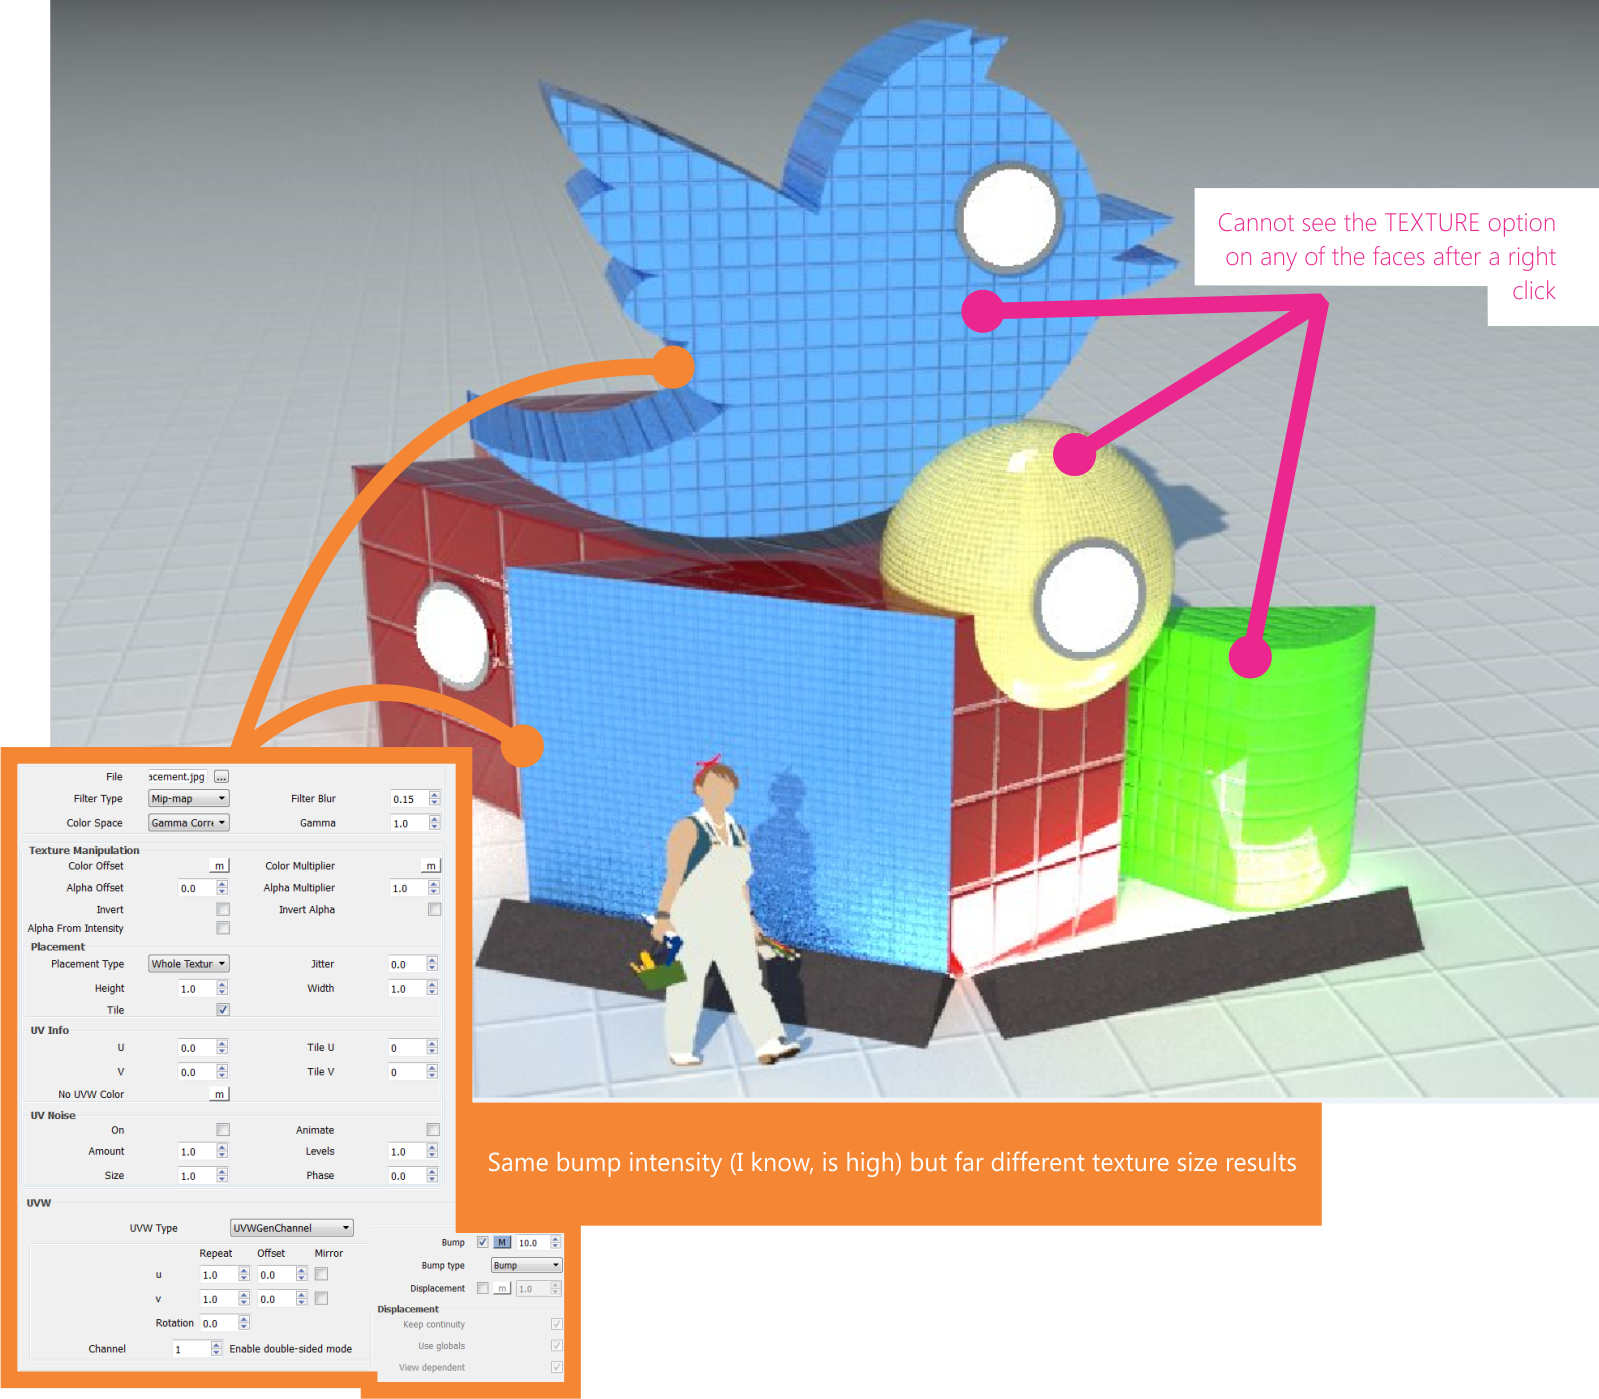
Just more data in case leads someone to an answer for this problem.
RL.
-
A) Are you selecting the actual face? Try turning on "Show Hidden" and select one portion of the curved face, then right-click.
B) Texture size is not determined by Vray Material, but by Sketchup Material size.
-
Hi Rob, to answer your questions:
@rspierenburg said:
A) Are you selecting the actual face? Try turning on "Show Hidden" and select one portion of the curved face, then right-click.
Yes, I usually go to EDIT GROUP then CTRL + A (Which select all the faces) and I apply the mat, but I have tried it face by face. Recently I have discovered tho, that those faces I can access to via the TEXTURE sub-menu when I click the right mouse button, I can fix the bug by simply applying PROJECTED.
Where is this "Show Hidden" option? Do you refer a polygonal selection (and not the whole face)? If so, I do not know where to access to that layer.
@rspierenburg said:
B) Texture size is not determined by Vray Material, but by Sketchup Material size.
Texture size (VRay mats only) can be determined either by Sketchup Material > EDIT Menu as you mention, or also by accessing the VRay Material Editor, going into the texture map we are want to change (diffuse or any other) and play with the values in the very bottom UVW section where it says REPEAT with U and V values (lesser value = bigger texture result) and also the rotation of the texture map.
I tend to adjust the values via VRay Material Editor, since if the material is saved/packed (IIRC) it keeps the property and there is no need to re-adjust the size via Sketchup Material when we use it in a different scene.
Regards,
RL.
-
I have digged a bit more into this, and realized that in order to be able to access to the TEXTURE menu on right mouse click, you need to have a diffuse map applied to the material, any other map will just not count and you will not get the TEXTURE option... Didn't know this fact.
RL.
-
Hi, I thought I should post an update.
In the end I have found that the best and fastest way to map the textures properly is with the help of SketchUV plug-in from Whaat, available at https://extensions.sketchup.com/en/content/sketchuv and that in case it gets complicated, combining the fix from Rob rspierenburg mentioned above in this same thread does wonders.
So a two-level solution for the problem, depending on the disaster grade that your geometry brings to the material
Hope it helps, God knows I have been bugged by this one...
RL.
Hello! It looks like you're interested in this conversation, but you don't have an account yet.
Getting fed up of having to scroll through the same posts each visit? When you register for an account, you'll always come back to exactly where you were before, and choose to be notified of new replies (either via email, or push notification). You'll also be able to save bookmarks and upvote posts to show your appreciation to other community members.
With your input, this post could be even better 💗
Register Login


Advertisement