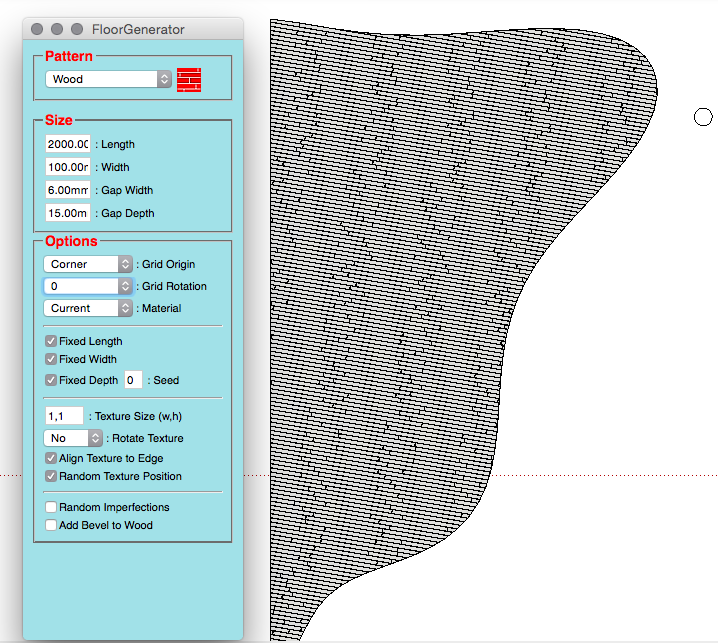
[Plugin] FloorGenerator ( Updated 6-Apr-2017)
-
Hello, i want to ask, is this plugin already avalible for sketchup 2015?
-
@arqjonatan said:
Hello, i want to ask, is this plugin already avalible for sketchup 2015?
In its PluginStore listing 'More Info' it says,
*Compatibility: Pre-8, v2013, ***>=v2014
Since 2015 is > 2014 seems to me it will be ! -
Maybe stupid but how do you rotate direction of the floorboards. However I try I get same direction.
-
@sepo said:
Maybe stupid but how do you rotate direction of the floorboards. However I try I get same direction.
By using the Grid Rotation option of 0,45,90. 0 and 90 usually work without a problem, but for some reason yet to be determined, 45 often fails. The 0 option always causes the pattern to be aligned with the longest side of the face.
-
OK, tried it and did not work for me. O makes it on the short side....will try to redraw the geometry and see what comes out of it. thanks
-
@sepo said:
OK, tried it and did not work for me. O makes it on the short side....will try to redraw the geometry and see what comes out of it. thanks
If you are unable to achieve the results you want, please post or PM the file to me. Please save as version <=2014.
-
Today I tried again the same geometry and it worked...joys of computing..
How do you go about texturing individual boards without going into each board? Is this actually possible? What I have done so far applied texture to whole face and than executed plugin. BTW great plugin. Much nicer than working with displacement in render time. -
@sepo said:
Today I tried again the same geometry and it worked...joys of computing..
Something I have experienced many times.
How do you go about texturing individual boards without going into each board? Is this actually possible? What I have done so far applied texture to whole face and than executed plugin.
The original face is sub-divided by a grid and new faces created to create the width and depth of the gaps. These new faces don't automatically inherit the material of original face so it is necessary to apply the desired material to each new face. Applying the material to the original face only defines that material as the current material.
BTW great plugin. Much nicer than working with displacement in render time.
-
Sdmitch This plugin is AMAZING! I am surprised it is free! the more i use it the more powerful i find it.
One thing that would be really great to see is a randomflip to the textures option. This would increase the quality of rendering substantially.
Great job again!
-
@unknownuser said:
Sdmitch This plugin is AMAZING! I am surprised it is free! the more i use it the more powerful i find it.
One thing that would be really great to see is a randomflip to the textures option. This would increase the quality of rendering substantially.
Great job again!
Wouldn't Random Rotate 180 do that?
-
I got a question. Im trying to make this wooden denk which has a organic shape. Now i read in the manual that the direction of the planks is in a angle of the longest side. I also set the texture 90 to the longest side. Now each time the planks seems to be set in some kind of angle, looks 45deg. (See attachment)
How can is set the planks to be 90deg to the longest side.(left long edge) Or is it better to make a big rectangle than do the flooring and intersect a shapes based on the attachment.

-
@rombout said:
I got a question. Im trying to make this wooden denk which has a organic shape. Now i read in the manual that the direction of the planks is in a angle of the longest side. I also set the texture 90 to the longest side. Now each time the planks seems to be set in some kind of angle, looks 45deg. (See attachment)
How can is set the planks to be 90deg to the longest side.(left long edge) Or is it better to make a big rectangle than do the flooring and intersect a shapes based on the attachment.
Setting Grid Rotation to 90 should do that. Since "Corner" is the Grid Origin selection, make sure that you pick a point that is close to a corner that the long edge is part of. The lower left corner for instance. Otherwise use "Center" for the Grid Origin.
Either options works as expected for me.
-
I just found this truly amazing plugin.
A question that I have - Is it possible to designate a edge to which the floor pattern will be aligned. Otherwise is it possible to enter a Grid Rotation that is not preset.
-
@seasdes said:
I just found this truly amazing plugin.
A question that I have - Is it possible to designate a edge to which the floor pattern will be aligned. Otherwise is it possible to enter a Grid Rotation that is not preset.
I think I found the answer to my question a couple of posts above ie
"... make sure that you pick a point that is close to a corner that the long edge is part of ..."Is that correct?
-
@seasdes said:
@seasdes said:
I just found this truly amazing plugin.
A question that I have - Is it possible to designate a edge to which the floor pattern will be aligned. Otherwise is it possible to enter a Grid Rotation that is not preset.
I think I found the answer to my question a couple of posts above ie
"... make sure that you pick a point that is close to a corner that the long edge is part of ..."Is that correct?
Yes, if you want the pattern to start in a corner. If you choose "Center" for the origin, you can click anywhere on the face and it will find the longest edge and align to it.
-
This is a wonderful plugin. I wonder if it could be made even better by adding features like this https://www.youtube.com/watch?v=plnmowRKumE
-
@sdmitch said:
@rombout said:
I got a question. Im trying to make this wooden denk which has a organic shape. Now i read in the manual that the direction of the planks is in a angle of the longest side. I also set the texture 90 to the longest side. Now each time the planks seems to be set in some kind of angle, looks 45deg. (See attachment)
How can is set the planks to be 90deg to the longest side.(left long edge) Or is it better to make a big rectangle than do the flooring and intersect a shapes based on the attachment.
Setting Grid Rotation to 90 should do that. Since "Corner" is the Grid Origin selection, make sure that you pick a point that is close to a corner that the long edge is part of. The lower left corner for instance. Otherwise use "Center" for the Grid Origin.
Either options works as expected for me.
Not sure now what did help, i tried texture settings to 90 deg earlier. When selecting the mesh for flooring, do you need to select a corner (see green circle) or just hover and press enter. When i over and noticed the green circle in a corner the planks are set correct.
Took some time but it works! and still about 100x faster than doing it manual

thanks for the advice
PS i noticed a texture in that BTW_Textures.zip i think its from cgtextures, you cant add this officially

-
Glad it finally worked for you. The corner/longest side selection wasn't handled well and I need to correct that.
-
Great plugin Sdmitch! Very useful for architecture and game creation.
i-block,diamond and hexagon patterns were excellent.
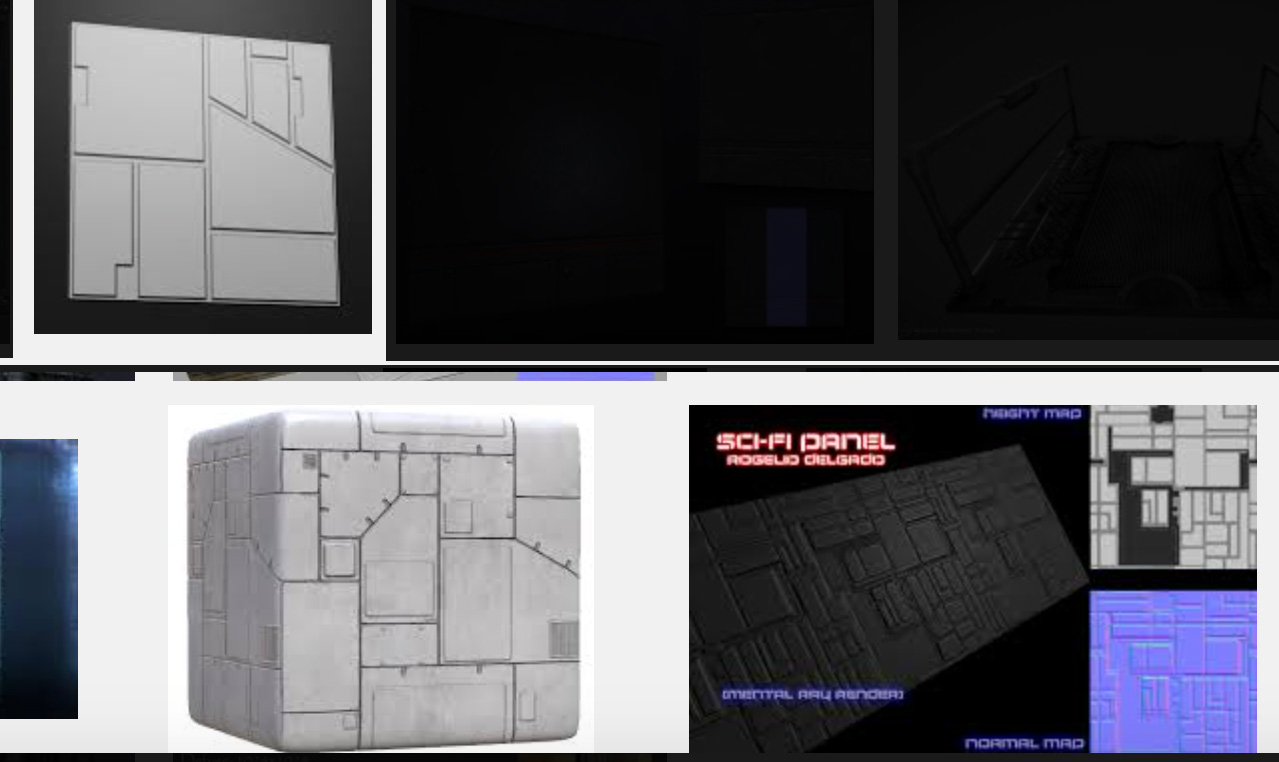
Just wondering if it is possible to create something like simple sic-fi panels
see attached examples a few simplified diagonals will be great.
Thanks again.Cheers

-
@srx said:
This is a wonderful plugin. I wonder if it could be made even better by adding features like this https://www.youtube.com/watch?v=plnmowRKumE
that would be cool indeed. In the mean time why don't you use shapebender?
Advertisement


