Spliting a Solid
-
I know this is a dumb question, I have seen it before but cannot find it any more so here goes:
I would like to split a solid object, say a cube. I know that I can create something like a rectangle that is bigger than the cube and then use the Split in the solids tools. However, if I just create a rectangle and then try it, I get the message that one of the objects (the rectangle). I have tried several things to turn the rectangle into a solid object, in fact if I click on the rectangle and look at the Entity Info, it has the information that makes you believe that it is a solid. I know Dave R has demonstrated this (as have others) before but I am doing something stupid that keeps this from working.
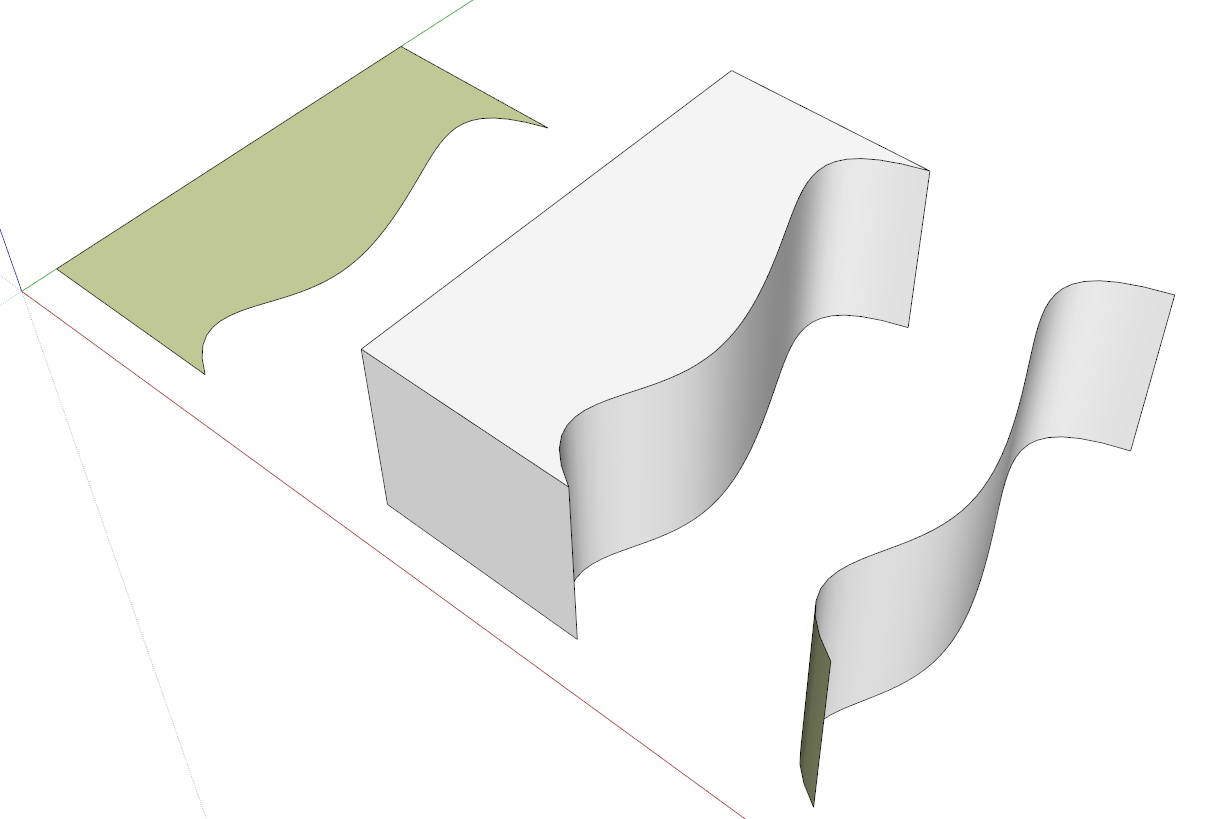
I also remember another post by Dave R where he did a "wavy" rectangle to help someone cut of bristles in a brush. I would also like to know how he created the "wavy" rectangle as I see a use for that as well.
Again, I know this is dumb and redundant but I have a need to do this and cannot remember how to do it.
-
A rectangle cannot be a solid as it has no volume. Give it some thickness and it can be a solid.
However, a rectangle is a plane and can be intersected with other geometry. This intersection can be used to split/slice/segment etc
Solid tools are part of the pro version of sketchup and one might say you need to learn the basics before you can really understand the pro tools.
-
As Box says, a rectangle cannot be a solid. One of the key definitions of a solid is that every edge is shared by exactly two faces. No more, no less.
You can still use a rectangle to cut through your box using Intersect Faces. It would be essentially the same method I used with the brush you're thinking of. the common way to do it would be to draw the rectangle and place it as a cutting plane where you want to make the division. If the box is a group or component, open it for editing and select the faces that need to get cut, context click and choose Intersect Faces>With Model. You will get edges where the cutting plane passes through those select faces. Be aware, though, there'll be no face created in the cut.
My preferred way would be to put the cutting plane in place, select it, use Edit>Cut. Open the box component for editing and use Edit>Paste in place. Select the cutting plane and the involved faces of the box, context click and choose Intersect Faces>With Selection. The delete the outer edges of the cutting plane if they extend beyond the faces of the box. The difference in this method compared to the first is that there will be a face left inside; it's the remains of the cutting plane, and Intersect Faces>With Selection limits the intersection so you don't run the risk of getting unneeded intersections from other touching geometry if there is any.
From there you can split the thing up. How you do that exactly depends upon what you are doing. I would most likely drag a left to right selection box around the geometry on one side of the split and make that a component making sure to tick the box for Replace selection with component. Then select the geometry on the other side and make it a component.
Very likely you'll need to heal a face in one of the components because the face in the cut will have been included in the other component. It's easily fixed by tracing an edge with the line tool. If you make components, you can drag a copy of the component away out into the clear and edit that one knowing you'll also be editing the original. Then discard the copy of the component when you've finished. If you make groups instead, don't bother making the copy. You'll need to edit the original instead.
As for the wavy surface, you just have to turn your think around a bit.

-


-
I wanted to add a great deal to Dave's post but in the long run all I had was this

Advertisement


