"Growing" a face
-
Hi all,
Not sure if this is a noob question or not, but I guess this is the right place for it.
I'm generating some irregularly shaped faces for a project, and i'd like to "grow" them, by which I mean extend them in every direction evenly, so that the face is larger in every direction by a specified amount, but remains in the same plane.
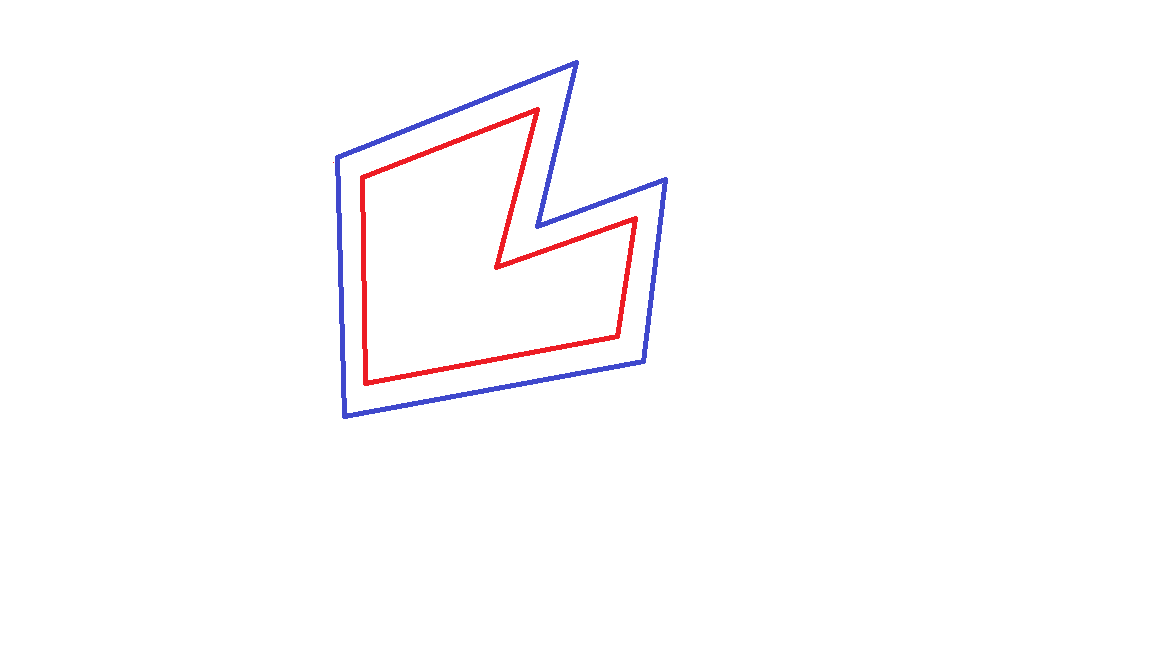
It's difficult to explain this clearly, so I did a quick MS paint job, attached. The red shape would be the original face, the blue shape would be the new face, extended in every direction by the same amount, but coplanar with the original face.
Any ideas? I think I could write some ruby to do this, but it would be HARD to get right, particularly when you have concave corners and the "grow" amount is greater than the distance between vertices - you have to detect edge crossing. I don't want to have to try if someone else has already done it.
Thanks for any help,
Phil
-
Use the native Offset tool on a preselected face or collect of coplanar edges.
Drag the offset edges that temporarily display, in/out of the original perimeter.
You can complete this offset 'freestyle' or by snapping onto another object or guide etc...
The VCB/Measurement-box will show the distance you have just offset, if you immediately type a new value+<enter> it will make the offset as you now specify. You can retype in values as many times as you want. Once you select another tool the offset is fixed.
If you have just offset a face say '10' units, and later want to do some similar offsetting you need not go through the above steps for these other faces, instead you can activate the Offset tool with on preselection and double-click on the faces in turn, which will make each one offset by the last used amount [10]... This 'remembered' value also applies to PushPull...
If you want to 'grow' the face and remove the original perimeter double-click on the original face to select it and its edges, then hold Shift+Ctrl and click on the face itself to deselect it. Press <delete> to remove the original face's edges. The original and donut face now merge into one face that uses the new offset perimeter... -
TIG has you covered... with Offset. But after your faces get a little crazier... You'll want TIG's Smart Offset. Found here http://sketchucation.com/resources/pluginstore?pln=TIG_Smart_offset
-
TIG gets the points! I just didn't know what the sketchup word for this was. I will be using his plugin I think, as I want to call it from code (which you can't with native offset) and some of my shapes are a bit crazy.
Thanks to you both for your help!
Hello! It looks like you're interested in this conversation, but you don't have an account yet.
Getting fed up of having to scroll through the same posts each visit? When you register for an account, you'll always come back to exactly where you were before, and choose to be notified of new replies (either via email, or push notification). You'll also be able to save bookmarks and upvote posts to show your appreciation to other community members.
With your input, this post could be even better 💗
Register Login


Advertisement