[WIP] NYC IRT R26 Train
-
Thought it's about time for me to add an update on my progress with this. I been very busy lately with other things.
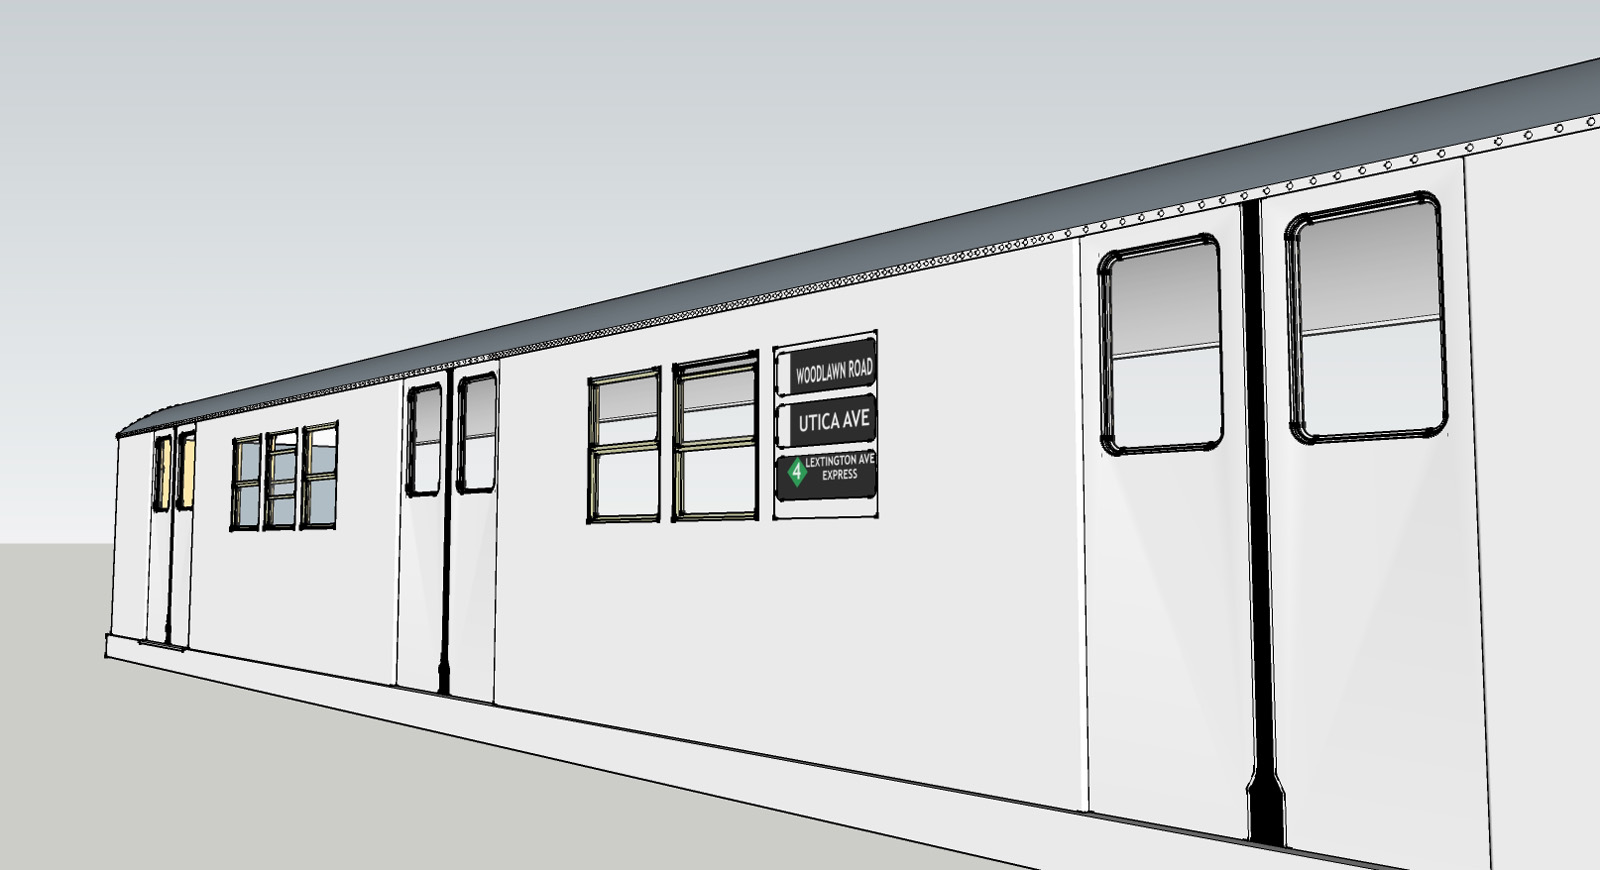
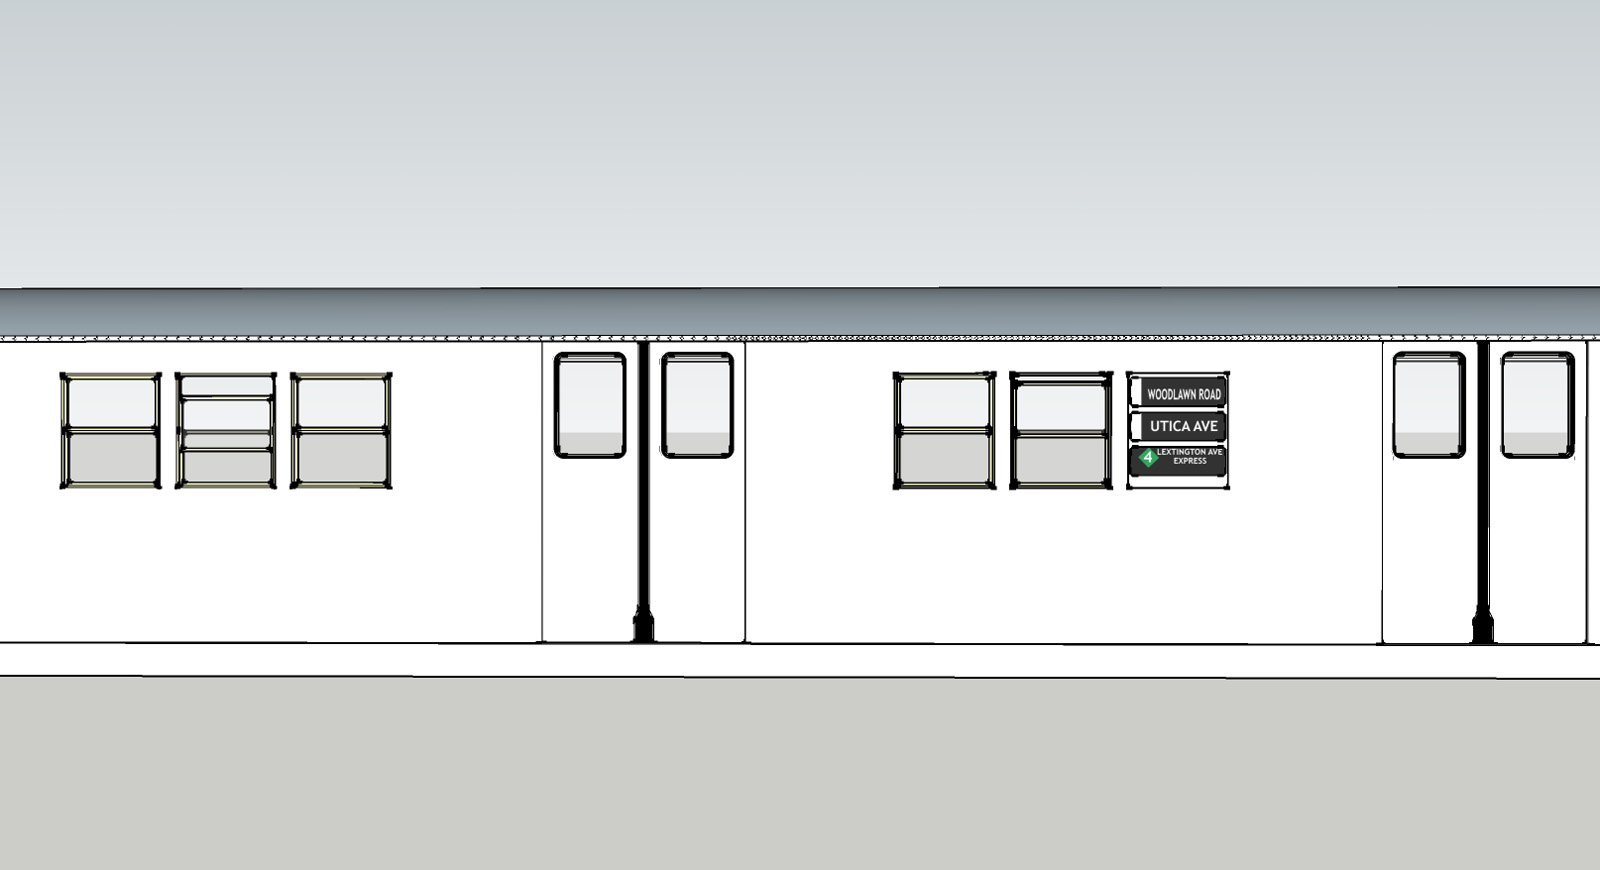
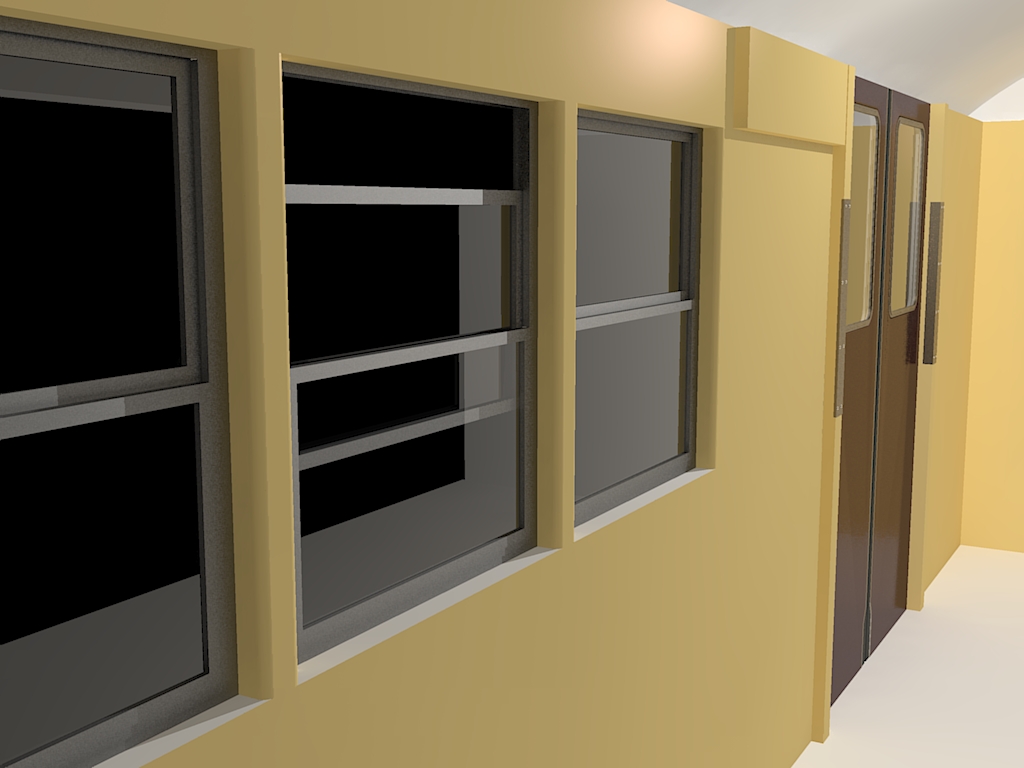
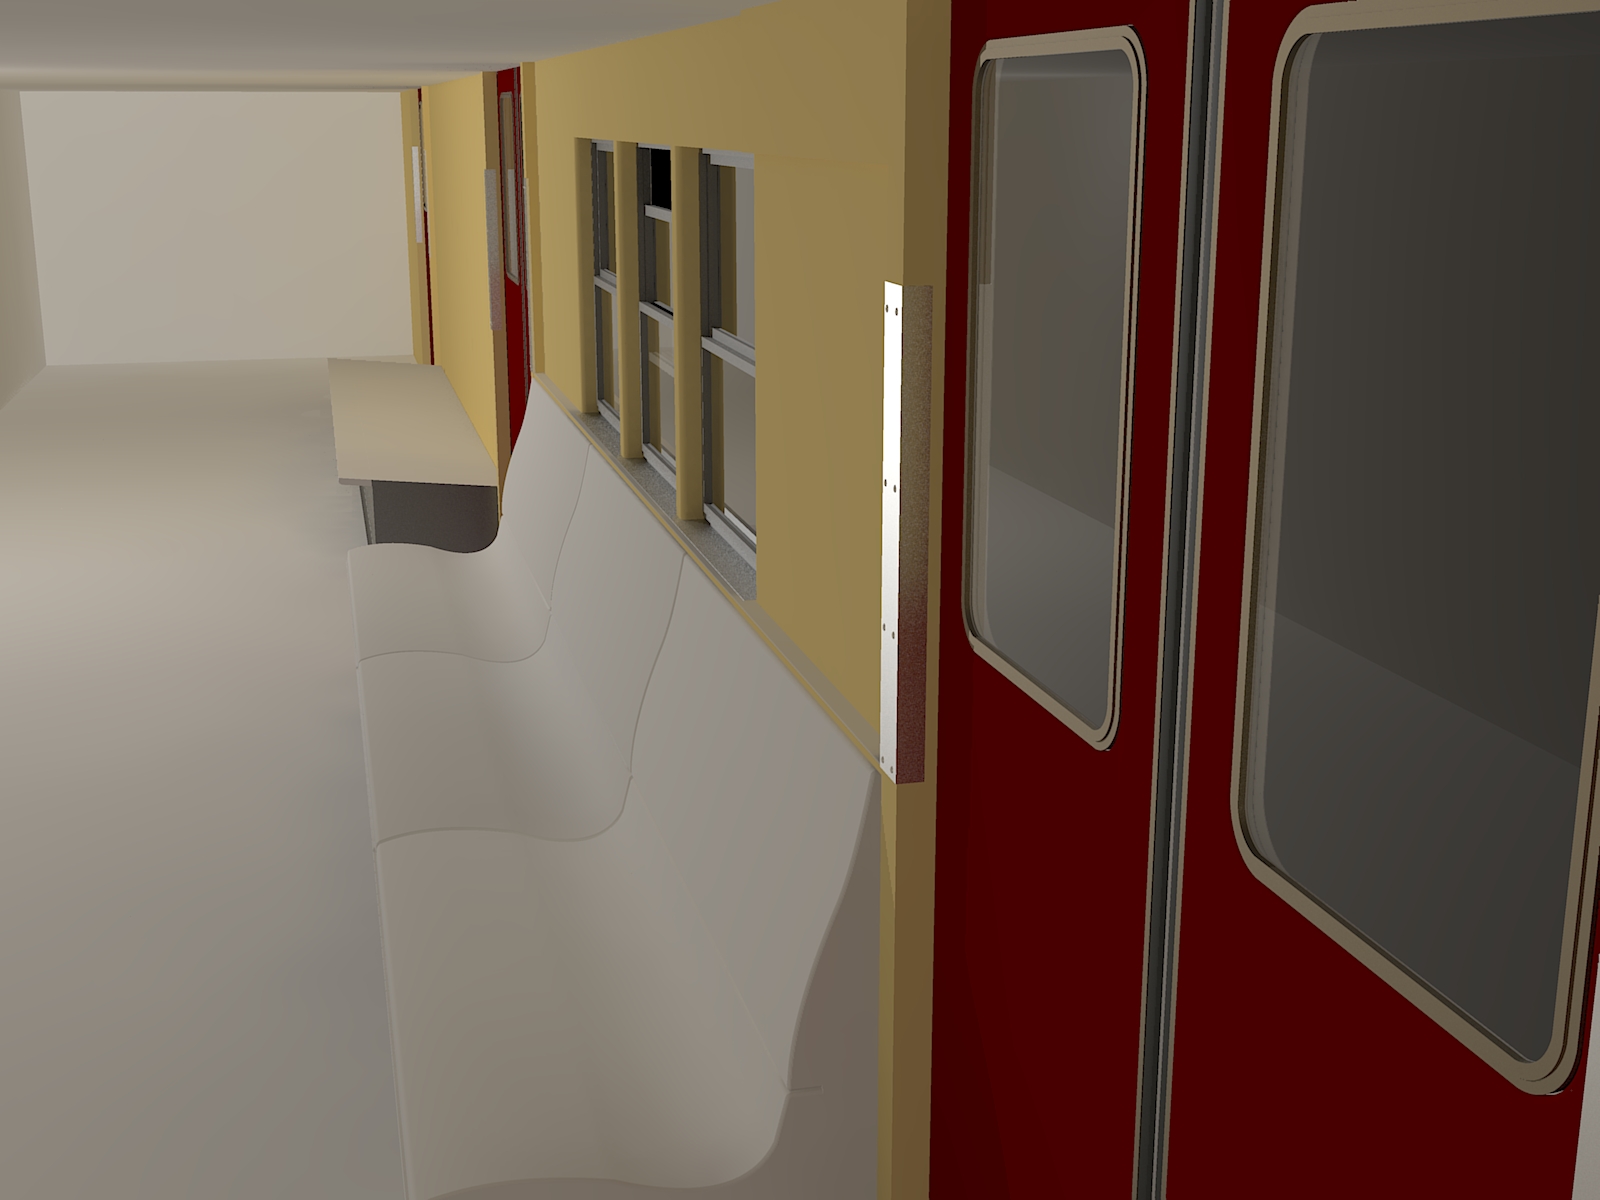
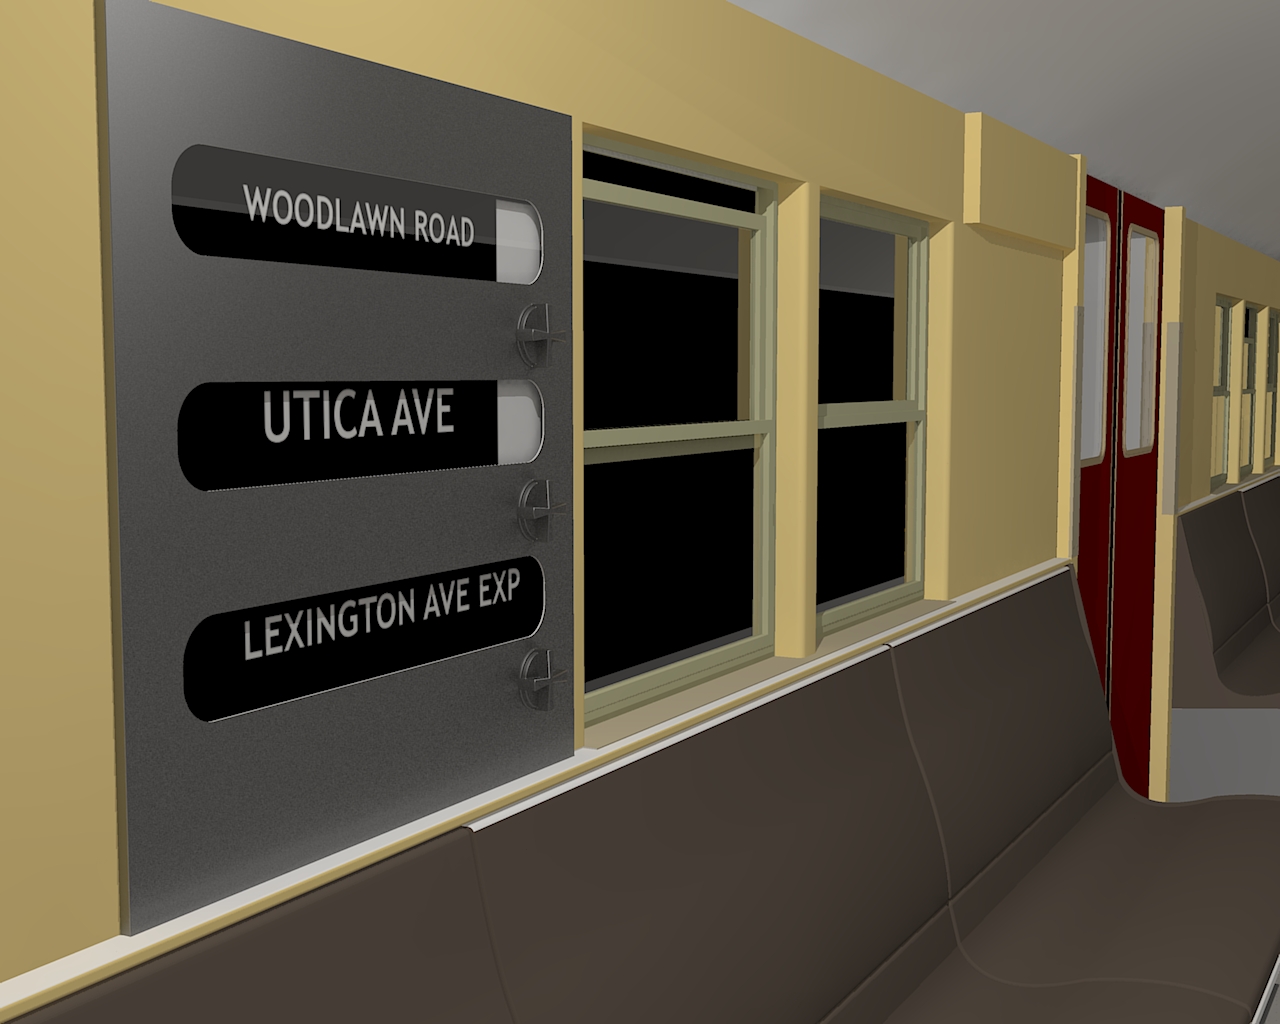
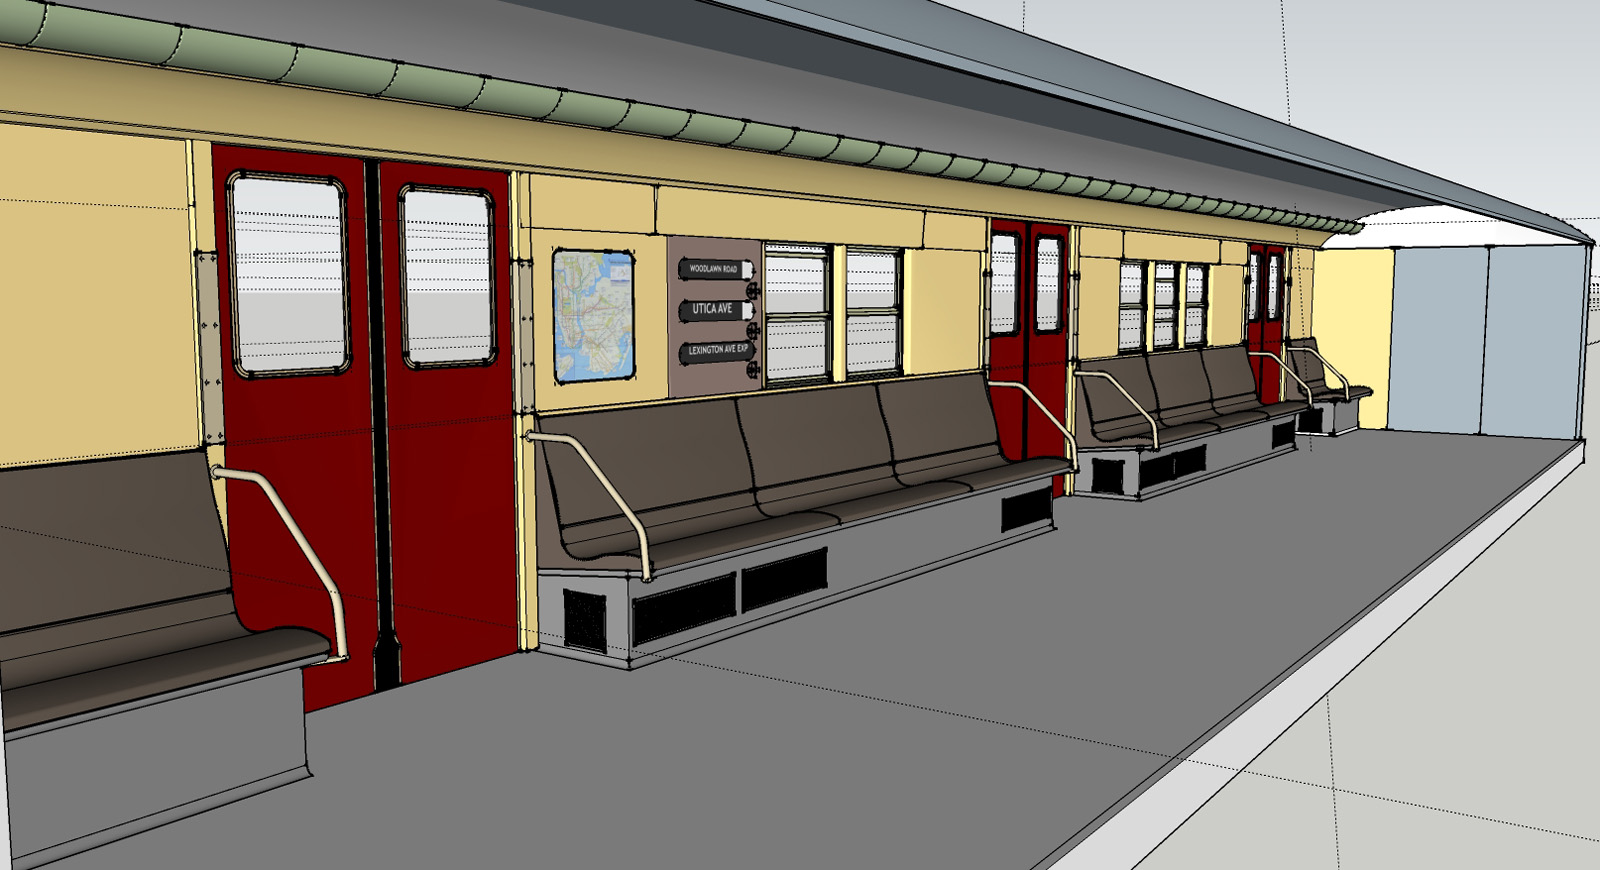
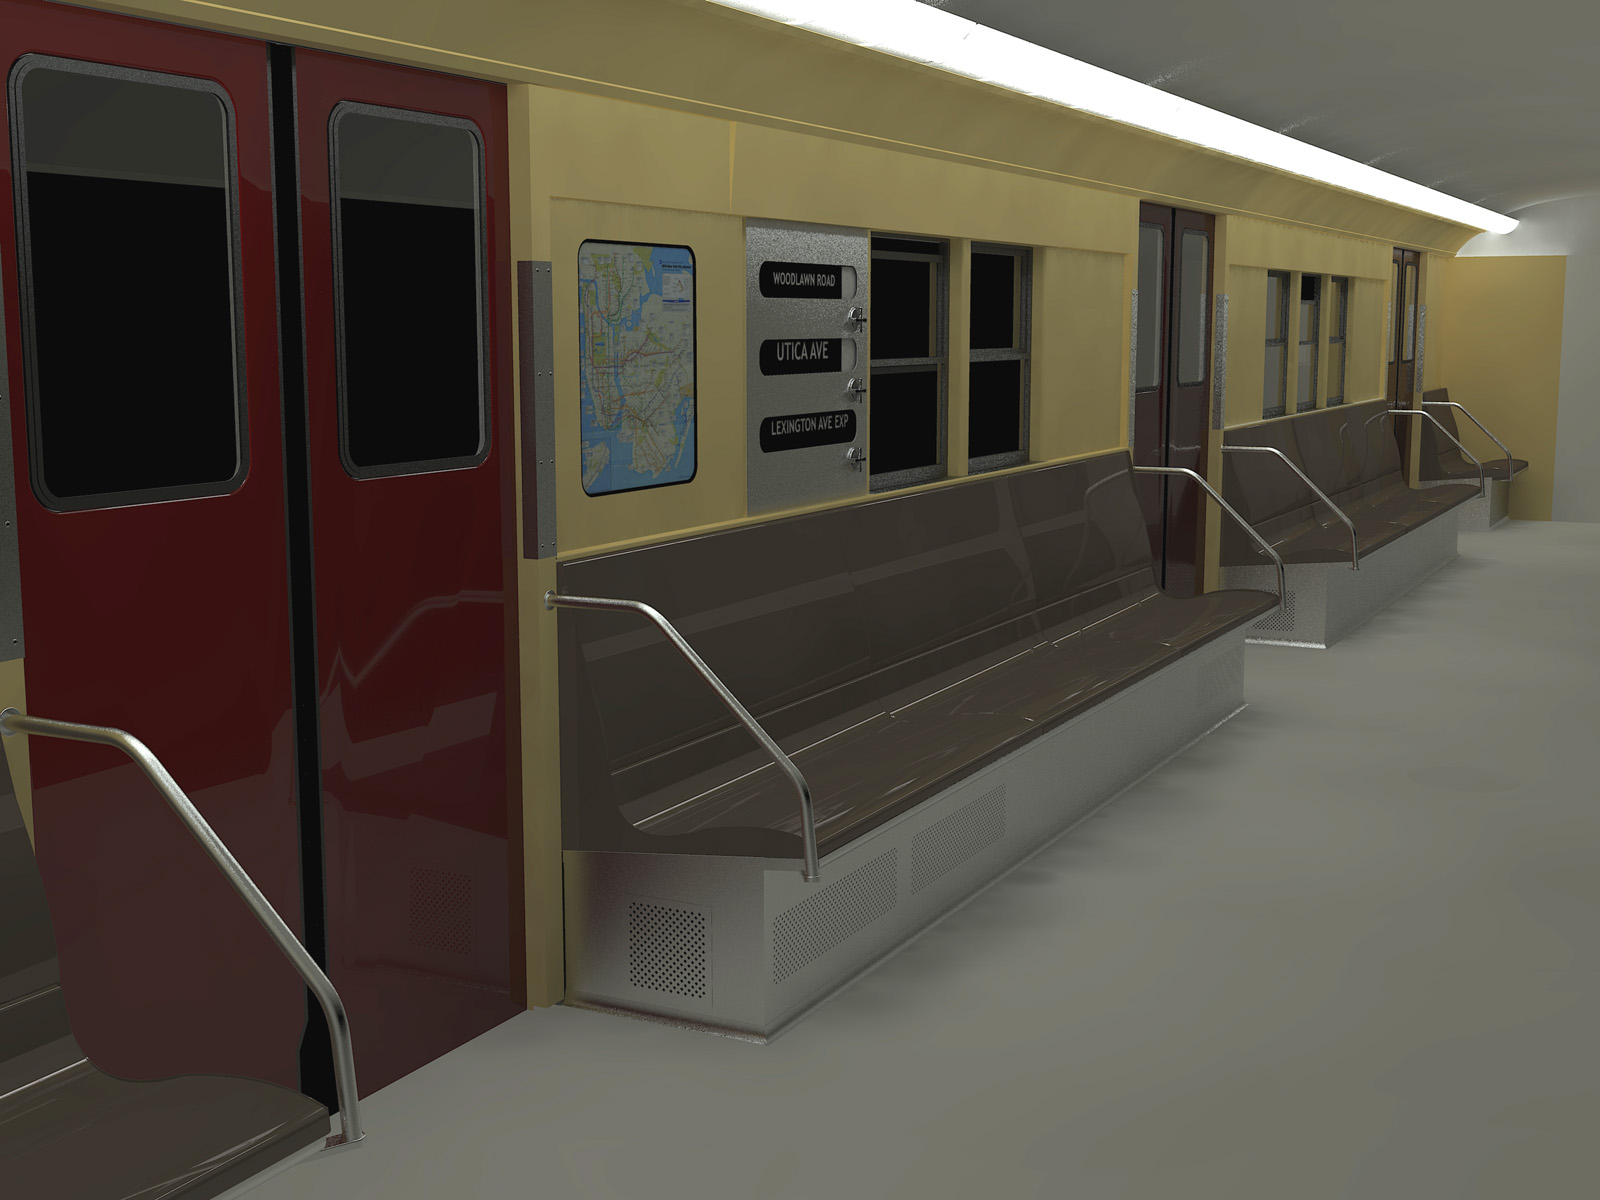
In my spare time I been working on the interior. It's not easy getting proper material for reference as these subway cars were retired from service years ago and sadly most are at the bottom of the Atlantic. Anyway, here are a few pics of my work in progress. I'm still working on the lights to try an d get them close to how they would look in real life. They are florescent tubes inside a ribbed Plexiglas casing. You wont see it here in my Sketchup jpeg but in Kerkythea, I replaced the green color with a Plexiglas material.
-
very nice.
-
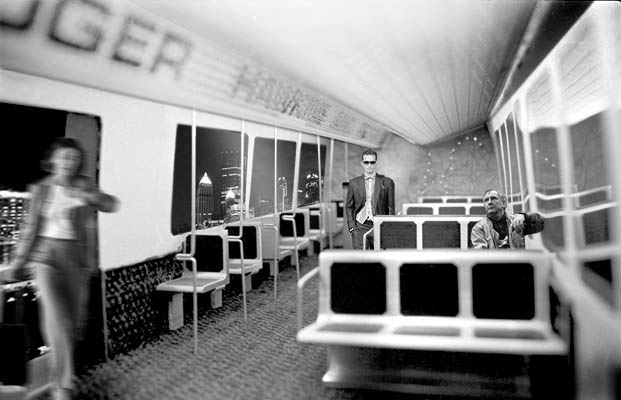
Reminds me of my senior thesis project in Industrial Design at Carnegie Mellon University 40+ years ago in the bad-old-days before sketchUp. My design partner, Peter Gary (now design professor at King Mongkut University's School of Design and Architecture), and I scratch built the whole model in about a week.



-
Sorry about the duplicate images. They are not in the HTML. The computer gods are angry. Some part of the POST RAPTURE phenomenon.
-
Very nice Mistro. The last render is looking pretty realistic.

I'll be following your progress on this.

-
they have a red train at the transit museum but i don't think it's an r26..
maybe time to rent some scuba gear in order to get the final details.

-
Thanks everyone!
@unknownuser said:
they have a red train at the transit museum but i don't think it's an r26..
maybe time to rent some scuba gear in order to get the final details.

Lol! I'm mad that they dumped them. I made a trip to the Transit museum too when I first started this project hoping to get a better idea of the interior. After looking at the 2 cars that came close, I found that the seventies MTA financial crisis caused a lot of mixing and matching of cars. Interiors too. I think I can get away with some modified details as long as I keep the main parts accurate. I have a friend who is a train operator. I will see if he can get me some material we cannot find on the web.
It may be a little while before the next update as I am about to move. I will try to squeeze one more in before I pack it up.
-

Hello everyone. It's been way overdue for an update on this project. Sorry for the long delay. It's been a crazy year for my wife and I. She got sick with Transverse Myelitis and I had to take some time off to take care of her. She's getting better now thank God and hopefully things will get back to normal soon.I'm back in full swing with my rig and my adventure into the 3D world. I recently got back to work on my train. I decided to shift my attention to the exterior front/back end. This train model looks so simple but it has many irregular angles and lots and lots of rivets and detail. I hope Sketchup does not quit on me before I finish this model. I'm also having some trouble with a part I thought would be simple. I still consider myself new to this and have some discipline and methods to learn.
I decided to work on half of the model instead of the whole thing at once since the train is basically the same on both sides and front/back. Once the half is done I will do a copy and flip. Did an experiment and it works perfectly. I had to tare off the roof too. The front/back was not the right size or at the right angles (very subtle). I didn't notice before that would've made the signage too small or boxy in the front. So far I got the front/back end of the roof sorted.

I made a place holder shape to aid in the construction of the gate thingy on the front/back ends due to the irregular and subtle angles. I then made it into a component, saved it, opened a new document and started modeling.

I'm 2/3 finished with this part. Those hinges were challenging for me. At first I was going to make the spring from an actual coil but went with donuts so I can do some shifting later on. This is a semi-top view to show the basic shape and angles.


What I want to do is extrude 7/16" to line up with the arm that is connected to the hinges, do a offset and a push/pull to make a hollow effect in the back, round the front edges by 1/8" and get a smooth transition with the long oval shape and the joining segment with the curves. That slight offset between the arms is one of those subtle details I observed looking at the real thing. I was hoping once I rounded the edges it would be a smooth transition.
But when I attempt to do the push/pull, I realize that because of the angles, the push/pull will not work. I even tried the joint pp and vector pp. All did not end well.


How can I solve this? My hunch is that I would have to treat this as an organic object but don't know where to start. I'm stuck on a part I thought was going to be easy (maybe it is and it's just my newbness showing
 ).
).I could also use some advice on group/component management. I keep forgetting that Sketchup has a layers function. I'm finding myself making groups to avoid the stickies where I do not want to commit newly made parts. But then I find myself wanting two groups to become one but do not want to explode because I want my curves to stay in one piece. Any help is much appreciated and thanks in advance.
It's nice o be back.
-
Bumping this as I am revisiting this model to get it completed for a scene I'm building. I'm still stuck on this part. I know I can just do something generic but I want a proper model. Can anyone help with suggestions regarding my last post in how I can solve getting that shape I'm going for. I now have a few new plugins since I posted in this thread last. I tried going at it with Artisan but didn't get the results as I'm a new user of that plugin. I also have 1001Bits (if that would help here). Any help is appreciated.
-
If you share that part I think I can give you an advice after I find the best way .
If I understand well you want to extrude the outside perimeter you have drawn onto the surfaces, right ? I would go with Joint Push Pull but perhaps you will have to clean a bit the geometry because of the angle between the surfaces . -
@unknownuser said:
I tried last night to upload the file to share but it was too large (about 5 mb)How can I share a file larger than 4 mb here? I never did it before.
Add it to archive, zip or rar , it will drop like 70% .
Just that part is over 4 mb ? WOW, what do you have there !!And the gap you got , I think you can simply fill it by drawing a line from the opposite corners .
-
@ely862me said:
Add it to archive, zip or rar , it will drop like 70% .
Just that part is over 4 mb ? WOW, what do you have there !!And the gap you got , I think you can simply fill it by drawing a line from the opposite corners .
Ha. I did a purge just to make sure and yeah...it's around 5 mb for that part. Must be all the donuts that make up the coil. I knew from the start that this model was going to be a monster. I'm putting a lot of love into it so I spare no expense of polygons as much as my system can handle. But if I can figure a way to lower poly count and maintain top quality, I'm open. This is actually my second serious Sketchup project I started back in spring of 2011 so my modelling skills were still very newbish. I'm inspecting it now though to see what I would do differently if I started it today with all the plugins I discovered.
Thanks for you tip on closing that hole. It worked but I'm still not satisfied with the geometry. Also thanks for reminding me I can make a zip file

I bet this is easy for some in these forums....feel a "duh" moment coming on.
This is where I'm at now
Train Gate Thingy2.zipThis is the basic shape without rounded edges
Train Gate Thingy1.zipAnd this is a flat starting point in case the others are too messy to work with
Train Gate Thingy flat.zip -
Ok !
Things you need to take in consideration :- use components for all the geometry that repeat itself, like the donuts from the springs or the hinges, like you did with the bolts .
- clean the inside geometry
- smooth the geometry you are creating using the right click menu go to Soften/smooth edges
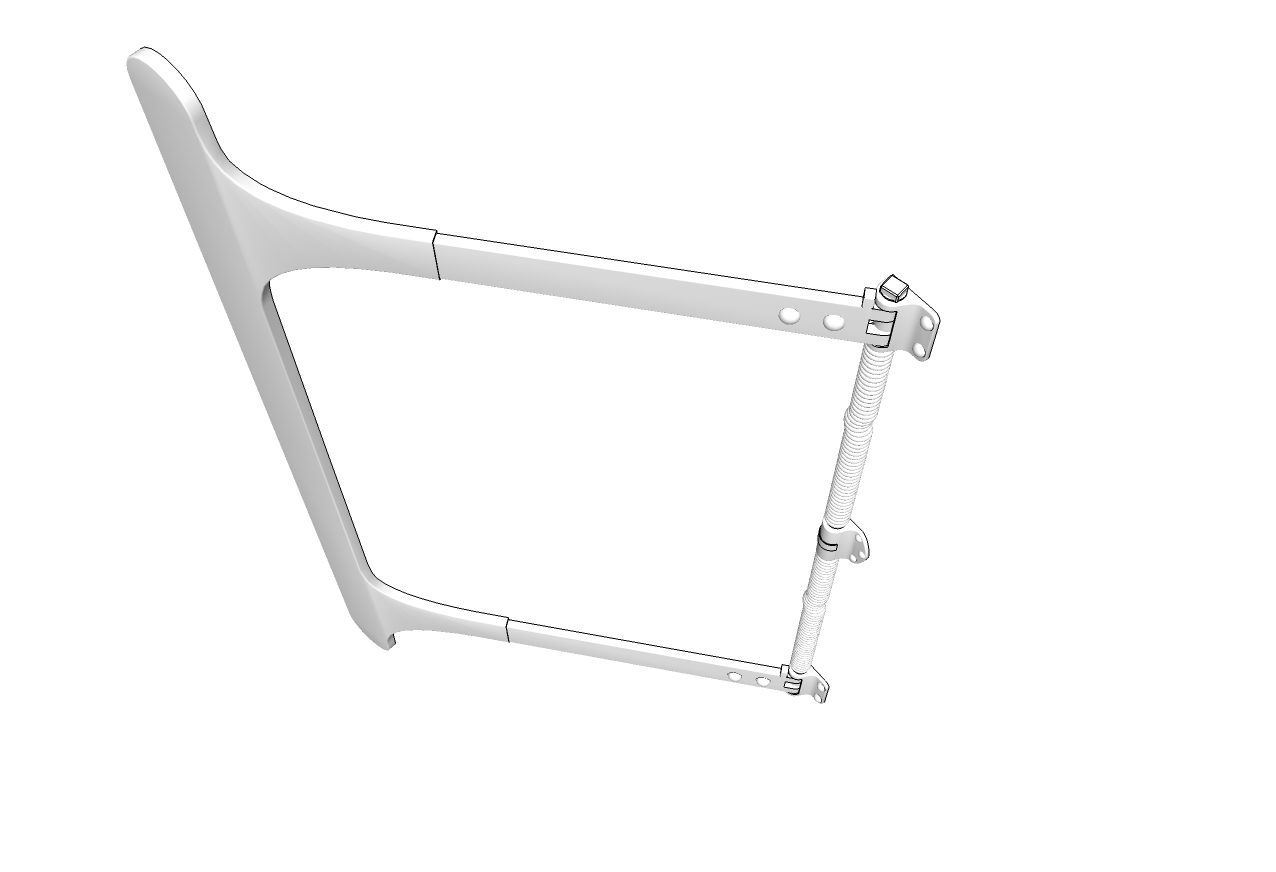
Coming to your specific problem . I used round corner to make the transition between the two planes smooth,then I used Joint push&pull to give thickness to the surface,then I used tools on surface to create the contour and pushed the inside part backward using again Joint push&pull .
At the final I used Round corner to make the outside edge round(although some geometry got erased, I redrawn it with the line tool and using move tool I closed the smaller edges) .If you have any questions feel free to ask !
Right now the model is about 600 kb !!
Train Gate Thingy flat ret.skp
-
@ely862me said:
Ok !
- smooth the geometry you are creating using the right click menu go to Soften/smooth edges
I used round corner to make the transition between the two planes smooth,then I used Joint push&pull to give thickness to the surface,then I used tools on surface to create the contour and pushed the inside part backward using again Joint push&pull .
Right now the model is about 600 kb !!
I'm Very impressed and humbled!


Still a little baffled at how you got it so clean. How did you get all the donuts to be components? And in doing so that brought the poly count down?
Thanks for your pointers, I will keep them in mind. I'm missing something with your first step of using round corner to make transition between the two planes. I assume you started from the flat version right? Did you smooth the geometry first before using round corner and if not, what edges did you select or did you tweak the joint pp parameters (tab button)?
I tried using round corner on the edges and keep getting broken geometry
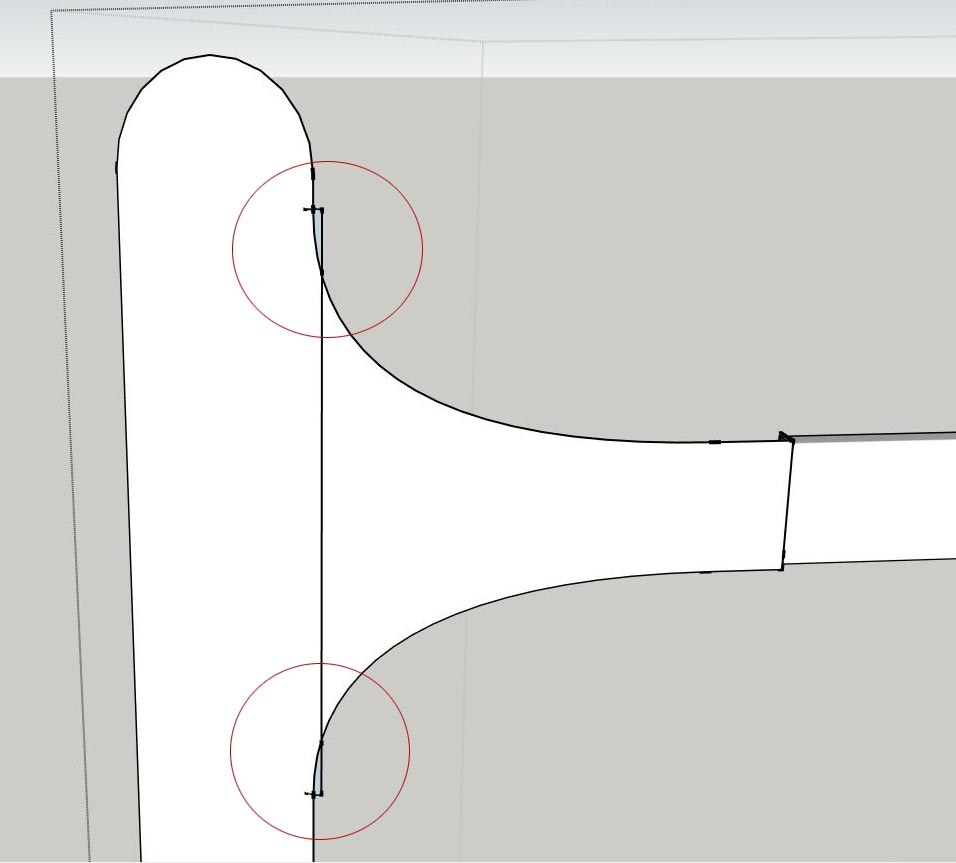
So I tried smoothing the edges that connect the 2 planes one by one and got a continuous face. I then tried the Joint push pull and the transition is not as smooth as yours.
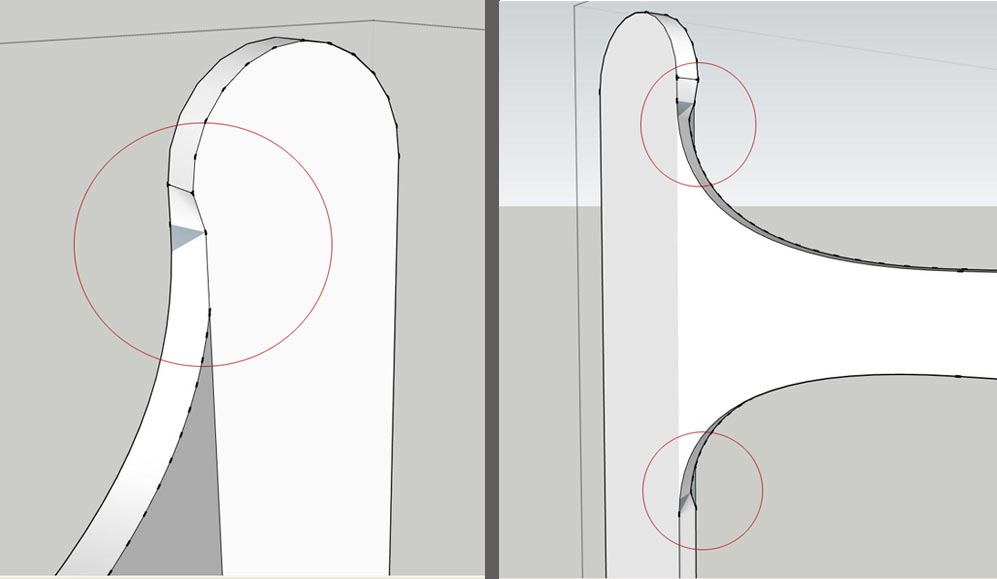
What did you do to keep the shape with the extrusion without getting that bubble effect?
-
How did you get all the donuts to be components?
I made another donut and made it component, then I created copies of it to match the others and I deleted the old ones(also I created a component for the top spring and made a copy to replace the lower spring)
And in doing so that brought the poly count down?
Yes, because it doesnt't matter how many components you have(of the same) they count nearly as one .I'm missing something with your first step of using round corner to make transition between the two planes. I assume you started from the flat version right?
Yep,but I kind of cheated a bit there-see the attached file.Did you smooth the geometry first before using round corner and if not, what edges did you select or did you tweak the joint pp parameters (tab button)?
Yes , I smoothed the geometry before using jpp. I don't know if it matters but at times I use 0 for the angle of influence(the lower parameter of the settings) .
So I tried smoothing the edges that connect the 2 planes one by one and got a continuous face. I then tried the Joint push pull and the transition is not as smooth as yours.
It almost never get smooth when you have complicated geometry, so you will have to retouch it.
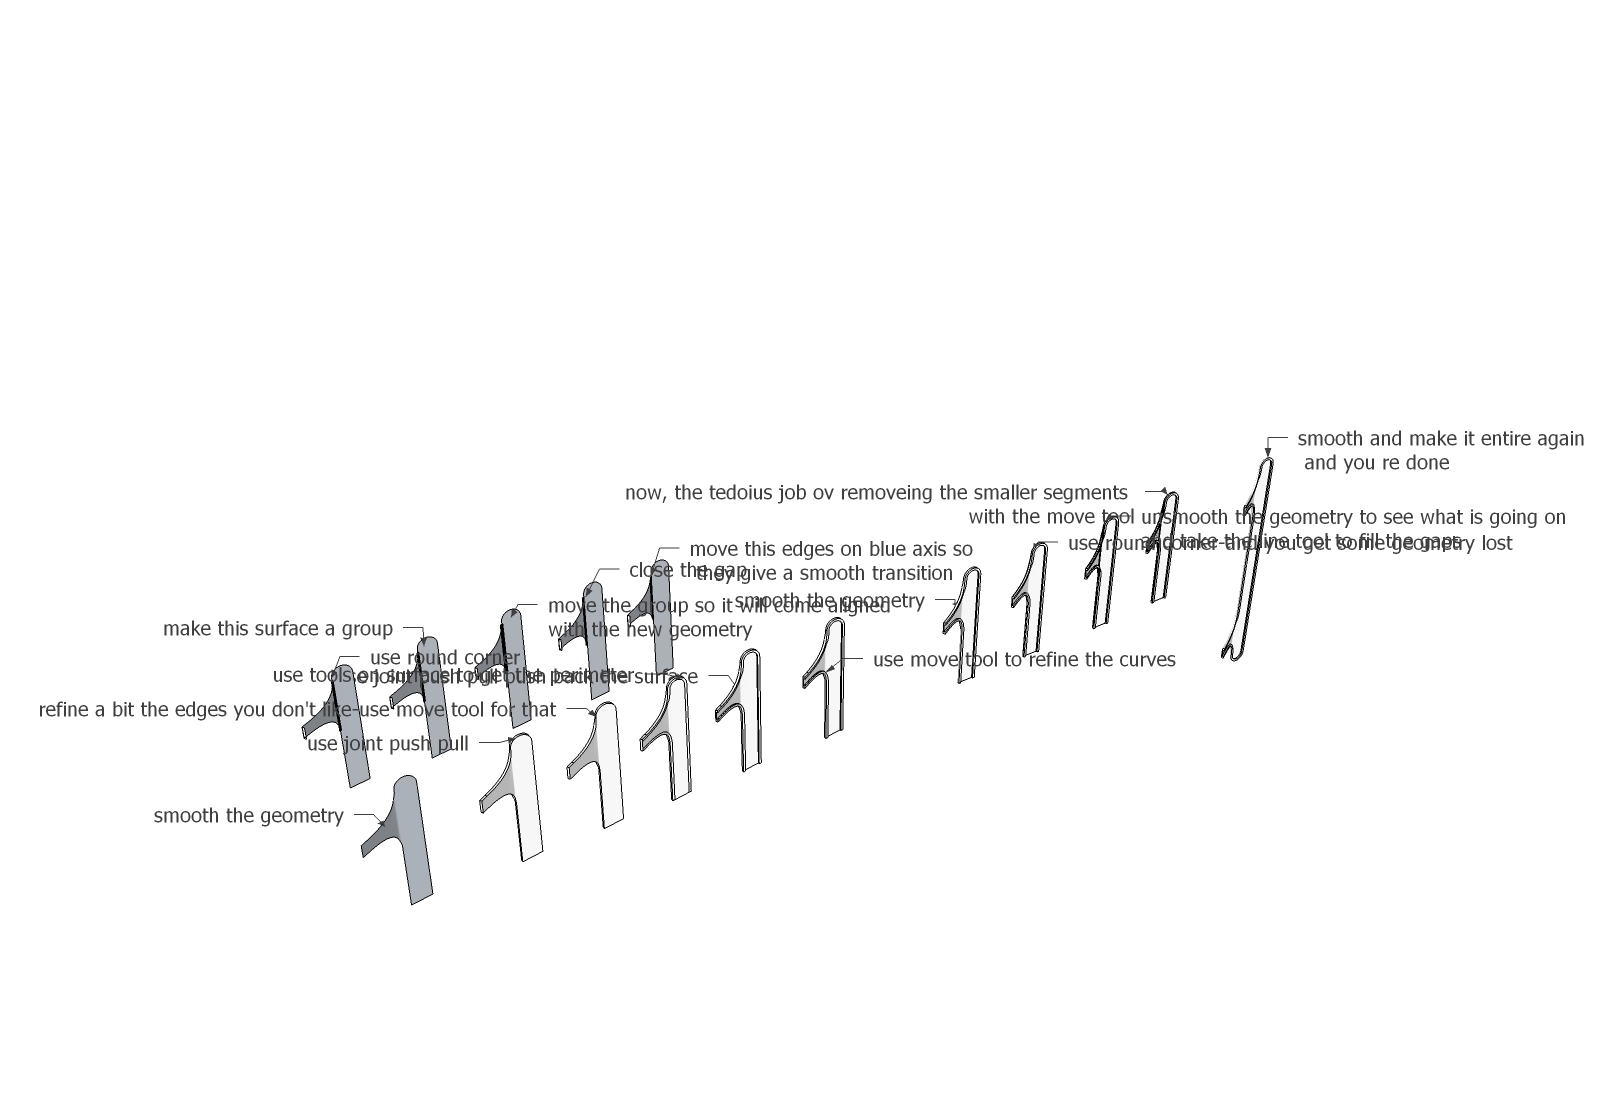
-
Thank you Ely! When I'm done with this train you're the first to get a copy

Your tutorial gave me a new perspective on modeling in Sketchup. I got it now. I have to get out of the habit of neglecting the usage of some of the simpler native tools. I'm currently finishing another project and will get back with an update to this over the weekend.
-
You need to have an open mind when using sketchup. I am not wrong if I say I can model an entire car only with the line tool and the move tool .
Attached is a link with a video of how you can use line tool and move tool to get the proper result . http://youtu.be/tzjA0GPdQrwTake care and have fun !
-
@ely862me said:
You need to have an open mind when using sketchup. I am not wrong if I say I can model an entire car only with the line tool and the move tool .
Attached is a link with a video of how you can use line tool and move tool to get the proper result . http://youtu.be/tzjA0GPdQrwTake care and have fun !
impressive! what is the plugin that splits a line into segments? and what do you use to make faces between to lines like at 5:30 min?
-
@peter_shaw said:
impressive! what is the plugin that splits a line into segments? and what do you use to make faces between to lines like at 5:30 min?
That is not a plugin it is a sketchup ability , right click on the line and go to divide,then move from left to right to divide the line in segments .
And the second one was skin.rb but now I use Curviloft, search in the Resources/Plugins for them !
Take care !
Sorry for the off topic !
-
Thanks ely. I actually got some thickness via vector pp. The problem is when I attempt to round the outer edges because of the sharp angle where the curve meets crease. I'm getting close. On my last attempt I got a hole in the geometry.
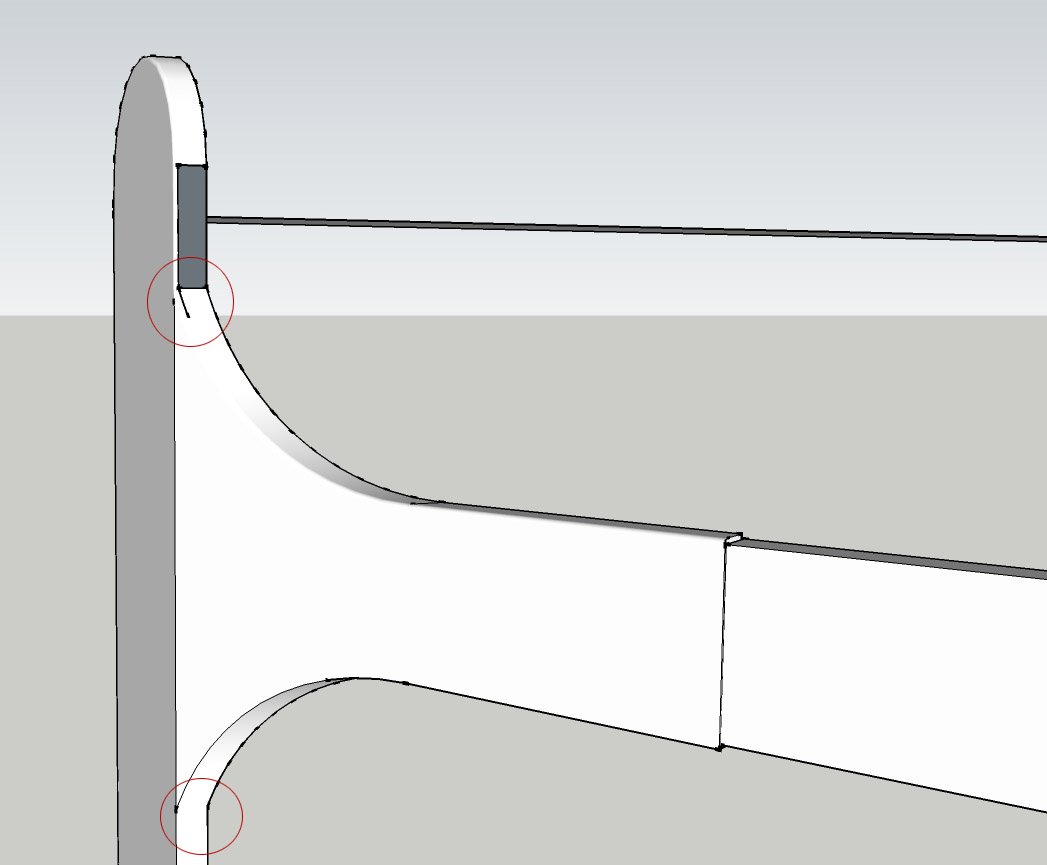
I tried last night to upload the file to share but it was too large (about 5 mb)How can I share a file larger than 4 mb here? I never did it before.
Advertisement


