Creating flutes in pilasters
-
Hello folks
I am trying to follow this tutorial here http://www.finewoodworking.com/item/34183/flutes-on-the-pilasters
Not having much luck as you can see below

Could anyone please tell me were I am might be going wrongThanks in advance
Simon

-
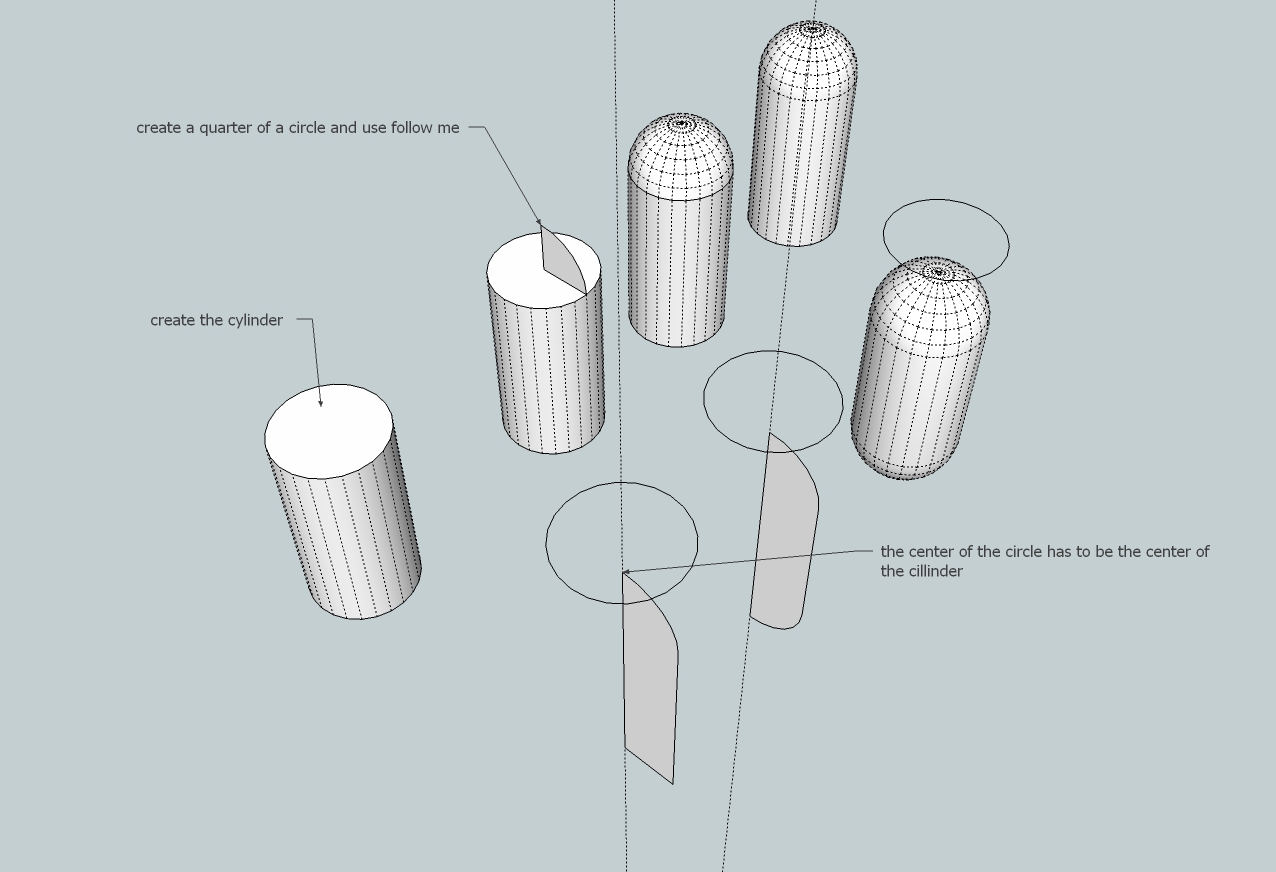
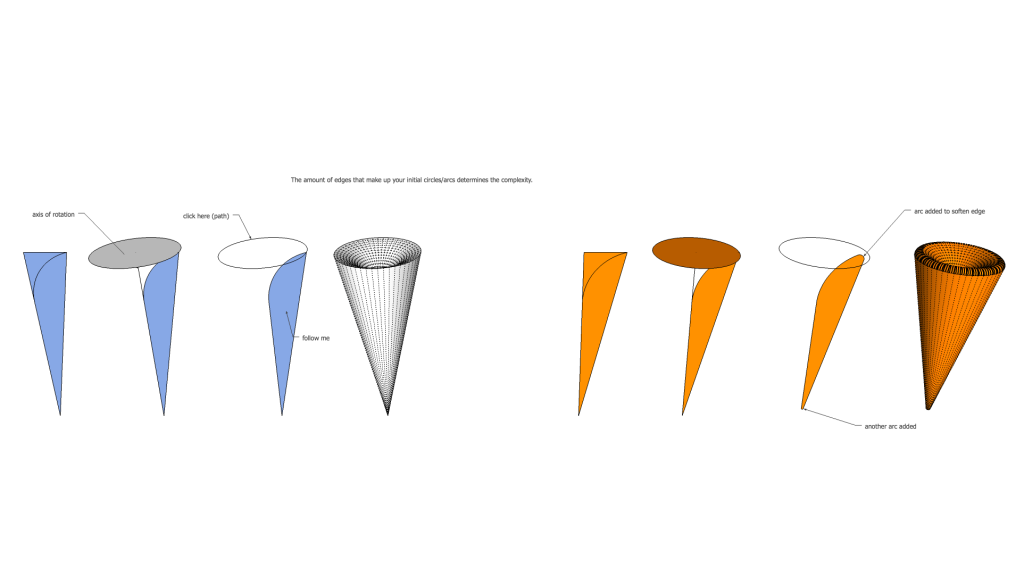
Assuming you want to create a cylinder with a round edge, here are the steps .
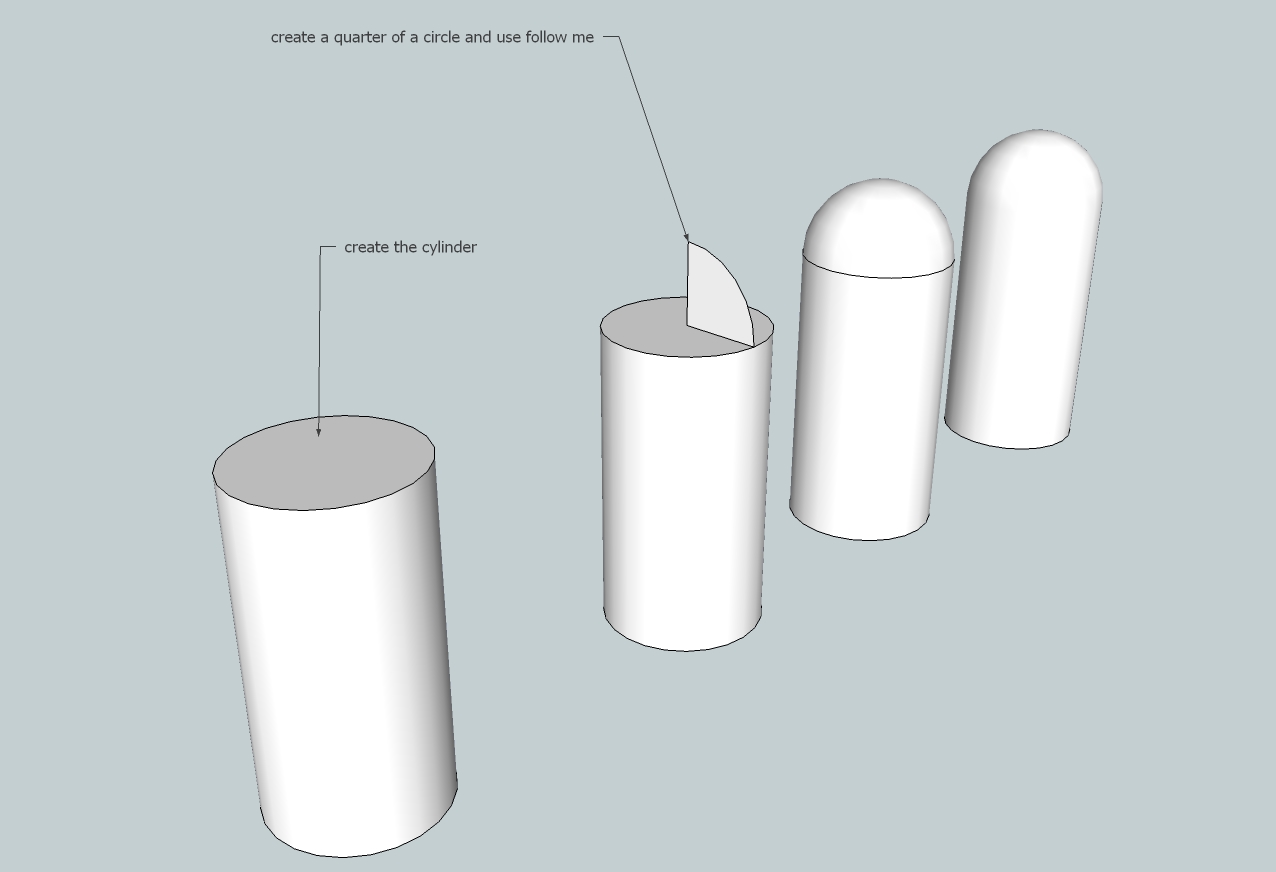
Or if you want to follow the tutorial exactly ..
If it is not please let me know which exact step of the tutorial you are not able to understand .
-
@chamferman said:
Hello folks
I am trying to follow this tutorial here http://www.finewoodworking.com/item/34183/flutes-on-the-pilasters
Not having much luck as you can see below
Could anyone please tell me were I am might be going wrongThanks in advance
Simon
It appears to me that you've got the center of the path (the circle) aligned with the wrong edge of the profile. Move one or the other so the high side of the profile is at the center of the circle.
It's good to know how to draw things like that but keep in mind that those flutes are a fairly small detail in a larger model. You may find it as effective to insinuate the flutes as I did here.
-
Dave,
As you say, Dave, that's "ass effective"!
That's an excellent example. If I thought more along those lines (or edges), I'd save a lot of time and headaches. My models, being for archviz, don't need the level of detail I sometimes put in, whereas they would benefit from some more rounding (or softened chamfers) of corners in the foreground. Finding a reasonable balance helps a lot.
Peter
-
-
Wrong kind of flute, Oli.

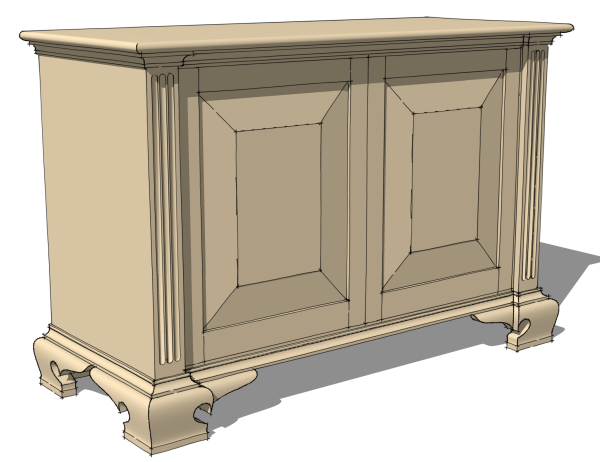
Flutes like the ones on the front of this cabinet.
-
ah i thought he was having issue with the profile.
-
Well, he was but the trouble is the profile is lined up on the circular path incorrectly so he gets the result you showed instead of one more like what Ely showed.
-
Thank you for the quick replies, have tried again & got better results but not 100% yet as you can see in the pics below

This was after taking Dave R advice & moving the the high side of the profile so it is at the centre of the circle. Thanks for the alternative suggestion Dave, i shall give it a go.
Could you tell which technique works better with a curved headed fluted pilaster
And this is trying after trying ely862me
Could you please tell me were I am still going wrong?
thanks again -
You're getting closer. The problem with the hole is caused by SketchUp not creating tiny faces. There are a couple of fixes. First, reduce the number of segments in both the path and the arc on the profile. The other is to scale up before running Follow Me. My choice would normally be to reduce the number of segments. Unless a single flute is the object of the model and will be viewed in close up detail, you don't need very many segments anyway. You could get by with 4-6 segments on the arc and 8-12 on the circle for the path.
As to the "curved headed fluted pilaster" I'm not quite sure what you're describing.
-
Thanks Dave I will give it a go
 Probably not using the right description "curved headed fluted pilaster"
below is a picture of what I mean

-
Ah, I see.
It would be much easier to insinuate those flutes the way I did in the blog post but you could draw them so they have the shape of the core box bit. Using just native tools, I would create the ends much like you are doing now and the part in the middle by creating the curved paths and running a profile over that. For that part think of the space through which the cutter would pass and draw that. Let me see if I can make you a quick example before I have to leave for work.
-
Thanks Dave it worked

Going to try you blog post now
-
Woo hoo!
So here's a quick example of the arched flutes or whatever they are called.
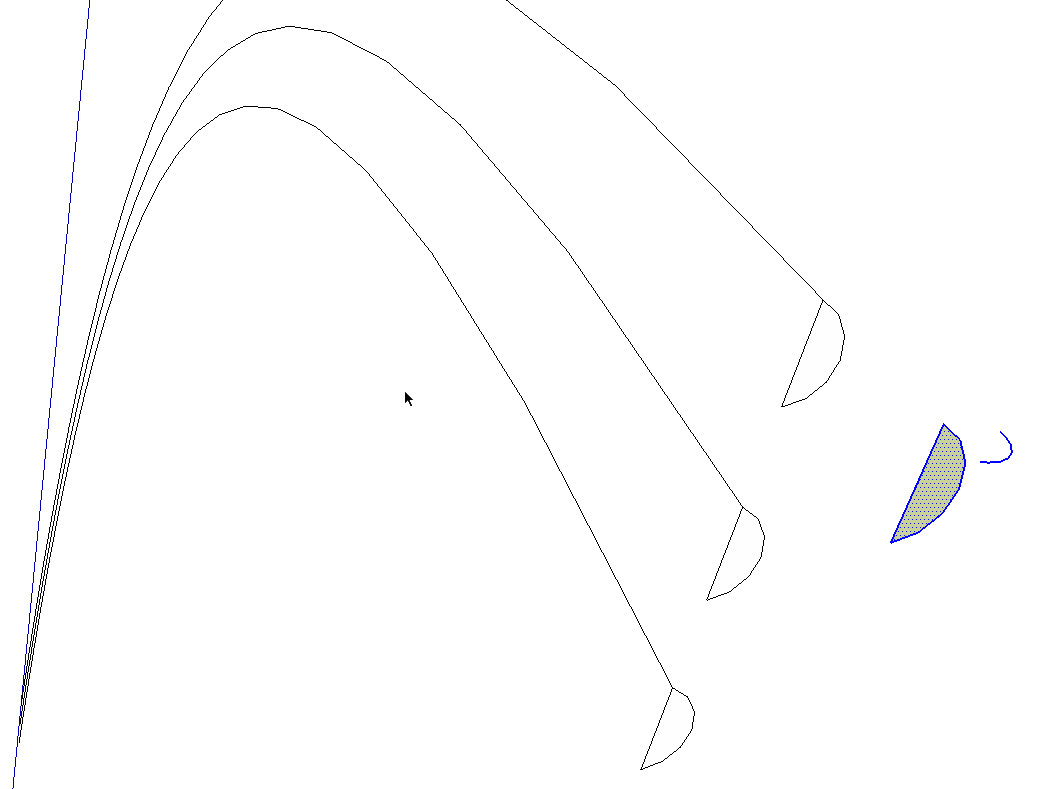
The set up. I'm only drawing the waste wood and not the unneeded geometry that wouldn't intersect the wood. I've got three profiles for the arcs and one for the end. We really could get away with a single arc for the Follow Me path for all three profiles but I put them all in so you could see where they'll go.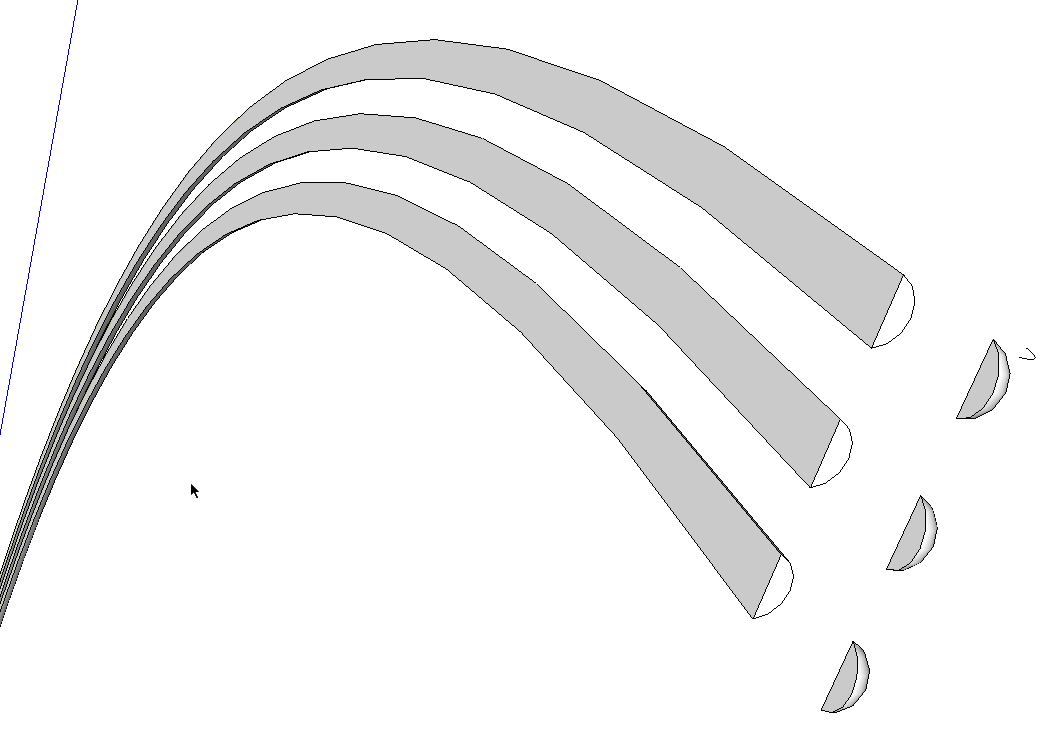
After Follow Me has been run on the profiles. The end shape is copied into place near the ends. They also get copied to the opposite end and flipped along the red direction.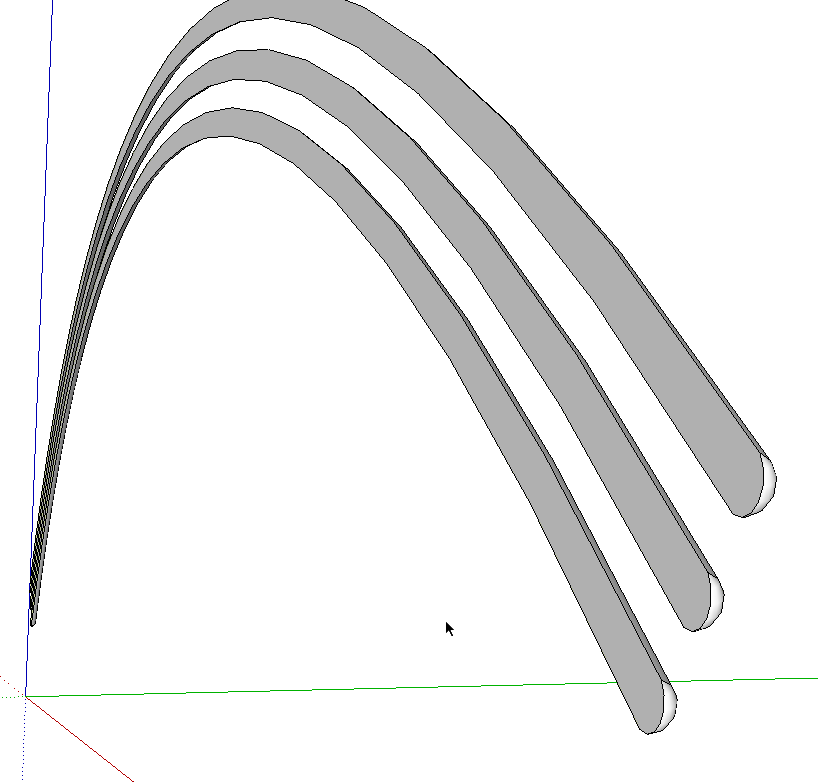
After the ends are moved into place and the unneeded lines deleted. These flutes are now ready to move into place on the board. After intersections are created, the skins over the flutes can be deleted.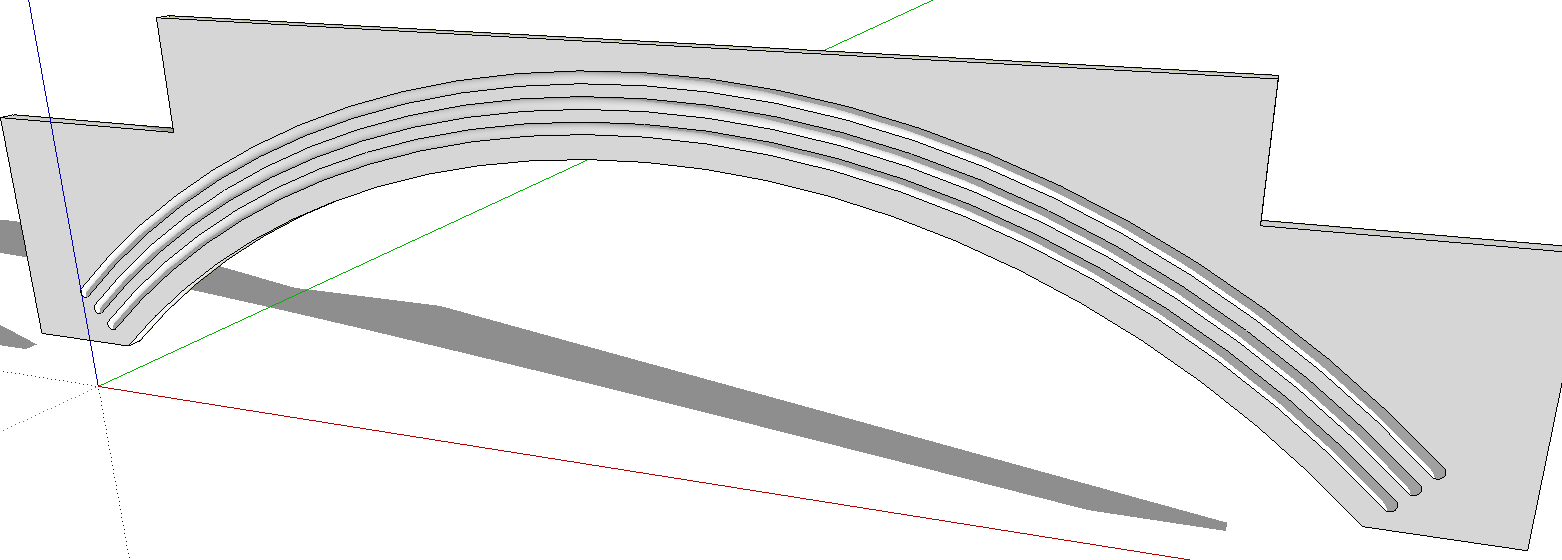
-
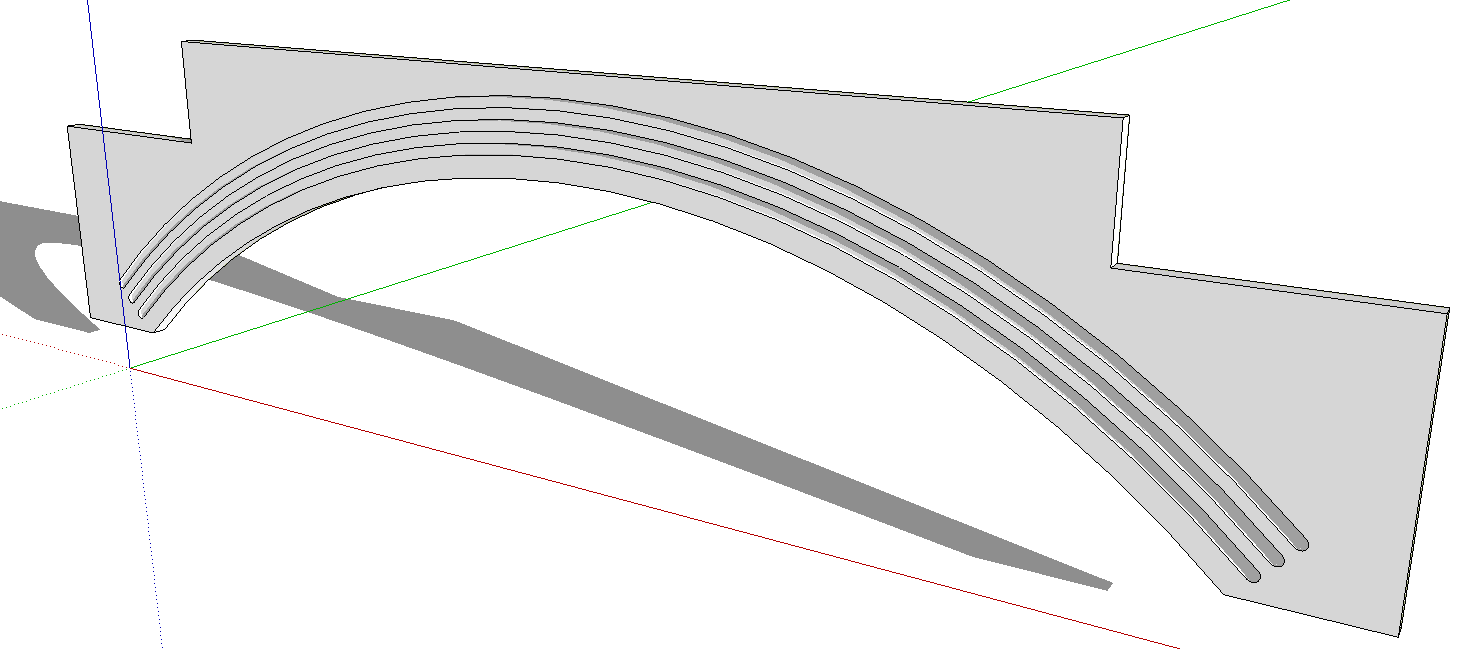
By the way, here's the flutes drawn as I suggested in the blog post. Much faster to draw and I think they'll pass.
-
good tips there. thanks guys.
-
Thanks Dave will give it a try over the weekend
And thanks for the tutorial which I have just finished

-
do you have overlapping or reversed faces in your model? I am looking at a faint line right above, upper left, of the left door. It looks like the material goes a shade darker. If it's supposed to be the same material, then it means there's an issue with your modeling.
-
Nice work c-man.
Andy's right. why is the pilaster on the left a shade darker than the rest?
Hello! It looks like you're interested in this conversation, but you don't have an account yet.
Getting fed up of having to scroll through the same posts each visit? When you register for an account, you'll always come back to exactly where you were before, and choose to be notified of new replies (either via email, or push notification). You'll also be able to save bookmarks and upvote posts to show your appreciation to other community members.
With your input, this post could be even better 💗
Register Login


Advertisement