Match photo axes?
-
Well, yes, you would trace over it and use Push/Pull to turn it into a box. You could actually the explode the image and it would be applied to the front of the house. You can then add whatever other details you need. If you wanted you could give the door and window some depth and add the roof overhang and so on.
-
Not sure I understand what you mean about exploding the image to apply it to the box.
-
If you import the image as an image and not as a texture, it will be an entity of its own. You can stand it up, size it as needed (as I showed in the link I gave you) and trace over it without changing it. If, after tracing over it and creating faces for the house model, you context click on the image, you'll have an option to Explode. Then the image becomes a texture applied to a face. You can then apply that texture to your house model.
Here's a quick example.
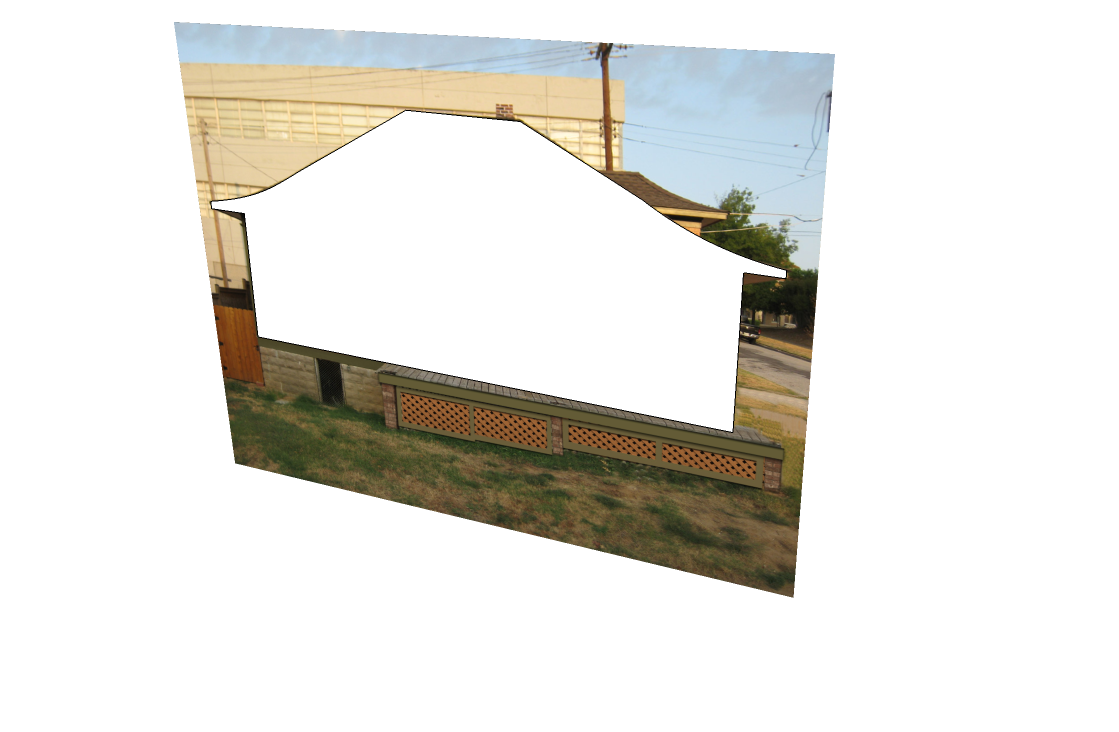
Image imported as an image into SketchUp. Outline traced onto image but it isn't part of the image.
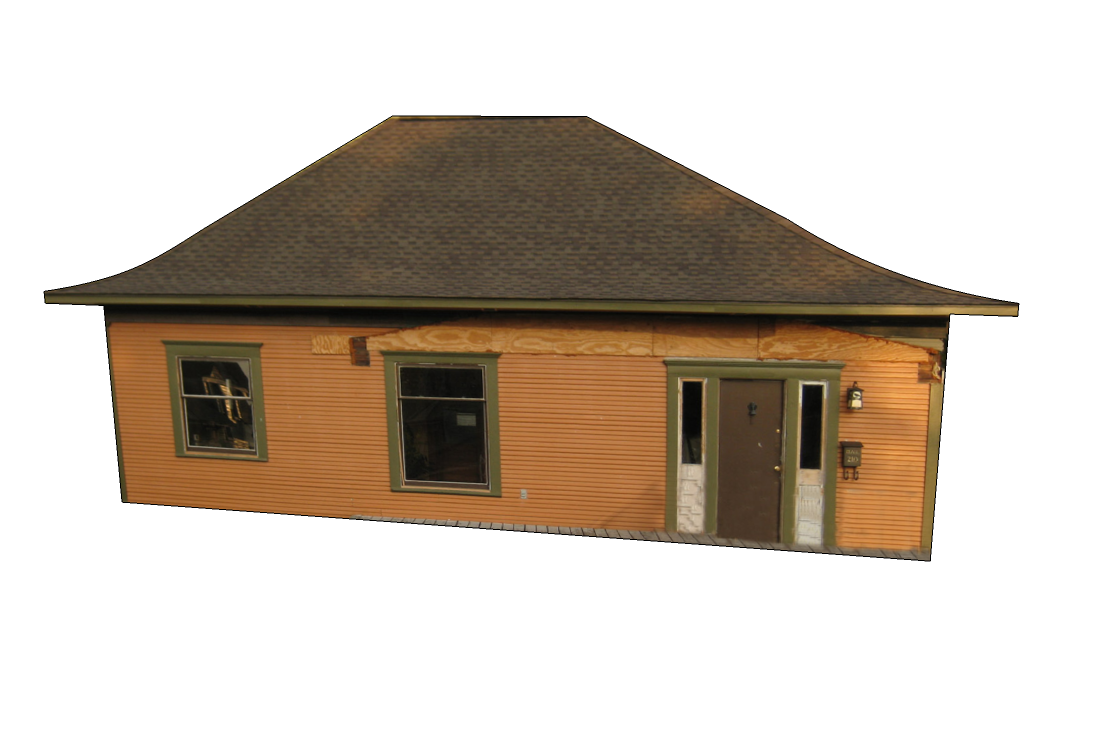
Image exploded and the unneeded bits deleted. The image is now a material applied to the house. You could make a 3D model of the house and apply the material to it. I just didn't take it that far. If this is your only image of the house, you're kind of on your own for the other sides.
-
WOW I actually did it! This is a big deal for me since i am still learning. Thanks so much for your help!
-
What inhibits you from getting a 3/4 view photo? Just curious.
-
I am working on a job for someone out of state. Normally I do architectural design in photoshop and autocad but SU can really help. If I ask the client for an angled photo then the other work I did would be out of wack.
-
@puppychew said:
I am working on a job for someone out of state. Normally I do architectural design in photoshop and autocad but SU can really help. If I ask the client for an angled photo then the other work I did would be out of wack.
Ken, I don't follow the "out of wack" part. You can model the other wall from a 3/4 view or an elevation view it does not really matter. You can even build that other wall as a separate file and then import it into your current file (rotated to fit your depth axis). If the dimensions are alittle off, you can stretch or compress the new wall to fit. Uou do know that you can change your scale or units of measure at any time in the design process? If the texturing of the new wall does not match that can be fixed too, I am just assuming that wall we cant see is made of the same clap boards and not Carrera marble. So you take you original front photos and select the biggest uninterrupted clapboard span you can find. You import that into photoshop, correct the parallel lines and tonal evenness and make it into a new material. Then after poking out windows etc. you click load the paint bucket with your new texture and with one click paint the whole side of the building to match the front. By using tricks of the trade there should be no "out of wackness" once you master the power of the program. Extra source material should only help and not hider your ability to deliver a good product. You will stub your toe learning new tricks, but in the longer run things will get simpler. Try new stuff and ask very specific questions on this forum an you will get a lot of help.
-
You're right - Thanks Roger
-
one more problem. I have new lattice for under the porch. I did the same with that image - exploded and deleted all but the lattice. I then imported it into the main file with the house. I am not able to take that section and place it on top of the image - it only goes behind it.
-
@puppychew said:
one more problem. I have new lattice for under the porch. I did the same with that image - exploded and deleted all but the lattice. I then imported it into the main file with the house. I am not able to take that section and place it on top of the image - it only goes behind it.
Post the file and I will show you how to place the lattice.
-
Make the lattice into a component or group and place it where you need it in the model. Remember you're working in 3D space so you can place one thing in from of another.
Hello! It looks like you're interested in this conversation, but you don't have an account yet.
Getting fed up of having to scroll through the same posts each visit? When you register for an account, you'll always come back to exactly where you were before, and choose to be notified of new replies (either via email, or push notification). You'll also be able to save bookmarks and upvote posts to show your appreciation to other community members.
With your input, this post could be even better 💗
Register Login


Advertisement