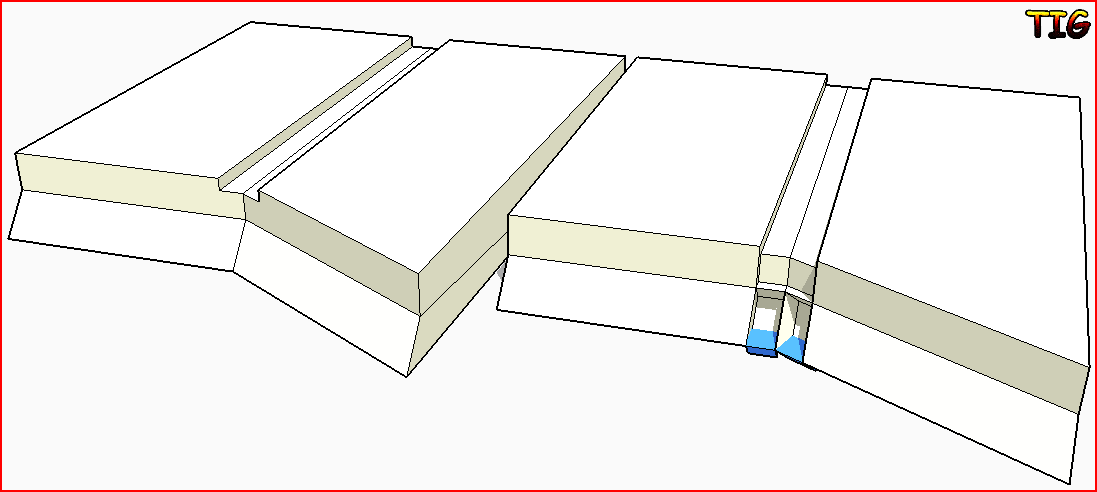
sketchucation logo sketchucation
    • Login
    ℹ️ Licensed Extensions | FredoBatch, ElevationProfile, FredoSketch, LayOps, MatSim and Pic2Shape will require license from Sept 1st More Info

    [REQ] Edge 2 Groove

    Scheduled Pinned Locked Moved Plugins
    68 Posts 11 Posters 5.2k Views 11 Watching
    Loading More Posts
    • Oldest to Newest
    • Newest to Oldest
    • Most Votes
    Reply
    • Reply as topic
    Log in to reply
    This topic has been deleted. Only users with topic management privileges can see it.
    • pilouP Offline
      pilou
      last edited by

      What is the "Split Sausage" function and where i can find it ?

      No problem for push the top and botton face with normal PushPull

      Joint Push Pull don't make these vertical faces Pushed
      The Smart Puspull make the good internal Push face alas it don't make the erasing!

      smart.jpg

      Frenchy Pilou
      Is beautiful that please without concept!
      My Little site :)

      1 Reply Last reply Reply Quote 0
      • pilouP Offline
        pilou
        last edited by

        Seems easy πŸ˜„
        Just code the repeat process β˜€

        Push.jpg

        Frenchy Pilou
        Is beautiful that please without concept!
        My Little site :)

        1 Reply Last reply Reply Quote 0
        • TIGT Offline
          TIG Moderator
          last edited by

          Pilou... you faked the image !
          Tinker!


          Capture.PNG

          TIG

          1 Reply Last reply Reply Quote 0
          • EarthMoverE Offline
            EarthMover
            last edited by

            I think Pilou is suggesting first and second push both on the Z. The second push requiring another offset first.

            3D Artist at Clearstory 3D Imaging
            Guide Tool at Winning With Sketchup
            Content Creator at Skapeup

            1 Reply Last reply Reply Quote 0
            • TIGT Offline
              TIG Moderator
              last edited by

              @earthmover said:

              I think Pilou is suggesting first and second push both on the Z. The second push requiring another offset first.
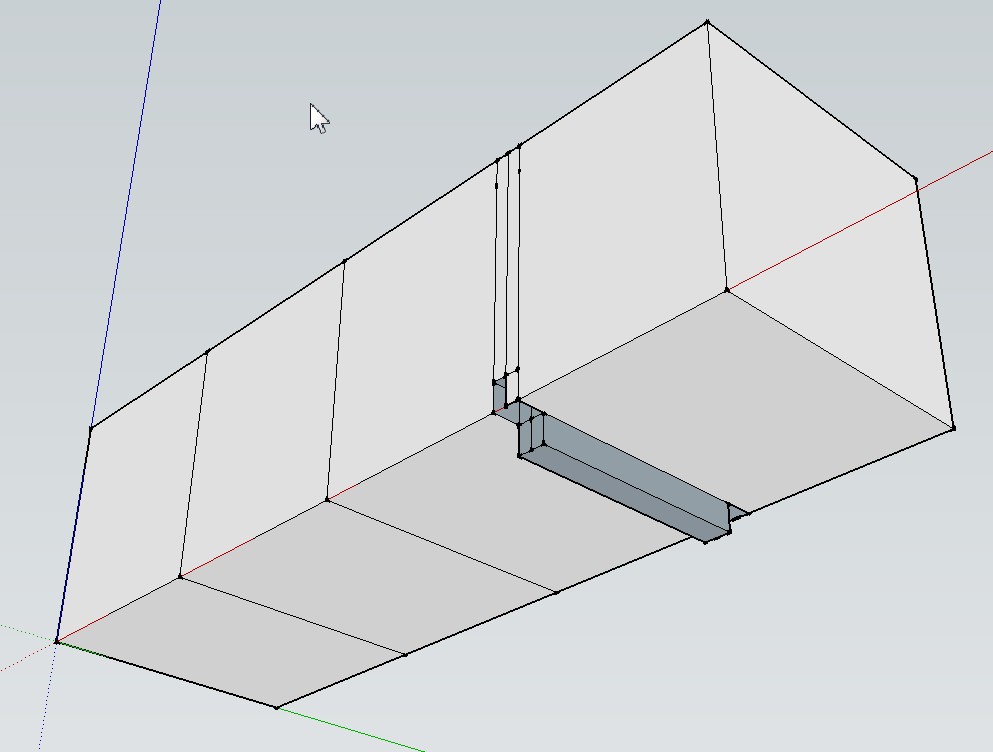
              All PushPulls are made perpendicular to their the face... BUT if the original faces of the edge defining the second groove are non-coplanar then PushPull will be square to each of them NOT align with the 'vertical' sides of the first groove we've made, so that PushPull is blocked by the impending geometry clash; if we were to 'force' it in code then the perpendicular sides of the different grooves would not be guaranteed to align where they meet, and we then need either 'mitered' angles at their junctions, or awkward 'ledges'... πŸ˜•
              I see that Pilou is PushPulling the second groove in the length not the depth, BUT if the base of the groove is not parallel with the top then it won't form a clean hole either πŸ˜’
              It needs more of a JPP solution...

              TIG

              1 Reply Last reply Reply Quote 0
              • TIGT Offline
                TIG Moderator
                last edited by

                But as I closed... That's fine only if the second groove's faces have no further faces at their end OR the further faces are in the same plane as the base of the first groove. These are special cases.
                The general case where there are other face angles etc will NOT PushPull cleanly and fail to end the groove neatly... πŸ˜•


                Capture.PNG

                TIG

                1 Reply Last reply Reply Quote 0
                • TIGT Offline
                  TIG Moderator
                  last edited by

                  It's relatively easy to make the special case orthogonal grooves but the general case is more tricky... πŸ˜•

                  TIG

                  1 Reply Last reply Reply Quote 0
                  • pilouP Offline
                    pilou
                    last edited by

                    @unknownuser said:

                    first and second push both on the Z

                    Yes πŸ˜‰
                    Line of the left element is an offset or a copy move along the side of left element
                    Line of the right element is an offset or a copy move along the side of left element

                    then you can push down on Z

                    @unknownuser said:

                    It needs more of a JPP

                    the jpp don't make negative push 😞
                    Smart PushPull yes as shown above but don't erase the inside !

                    Frenchy Pilou
                    Is beautiful that please without concept!
                    My Little site :)

                    1 Reply Last reply Reply Quote 0
                    • pilouP Offline
                      pilou
                      last edited by

                      @unknownuser said:

                      BUT if the original faces of the edge defining the second groove are non-coplanar

                      That is not the case of the EarthMover example

                      But i believe that will be the same in the no coplanar face of elements
                      I come back with an example πŸ˜‰

                      no_coolanar.jpg
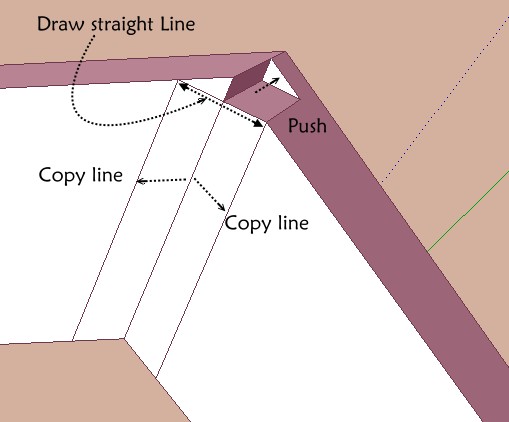
                      And no problem for make the groove with normal push

                      Ps Crossing posts
                      your example is a double non coplanar face element πŸ˜‰
                      but I believe that another will be the same
                      I come back with your vicious example πŸ˜‰

                      Frenchy Pilou
                      Is beautiful that please without concept!
                      My Little site :)

                      1 Reply Last reply Reply Quote 0
                      • pilouP Offline
                        pilou
                        last edited by

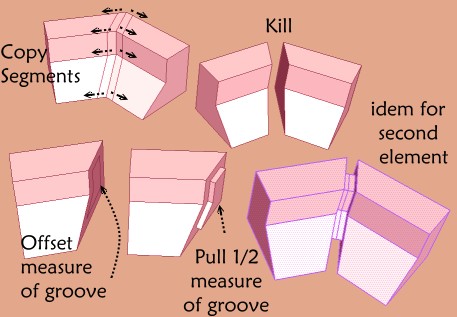
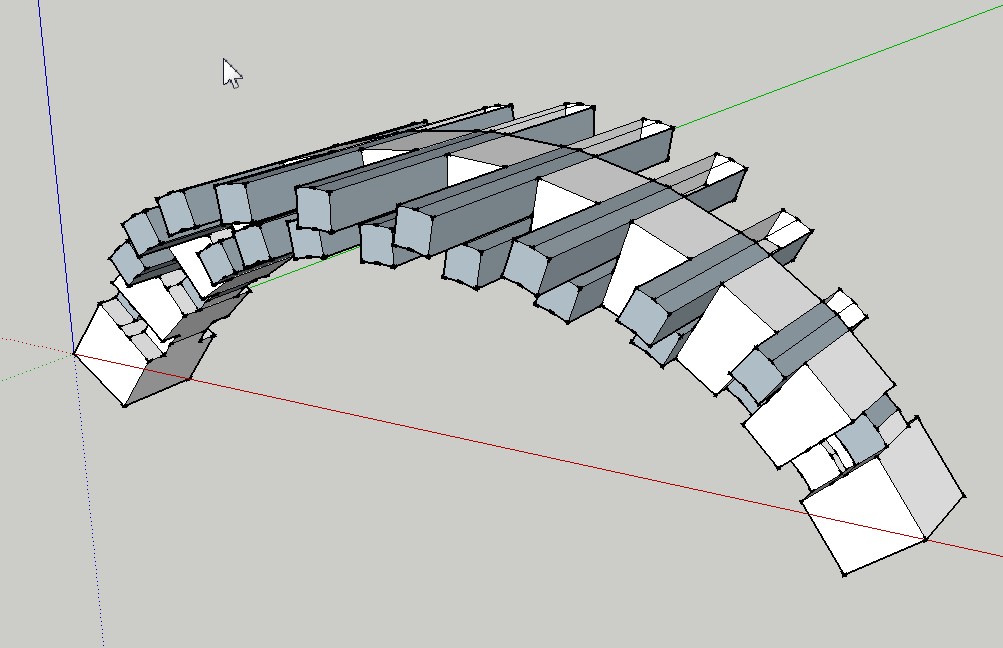
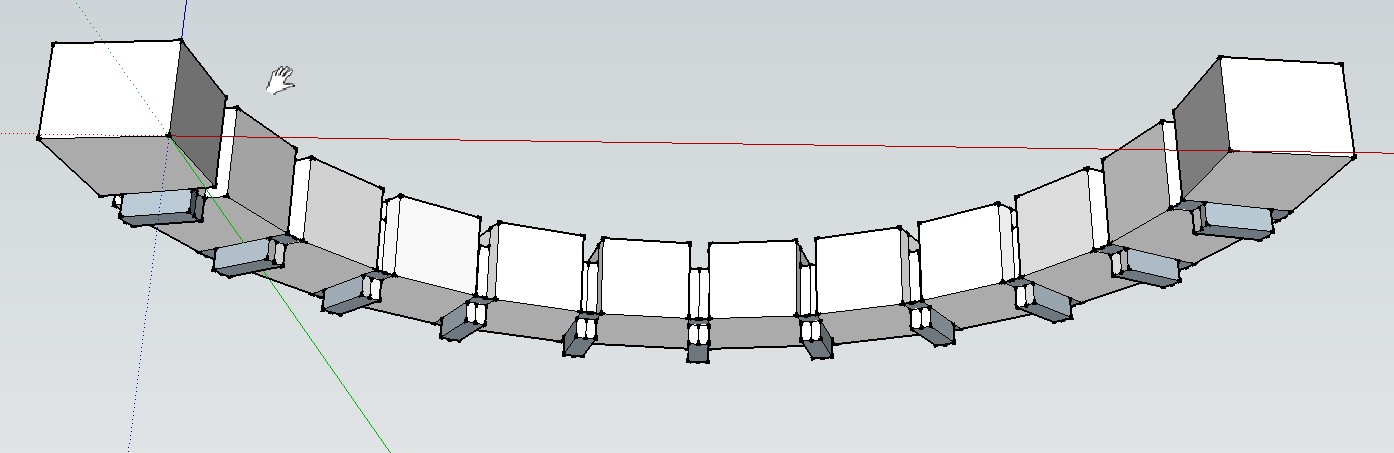
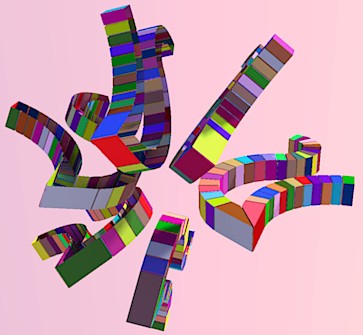
                        In fact that is more easy than all previus! πŸ’­ πŸ˜’ πŸ’š 😎 β˜€
                        Must have internal faces for make the Offset Pulling and close faces!
                        And must work in any cases not too vicious πŸ˜‰
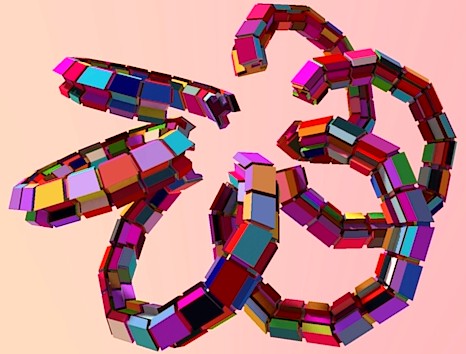
                        There is an optic effect on the result on this image : groove and section seem sometime slaloming! πŸ˜„

                        groove2.jpg

                        troc1.jpg

                        troc.jpg

                        Frenchy Pilou
                        Is beautiful that please without concept!
                        My Little site :)

                        1 Reply Last reply Reply Quote 0
                        • TIGT Offline
                          TIG Moderator
                          last edited by

                          A clever solution... IF grooves are wanted on all faces [but it could even be adapted with coding a custom offset on selected edges only]...
                          IF the object is a solid group then you could simply made a sacrificial over-sized block group that is the groove thickness wide and aligned on the edges' plane, and then in pro use the solid tools to subtract it from the original form, leaving the full slot; then we'd apply the offset around the newly through cut face and pushpull it by the groove width [no mid-line is needed] to fill the gap - erasing the extra inner face left behind to maintain 'solidity' for the next groove set to work...
                          BUT again this only works if the selected edges are all coplanar; 'skewed' grooves will not work. πŸ˜•

                          TIG

                          1 Reply Last reply Reply Quote 0
                          • EarthMoverE Offline
                            EarthMover
                            last edited by

                            If it is a "Solid" object, the offset seems like an unnecessary step. Could you just isolate the edge itself and take a box the size of the desired groove and "follow me" it around the edge to create the cutting (Subtracting) component, thus only taking away what was necessary for the groove? Similar to Jeff's technique in this thread - http://forums.sketchucation.com/viewtopic.php?f=15&t=41095&p=365238&hilit=groove#p364287

                            I would be okay if the tool only worked on solid objects.

                            3D Artist at Clearstory 3D Imaging
                            Guide Tool at Winning With Sketchup
                            Content Creator at Skapeup

                            1 Reply Last reply Reply Quote 0
                            • pbacotP Offline
                              pbacot
                              last edited by

                              Thanks Sam. DL'd. Can't wait to see how it works! Peter

                              MacOSX MojaveSketchUp Pro v19 Twilight v2 Thea v3 PowerCADD

                              1 Reply Last reply Reply Quote 0
                              • pbacotP Offline
                                pbacot
                                last edited by

                                Woops. Crashes SU on my Mac. Peter. No messages to report.

                                MacOSX MojaveSketchUp Pro v19 Twilight v2 Thea v3 PowerCADD

                                1 Reply Last reply Reply Quote 0
                                • EarthMoverE Offline
                                  EarthMover
                                  last edited by

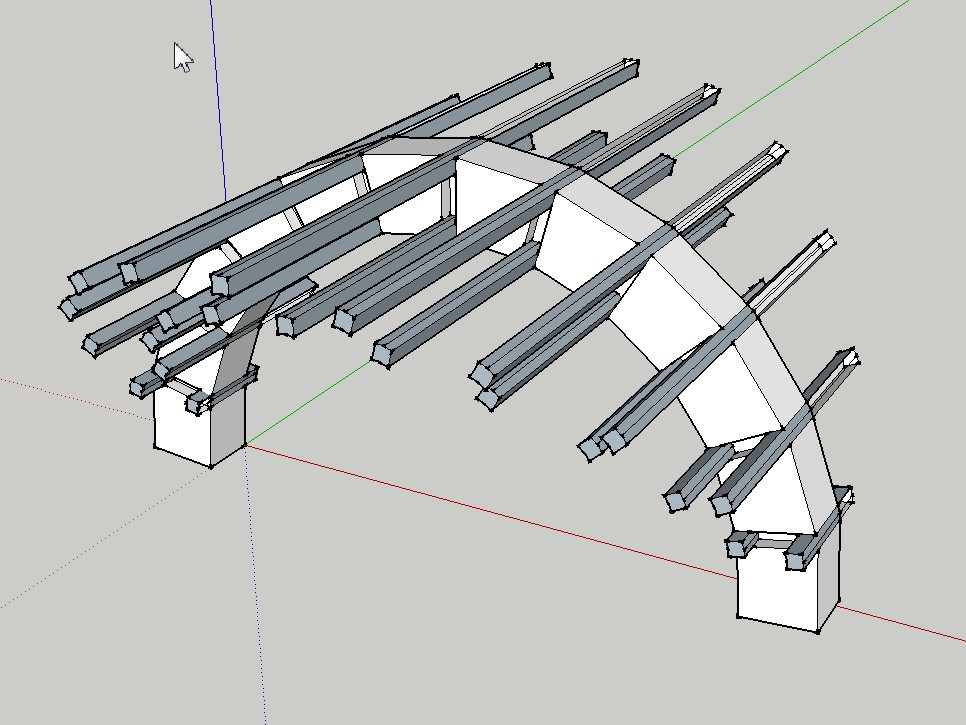
                                  Works great on the example I provided which are created via "curves" where some of the edges are supporting non planar faces. πŸ‘ However, it curiously fails on edges which support planar or perpendicular surfaces. Also fails on the shape I provided when the bottom is added to make it solid.

                                  Thanks for the work so far. I wonder can the tool be further tweaked to work on a variety of different situations where grooves would be needed? (i.e. single face grooves, grooves to define cabinet drawers, grooves for concrete building facades, etc.) Thus being more useful for a variety of different users. Also, can the width and depth be defined separately?

                                  Thanks again Sam for solving the first part of the riddle. What was the logic you ended up using for the code? I tried to decipher it, but it's a little over my head.

                                  3D Artist at Clearstory 3D Imaging
                                  Guide Tool at Winning With Sketchup
                                  Content Creator at Skapeup

                                  1 Reply Last reply Reply Quote 0
                                  • pilouP Offline
                                    pilou
                                    last edited by

                                    @unknownuser said:

                                    this only works if the selected edges are all coplanar; 'skewed' grooves will not work.

                                    Have you an example of that ?

                                    I will try the new SAM plug πŸ˜„

                                    Frenchy Pilou
                                    Is beautiful that please without concept!
                                    My Little site :)

                                    1 Reply Last reply Reply Quote 0
                                    • charly2008C Offline
                                      charly2008
                                      last edited by

                                      Hi,

                                      I have tested the groove tool. The results are unusual. I do not know why.

                                      Charly


                                      2012-05-01_172327.jpg


                                      2012-05-01_172653.jpg


                                      2012-05-01_173710.jpg


                                      2012-05-01_173818.jpg

                                      He who makes no mistakes, makes nothing

                                      1 Reply Last reply Reply Quote 0
                                      • sdmitchS Offline
                                        sdmitch
                                        last edited by

                                        Using the Edge 2 Groove model supplied, I have been able to create a plugin for this unique situation.

                                        [flash=800,600:14uqb6r8]http://www.youtube.com/v/JvROg-dN2YA[/flash:14uqb6r8]

                                        Nothing is worthless, it can always be used as a bad example.

                                        http://sdmitch.blogspot.com/

                                        1 Reply Last reply Reply Quote 0
                                        • sdmitchS Offline
                                          sdmitch
                                          last edited by

                                          Charly, Please see my last post. I knew it was a mistake to post the alpha version because people always think that, no matter what bazaar situation they can create, the plugin should be able to handle it.

                                          Nothing is worthless, it can always be used as a bad example.

                                          http://sdmitch.blogspot.com/

                                          1 Reply Last reply Reply Quote 0
                                          • sdmitchS Offline
                                            sdmitch
                                            last edited by

                                            Yes I'm sure much more can be done but, as I stated in the post, the plugin attached was developed and tested on that one example alone.

                                            I just looked at it as a sidewalk, with at flat top and curved sides. I examined each edge to see if it was between coplanar faces, normals parallel, to indicate it was on top and calculated the boundary points of the three faces that I could pushpull to create the top and side grooves. In addition to the normals parallel, I need to require the the normal.z is pointing up or down. This will allow sides to be straight as well.

                                            Adding grooves to a four sided column poses the additional problem of trying to determine "which" way is up".

                                            Nothing is worthless, it can always be used as a bad example.

                                            http://sdmitch.blogspot.com/

                                            1 Reply Last reply Reply Quote 0
                                            • 1
                                            • 2
                                            • 3
                                            • 4
                                            • 3 / 4
                                            • First post
                                              Last post
                                            Buy SketchPlus
                                            Buy SUbD
                                            Buy WrapR
                                            Buy eBook
                                            Buy Modelur
                                            Buy Vertex Tools
                                            Buy SketchCuisine
                                            Buy FormFonts

                                            Advertisement