Chain rings (bicycle related) [TUTORIAL]
-
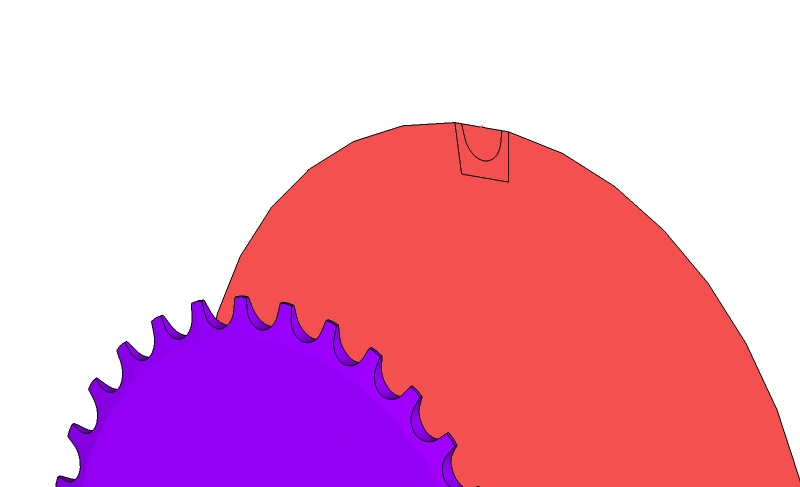
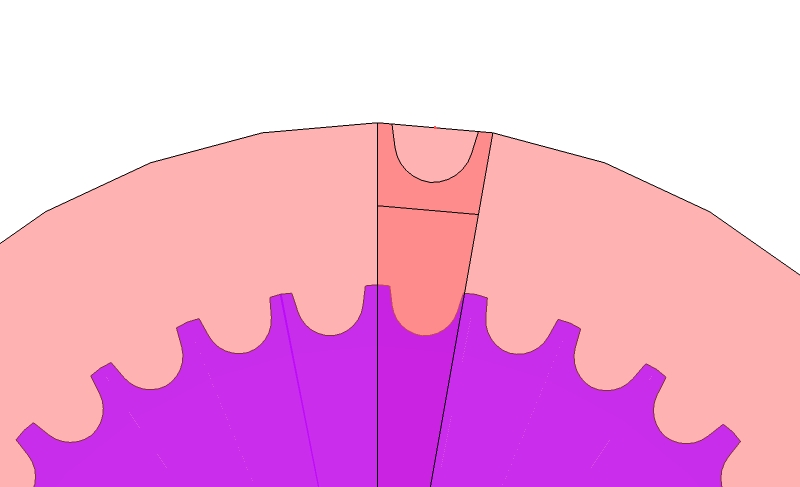
I have no problem modeling a single gear. My problem is when I try and make two different diameters of chain rings. I need the teeth to all be the same size while being on different diameter of chain ring. Here are a few pics of what I have so far. As you can see I have scaled up the bigger diameter teeth which is not right but gives you guys an idea of the problem. And the last two are of RSW's work of art from this thread http://forums.sketchucation.com/viewtopic.php?f=81&t=5942&hilit=marin+bike&start=45. In RSW's thread he mentions that he had to use AutoCad to figure out the spacing on different diameters of cogs.
Any help would be appreciated.
Cheers
S


-
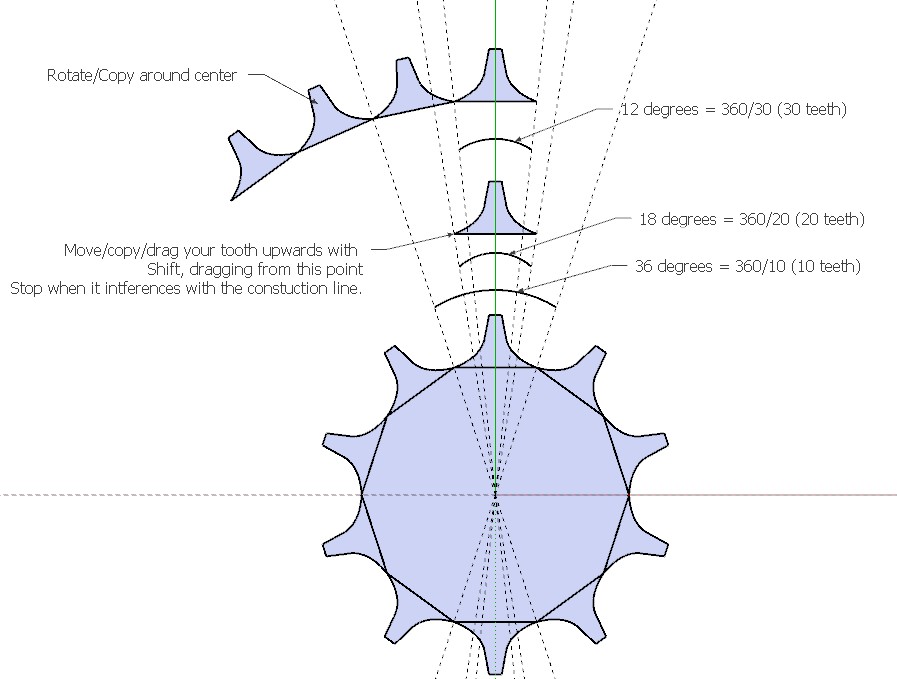
For bycicle chains, the size of the wheel and the number of teeth are closely related. When you have your tooth element, make it a group end save it aside. When you create the next wheel, calculate it diameter precisely, copy your tooth group to that new wheel, explode the group to intersect it with the wheel and copy it the correct number of times. It should run ...
-
If you don't like math you could do it like this, using SUs inferencing, protractor/construction lines and components.
The only math involved is dividing 360 on the number of teeth required.
-
Bjorn, that's an excellent illustration.
Slimdog, the suggestion of just drawing the tooth is good but make it a component instead of a group.
-
Thats great bjornkn. I was hoping someone would answer with a good diagram. That helps lots but I am not sure its to whole answer.
Your divisions all divide into 360 equally and easily. I don't think the cogs that rsw's modeled go equally into 360 all the time. I am not sure about this but I will try and have another go at it when I get home tonight.
-
You decide what number of teeth you want. My examples were just using "easy" numbers.
You may just as well have 17 teeth. Simply 360/17=21.17647 degrees. Divide by 2 to get half of it on each side of the center line.
You could also make a 17-side polygon and use lines from its center through perimeter points as guides.
Just make sure that the top edge is horizontal (if you're following my examples). -
hi,
the zero maths way, if you know the pitch and bearing radius of your chain, you can use tape tool to adjust any number of circle segments to fit [23s = 23T, etc...].I had started doing a tutorial for scratch building chains and sprockets, but can't find it. the attached png and skp has the basics of how I do it.
 it's just the start of a tutorial...
john -
Stoked!! Thanks driven. That makes a lot of sense now.
Thanks to bjornkn to for the ideas to.
-
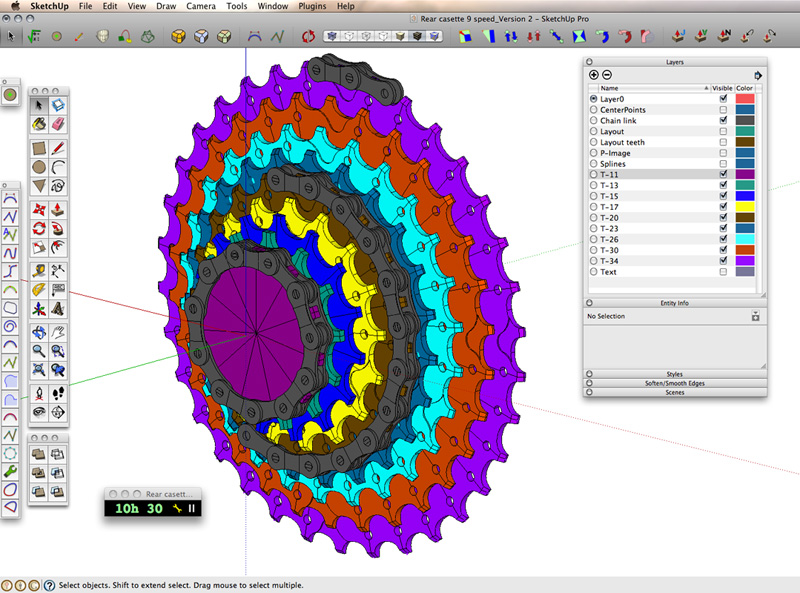
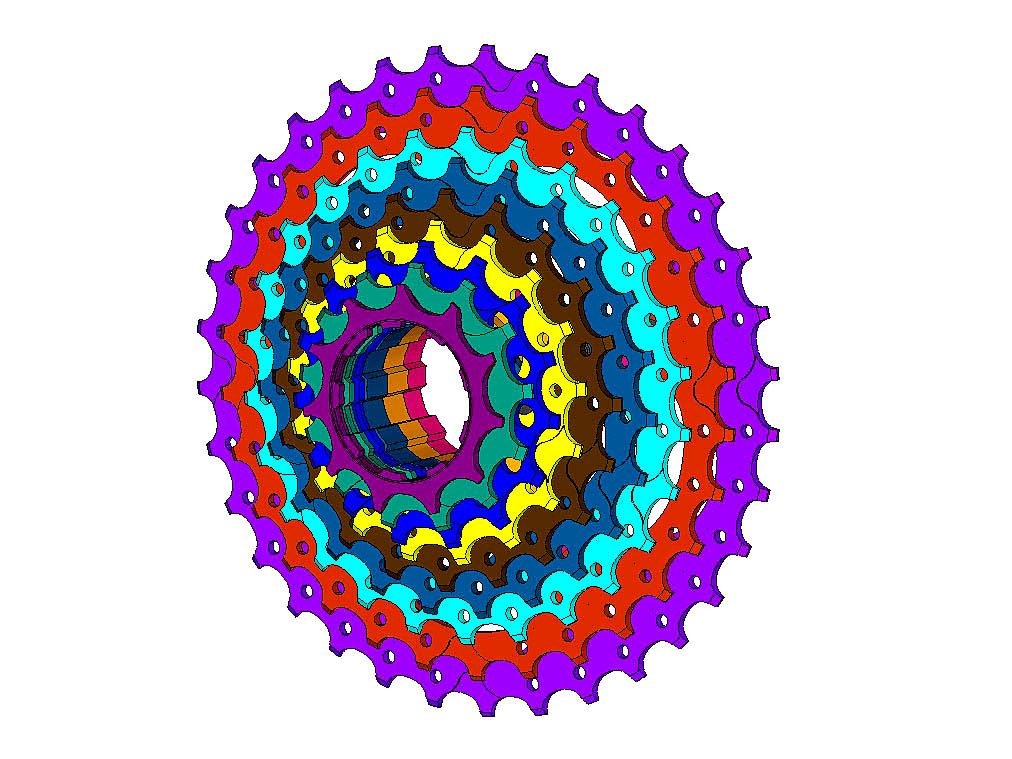
Here's what I have so far.
Thanks for all the help guys.
-
Slimdog, that looks great. Now, if you want to make the chain rings look solid instead of like small pieces, open are tooth component in each one and hide the seam lines using Shift + Eraser Make sure there's no interior faces, too. They aren't needed anyway.

-
Thanks for the little story board Dave. Its so much easier to express your ideas in pictures.
Its still a work in progress. I still need to shape the teeth on the last few cogs and then boar out the hole in the middle for the splines. Then I have to Mill out the backs of each cog to loose some weight and make room for the collar to attach each cog to the hub. I like keeping all of the geometry on so I can rotate the cogs easier. I will hide and clean up the model last.
Whats wrong with interior faces?
So far the file is about .7 mega bites.
Cheers
Steve
-
It's that old saw about a picture being worth 1000 words. It's really true.
As to the internal faces, notice in the middle gear there are magenta "sparkles" radiating from the center. This is typical because the graphics is showing those inside faces of the components They aren't all magenta (the back face color) in this case. Some of them are the front face color. It just depends upon which side of the faces you are seeing. Notice that the nearest gear looks like it is a solid, single component thing. With no internal vertical faces to show, the sparkles are gone.
-
Could you please be more specific about which ring is showing magenta sparkles. I dont see them. The middle one to me is the brown one. I have been diligent about the white face facing out but have not payed any attention to the internal faces that you are recommending to delete.
-
Wow! Some great help / suggestions on this topic. I'm adding a [TUTORIAL] tag to this one.
Thanks all,
Mike
-
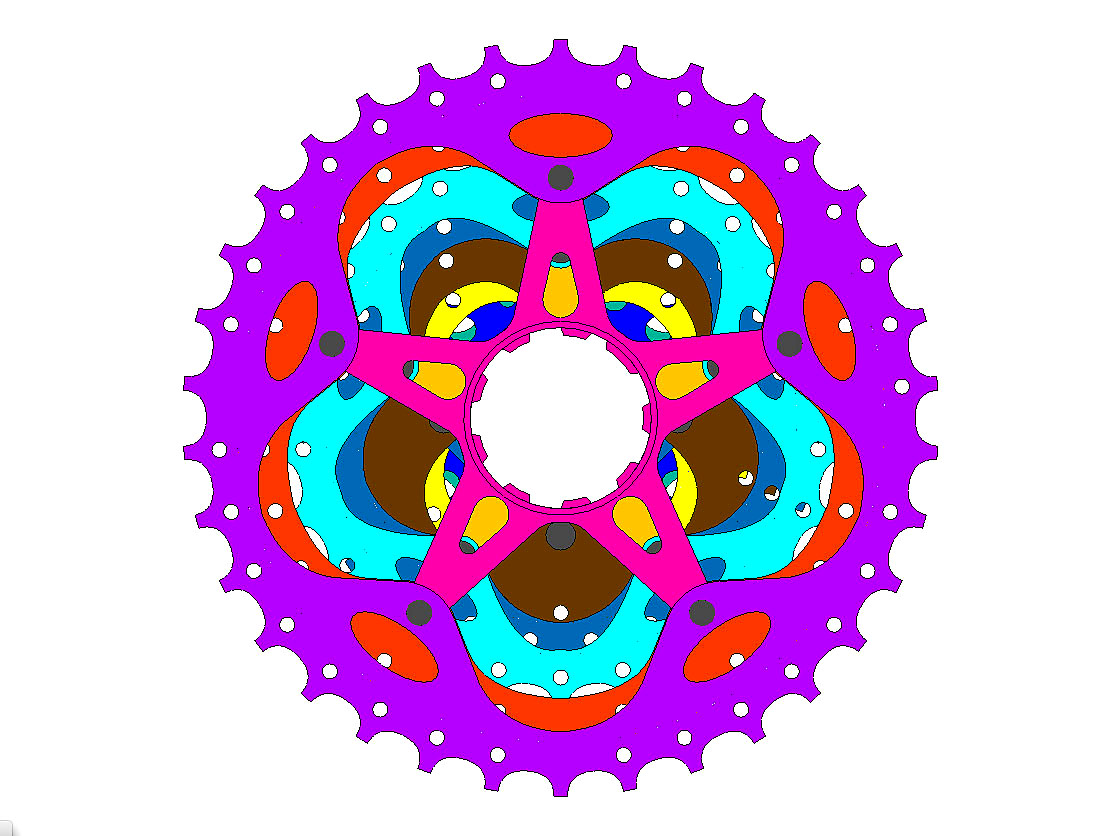
Steve, here's a cropped view of the image above. See the magenta and light tan lines on the face of the whole sprocket? those are what I was referring to as 'sparkles' and come from the vertical faces showing through. Notice on the right, with those vertical faces and the vertical line at the center deleted there are no sparkles.
As to the face colors, it is good to keep the white ones out and the blue ones in. I normally use a green instead of the blue because it is easier for me to see especially in cases where SU is shading a surface or when there are tiny holes. I changed the back color to magenta for this example and made the front face the tan or brownish color.

If you click on the image you can access a larger version which might make it easier to see.Mike, you're right, the tutorial on drawing the sprockets is good. Thanks for changing the title.
-
Ahhh ok now I see the magenta showing. I have played with changing the back face color in the past but found no use for it so I haven't continued with the practice. I am going to going to clean up the model by hiding a lot of the geometry when I am done but see no benefit to erasing the interior faces yet.
Thanks for the tighter crop.
Steve
-
As I said, I find it easier to pick out tiny holes with the green back face color but it's entirely up to you. As to those interior faces, as long as you're working on it, they could stay but if you want to make the chain rings look like single entities, you want to remove them. It's your model, of course and you can make it look however you want. What I've shown is just one of the things I do to make my models look cleaner.
-
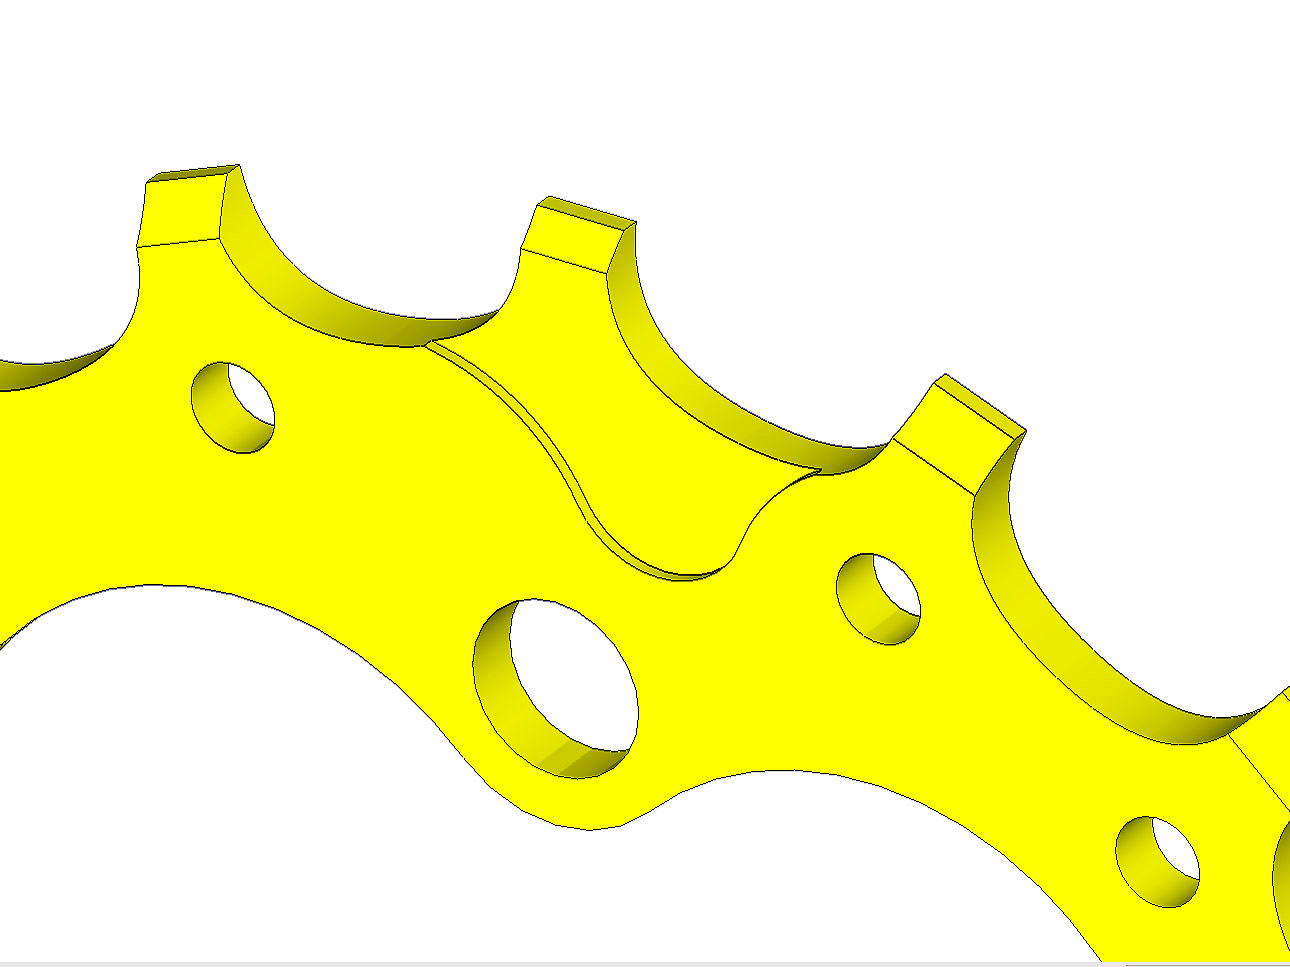
Hey Dave I was playing around with erasing the interior faces last night. It does make the model look much better. The problem I have is that all the teeth on one ring are divided up equally which doesn't all ways divide in to 360 within 0.000 degrees which is the limitation of sketchup. So there are going to be some overlapping of edges or spaces. And now I have been milling out the insides of the rings to loose some weight and adding some holes for the rivets to mount the rings to the hub. Which is also going to be a problem for the looks of the finished model because I am dividing the hole mounts into 5 spokes which need to match up to the teeth which are divided up into different numbers. Kinda hard to explain. I will post some more pixs tonight. The computer I am modeling on is not hooked up to the internet.
S
-
You might need to model the inner part of the chain ring separately from the teeth so you can put in the holes where needed. And it might be that you would want to divide the inner area into five sectors. That way you can do the same thing you did to the teeth, dividing them into components, with the center area.
-
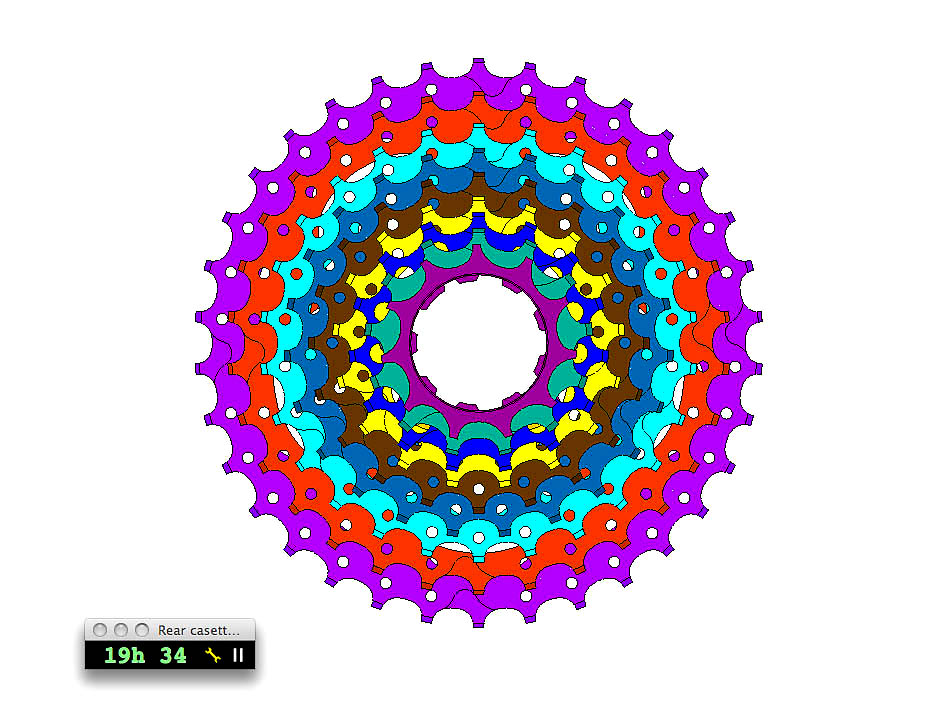
Here is the final product.
I did make each inner spoke into one component. The trouble is that there are five spokes and that doesn't divide equally into the number of teeth on most of the rings. So I didn't feel like making it perfect which means there are some small gaps. On some of the smaller rings I just exploded the whole ring and made it into one component.
All in all it was a good project and I learned a bunch thanks to you guys. It was a bit of a tangent I went off on because I dont even need the cog set for the bike I am working on. I just like how RSW's model looked and wanted to have a go at it.
File size was 1.7MB.
Cheers
S

Hello! It looks like you're interested in this conversation, but you don't have an account yet.
Getting fed up of having to scroll through the same posts each visit? When you register for an account, you'll always come back to exactly where you were before, and choose to be notified of new replies (either via email, or push notification). You'll also be able to save bookmarks and upvote posts to show your appreciation to other community members.
With your input, this post could be even better 💗
Register Login


Advertisement