sketchucation logo sketchucation
    • Login
    ℹ️ Licensed Extensions | FredoBatch, ElevationProfile, FredoSketch, LayOps, MatSim and Pic2Shape will require license from Sept 1st More Info

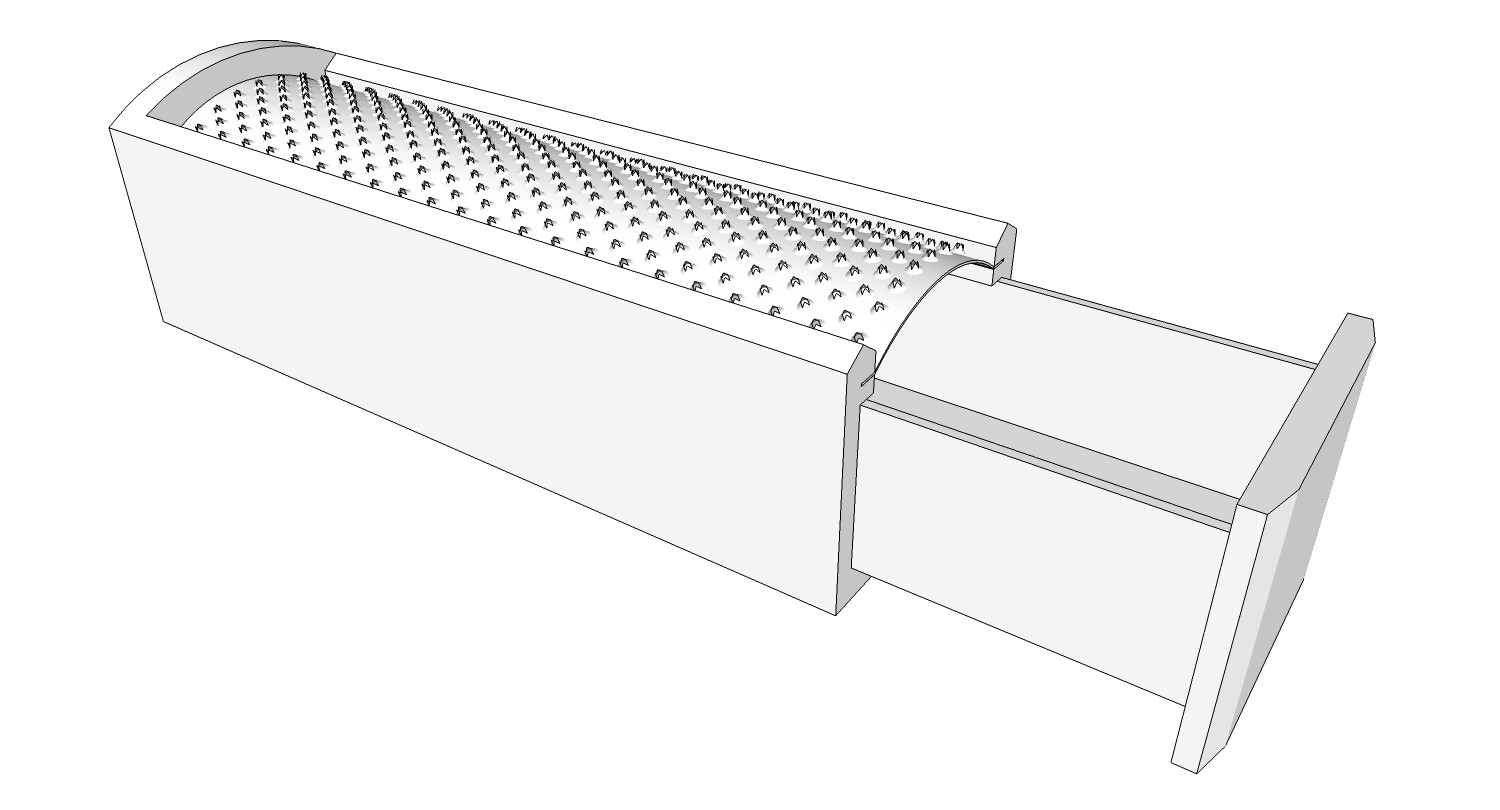
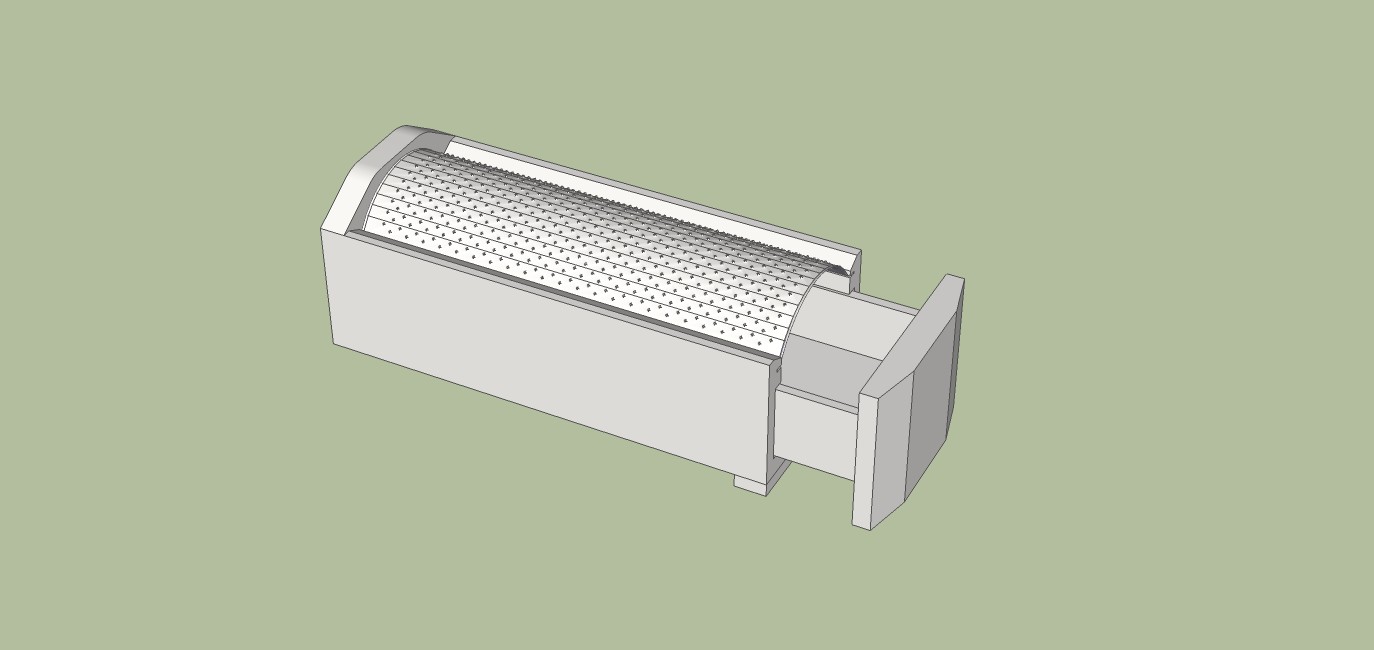
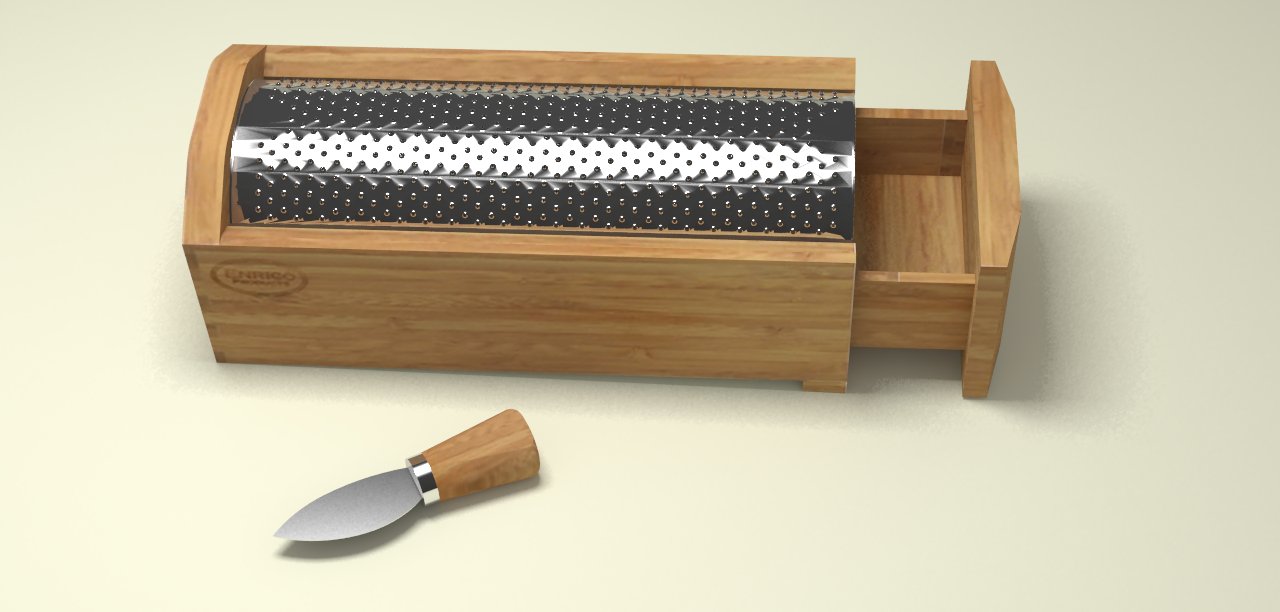
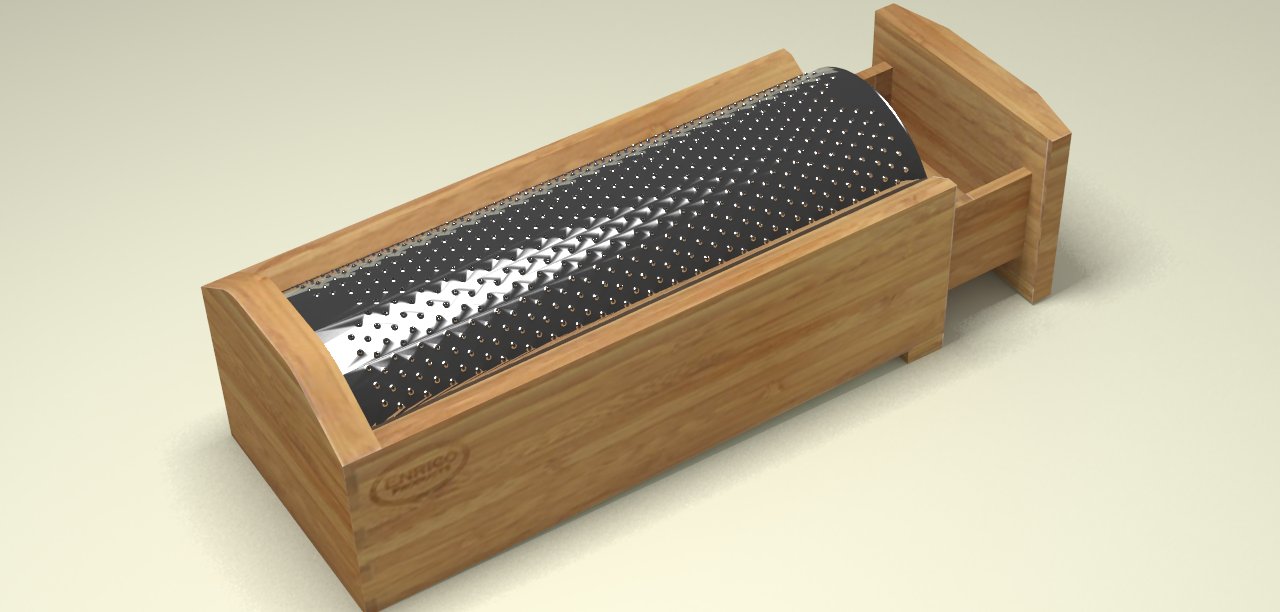
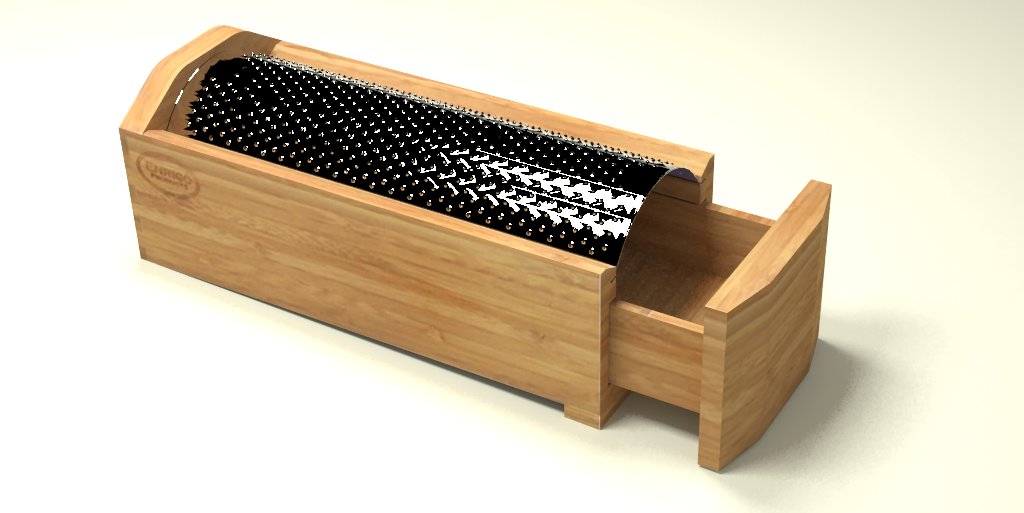
    Model this: Enrico bamboo cheese grater

    Scheduled Pinned Locked Moved Gallery
    37 Posts 20 Posters 3.1k Views 20 Watching
    Loading More Posts
    • Oldest to Newest
    • Newest to Oldest
    • Most Votes
    Reply
    • Reply as topic
    Log in to reply
    This topic has been deleted. Only users with topic management privileges can see it.
    • daleD Offline
      dale
      last edited by

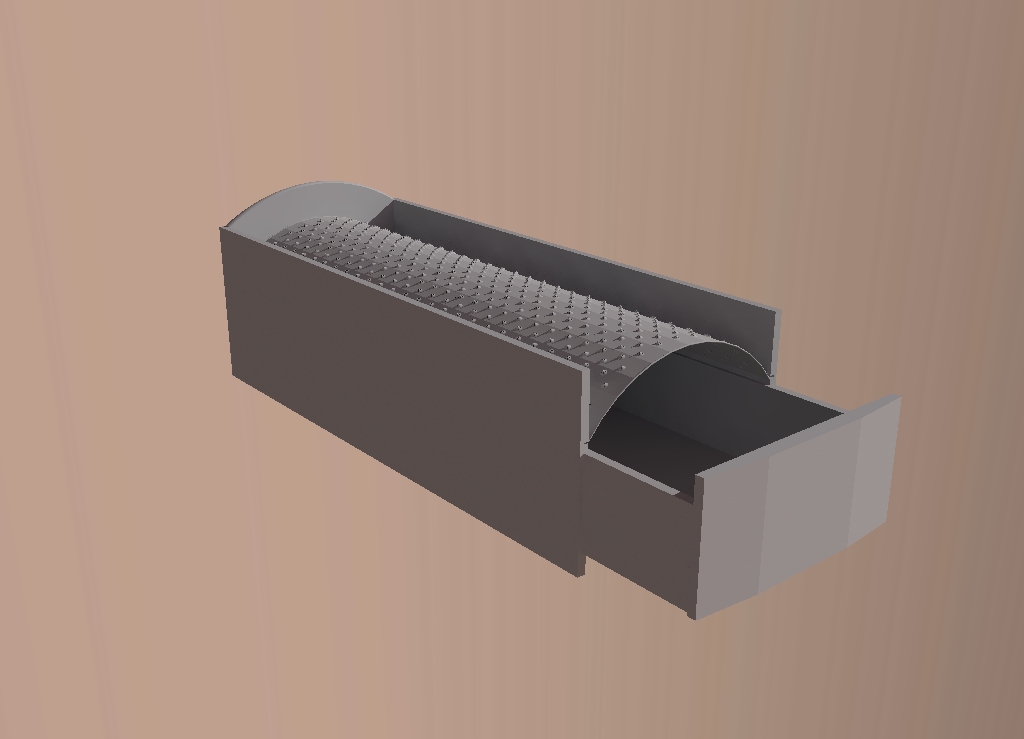
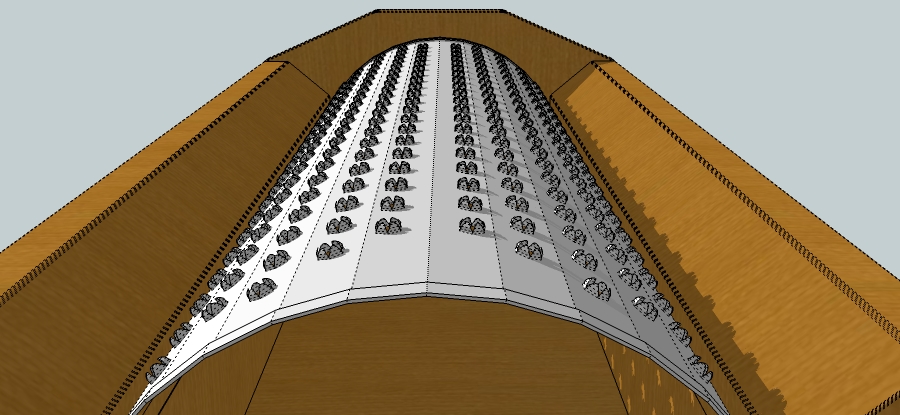
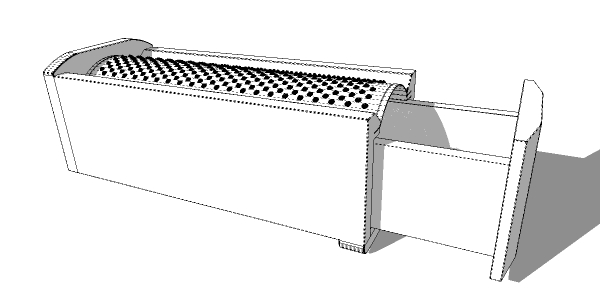
      My attempt. Primarily I used "follow me", and intersect with model to form the graters. Was good fun.


      Picture 128.png


      Picture 133.png


      Picture 134.png


      Picture 137.png


      GRATER2.jpg

      Just monkeying around....like Monsanto

      1 Reply Last reply Reply Quote 0
      • Rich O BrienR Offline
        Rich O Brien Moderator
        last edited by

        Okay, here's my ATTEMPT 😳

        Cheese Grater Textured.jpg

        Cheese Grater Lines.jpg

        Cheese Grater Wireframe.jpg

        Cheese Grater CloseUp.jpg

        Fun challenge and used 2 Ruby Scripts

        • Round Edge v2
        • Joint Push Pull

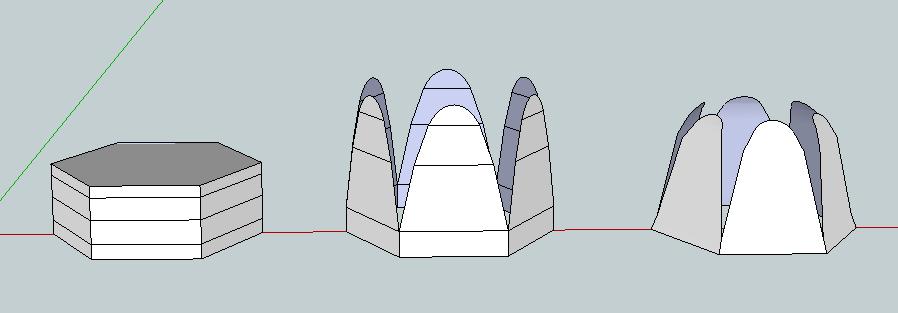
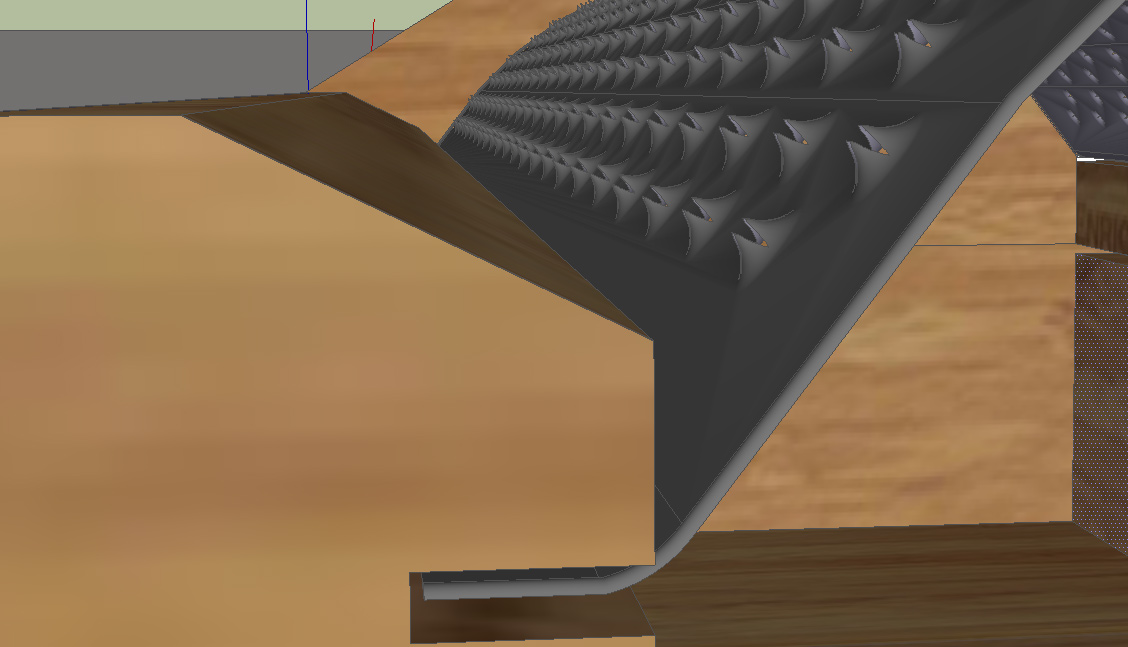
        To keep Poly count low in kept the graters as simple as i could, here's an example...

        Grate Design.jpg

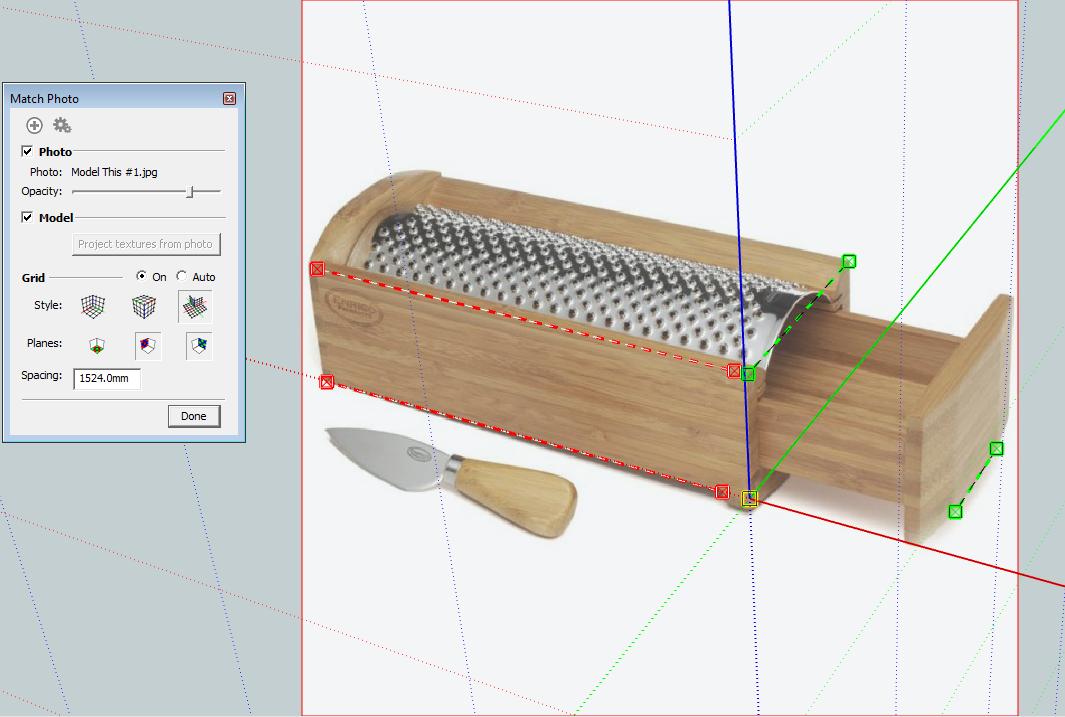
        Also used Photo Match to rough out the dimensions...

        Photo Match.jpg

        If someons feels the need to view it in SU here's a link...

        favicon

        (www.box.net)

        I didn't want to clutter the 3D Warehouse with Cheese Graters!!!

        Download the free D'oh Book for SketchUp πŸ“–

        1 Reply Last reply Reply Quote 0
        • D Offline
          d12dozr
          last edited by

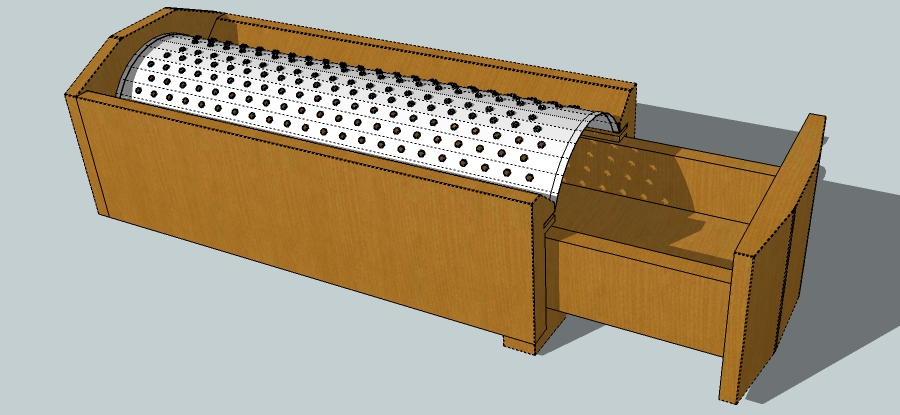
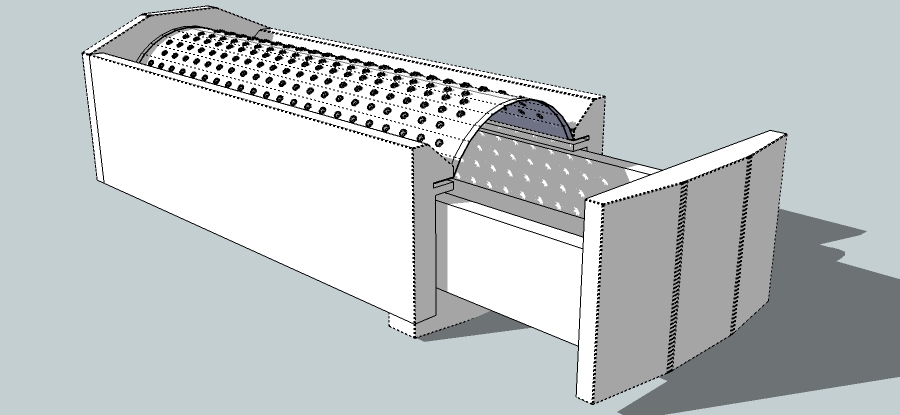
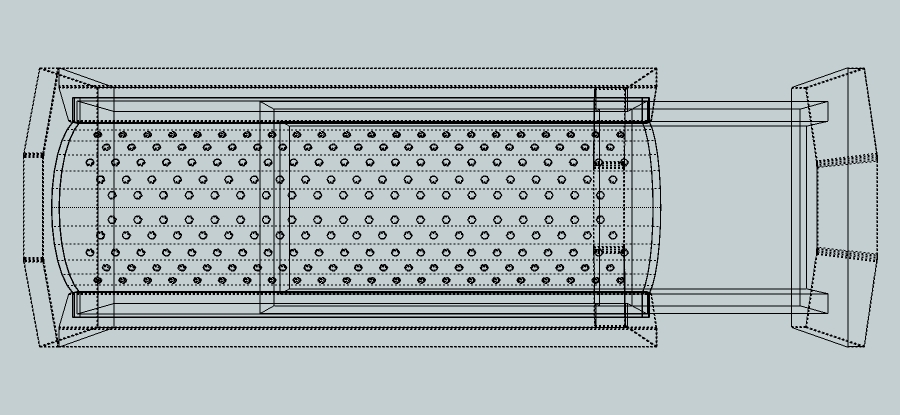
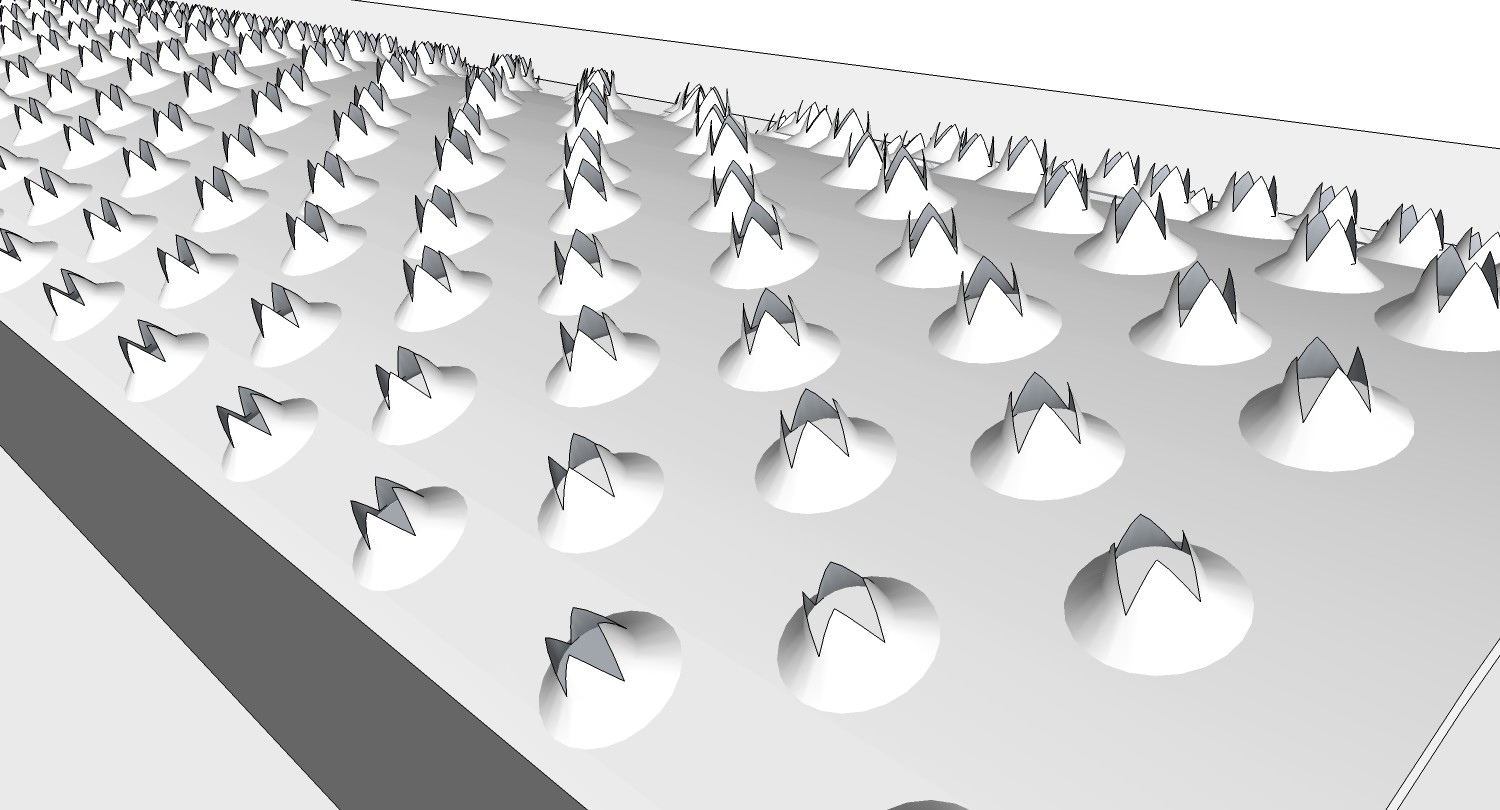
          This was fun! I tried to hurry at the start, made some sloppy geometry, and when I went to save SU did something called "Check Validity" and deleted most of the faces on my grater! πŸ‘Š So I had to redo them, but I think it turned out good.

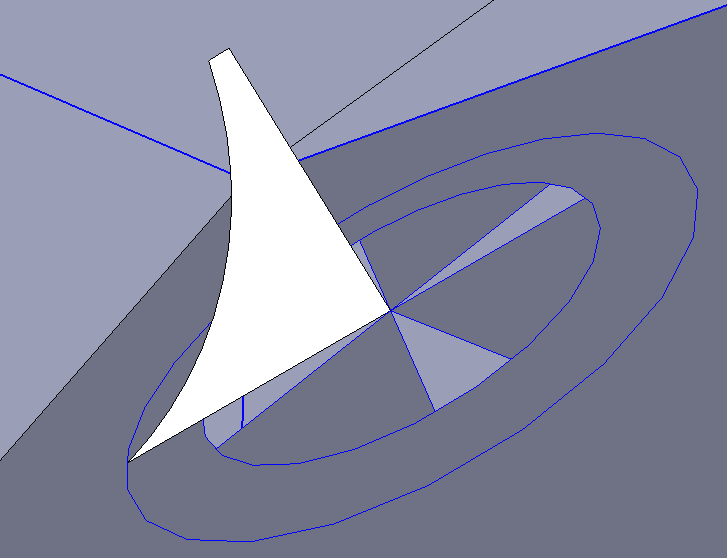
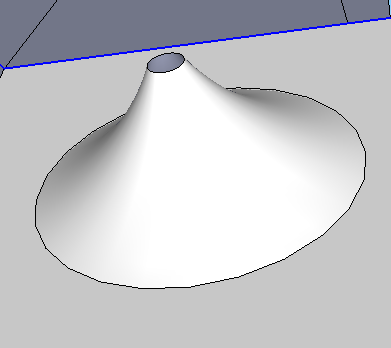
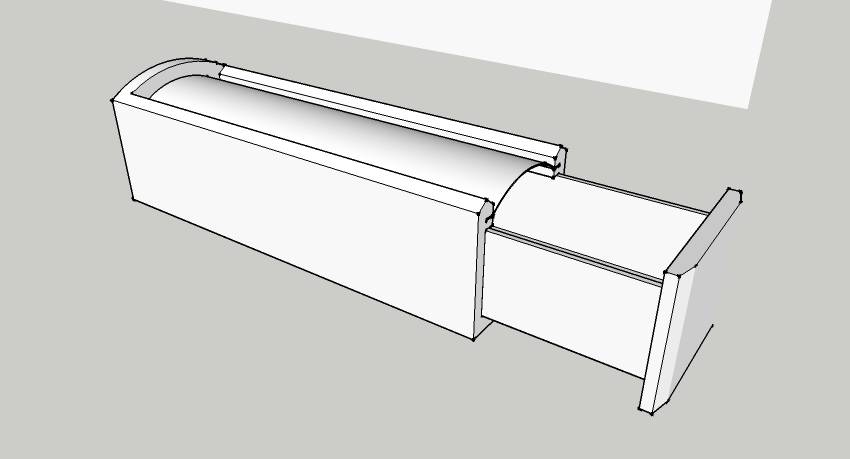
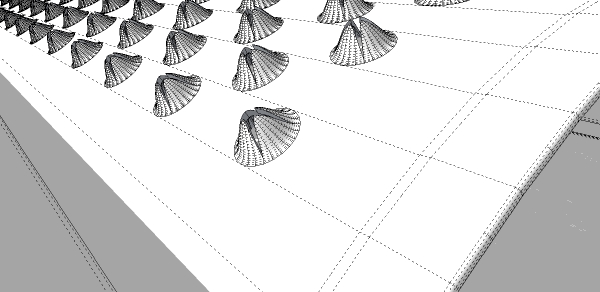
          I did not use any plug-ins. I made the box first, then for the grater I used 2 cones and "intersect with model"(see picture), made into a cutting component and arrayed them using a temporary plane to get perfect lines.


          Model this - Cheese grater4.jpg


          Intersect with model


          Finished cutting component


          temporary plane


          Model this - Cheese grater6.jpg


          Hidden geometry


          Model this - Cheese grater7.jpg


          A clay render, just to practice.

          3D Printing with SketchUp Book
          http://goo.gl/f7ooYh

          1 Reply Last reply Reply Quote 0
          • jeff hammondJ Offline
            jeff hammond
            last edited by

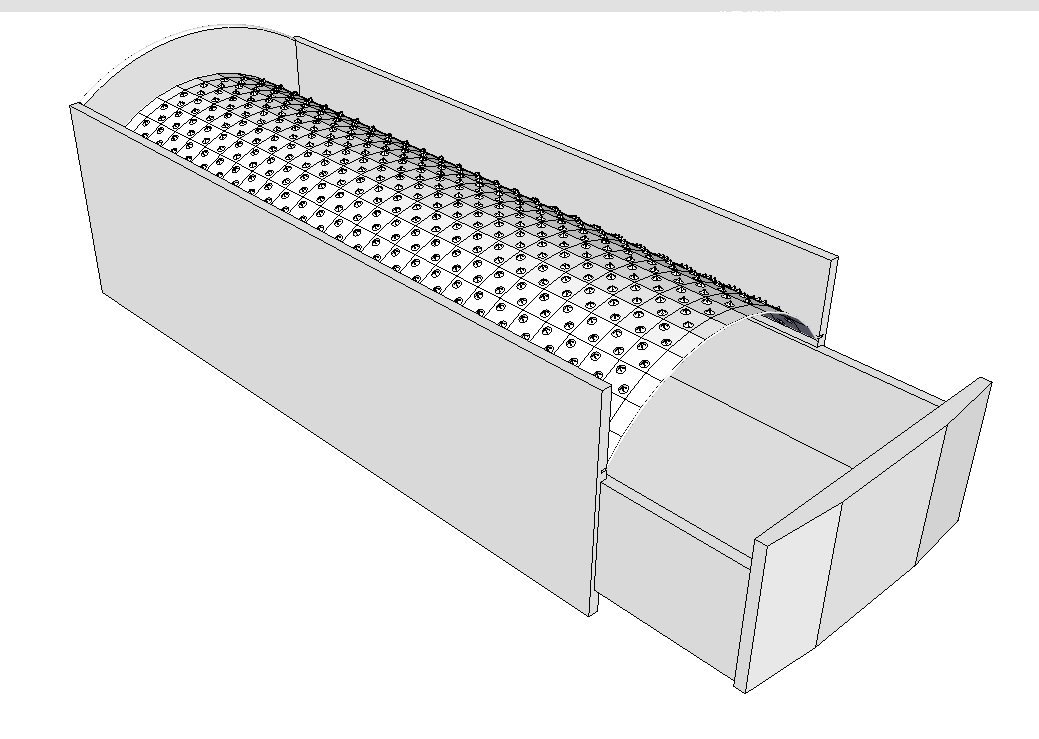
            i did another one which i managed to get the poly count down (though it's still pretty high).. i took some screen shots along the way.. .skp attached at the end of this post.

            no rubys.. 6 SU tools total were used.. i'll try to get some time tomorrow to make the cheese catcher..

            a pretty cool exercise for me in that i rarely ever model without thinking about dimensions etc.. this was done fully freestyle and only by eye. (but, there's also some mistakes that were made as to sizes/proportions so while it was fun, i couldn't use this approach if someone was paying me to draw this for them)

            cheese.jpg

            http://homepage.mac.com/jeffhammond/.Public/scf/cheeseSBS.jpg


            JH_Cheese_SKP.zip

            dotdotdot

            1 Reply Last reply Reply Quote 0
            • C Offline
              Cyberdactyl
              last edited by

              Looking good Jeff.

              So far, I'd say yours has the best 'feel' πŸ˜‰

              1 Reply Last reply Reply Quote 0
              • D Offline
                dedmin
                last edited by

                Projects like this really show how week SketchUp is with hi poly modeling! I used Fredo's round corner and radial bending to make cheese grater and it took half and hour just to bend and killed SketchUP! It was a breeze in 3DS Max!

                1 Reply Last reply Reply Quote 0
                • D Offline
                  d12dozr
                  last edited by

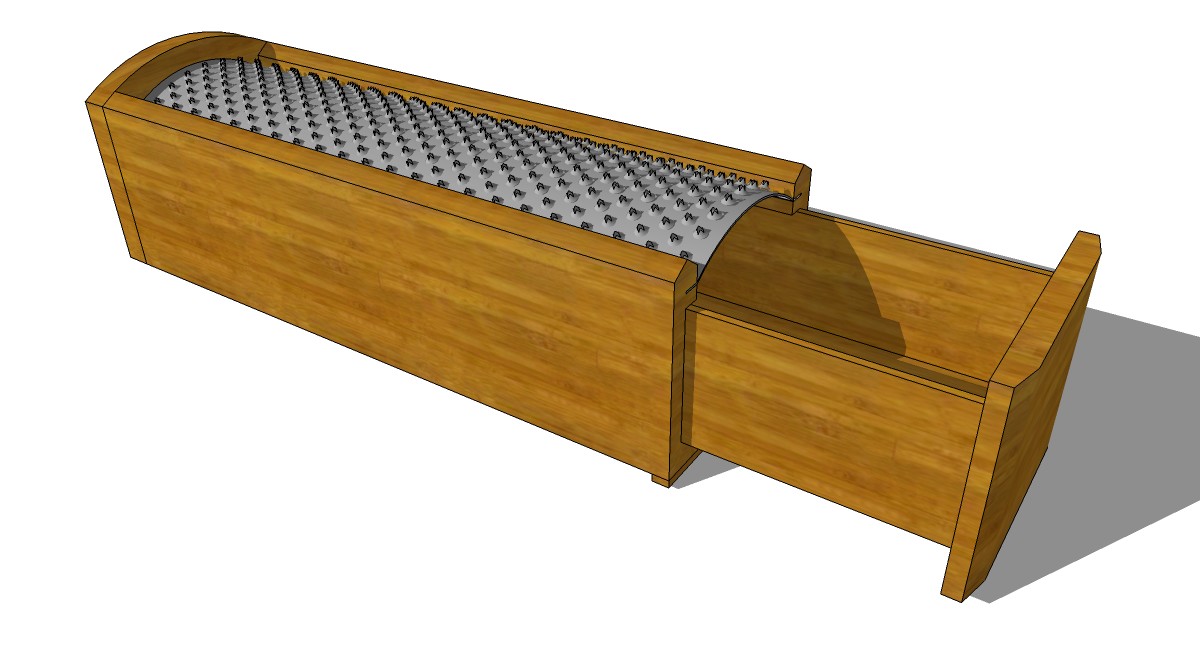
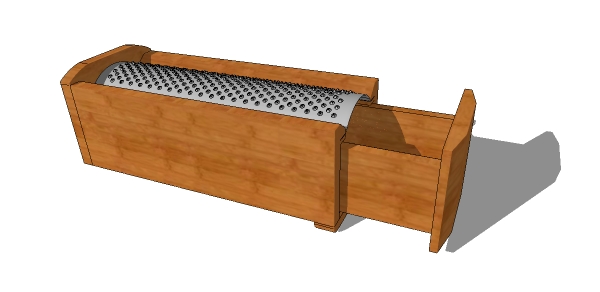
                  Mine textured and a fun clay render as well...


                  Model this - Cheese grater8.jpg


                  Colored lighting effects for fun

                  3D Printing with SketchUp Book
                  http://goo.gl/f7ooYh

                  1 Reply Last reply Reply Quote 0
                  • R Offline
                    rev3rse
                    last edited by

                    It seems simple, but that little element was a bit difficult to model.
                    Texture extracted from posted picture πŸ˜„
                    I was trying to use Round corners ruby, but in the end i've preferred to not use it..
                    For the knife, a simple truncated cone with 2 planes in intersection
                    Some screenshots, details of work in progress and final piece (with some renders for fun..)


                    gr-01


                    Grattugia-02.jpg


                    Round-corners ruby


                    The knife


                    Grattugia-coltello.jpg


                    Grattugia-04.jpg


                    Final render.jpg


                    dettaglio.jpg

                    1 Reply Last reply Reply Quote 0
                    • jeff hammondJ Offline
                      jeff hammond
                      last edited by

                      let me guess EA, 300,000 polys? πŸ˜„

                      your post reminded me that i used weld.rb with mine.. it's been a keyboard shortcut for so long that i forgot it was even a ruby.

                      dotdotdot

                      1 Reply Last reply Reply Quote 0
                      • M Offline
                        MIke Ravenwolf
                        last edited by

                        lol, wow,
                        definitively can see how my model will have some, cough, deficiencies, compared to some of these I've seen. πŸ˜„
                        All i have left to model is the cutting teeth on the grater and maybe the knife. Hopefully by tonight II can post it.
                        going to try and give Jeff's method a shot. seems like it would work best for the approach I've been doing.

                        Carpe Diem, Foveo Noctim

                        1 Reply Last reply Reply Quote 0
                        • EscapeArtistE Offline
                          EscapeArtist
                          last edited by

                          Rubies used: Round Corner, Weld, Bezier Curve, set center point

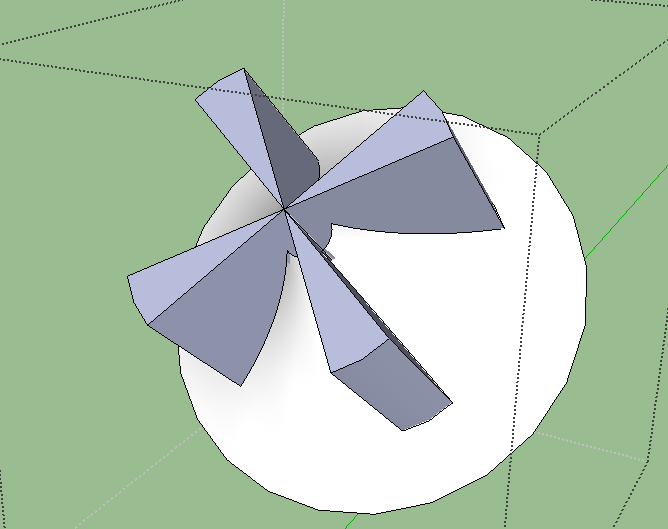
                          Grater pointy parts constructed similar to Dale's method; Bezier created the shape, follow me made it, center point allowed me to place it, and intersection cut out the "star" shape, followed by removing unwanted geometry. The metal here actually has thickness in case we render. Otherwise, it's pretty standard SU construction and tools. This model is pretty darn heavy. I definitely learned something building this, figuring out how to place the pointy parts on the grater was a challenge for me.


                          GRATER.jpg


                          GRATERcu.jpg


                          GRATERt.jpg

                          1 Reply Last reply Reply Quote 0
                          • EscapeArtistE Offline
                            EscapeArtist
                            last edited by

                            @unknownuser said:

                            let me guess EA, 300,000 polys? πŸ˜„

                            your post reminded me that i used weld.rb with mine.. it's been a keyboard shortcut for so long that i forgot it was even a ruby.

                            208,700. Sketchup was feelin' the pain. πŸ˜†

                            Weld's quickly become one of my favorite rubys, makes for a lot smoother model.

                            1 Reply Last reply Reply Quote 0
                            • soloS Offline
                              solo
                              last edited by

                              These are all fantastic, the best part about this exersize is that there are many ways to skin the proverbial cat, so many different methods used to achieve a similar result. This is what makes SU such a great tool.

                              http://www.solos-art.com

                              If you see a toilet in your dreams do not use it.

                              1 Reply Last reply Reply Quote 0
                              • daleD Offline
                                dale
                                last edited by

                                These are great, and as usual I've gleaned a great deal. My greatest respect guys πŸ‘ Thanks for this Pete.

                                Just monkeying around....like Monsanto

                                1 Reply Last reply Reply Quote 0
                                • RichardR Offline
                                  Richard
                                  last edited by

                                  Stevie Wonder got one of those for christmas - he said it was the most violent book he ever read! πŸ˜„

                                  [BUILTBRAND.COM.AU](http://builtbrand.com.au/)

                                  1 Reply Last reply Reply Quote 0
                                  • dermotcollD Offline
                                    dermotcoll
                                    last edited by

                                    🀣 Sweet aussie humour !!!

                                    When you burn your arse - you gotta sit on the blisters!!

                                    1 Reply Last reply Reply Quote 0
                                    • jeff hammondJ Offline
                                      jeff hammond
                                      last edited by

                                      rotated the knives 45deg for more practical cutting, added a logo, roughed out the box, pseudo clay render.. i think that's about as far as ima take this one..

                                      click for larger

                                      close up renders with the metal are going to show the problem of keeping the poly count down so i do think if i'm ever faced with a similar situation again, i'm going for high poly and instancing (which i very recently found out is possible with indigo πŸ˜„ )

                                      dotdotdot

                                      1 Reply Last reply Reply Quote 0
                                      • jeff hammondJ Offline
                                        jeff hammond
                                        last edited by

                                        @rev3rse said:

                                        Texture extracted from posted picture πŸ˜„

                                        nice thinking.. it looks good.

                                        dotdotdot

                                        1 Reply Last reply Reply Quote 0
                                        • M Offline
                                          MIke Ravenwolf
                                          last edited by

                                          lol wow... I only wish i could get a render as good as Reverse or Jeff's (or anyone's for that matter lol) but i don't think that'll be happening anytime soon.

                                          I'd have posted it last night if i wasn't being sucha perfectionist (bottom face of the grater plate...lol something no- one will likely ever see....), but when you have a 4 week old that is refusing to fall asleep and keeping you up with her crying...lol what else are you going to do. πŸ˜„ ahhh the joys of new parenthood,lol

                                          what did you use to get the 'psuedo-clay' render, Jeff?

                                          Carpe Diem, Foveo Noctim

                                          1 Reply Last reply Reply Quote 0
                                          • jeff hammondJ Offline
                                            jeff hammond
                                            last edited by

                                            hey Mike.
                                            congrats on the new family member!

                                            i used indigo renderer which works out especially well for this because it will render backfaces.. there's no way i would want to attempt adding a thickness to the metal just so i could have all front faces showing πŸ˜„

                                            dotdotdot

                                            1 Reply Last reply Reply Quote 0
                                            • 1
                                            • 2
                                            • 1 / 2
                                            • First post
                                              Last post
                                            Buy SketchPlus
                                            Buy SUbD
                                            Buy WrapR
                                            Buy eBook
                                            Buy Modelur
                                            Buy Vertex Tools
                                            Buy SketchCuisine
                                            Buy FormFonts

                                            Advertisement