Texture/Geometry Help
-
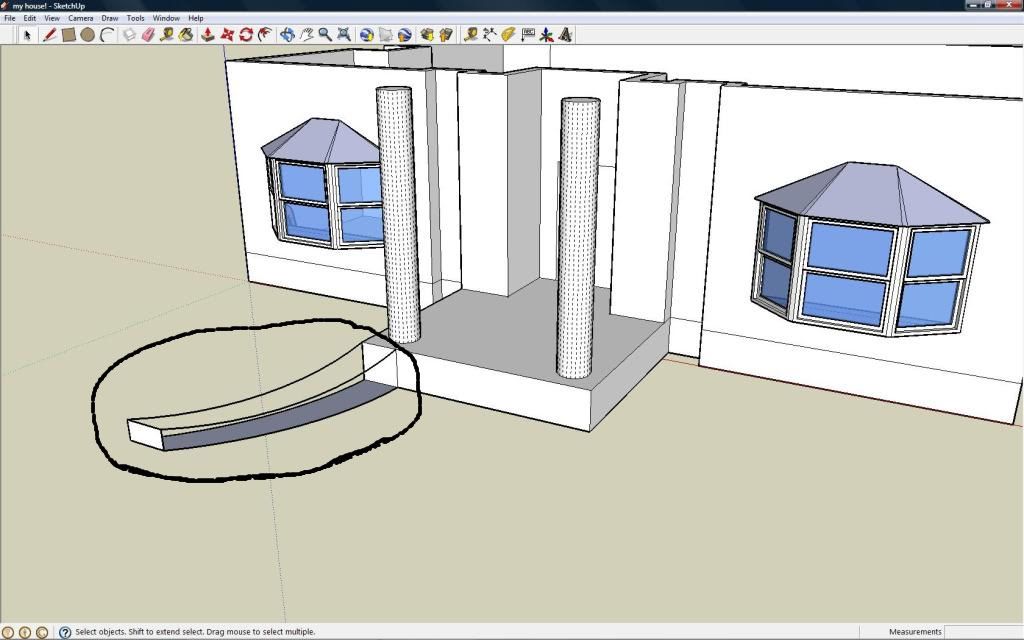
Hi, I'm kinda new to Sketch up, been using solid works a while and ran into a problem with sketch up that I can't figure out.
I'm doing a curved entry way from a house and the problem is, all the lines are connected but they wont create the box/surface I need so I can texture it.
Please help!! Thanks for any future help too!
-
Without going in too too much detail, it is to do with the fact that SU is a polygon modeller, so everything is made of perfectly flat faces.
This means it is hard to get faces to fill in the manner you want.
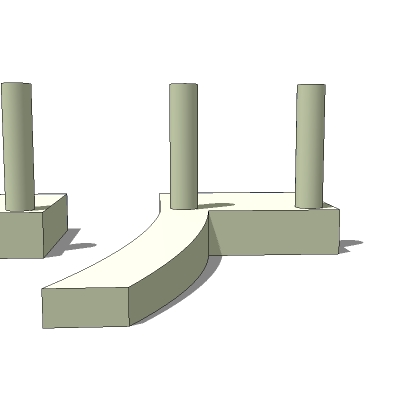
Try the method described in this tutorial.
-
I see Remus got up early this morning.

You can use the method he describes...I've attached a similar tutorial, but one that gets the face of the ramp // to the original porch. Use the scene tabs to advance through the tut.If you want to go with what you have already, you'll need to 'stitch' the faces together....draw lines across the gaps, joining the green inference dots that appear. You may be able to draw verticals at the sides, creating quadrilateral faces, but you'll almost certainly need to zig-zag across the top face, creating triangles.
-
Once you have made the ramp by Alan's method, if you decide the slope isn't what's needed, then you can select just the top face of it and rotate it about the red-axis, centred on the edge of the upper-plinth: in this case about 6.6 degrees will have it drop down a little so that it's meeting the ground 'feathered'. After you input the 6.6 [BUT before doing anything else] you can always type new values to tweak it - e.g. type 6 or 7 and you'll see the ramp slope vary accordingly...
-
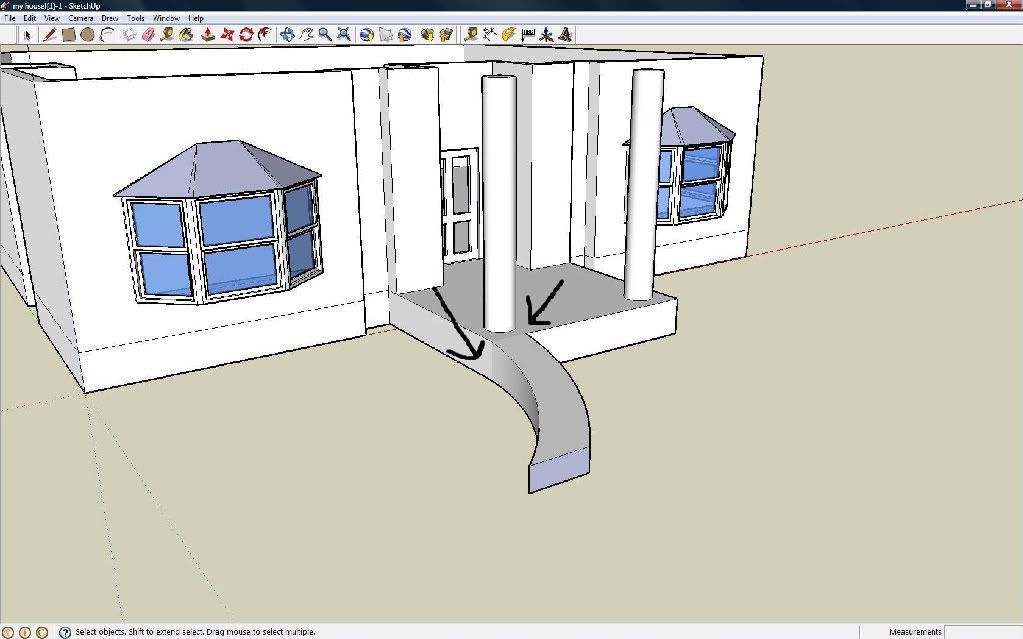
Okay, so thanks to your awesome tutorials ( both of you ) I was able to get what I wanted. Took me a while. Heh, did not even know that the Follow Me tool existed! Anyways, in the picture attached is my only concern, It might just be me but yours didnt have this and I want to know what I did wrong etc. Call me a perfectionist.
Also is there a way to mirror objects?
Thanks for help!
-
The change of face colour are from their plane changes. If you temporarily 'view hidden geometry' you'll see the various hidden edges that form them. You can un-hide/un-smooth these edges, or draw new edges over them if you want...
Also if you want to 'drop' the ramp slope so its toe is at grade then use the 'rotate top face' idea I already explained...
To mirror stuff... Group the ramp [select all of its bits and then 'make group'] and then copy that group to one side [Move+ctrl] - as a group its geometry doesn't now stick to anything else so it's 'self-contained'... now you can Scale the copy - drag a central green-handle generally towrds how you'd like it to be 'flipped' and type then -1, the thing 'mirrors' about the plane the handle pulled against as an exact mirror. Finally Move the flipped copy to where you want it to end up - you can finally Explode the copy if needed...
There is also my 'Mirror.rb' script - but for this very simple mirroring the above methods work just fine...
-
Thank you all for the help!
Hello! It looks like you're interested in this conversation, but you don't have an account yet.
Getting fed up of having to scroll through the same posts each visit? When you register for an account, you'll always come back to exactly where you were before, and choose to be notified of new replies (either via email, or push notification). You'll also be able to save bookmarks and upvote posts to show your appreciation to other community members.
With your input, this post could be even better 💗
Register Login


Advertisement