Silvershadow's eye candy 1: The river runs thru it
-
%(#BF0000)[The ghost returns....
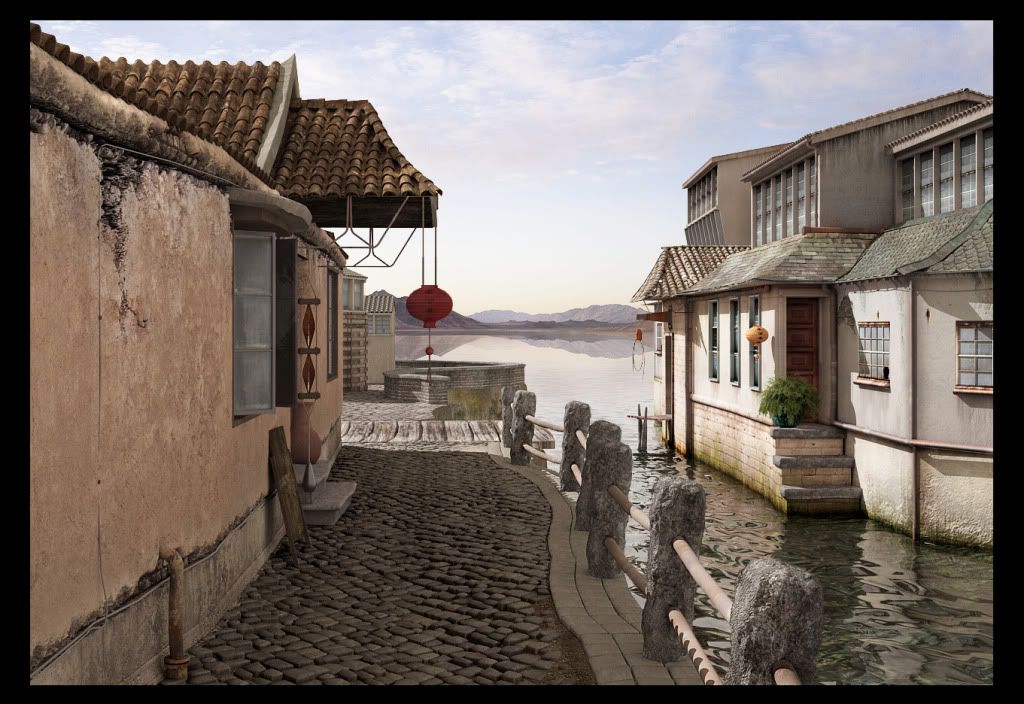
Hi all young and old sketchup users, developers of the new sketchup 7 team,and any other modeler out there that do not really know the true potential power of this amazing tool. Today i want to share the power of sketchup itself, to encourage those who thinks sketchup is just a tool that can only build block models and nothing more. Keep in mind it was rendered in vray but i want to focus more on the power on sketchup itself.
I was encourage by this person on spinquad who posted a water village model and thought wow, i want to build this, hee hee and so i did.
Note also that everything you see in this model is raw model, no textures,
no bumps, no displacement, just hardcore modeling. It is still an ongoing process but i really had to share with you guys my new baby
Information:Render time period: 4 days
File size currently: 17.9mb
Platform build on: proud to say, 100% sketchup (hand modelled)
Plug-ins mostly used: bezier round edge, knife,subdivide and smooth,sketchy FFD, extrude along path and bezier curve, joint push pull,vector push pull.
I will attach also the reference image at the end so you guys can compare at the end.Last words: It was really amazing, to the developers, i hope you guys see this and realize there are some people out there that uses sketchup for more than just block modelling, please allow more poly models into your new release, and for those who have just started working on sketchup, hang in there, this is an amazing program ! Hi 5

Process (1-12)


 chao]
chao] -
hi silvershadow!
great modelling! did you model each roof tiles and the stones? can you share more about the process? i really like to learn this!

i forgot to ask, whats the spec of your pc?
-
thats really good. Good job on modelling the tiles/paving, although i dread to think what the poly count is.
-
%(#BF0000)[yes i did build every cobble, and roof tile lol
Cobbles:
i started with a image, traced it and made symbols of the cobbles to keep the file size small. then i used bezier round edge on it to smoothe and round its edges. (a bit of cleanup went into that, sometimes destry the faces)
then i packed them on a flatsurface and deleted the parts i did no need on the sides.
Then i used the plugin called drop. It dropped the cobbles to the sloped surface. then i just fine tuned them to look nice.
files size of all the cobbles 1.5MBRoof tiles on canopy.
I used a symbol again for roof tiles to keep file size small.
on for facing up and the other one for facing down. I stacked them where i needed them
and deleted the edges i did not need. I used a plugin called sketchy ffd, (benging geometry)
pretty cool tool but does not work in symbols. SO i had to destroy the symbol on the canopy boosting the file size to about 5mb. (could be great if this could be fixed that sketchy ffd works with symbols custers)
Anyway, it bended it with sketchy ffd and saved me hours of re shaping work in sketchup.] -
%(#BF0000)[Remus:
hee hee thats the idea. I wanted to create a high poly model 100% build in sketchup and see if its possible to show to everyone sketchup is not a program to think light off ]
] -
Dear Silver-Shadow
Amazing modelling! You have indeed demonstrated what one can do with just Sketchup.
I'm not too sure what you mean by symbols. Could you put together a tutorial showing just one thing: how to make the cobbles (just a small area).
Kind regards,
Bob -
%(#BF0000)[Hi sorry correction {symbols = components}
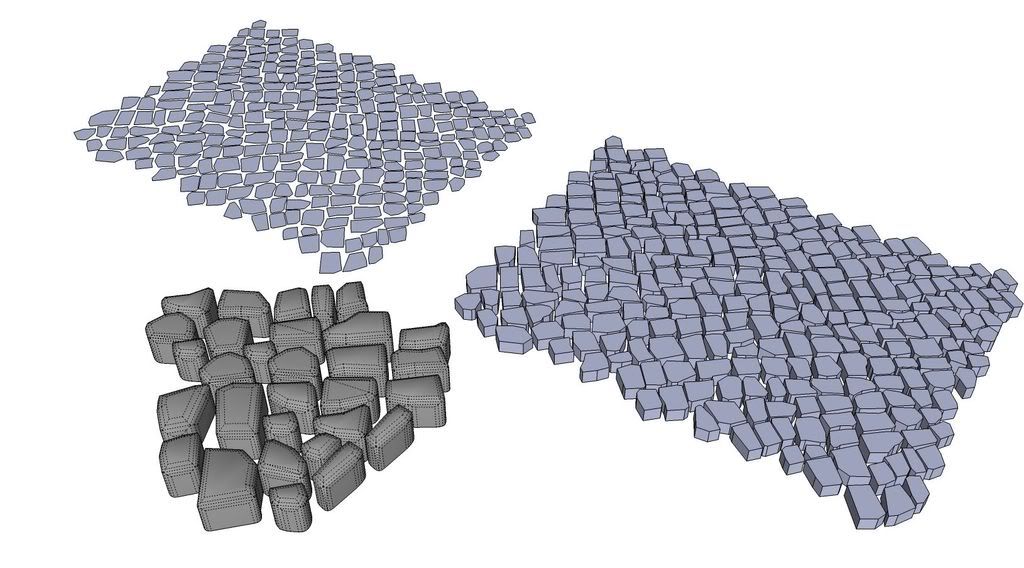
ok here is a preview how it was done...
see image... i traced a picture of cobbles and was left with this, extruded the tracing and made a component of each cobble. then rounded its edges with bezier round edge plugin. cleaned it up a bit and whoala. by the way..tool me 4 hours to build my cobble road lol
] -
As said before next door:

-
%(#BF0000)[thanx stinkie
 now we just need to hope the sketchup 7 development team sees this and create us a better bad ass sketchup 7, handling multi cores and more poly count than before to handle these puppies better]
 -
Hi silver, this is pretty amazing!
It is so good to see these latest rubies being used to create a more organic model like this.
I hope we start seeing more like this.
You have shown a lot of patience in creating the cobbled path alone!Love it

-
this is truely amazing!
and I am especially impressed by your patience. 4 hours for the road... really deeply impressed

-
Hey Ho Silver. This is marvelous!
I remember seeing the same scene in the VrayforC4D gallery section and I must say your SU version is as good or even better.
Fantastic modeling and great to see SU used to do more than rectangular modeling.I appreciate a lot your 'how to' explanation and the plugins you used.
Hopefully dev team of SU7 watches this thread as you are right to call for more modeling tools in next release.Some of the rubies you used are new to me (musty check out the Bezier thing) so I watch this thread carefully for any new hints.
I can't wait to see a full textured photoreal rendering in the end. Knowing your capabilities, I am sure it will look hot.
Oh yeah, maybe Whaats new 'spherical uv-mapping tool' can be handy when you start texturing... for some parts in the scene (e.g the light ball, maybe the cobbles etc...).Cheers mate and congrats already for your achievement.
See you around and send my regards to FreeAgent.
Kwistenbiebel
-
thanx biebel, thought you might like it lol
-
Awesome stuff mate, I hope to see this all the way to completion.
The texturing is going to be the cool part.
What engine do you intend using for final rendering ... Vray?Amazing new tools we have these days.
-
 %(#BF0000)[hey guys, i made a tut for you guys on cobbling....so cool you can use it anywhere and its actually really cool. Things you need is sketchy physics.
Step one...set up your model, build the slop the cobbles is gonna lie on...
once finished, group the site, make sure the blue is facing down, so the right face is facing upwards. then go and build your high poly cobbles. once finished make them a symbol and copy as many as you need.
position it above your site.
select all your cobbles and right click on them as a group and look for sketchy physics and look for shape, choose box for a shape.
Next step is to select the floor (slope) and choose its shape as static mesh.)
Then move it just above the slope, not so far as indicated on the image.
Ready:....steady ...press play...
wait 5 seconds or less and see how these stone pave themself. after its settled...press cntrl a, to select all and copy.. open a new drawing, paste it and its settled in that state. pretty cool hey lol. i have attached a file so you guys can see what i try to explain. just press play once youve opened the model (skeychy physics needed)
....comments are welcome...]
-
Excellent, thank you - that is so clever. Especially grabbing the SketchPhysics model before it resets

Bob
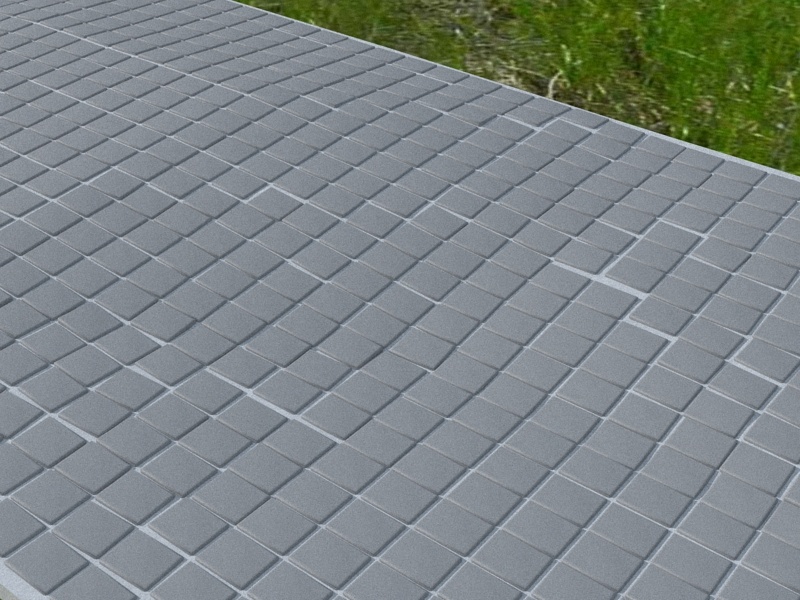
PS I pulled up the surface with vector push-pull to create a mortar bed and ran a quick render.

-
so glad you guys enjoy this...it makes modelling just more fun hey lol
-
Great tut Silver! Thanks for that

-
Thanks from me too! This'll come in handy!
-
thank you!

Advertisement


