sketchucation logo sketchucation
    • Login
    1. Home
    2. ktkoh
    3. Posts
    ℹ️ Licensed Extensions | FredoBatch, ElevationProfile, FredoSketch, LayOps, MatSim and Pic2Shape will require license from Sept 1st More Info
    K
    Offline
    • Profile
    • Following 0
    • Followers 0
    • Topics 83
    • Posts 249
    • Groups 2

    Posts

    Recent Best Controversial
    • Rotating Component so long dim is on red axis

      I have code to tell me which axis the max bounds dim is on and now I would like to rotate the component so the largest dim is on the red axis. I need help with the translation statement to make the proper rotation.

      model = Sketchup.active_model
      entities = model.entities
      ss= model.selection
      entity = ss.first
      selection_bb = entity.bounds
      max_dir = "blue axis"
      if selection_bb.height > selection_bb.depth
          max_dir = "green axis"
          if selection_bb.width > selection_bb.height then max_dir = "red axis"  end
      else
          if selection_bb.width > selection_bb.depth then max_dir = "red axis" end
      end
      
      UI.messagebox("Max Dir = " + max_dir)


      Thanks
      Keith

      posted in Plugins
      K
      ktkoh
    • RE: Dovetail plugin

      I decided to add another way to detail drawers and add dovetails to the corner joints using some other plugins and my K2WS_Tools.
      http://forums.sketchucation.com/viewtopic.php?f=323&t=39870

      My process is to use a starting drawer component I created that has 1 dr box side, 1 dr box end, dr bottom and an added front. (I happen to build most drawers as complete drawer box which has a drawer front added.) I bring this component into my drawing re size with Fredo6 FreeScale, complete the box, add dovetails, then use BooTools Difference to add the bottom slots. The reason I start with only a partial box is that if there are 2 instances of a component (think sides) that re-size then one of these components is made unique and has a new name. So this way I make the copies after re-sizing and only have one side component.

      To demonstrate this process I have uploaded 2 videos to YouTube: Part 1 shows some of my drawing style and completing the drawer. Part 2 shows how my K2WS_Tools is used to add thru dovetails and how BooTools is used to make the bottom slots.

      These are my very first videos so be kind with comments about the presentation but see if this would fit your sketch-up workflow.
      Keith

      Part 1:

      [flash=560,315:l2tmpd3h]http://www.youtube.com/v/aVRiQZhyus0[/flash:l2tmpd3h]

      Part 2:

      [flash=560,315:l2tmpd3h]http://www.youtube.com/v/od-lx0Db0U0[/flash:l2tmpd3h]

      posted in Woodworking
      K
      ktkoh
    • RE: Help needed to test cabinet plugin

      Tested your cabinet plug-in and was impressed. However I was trying to design a base cabinet with 2 drawers at the top and then doors on the lower part of the cabinet. What I got was a 30" tall base cabinet with 2 doors and then 2 drawers on top of the base cabinet with a total height of about 50". Also when I specified drawers I was not asked anything about size. I'm sure there are too many options to please all cabinet designs but I would think this would be able to get a kitchen design started and the individual could add/change some details with less work than starting from scratch.

      Keith

      posted in Developers' Forum
      K
      ktkoh
    • RE: [Code] Parsing arithmetic formulas

      I used this code in my joint tools and found it very useful as the user could enter equation if they do not know the actual value. However I could not make it work if the user entered the " for inches as sketch-up does.

      Keith

      posted in Developers' Forum
      K
      ktkoh
    • RE: Edge length question

      Thanks TIG That was exactly what I needed!!!

      Keith

      11

      posted in Plugins
      K
      ktkoh
    • Edge length question
      cface=codef.entities.add_face(@pt)
      							orig_ents = codef.entities.to_a
      							cface.pushpull(-1*@c2depth)
      							if @edge == "Round"
      								fin_ents = codef.entities.to_a
      								added_ents = fin_ents - orig_ents
      								added_ents.each {|e| e.smooth="true" if e.is_a?(Sketchup;;Edge) }
      								added_ents.each {|e| e.soft="true" if e.is_a?(Sketchup;;Edge) }
      							end #if Round
      

      I am using the code to smooth the edges of a Mortise however I don't want to smooth the bottom edges. I have tried several ways to add the test "e.length == @c2depth" but have been unsucessful. Any ideas how to do this??

      Keith

      posted in Plugins
      K
      ktkoh
    • RE: New mortise & tenon tool for woodworkers

      I have expanded on this program and released a Joint tool for woodworkers. See this post http://forums.sketchucation.com/viewtopic.php?f=323&t=39870#p352395 It is still a work in progress but I think quite useable at this point. There still is the problem that I don't incude a visual tutoral. As the author I think its easy but I am sure that users may not see it this way. However if you look at the included drawing and practice on the joints I have included there I think its managable. Use the xray setting so you can see what is happening and as always a "undo" puts every thing back and you can test new data.

      Keith

      posted in Plugins
      K
      ktkoh
    • RE: K2WS_Tools a joint tool set for SU

      Load the SU Doc drawing file K2_Tools_Doc.skp and review the scene tenon dim. Now open the scene test joint 2 and I will try to walk you thru the process.
      Lets start with the M_T_Joint tool. Select the tool from the Tools menu flyout.
      The status text(at the bottom of the screen) will be "Select 1st Component for Tenon Joint: RIGHT CLICK to Change Data: [SPACE BAR] to Exit" The component to get the tenon is the horizontal board connected to the sq leg. So select this with the left mouse button.
      The status text now reads: Select 2nd Component for joint: This is the square leg select and it is hidden so you can see the end of the horizontal board that will get the tenon.
      The status text now reads: Select First Edge in component 1 Parallel to Tenon Width: In this case it would be the 3 inch edge. Select the edge.
      The status text now reads: Select Second Edge in component 1 90 degrees to First Edge (defines shoulder 1) So select the top or bottom thickness .075 edge. NOTE you may need to zoom in to pick a narrow edge look for the help to indicate the middle then select.
      The joint should now be complete and the selection tool active. Choose the x-ray view to see the results.

      All the programs work smiluar. You are always idetifing the face for the feature by selecting 2 edges. Screw Holes and Pocket Screws require the thickness edge first then the 2 edges that define the face.

      I do hope to have some demos up but that won't be for a while.
      Try this and see if it helps.
      Keith

      posted in Woodworking
      K
      ktkoh
    • RE: [Plugin] K2WS_Tools a joint tool set for SU

      Dave: I know you might need to hide the other component some times it seems to depend on what view you are looking at. You can do this without leaving the tool with a right click on the component and select hide the tool should stay active.

      At this time I don't know of a way to add copies of an component in a plugin. If I find a way to do this I can update later. That was why when I first sent you this it only added one component and it seemed you felt the joint was not complete.

      Mac users: I replaced the \ with / so the files should work on your systems.

      I did find that the M&T Joint tool still had require pointin to my dir so I also changed that. The zip file has been revised.

      Keith

      posted in Plugins
      K
      ktkoh
    • RE: [Plugin] K2WS_Tools a joint tool set for SU

      Dave: Which tool do you use for the second end of the strecher?
      Here is a picture of the M&T Joint tool on the Right end which makes the tenon on the strecher and the mortise in the leg. The legs are the same component flipped so the other leg has the mortise. Next I use the Tenon tool and added a tenon to the left end of the strecher. This is a picture of the results.
      When using the loose tenon tool use the loose tenon Joint first then the mortise tool on the other end of the strecher and see if that gives the same results

      I removed all the test directories the file and dir from the plugins dir restarted my computer and downloaded the zip file and installed it on my computer. So far no problems with any programs. Is there a better way to test?

      Keith


      tenon test.jpg

      posted in Plugins
      K
      ktkoh
    • RE: [Plugin] K2WS_Tools a joint tool set for SU

      The should be unziped in the Plugins folder. If not then copy the file loadK2WS_Tools.rb to the Plugins folder and then copy the dir K2WS_Tools and all its files also to the Plugins directory. I don't know the path to the Plugins folder for a Mac.

      Keith

      posted in Plugins
      K
      ktkoh
    • K2WS_Tools a joint tool set for SU

      I have taken the mortise tool idea and made a set of joint tools for woodworkers and posted it in the plugin forum http://forums.sketchucation.com/viewtopic.php?f=323&t=39870#p352395
      Check it out and see if you find it useful. This one also works in mm now.

      Keith

      posted in Woodworking
      K
      ktkoh
    • [Plugin] K2WS_Tools a joint tool set for SU

      UPDATED TO VER 2.1.0 8/1/2014
      Access by Tools/K2WS_Tools/Select desired Tool

      This plugin works on components and the Joint Tools (Biscuits, Domino, Dowel, Loose Tenon, M&T ) add the joint feature to both components with options to add detail to only one of the components or add joint reinforcement component (ie. Dowels)

      This is the new version 2.1.0 of K2WS_Tools for you to try. The first difference you will notice is in the menu. After selecting Tools/K2WS_Tools/Dowels a toolbar for the dowel program will open in your file. There are 2 icons with the joint tools for:

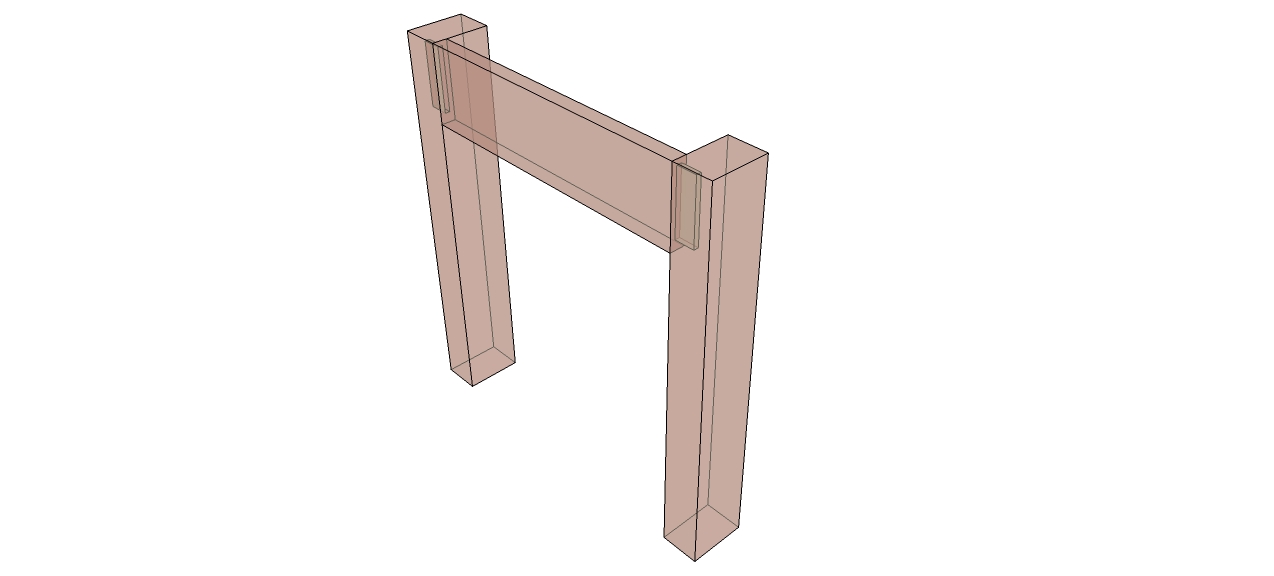
      1. Complete Joint: Select 2 Components to make the Joint the program will ask the user to select the desired operation on the selected joint. (Complete Joint, Single Comp, etc)

      2. Help This opens a help file for each program that describes its basic use.

      The toolbar is only temporary for that SU secession so I would just leave it in the main view but move out of your way.

      The other major difference is that parts added to complete joints are now instances of a component so if you add 2 loose tenons to a joint there will be 1 component and 1 instance. Also if any other joints use the same size loose tenon these will also be instances.

      Also the joint face dimensions are displayed for your convenience as you specify the joint data required.

      This was added to the SU PlugIn Store today.

      Keith


      Version 2.1.0

      posted in Plugins
      K
      ktkoh
    • RE: Opening other files from ruby

      Thanks Dan that worked just fine. I think I will only need to show the file once as the joint tools are not extreemly complicated but it is importsnt to know what edges the program is expecting you to pick.

      Thanks
      Keith

      posted in Plugins
      K
      ktkoh
    • RE: Opening other files from ruby

      Jim that command works however I couldn't get the path + file name formated with quotes so it would work the variable @helpfile contained the info but without the enclosing quote marks it didnt work.

      Keith

      posted in Plugins
      K
      ktkoh
    • Opening other files from ruby

      I was wondering if I could open and display a picture file from a rb file. I use a data file and the first time the program runs on a computer it creates that file and I was thinking it would be a good time to also open a help file the first time the program ran. I would like it to be a jpeg file saved from a SU drawing showing what the data represents and which edges the program is asking the user to select. Is this feasable?

      Keith

      posted in Plugins
      K
      ktkoh
    • RE: Fractions and units display

      Is there a model variable that would tell me what the units setting is? It might help the problem if I could change the units while the program runs and then change it back before the program exits. I did find a way to strip the inch unit sign

       @hasInch = @fpt.to_s =~ /\"/ ; if @hasInch then @fpt=@fpt[0,@hasInch] end
      

      however this was not a complete solution as calculations still stopped the program.

      @xcl[0]=x1+(@hpt-((@fpt)/2))
      

      These equations don't work when the @fpt variable is a fraction. And I also found out that other areas of my program where I am working on geom a float number does not seem to work. There are obviously many things I don't understand about length variables. Any thoughts or suggestions will be appreciated.

      Keith

      posted in Plugins
      K
      ktkoh
    • Fractions and units display

      I have the K2WS_Tools out for beta testing and a problem has shown up with fractions with unit display checked. I pass the input to Arithmetic parsing so fractions and equations are accepted. However with an input of 1/4" the units display the input is not processed into an SU length and the program bombs. I am thinking about parsing the input to remove the trailing " as I could in basic but so far I have not found enough the help file to tell me how to do this. I could use your help.

      Or if there is a better way of handling this problem I am also open to suggestions.

      Thanks
      Keith

      posted in Plugins
      K
      ktkoh
    • RE: Reverse faces after pushpull??

      Thanks Dan worked like a charm. I can't tell you people on the forum how much I appreciate the help. Books and help files only go so far its help like I get here that makes any thing I come up with possible. I have ideas and I am sure there are ways of getting it done but it takes help like I get here to make it a reality.

      Thanks All
      Keith

      posted in Developers' Forum
      K
      ktkoh
    • RE: Reverse faces after pushpull??

      Here is what I have been trying but the code breaks some rule or rules. I am trying to capture the no of entities created with the push pull and search thru them for faces and reverse the faces I find. On the first hole the no of entities increase from 49 to 84 so I was trying to loop thru those to find faces. error message is #<NoMethodError: undefined method `[]' for #Sketchup::Edge:0x9f13ee4>

      
      cface=codef.entities.add_face(@ptsc)
      orig_l=codef.entities.length
      #UI.messagebox("Orig no of enities = " + orig_l.to_s)
      if @thruHole == "Yes" then cface.pushpull((@edge3L-@z1)*-1) end
      codef.entities.erase_entities cface
      fin_l=codef.entities.length
      #UI.messagebox("Final no of enities = " + fin_l.to_s)
      	for j in orig_l.to_i..fin_l.to_i
      	ents = codef.entities[j]
      	if ents[j].typename == "Face" then ents.reverse! end
      end # for j
      

      Keith

      posted in Developers' Forum
      K
      ktkoh
    • 1
    • 2
    • 6
    • 7
    • 8
    • 9
    • 10
    • 11
    • 12
    • 13
    • 8 / 13