Hi all. I've been working on a plugin that will create gcode for my CNC router. This plug-in will take your 3D model and create 2.5D toolpaths for use on your CNC. Just download the Ruby file and put it in your plugins folder. I'm not a programmer by trade. I just started learning at the beginning of this year. This script took me that last 5 months to create and it probably is not coded the greatest, but it works!
= CNC 2.5D Profile
Copyright 2012, John Groeschel
All Rights Reserved
== Disclaimer
THIS SOFTWARE IS PROVIDED "AS IS" AND WITHOUT ANY EXPRESS OR IMPLIED WARRANTIES,
INCLUDING, WITHOUT LIMITATION, THE IMPLIED WARRANTIES OF MERCHANTABILITY AND FITNESS
FOR A PARTICULAR PURPOSE. PLEASE VERIFY GCODE CREATED PRIOR TO RUNNING ON CNC. I AM NOT
RESPONSIBLE FOR DAMAGE AS A RESULT OF USING THIS SCRIPT.
Permission to use, copy, modify, and distribute this software for
any purpose and without fee is hereby granted, provided that the above
copyright notice appear in all copies.
== Information
Author:: John Groeschel
Pieces of this code came from the following:
-Hatchfaces.rb by Joel Gustafsson
-Offset.rb by Rick Wilson
Organization:: none
Name:: CNC 2.5D Profile
Version:: 0.5
SU Version:: I developed this on SketchUp version 8. I have not tested on previous versions.
Date:: 05-May-2012
Description:: Creates gcode for CNC applications using 3D models in Sketchup
Requires:: TIG's Smart Offset http://sketchucation.com/forums/viewtopic.php?f=323&t=49624 V1.9 or higher (version 2.1 included in zip file)
History::
0.1 beta:: 22-May-2012
- Original release
0.2:: Corrected final cut from going in opposite direction from rest of cut.
Fixed inside only and outside only cuts.
0.3:: Updated to work on MACs and to make the code unit independent, so now it works with metric parts.
Added stock size to output file.
Revised so that z axis does not lift between cuts on single hole inside cuts.
Now more than one part can be cut at a time. They have to be grouped together.
It now sets the G90 or G91 automatically in the gcode file based on model units
You no longer need to supress the units symbol. This has been turned off in the plugin
0.4:: Added require 'offset.rb'
0.5:: Revised group checking on line 167. Fixed a bug that would not change the layer status back to default. Incorporated TIG's Smart Offset. Added "Stock to Leave for inside & outside cuts.
Usage:
There are a couple of settings within Sketchup that need to be set. Select Window/Model Info and this window pops up:
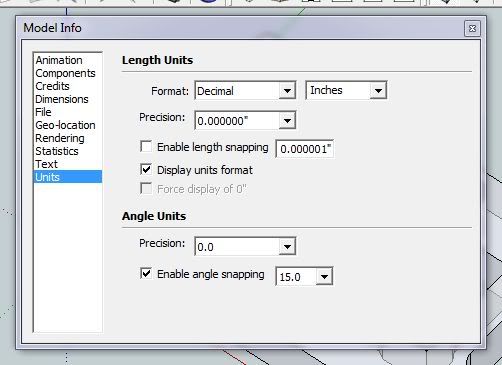
Uncheck the "Display units format" If you don't, the inches symbol (") will show up in your gcode and your controller software will not recognize it.You can also set your precision to what you want in your gcode file. Whatever the precision is set to here, is what your gcode file's decimal places will be. (This has been changed in V03. The default decimal places is 3)
A few more rules to using this script. First, the part cannot be below the X-Y plane (tabletop). It will give an error if it is. Second, the script is set up that if looks for the closest point to the origin in the X-Y plane to determine where to plunge down. The best place to put your part is in the +X/+Y quadrant. If you do not, there could be a possibility that there are two closest points to origin and Sketchup will pick one at random, which could cause the tool to plunge where you don't want it to. Third, inside radii need to be modeled slightly larger than half of the cutter diameter. For example, if I'm using a .25 diameter endmill, I need to model my INSIDE fillets to .13 inches. If you really need a .125 radius, you can use a smaller endmill or model the inside corner sharp. This is not a problem on outside radii.This is changed in V05 with the incorporation of TIG's Smart Offset
Here is the model that I want to machine. The model is placed in the +X/+Y quadrant.
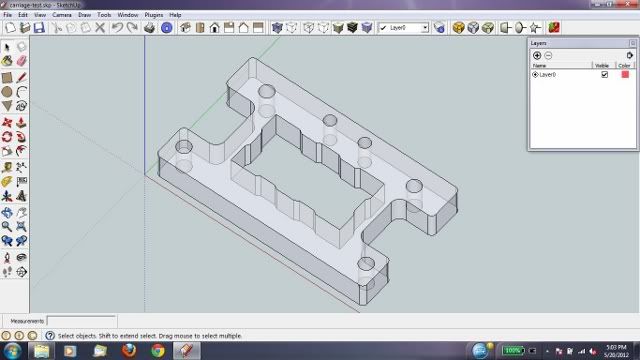
Your part must be in a group or this script will not work. If your model is not in a group, the script will give you an pop-up window stating that your selection is not a group. Once it is in a group, select it and select CNC 2.5D Profile from the plugin menu.
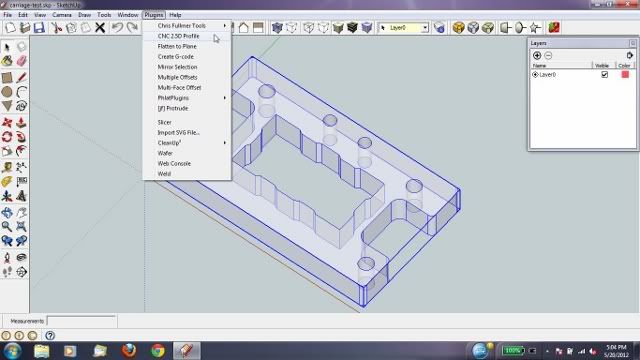
The option menu pops up. Fill in what you want for this cut. The values that you enter are stored in a text file in your plugins folder. The next time you run the script, the plugin will read these values back into the options panel.
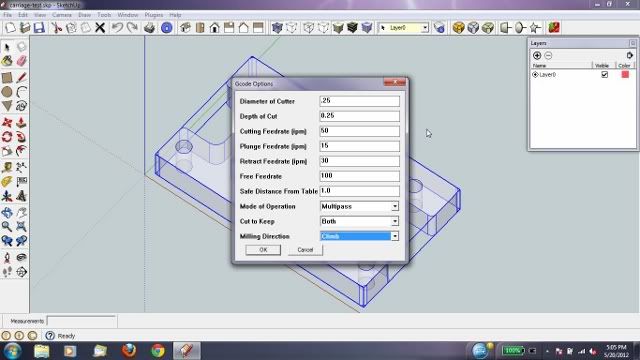
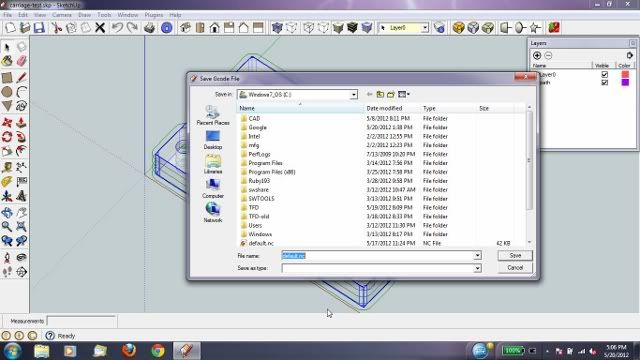
The script will run. When it is done, a file save menu will pop up asking you where you want to save your gcode file.
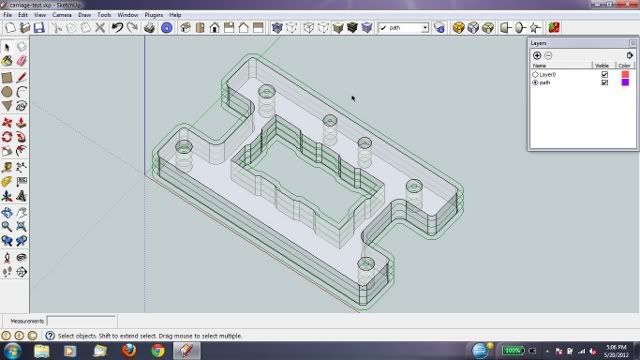
When completed, the cutter paths are displayed on the screen. The cutter paths are put on a separate layer, so you can toggle them on and off.
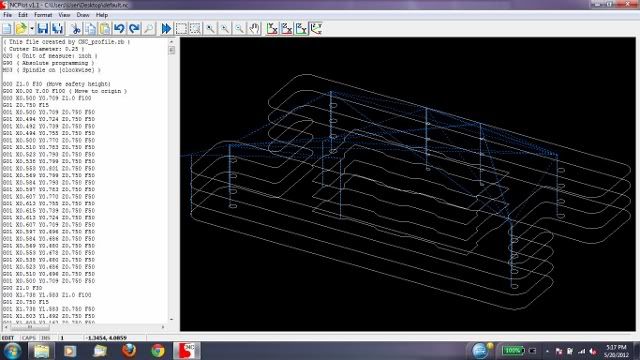
Here is the output of the gcode file in NCplot
%(#FF0000)[Please delete previous versions before installing V04!
Extract zip file to your plugins folder. You should see CNC-profile.rb in the plugins folder and you should see a new folder called CNC_Files. This is required for macs.]
CNC-profile_v05.zip


