Another amazing model from a truly amazing master modeler!
Some day when I have a year or two to spare I'm gonna try to model something like this (I will fail miserably, of course, but hey, you gotta try, right?)
Another amazing model from a truly amazing master modeler!
Some day when I have a year or two to spare I'm gonna try to model something like this (I will fail miserably, of course, but hey, you gotta try, right?)
@bryan k said:
Once the render program makes sense, you realize it's the set up time and waiting for test results that is the hardest part.
Actually I probably have the perfect setup for rendering. I've built a backup computer that is a perfect copy of my main computer (just different RAM). So I could 'cook' the render on it while still using my main computer.
Of course, that will never happen. Oh well.
JIM!!!!!
So good to see you here! How are you doing? Have you fully recovered from that fall and head injury? And what have you been up to? I sure hope you have been creating more fantastic SU models. You have way too much talent to not be. If you have I would love to see them, and I know everybody here would also.
Yeah, I know what you mean about having to crawl around under the mower, and paying dearly for it afterwards. I probably have mine raised maybe ten inches or so, and have been under it countless times trying to figure out what the heck is wrong with it. And of course you never have the tool you need once you manage to get down there. Between that and having to use my push mower to do the lawn, I'm lucky to crawl back to the house at night. Say, you wouldn't consider loaning me that zero-turn for a while, would you? Just for a couple of years.
I actually figured out a way to slap together a quick and dirty version of my stand, just to get me thru this current problem. And then, after I figured out what I would need to do, I realized that there would be no way to get the damned mower up there. If it had power to the rear wheels there wouldn't be a problem to solve! Just another example of how my brain is constantly falling short of the mark. Very frustrating
So you think I should take my show on the road and jump the shark, huh. Wasn't Caesars Palace the one where the video showed his body being totally mangled in slow motion? That was gruesome. I may need to pass on that.
Well, again, it's so good to see you here again. Try not to be a stranger. I hope this current craziness is not affecting you too badly. Personally I have painted over my door with lamb's blood, just to cover all the bases. You never know.
Steve
No, I gave up on ever being able to render a long time ago. It's simply beyond me. Not enuf active brain cells.
Mike,
I admire your determination to master rendering. Wish I could do that.
Very nice model. I really like the wrinkles on the sofa, very realistic. Well done!!
Steve
Sorry I haven't posted in a while, been dealing with major problems with my riding mower. A few days ago I was mowing, and suddenly got a huge cramp in my thigh muscle. Well, you know that when that happens you have to straighten your leg, immediately. To do that I had to stand up on the mower, but when I did so it started to shut down because of the stupid "safety" switch under the seat, and rather than just let it shut down like I should have, I decided to sit back down (with my leg sticking straight out to the side), which did keep the mower running, but somehow resulted in the mower not moving at all, no matter what I did. Pushed it back to the barn and since I haven't gotten around to building the tractor stand I described in another post, I had to labouriously get it raised up on stacks of short 2 X 8's. Determined that the belts were all ok, and now I'm checking into the variable speed pully and the transaxle. Meanwhile, I've been mowing using my push mower, which is less than ideal given a number of physical factors in my tired old body. Mow for 10 minutes, rest for 20 minutes, repeat. Absolute exhaustion, and not a small amount of pain. Awww, poor baby. At least I've been sleeping well. Anyhow, that's the beginning of my 'How I spent my Summer Vacation' essay. I'm hoping I get an 'A' on it.
Hope to post some stuff soon, maybe this evening. Want to get into how the robot was created (the real robot, not my model). It's pretty interesting (to me at least).
Thanks for all the kind words. Hope you are all doing well and staying safe in these insane times.
Steve
Sorry, had to get some sleep. Like a lot of people nowdays, my sleep schedule is pretty much out the window, so I sleep when I can.
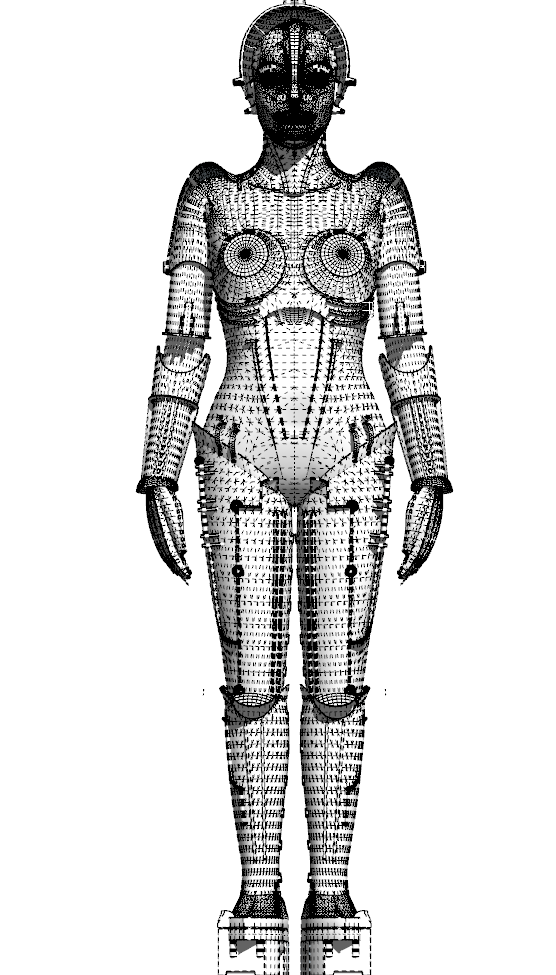
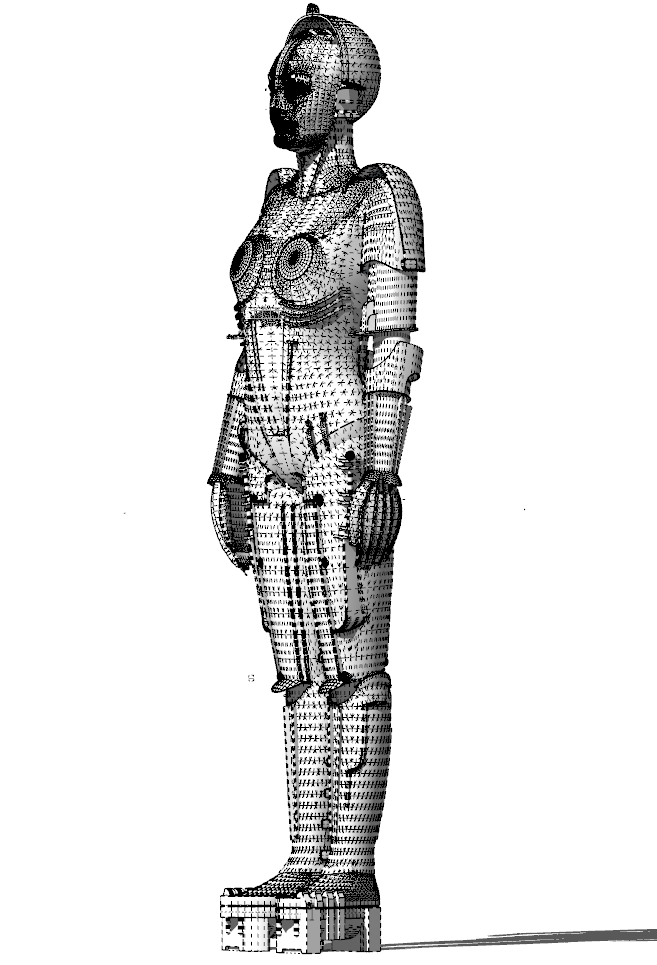
Anyhow, here are some shots showing the geometry.
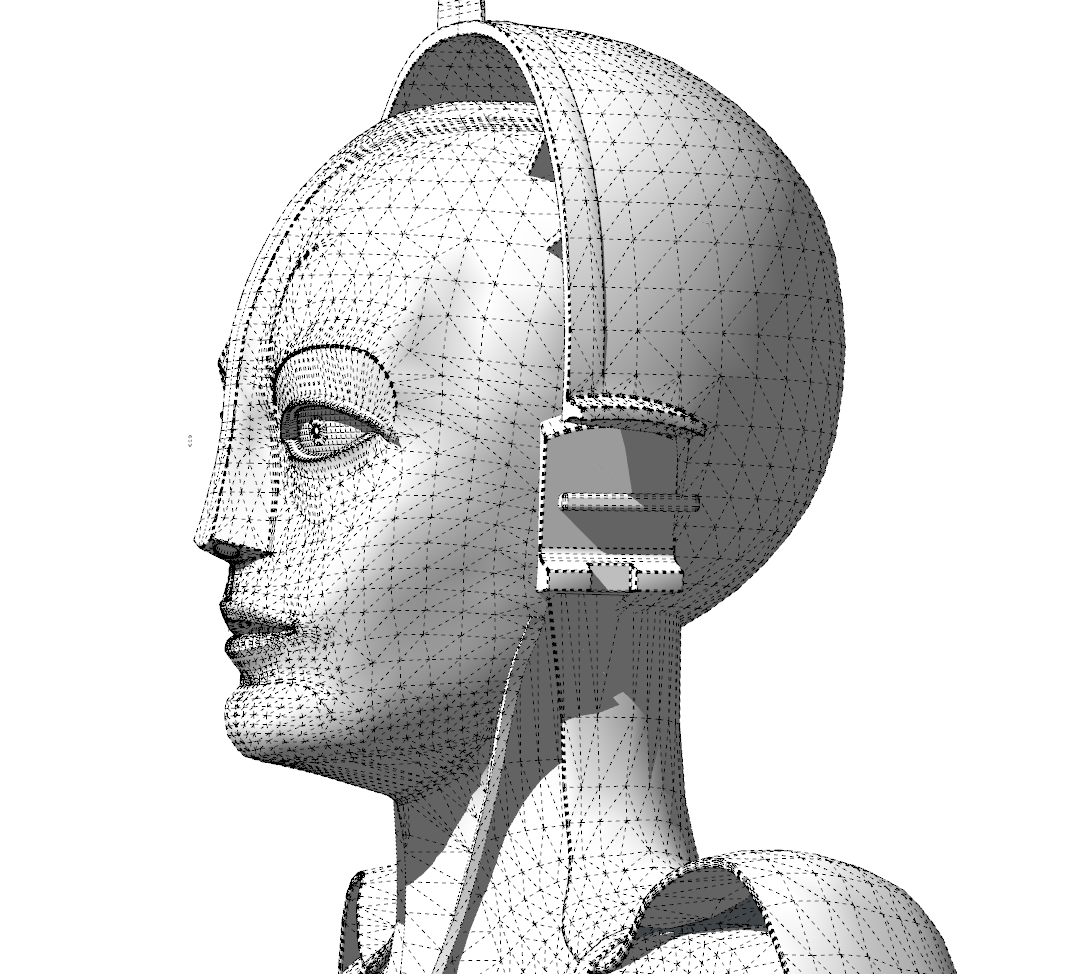
some closer shots showing the head, since it shows up as pretty much a black blob in the full figure shots.
If anyone would like some closer shots of some of the model, just let me know.
Wow, this is so weird - hadn't thought about this model for a long time, then just a couple of days ago I came across it and have been working on it since then. Then I received an email saying that someone had replied to this topic, after more than four years. Really strange.
Anyhow, thanks for the nice words, much appreciated as always.
First off, in reply to pbacot's question from back in 2016
@pbacot said:
Did you model Maria too?
No, it was a model that I got from the warehouse. Had to heavily modify her, broke her neck, her arms at the shoulders, elbow and wrists, and her legs at the knees and ankles. (I know, it sounds like I need some serious therapy, and I probably do, for a number of reasons). All in all, it was probably more trouble than just making her from scratch.
I will post some shots of the geometry later this morning.
Been working on her face, still cannot get it right. Very frustrating. I actually did start work on a full-size bust of her to hopefully help me with this, but set it aside upstairs for a while and then discovered that it had fallen off the table and had separated from the armature in a number of pieces (a homebuilt armature, not as stable as it should have been). There's just no way to get something like that back on the armature, so I threw in the towel on that little project. Very disappointing.
I'm looking forward to posting some of the background on Metropolis, this movie has such an unbelievable history.
@mike amos said:
I'm going to be boring and go with the WOW, very nice to see your models here, bloody marvelous.
Hey Mike,
Many thanks for the nice words
Steve
@pilou said:
:fro:
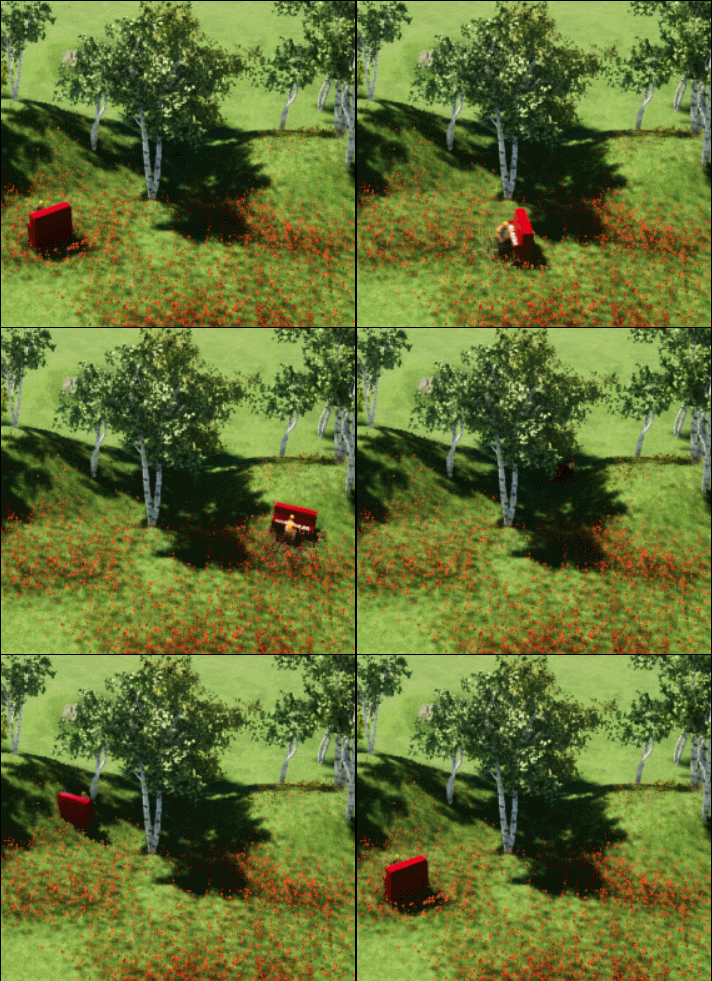
You must put that in the free Twinmotion 2019 (if you have loaded it) !
Looks like it would be fun, but for me it would just be one more thing I wouldn't be able to figure out. I'm really trying to minimize my frustration level
@tuna1957 said:
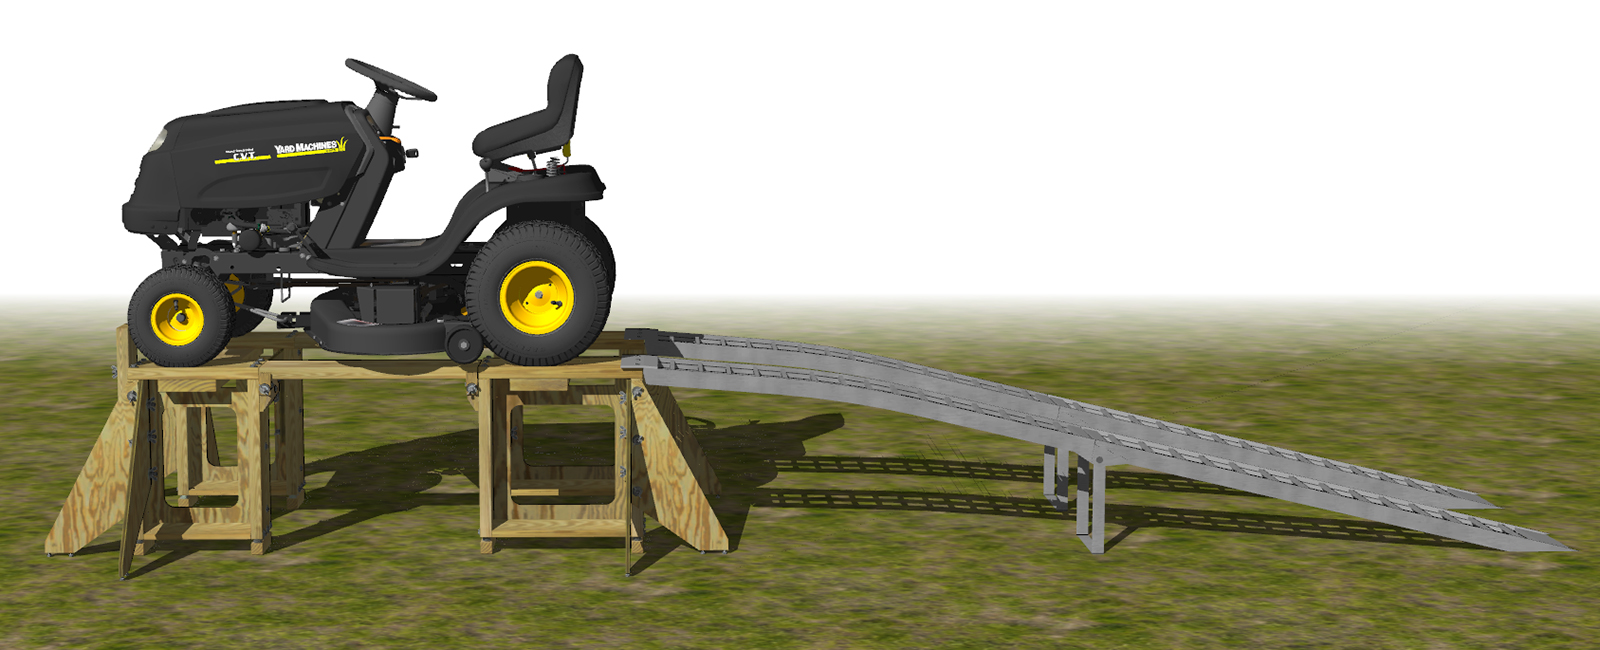
Pretty darn cool..... could very well make some $$$ with this sort of thing if you were so inclined. Curious if you can find pre-made metal ramps that are long enough to allow the mower deck to clear on the way up. Most of the ones I've seen for sale would be to steep.
Thanks, but won't be making any $$$ with this, it's just something to make life a little easier for me.
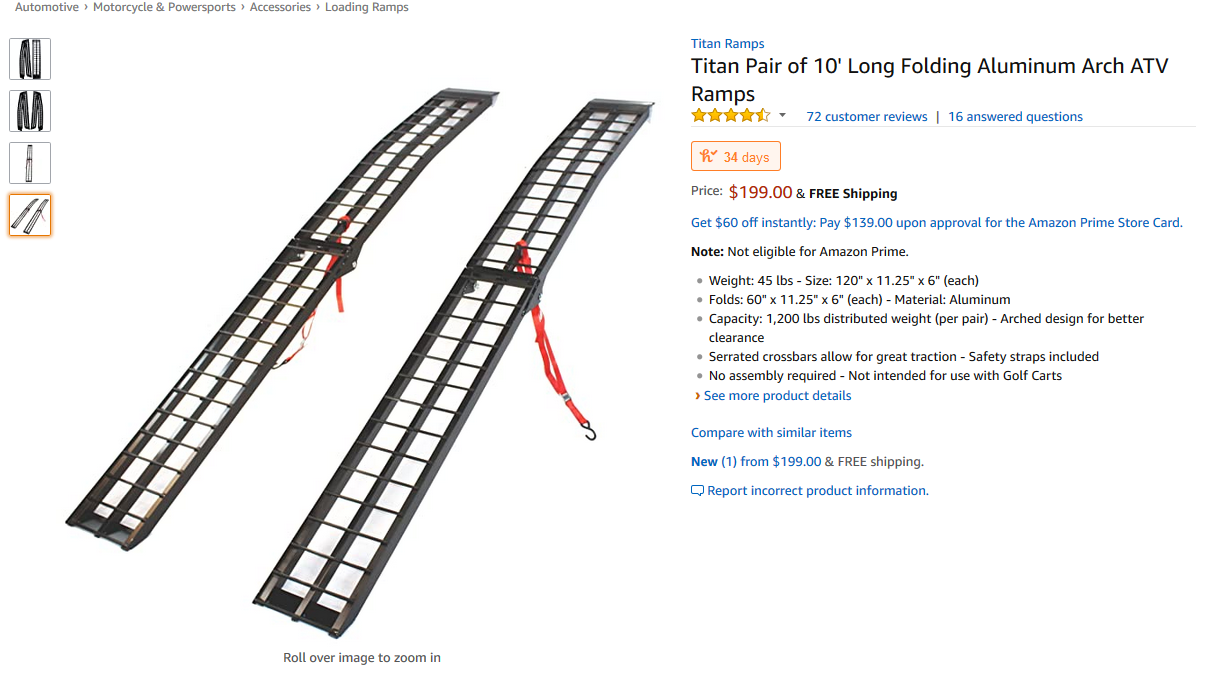
As far as the ramps go, I too was concerned with the deck clearing the ramps. I considered all my options and decided that a foldable ramp at least 10 feet long would do the trick. All of the ramps I'm considering are the longest I could find, keeping in mind that for strength and dependability adding a brace at the fold point is a must. This is one of the top contenders -
I think the deck would clear ok with these
@pbacot said:
As always truly masterful modeling and fine pure sketchup rendering!
I appreciate the kind words (keep 'em coming)
@jenujacob said:
@hellnbak said:
...but when I'm having fun with a model I just can't seem to back off. And I did learn a LOT about my mower while researching everything....
I can totally understand this... glad to know that I am not the only one!
cool project though! keep us posted here!
Thanks. It's still in the develpment stage. For example, I've decided to add some slots to let me slip in a plank in case I need to use a scissor jack to let me remove a wheel, or whatever
@hornoxx said:
:shock: wow! - what an unusual but even more cool and real project this is!! Excelent!
Much appreciated!
The stand, part 2
So, a little background on this project. As I had mentioned I had built a stand similar to this probably about 17 years ago, and while it did indeed made working on my mower at the time (can’t remember what model or year it was) much easier, unfortunately I sort of “designed” it as I went. It got the job done and I used it countless times, but it was clunky and took up a lot of room in the barn when disassembled and stored. But worst of all, for whatever reason, I did not use treated lumber. I did apply two coats of a gray paint that was supposed to seal it and protect it from the elements, but after about maybe six or seven years or so it started getting soft in places and it just wasn’t safe to use anymore. (If I was concerned enough about it being out in the weather to go all that trouble why the hell didn’t I just use treated lumber???).
I did manage to find some photos of it, but they are of poor quality (digital cameras of the time weren’t all that great, mine actually stored the photos on floppy disks).
They were taken the day I first got the nerve to drive the mower up on it, before I decided to add the sacrificial wood blocks under it to keep it up off the concrete, and then disassemble and paint it.
With ramp and center sections removed (the ramps were foldable). Had a lot of people stop and ask me about this, how the heck I got the mower up there. Should have charged admission.
I used the photos to jog my memory enough to build a model of it (not sure why). I do remember that I had countersunk all of the lag bolts. Dumb decision and completely unnecessary . I ended up having to fill all the holes around the bolt heads with caulking to keep them from filling with water and soaking into the wood. (I didn’t bother countersinking the bolts in the model).
The removable center sections were indeed clunky and over-thought.
But, back to the new stand. I used simple stand-in tires of correct size and spacing to ensure everything would work with my mower (everything was modeled on a one-to-one scale, full size).
And then I sorta went a little crazy with it
Not sure why I bothered with all this, it wasn't necessary for modeling the stand, but when I'm having fun with a model I just can't seem to back off. And I did learn a LOT about my mower while researching everything. Still lots of parts and pieces missing, obviously, probably more than are actually there, and I'm not sure I'll ever finish it. But maybe after I get the stand finished and get it up where I can see and measure everything easier.
Been designing a stand to make working on my riding mower easier, and thought I would post it here and see what you think. Comments, criticisms and suggestions are more than welcome.
I have a 2007 MTD 13AN771H729 46 inch, and, while I generally like it a lot, doing maintenance on it can be a real pain. Removing the deck on this thing is anything but straight forward, and I’m a long way from being a spring chicken (whatever that means) and getting down on the ground (and back up) can be very difficult.
So I’m going to build this to get the mower up where I can work on it at a comfortable level. I had built a similar stand many years ago, but let’s just say I didn’t really plan that one very well. More on that later. Keep in mind that this is designed for my particular situation. I live in an old farmhouse, and it has a small barn and workshop with a large concrete slab in front of them. While I do use a grass texture in some of the photos, that is just to give it a base (and I’m too lazy to develop a decent concrete texture). It would not be suitable for use on the ground. The slab is large enough that I can leave it up all summer without it being in the way, so I will assemble it in the Spring and disassemble and store it when the mowing season is over. I could maybe/sort of use it in the barn, but it would be tight, to the point that actually working on the mower would be too much of a pain (the barn, like the other buildings, including the house, was designed by children and built by fools).
The center sections can be easily removed to facilitate working underneath the mower, and for removal and installation of the deck. Ramps can also be quickly removed to make working around the mower easier.
I have an old garden wagon, from which I have removed everything on top and attached a slab of ¾” plywood. I’ve been using it to haul things around, and I will just attach the “box” (with piano hinges inside to let it fold flat for storage) with wing nuts on lag bolts. The top will have lips to set it on the box.
I don’t want the actual stand to be in constant contact with the concrete so I will use “sacrificial” wooden blocks, separated by a number of washers on the lag bolts. Easy to replace and I will just make an extra set or two when I make them. I will just use lag bolts to lift the “outriggers” away from the concrete. This is the same setup that I used on the original stand and it worked well.
I am also considering the use of some type of hard rubber blocks, but I’m moving away from that for now due to some concerns about it’s suitability.
While the original had wooden ramps, I’ve decided to go with aluminum for this one. There are any number of them available online, but I have narrowed it down to a select few. Reading the reviews it’s not too surprising that the main problem with this type of ramp is the area where the two sections join/fold. That is obviously the weak point, so I plan to add a support of some type (possibly a swing-down support)to take care of that. The design of that support and how the ramps will connect with the stand will have to wait until I have decided which ramps to order.
An exploded view, probably more confusing than informative. The majority of the cuts are simple straight cuts, and the few exceptions aren’t anything that difficult. I actually bought all the treated lumber maybe six or seven years ago (after visiting stores all over the area to make sure I got the best I could find) and have had them stored so that they dried without warping. So they are more than ready for a suitable protective finish to be applied to each piece before it is assembled. I have done a lot of research on protecting treated lumber, and am aware that whenever you make a cut you are exposing untreated lumber. There are products specifically designed to take care of that. I actually photographed some of my lumber and used the photos to make the wood textures seen in the model. I also found a good supplier for all of the stainless steel hardware needed, and it’s been waiting and ready to go also.
The whole thing can be quickly broken down for storage, taking up very little space, just by removing a number of wing nuts (gonna buy a wing nut attachment for a drill to simplify this, just haven’t decided on which one yet. Might just make my own)
(The guy is just a 3D figure I found in the Warehouse. I did not model him, just modified him a bit and scaled to 6-foot height to add a scale reference.)
Well, I've about reached my limit on the number of photos you can post, so I'll add more in a new post.
Hope everybody is doing well and staying safe
Nice work, Bryan.
What's the purpose of the safety cone? To signify that the work is under construction?
Hey Dave,
I've always struggled to make threads. I've downloaded your video and will study it to see if it's something that I can actually use. But at this point I am assuming it will be over my head, like most things.
Finally got to hear the Master's voice
Can't complain about the snow this year here in southwest lower Michigan, been very mild. Unfortunately, that means a lot of wear on my snow tires, but I guess there's a tradeoff for everything.
Stay safe, and keep the good info coming.
Steve
Very impressive work
@kolibri69 said:
Almost exclusively with QuadFace Tools, Vertex Tools and SubD.
Sure wish I knew how to use these plugins, would make my life a lot easier