That's some nice spokeshave work he did. I see how the joints work, and it would be an easy glue-up using 10mm x 50mm dominos. The base has different angles and curves, but is similar in arrangement to a pedestal I just built in ash.
Oops, your profile's looking a bit empty! To help us tailor your experience, please fill in key details like your SketchUp version, skill level, operating system, and more. Update and save your info on your profile page today!
Urasik Extensions | Lots of new extensions to check out Learn More
G
Offline
Posts
-
RE: On the road
-
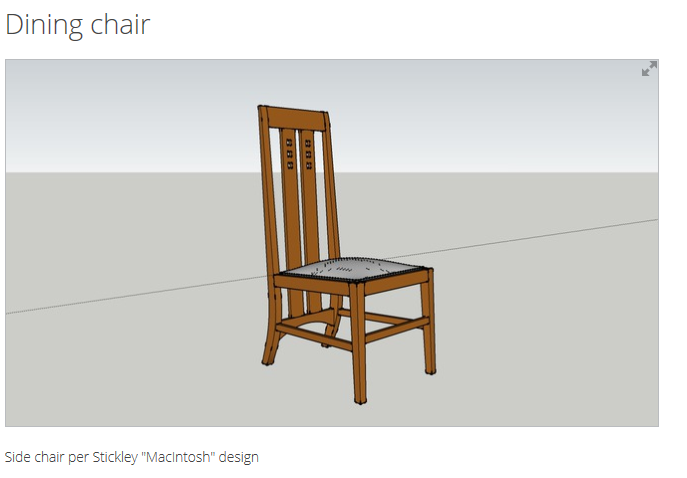
Another Stickley piece: dining side chair
Enjoy!
Render done in Chief Architect. Chair is up on 3D Warehouse. MacIntosh chair, Highlands table. Table in Warehouse also.
-
Soap skin using free v.14
Anyone having any success with this? I have the plug in installed and cannot seem to get anything to generate.
I take a closed polygon, select all the perimeter lines, and can get it to do its flat mesh thing, but cannot get it to process into a skin I can inflate.
Trying to do a chair cushion.
-
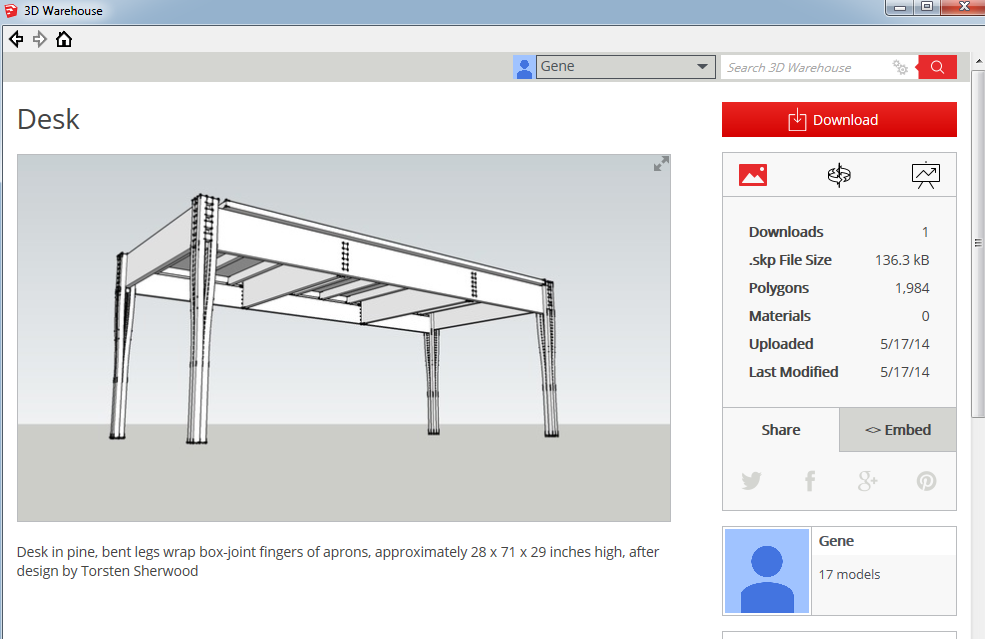
Writing desk
Joinery all shown in model, mostly loose tenons, Festool dominos.
If you build furniture, please comment on the joinery and suggest alternates.
-
RE: Shopmade Cam Clamps
OK, thanks, I now see trim and keep. Pro only, and I don't have pro.
It makes things go faster than intersect with model and also generates the interesecting surfaces better. I suppose if I was being paid for SU work I would buy Pro and get this, but for my use, I'll stick with what I have. I've enough cost in my other software.
But I like those cam clamps. I had a pair but now only own one, and it comes in handy. Good for light work.
-
RE: Banca Desk
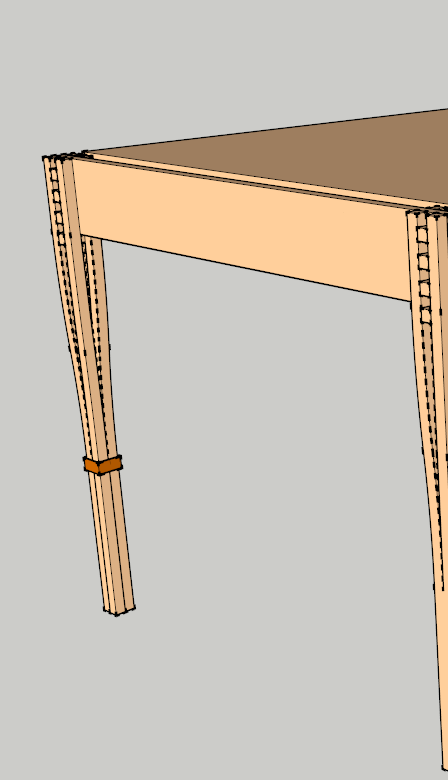
And here is a thought about those legs and whether to pre-bend.
Consider it done with a little design change, that of adding a collar of carbon-fiber tape to the legs right where the curve ends above the bottom straight segment. I'll have to see whether carbon fiber can make the 90 bend without compromising its strength. The visual can be called an enhancement.
Another option for the wrap-tie would be a 19mm length of square brass tubing. Available in 1.25" square at .100" wall thickness, it would fit snugly to the legs if the quarters were milled to precisely 16.5mm square, or right under 0.650". See this site for the brass. http://www.lewisbrass.com/tubing/square-brass-tubing-3/
A pic of one leg, wrapped thus, is shown here.
-
RE: Banca Desk
My first take on it was a mistake. I made all the components 3/4" thick, not 5/8".
I think I'll go back at it and do it all in 16mm parts thickness.
With white pine, I don't think there is much to be gained by taking all the trouble to bend with steam. Today's glues should hold all together just fine. There is a lot of long grain to long grain in the joinery.
The top is a floater. The project should make for a pleasant weekend in the shop.
-
RE: Reflect/mirror details at both ends of symmetrical parts
See this YouTube video, Dave, and explain what Mike has done at about the 2:20 mark to make the component auto-mirror at the opposite end of the beam.
-
Reflect/mirror details at both ends of symmetrical parts
A lot of model detailing involves working on ends of parts creating joints, and the parts are symmetrical, the joint detailing mirrored at the other end.
Table stretchers and timberframe parts are prime examples.
So how do you set up the components when building, so that when you go in to do the joinery, you only have to do the work on the one end?
-
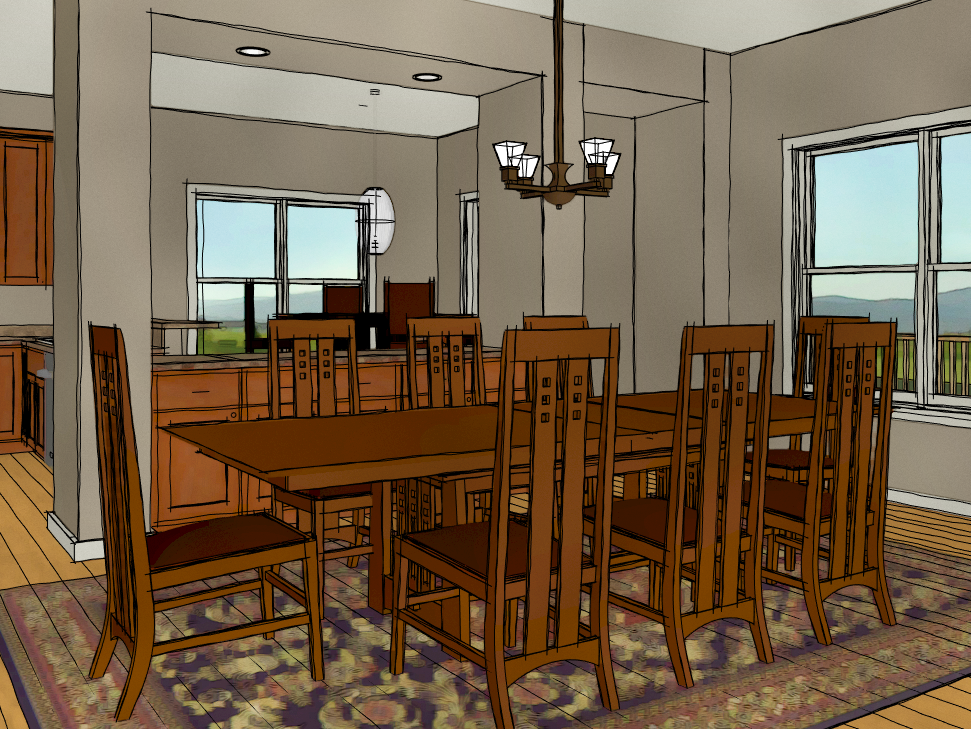
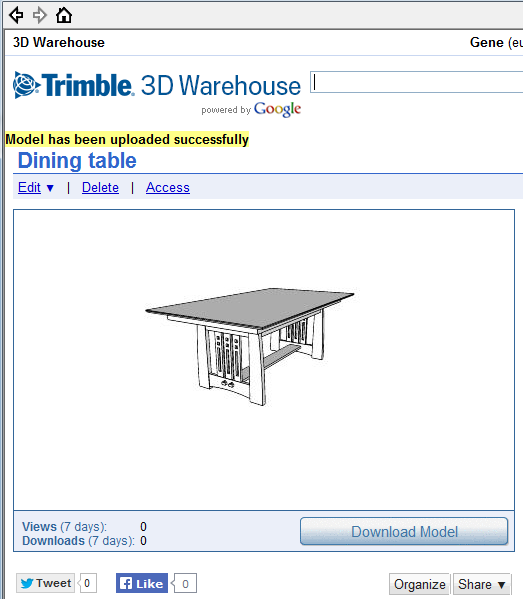
New Stickley table design
Introduced in the fall of 2012, this arts-and-crafts-style beauty features a floored compartment under its center, in which the two 18" x 44" leaves are stored. Divided at center, the top plus its aprons divide smoothly on ball-bearing equalizer slides to permit access to the leaves, and leaf installation.
Am researching the source of hardware that is equivalent to what Stickley uses, in planning to make something like this.
Get it from the Warehouse and see what you think. It is a work in progress. Details of the frame, pocket, hardware mounts, etc., all to be determined. I got the scale and proportions pretty close, though, for the overall piece.
-
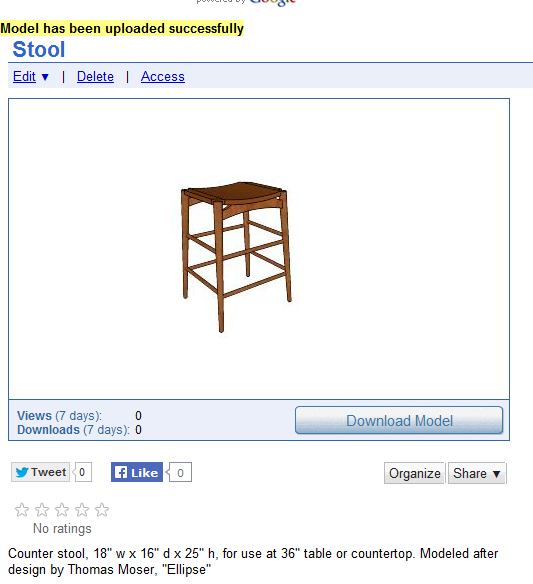
Counter stool after Thos. Moser "Ellipse"
Up now on 3D Warehouse. Kind of close, but not quite true.
The legs are straight tapers, and I believe the Moser stool legs have a slight bow (what is that term) like a Greek column. Stretchers could be a tad bit more thin, and placed a tiny bit differently, high or low.
Edge rounding required, and I did the seat not as a single curve, but with two flat side "landings" to make the leg cutouts easier to model.
I'm sure a wizard with all the skills and ruby extensions can do better.
-
RE: Need help getting and installing round edge ruby
Silly me. Only needed to close SU and there it is! Thanks for putting up with my blather.
-
RE: Need help getting and installing round edge ruby
I deleted the file. How do I do the fix?
-
RE: Need help getting and installing round edge ruby
Here is what my plugins look like after my attempts at doing this.

-
Need help getting and installing round edge ruby
I am using Sketchup Make 8 (13.0.4812) and have been striking out trying to install the Fredo stuff for rounding edges.
-
RE: Coffee table w/ lift top for laptop work
And it's only 99 bucks, which is a great price for the hardware PLUS a CNC-cut prototype that can be used for the hole-drill template.
-
RE: Coffee table w/ lift top for laptop work
What is interesting me as regards hardware, is the price of the complete RTA unit I was seeing today at the Farm & Fleet store, an item made by Sauder, is selling for something like $100. All the Souder stuff is discounted this week.
I cannot find the hardware anywhere online for a price close to this.
So, buy the kit (yes it is a kit with the hardware unmounted) and throw away all but the metal. Then make a nice one.
OTOH, the wooden one might be best. One could prototype it for little material expense, fine tune things, and then do the real thing.
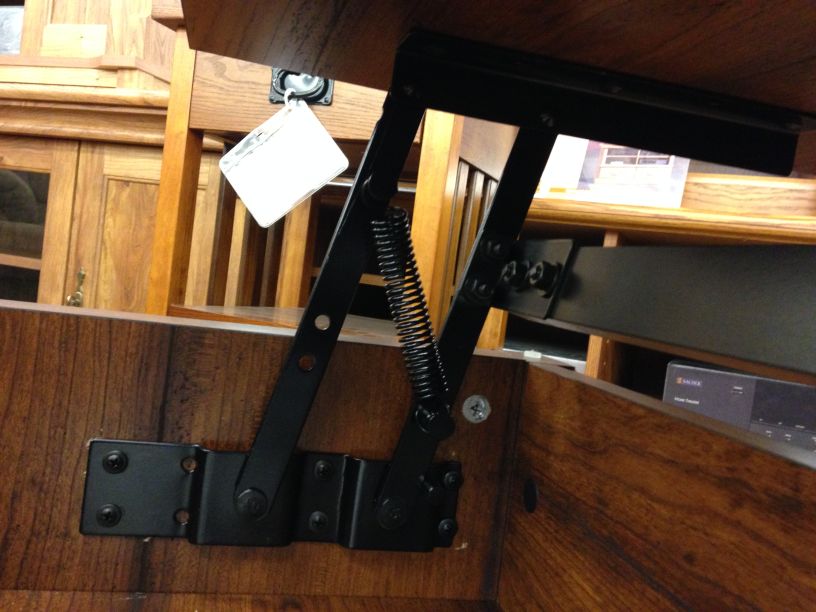
FWIW, I have attached a pic of the hardware that comes with the RTA Souder table. Pretty beefy stuff, with a nice spreader strap running side to side to minimize wobble.
-
RE: Coffee table w/ lift top for laptop work
Just saw it in the flesh. Photographed the hdwe and will post later. Will go back to store for better look and measure everything. The top action, up and down, is nice, and when up, is perfect height for laptop work from couch. The store had one in a seating group, couch on long side.