[Tutorial > Modeling] Wanted: tuts on curvy thingies
-
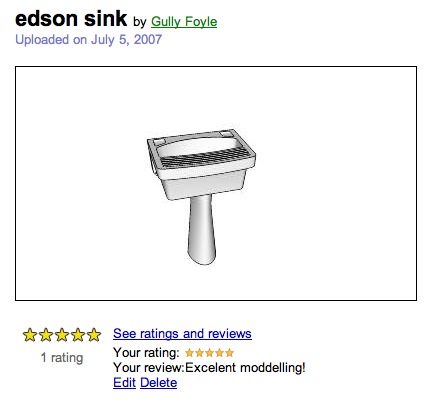
 Edson, you now have a sink named after you !
Gully, this is very good of you. You are a credit
to this forum
Mike

-
Well Edson, I'm very glad the model serves your purpose.
You know, I actually did start out to make it a step-by-step tutorial, but I kept changing my mind about how to go about it or realizing I had forgotten to do something in an earlier step. So after going back and reworking the previous steps a few times, I said, "Screw this, I'll be lucky to get one copy of this thing right, much less a half dozen," whereupon I just worked on a single instance of the model, abandoning the idea of capturing a neat progression of stages in progress.
I'd like to say there was some special trick method, but really it was a combination of pretty much the whole tool kit. Starting with a rectangular block (and leaving the pedestal for last), I scaled the bottom surface down to impart the taper. The angle of the taper is one of the things I kept going back and fiddling with. Then I intersected a pair of perpendicular planes with a fillet radius between them with the block to divide the upper from the lower part of the basin and scaled the lower part down to recess it from the upper part in the front and on the sides. Did I mention that I worked most of it as a symmetrical half?
The fillet radius all around between the upper and lower parts was of course done with the Follow Me tool, with quite a bit of fiddling and hand-stitching to make up for some of its deficiencies. Naturally I ran into the inevitable defect in the surface of the spherical radius produced by running a fillet radius around a curve and had to stitch that up.
I Push/Pulled the basin down into the block, scaled the bottom to taper it, and used Follow Me again around the bottom. The grooves on the top front and the soap depressions are self-cutting components.
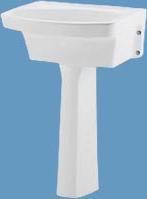
I knew (or guessed) that the pedestal was U-shaped in section instead of rectangular, since I just happen to have a pedestal sink in my spare bathroom whose pedestal looks just like that. I drew a half circular face on the ground plane, scaled it unidirectionally into a parabolic shape, and Push/Pulled it to about two-thirds of its height. Then I P/P'd several short segments using the Ctrl key and scaled them to achieve the waist.
Without turning this into a novel, that's pretty much it. I left out various scaling and push/pulling and so forth, but I'm sure you get the idea.
Maybe next time I try to make a step-wise tutorial, I'll get my $hit together enough so I don't have to end up explaining in words what would be more effectively demonstrated.
-Gully
-
Great job Gully,
and darn close!
ezk

-
Edson,
This response isn't even in the same class as the previous (doing it for real :`) but what I often do for something I need quick and can't find is to steal parts from several other similar components...then moosh around the already made geometry until I get something close enough. (The last time was morphing some american standard fixtures I picked up on the net to look like the photos of some stylish Italian numbers proposed for a $1/2mil bathroom my buddy in CT is doing...got it done good enough on time!)
Best, Tom. -
@mike lucey said:
 Edson, you now have a sink named after you !
yes, mike, isn't that something?
gully, thanks again for the sink and for the explanation.
tom, i disagree: your tip is quite pertinent to the topic. it is a way of getting it done when one is in a hurry.
a sociological note: my not-quite-scientific search for laundry sinks (aka tubs) in the internet suggested me that they are no longer common in north american and european homes. do you agree with this? my guess is that it is due to the fact that having paid domestic help is no longer common there. on the other hand, in south america, having a maid is still common, as many people are poor. thus the presence of proper washrooms in homes and of laundry sinks in them.
best to all.
edson (as in the famous, best-selling edson sink)
-
That a good 'Step by Step' explanation of the process
Gully.I can understand what you are saying about trying to
show the model at various stages and the tendency to
just blast ahead and do it.I'm wondering if a program like http://www.ScreenSteps.com
would be the answer here as it let the modeler just
take a quick screen shot as they go along then put some
form of notation later on. The program lend itself to
easy tut production and the Beta has more advanced
functions.I'm also wondering if we as a group could standardise
on a particular program for creating tutorials and I
think ScreenSteps could be the answer as its Win / Mac
program..Its not too expensive but again I'm wondering if some
kind of a deal could be worked out with the producers
and SketchUcation.As I said, I'm just wondering. Have you guys any thoughts
on the matter ?Mike
-
Well, Mike, I think my problem here was not so much one of lacking the right tools to make a tutorial, but rather of conflicting objectives. I mean, as far as screen shots are concerned, there is a very nice screen capture utility in Paint Shop Pro, and another even more flexible and sophisticated one in CorelDraw (which even captures menus and custom cursors), although I usually prefer the one in PSP because it allows to me bring a capture directly into an environment where I can crop it, resample it, annotate it, and otherwise enhance it. I have created a number of tutorials on the GG site using images made in this way and assembled on a commented web page using Dreamweaver, which is such massive overkill in terms of high-octane tools for a fairly simple application that it's something like using a Howitzer to do the job of a pea shooter.
The problem in the case of the sink was one of scope. A particular utility sink was far too specific a subject for a tutorial (although I was very glad to help you with it, Edson, and please feel free to pose more such requests), and "curvy thingy" far too general. A tutorial should present one or two basic principles distilled down to their essentials, so they can be adapted and applied to a variety of particular applications. Our mentor Jean Lemire, of course, is a master at this.
Perhaps I will go back to the sink and try reducing it down to a few basic geometric elements, without getting hung up on specific features and proportions, which is what I allowed to derail me. As to whether a scene-based .skp or a series of screen shots is more appropriate, I think, depends on whether it is the geometry itself or non-persistent display elements that are more important to the subject of the tutorial.
-Gully
-
Gully, I'd love to see a tutorial on making that sink.
It's beautiful.(Gidon)
-
Come on, Gully, Eventually I also made the tut for the Dome film!
-
Well, since Gidon asked, I may just consider it.
Of course, if I acquiesced every time Gaieus got after me about something, I'd be constantly doing all manner of bizarre things. By the way Gaieus, I've been meaning to ask you: regarding your most recent avatar, um, what's that brown thing on your face?
-Gully
-
Probably just some whiskers (stubble) Gully.

-
@gaieus said:
Probably just some whiskers (stubble) Gully.

I see. Maybe you could find a picture where your face is more than 10 Angstrom units across so these questions would not arise.
-Gully
-
Gaieus,
Did you change your avatar just because I was teasing you about it? Heck, I didn't think I had so much influence over you.
By the way, speaking of 10 Angstrom units, and returning for a moment to the subject of unit conversions, check this out:

-Gully
-
Yeah, I know Anstrom is pretty small. I'm more big headed than that (even in the photo).
-
@edson said:
... about objects with a lot of curves and angles... and ran into a lot of problems, so much so that i gave it up.
that's one of few reason i left sketchup (6) for a while too. those curvy thingies.
Advertisement


