Pool Coping (create tiles between two coplanar curves)
-
So you want something like this?
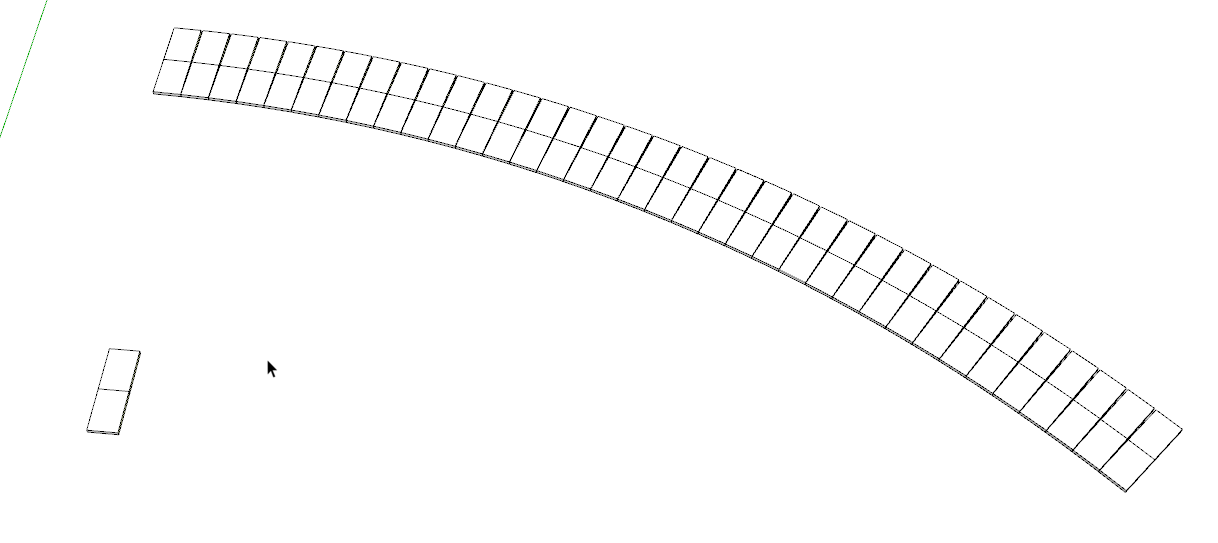
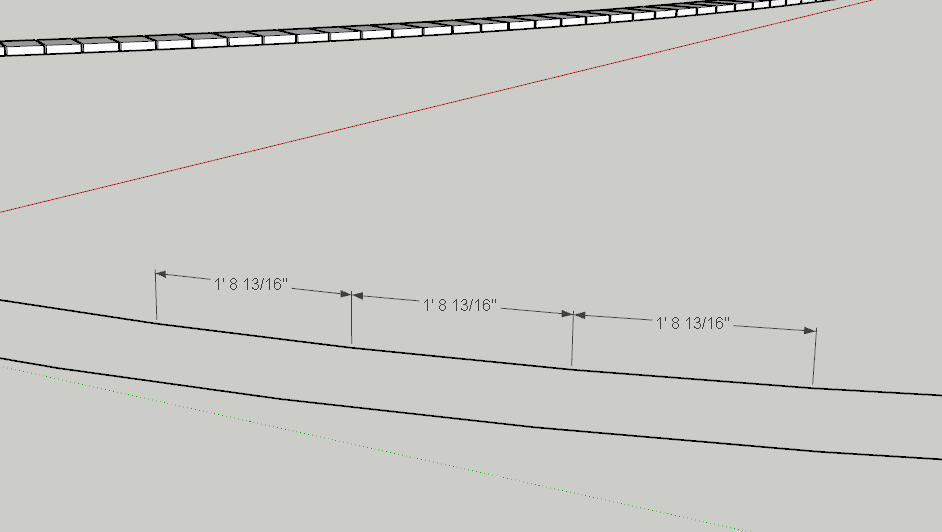
I made a tile component and then a nested component containing two of them. Then I used PathCopy to array them along the arc. To get them to align correctly, I made the length of the segments in the arc 8 in. and use an interval of 8.1 in. The components red axis gets aligned with the edge segment in the arc.
You'll need to handle the acute angle at the point individually, of course, but then the coping tiles will need to be cut anyway.

-
You solution is clever -- thanks --- but I am still left with these triangle gaps.
The damn coping is so big it will be painful to manually deal with them all!
See pics below.
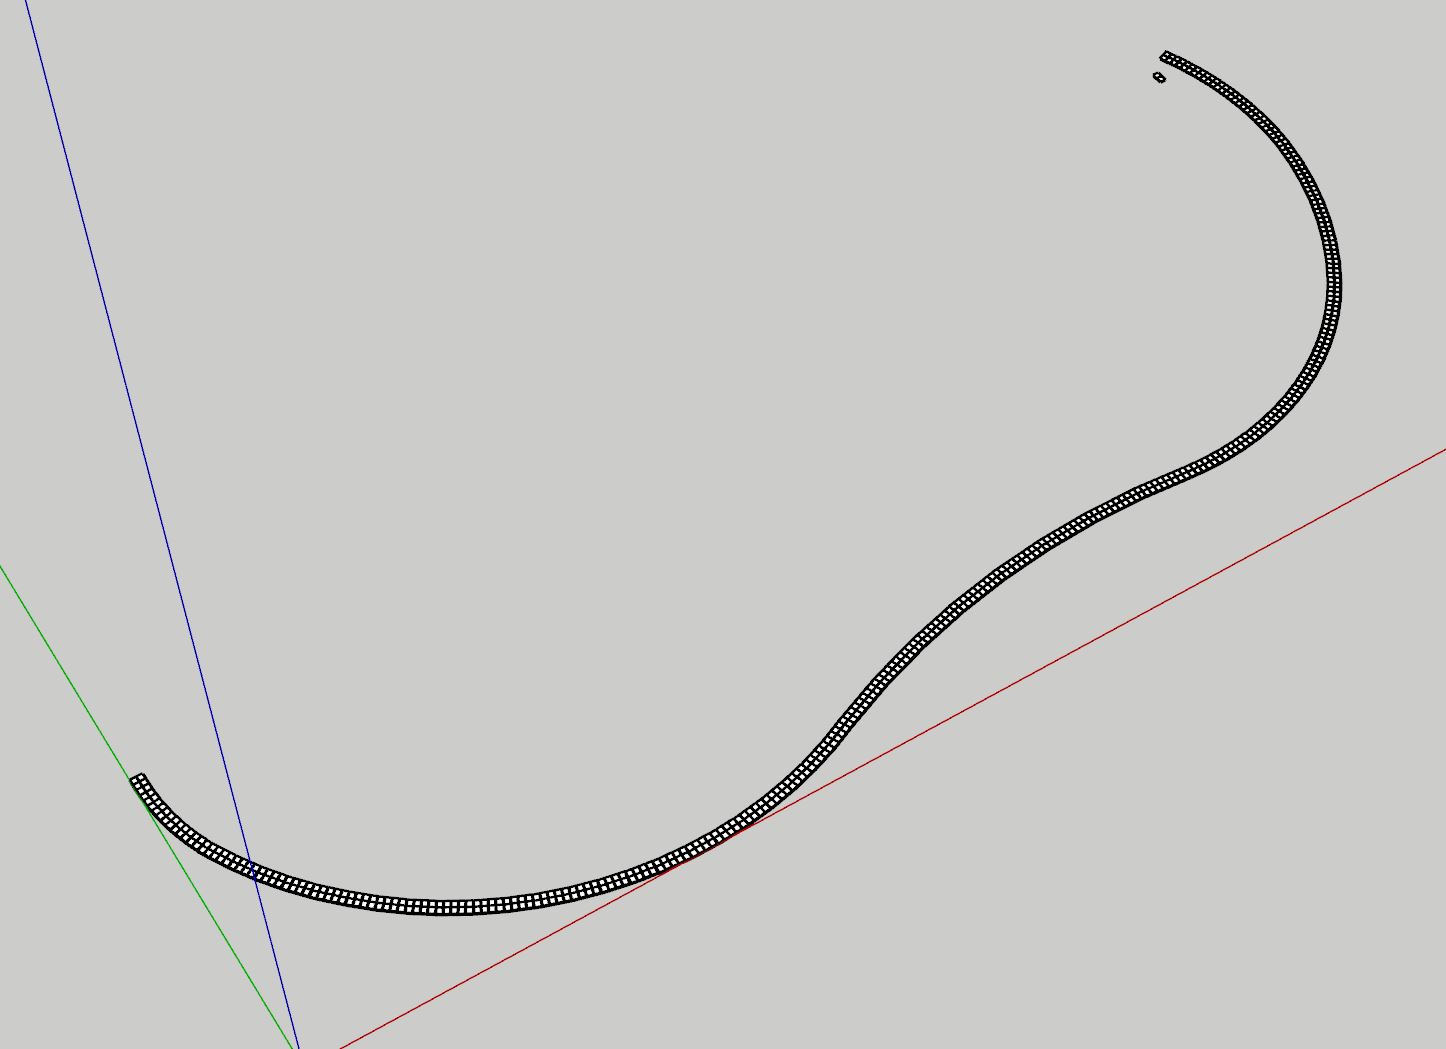
This time I am attaching the actual skp file too in case you or anyone can get closer...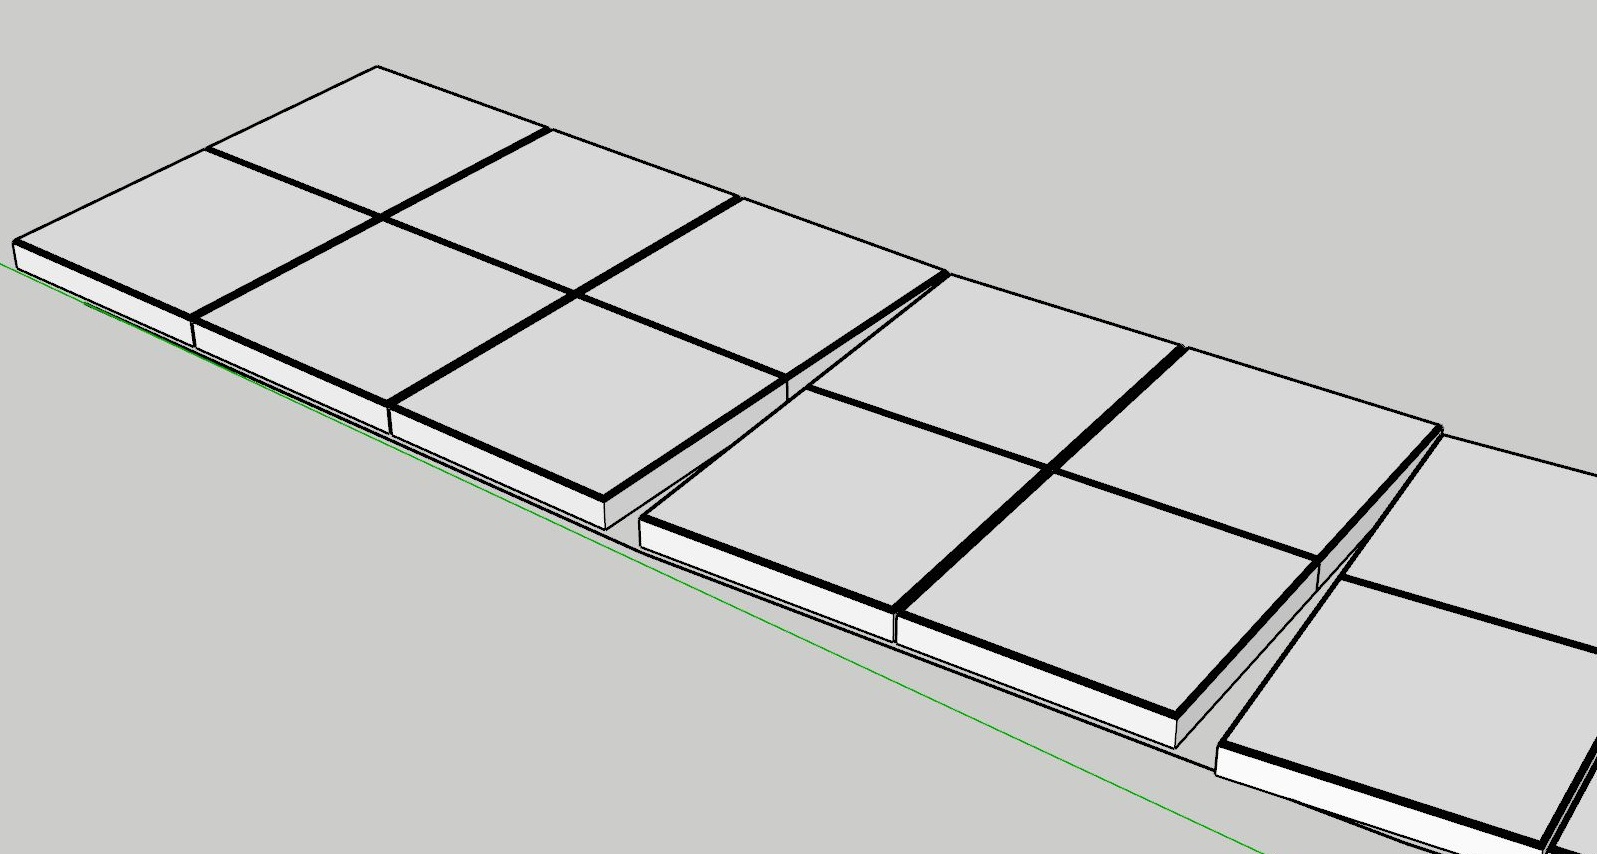
-
I'd say that's pretty good. You might want to do test renders with a portion and see if the end result is OK for the view angle, distance etc. Adjust obviously bad parts manually. Or you may have to do it in two runs. inner and outer, just like they may have to in the field.
You probably have thought of this, but don't overdo the rounding. You only need a few smoothed faces to give the effect for most uses. -
Try creating a middle line (center of tile) it will align better without huge gaps. You will also need to change your component axis to center of tile.
-
Maybe Steping Stones by Sdmitch ? http://sdmitch.blogspot.com
(only one curve is needing) -
@skavan said:
You solution is clever -- thanks --- but I am still left with these triangle gaps.
You didn't do what I wrote and adjust the segment length in the curve. As Solo suggested, make the curve the centerline.
Pilou's suggestion of using Stepping Stones is a good one as it will automatically trim the tiles and leave you with a grout line between tiles.
In any case shorter line segments will help.
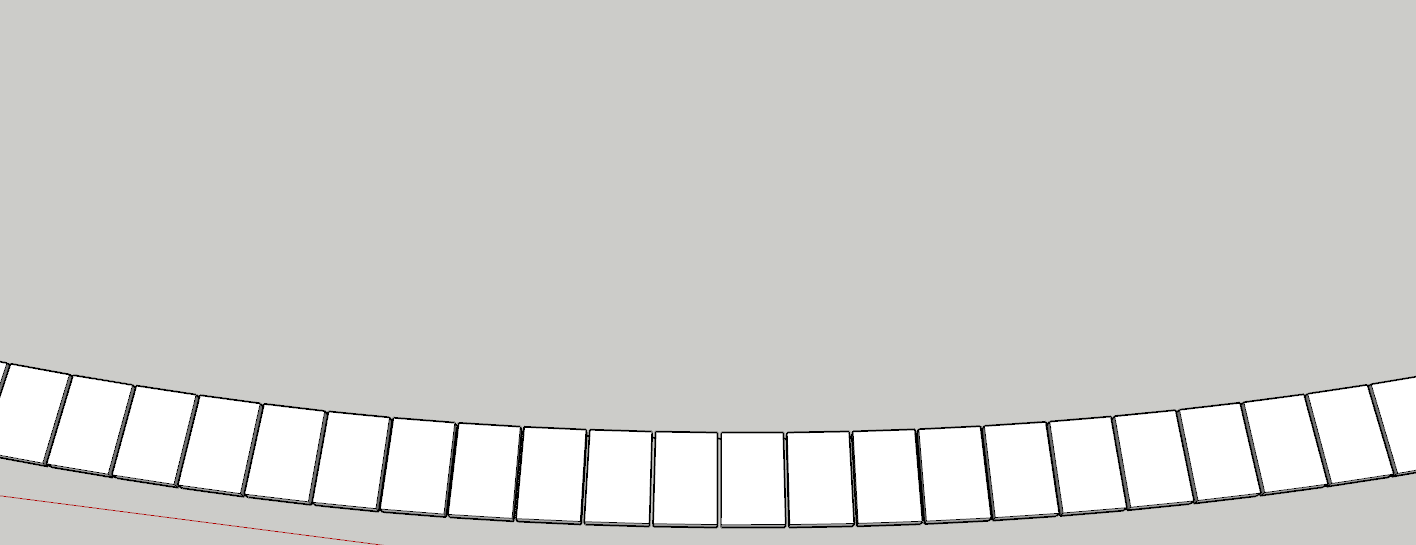
Here's the result after replacing your curve with a 10s Catmull Spline.
Pool Copibg Edge.skp -
So much good stuff in each line of your note! See below:
@unknownuser said:
You didn't do what I wrote and adjust the segment length in the curve. As Solo suggested, make the curve the centerline.
I did do that. At least I'm pretty sure I did.
@unknownuser said:
make the curve the centerline
Cool...but color me dumb - how do I create that centerline. Offset gives me "two" lines. Is there a way to force it to one? If adjust its size to exactly half, both lines disappear.
@unknownuser said:
Pilou's suggestion of using Stepping Stones is a good one as it will automatically trim the tiles and leave you with a grout line between tiles.
Awesome. If I could now figure out a way of cutting those stones with a 1/8" gap on the cut...I'm in business.
@unknownuser said:
replacing your curve with a 10s Catmull Spline.
That's cool too. How did you replace my curve with a 10s Catmull spline?
-
@skavan said:
I did do that. At least I'm pretty sure I did.
You might have adjusted the length of the segments but you didn't make them 8 in. long as I said to do. On your inner curve they are 20-13/16 in. long.
@skavan said:
Cool...but color me dumb - how do I create that centerline. Offset gives me "two" lines. Is there a way to force it to one? If adjust its size to exactly half, both lines disappear.
If you are starting with the inner curve, use half the tile length as the offset distance. If you are setting out two rows of tiles along the curve as I did in my first post, use the length of one tile. I made my tiles 8 x 12 so if I wanted to use the centerline, I'd offset by 12 in. As Solo implied, you would need to set the component's axes at the midline so the tiles would be placed properly with Path Copy.
@skavan said:
Awesome. If I could now figure out a way of cutting those stones with a 1/8" gap on the cut...I'm in business.
Stepping Stones gives you the option of setting the gap between tiles. Did you look at the tutorial video in the link provided by Pilou?
@skavan said:
That's cool too. How did you replace my curve with a 10s Catmull spline?
I used the Catmull Spline tool in Fredo6's Bezier Spline extension and set it to 10 segments between control points. I right clicked on your curve, selected BZ - Convert to>Catmull Spline and typed 10s and hit Enter.
-
Eureka.
Thank you every one.
As a result of the many inputs on this thread (esp @Dave R)- I now have exactly what I wanted - with very little work! Here's what I did (still some things that I don't understand though):-
Took the inside of my two lines and offset (the line) it exactly half way.
(don't understand the benefit of converting it to a Catmull Spline - perhaps Dave R can explain...and when I did it, I noticed some funny loops, so I performed this procedure without that step.) -
Edited the ruby code of the Stepping Stones.rb, to break the single tile that it creates, into two tiles seperated by the specified gap. While I was tinkering, I put the created tiles in a group.
Dave R -- when I mentioned that in my last post, I was referring to splitting so I got two stacked tiles. Not the seperation between the tiles.
That's it. Running the script gives me lovely tiles all the way along the coping edge.
My last remaining challenge is rounding the edges using a v-ray bump map (edgetex), rather than using fredo6 rounded corners, which will create a lot of unneeded geometry. No matter what I try - it doesn't work. I think it may be a v-ray bug.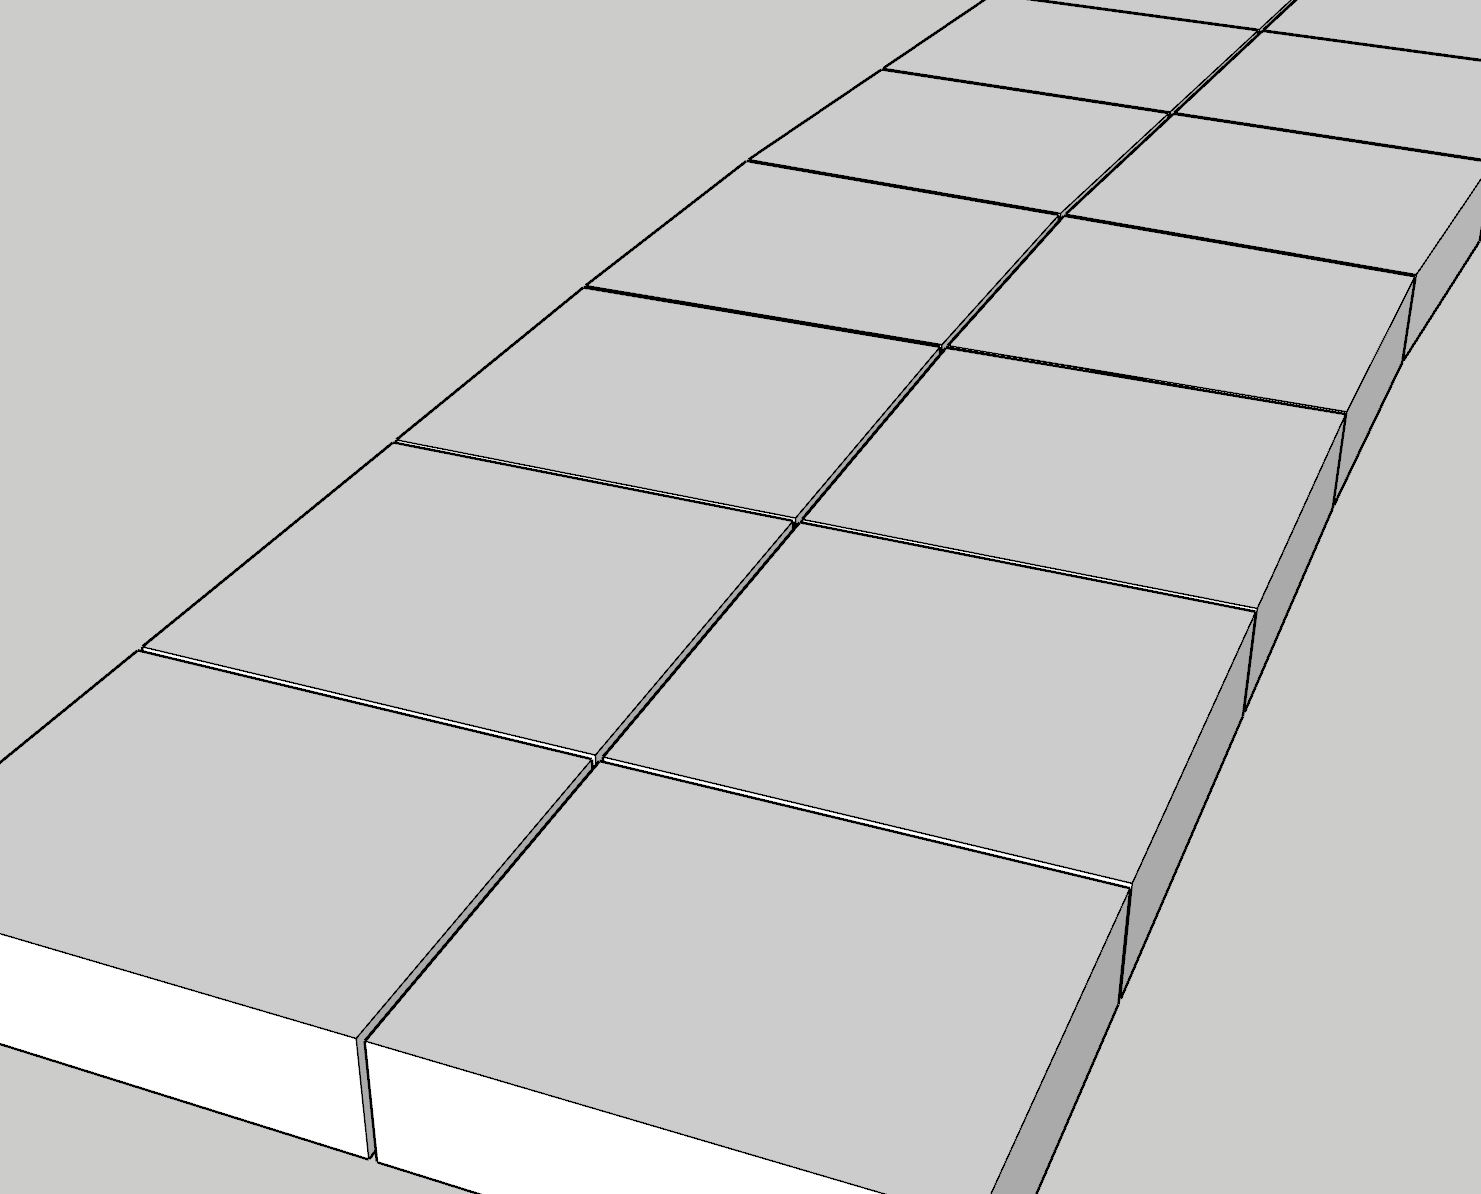
-
-
Good one!
-
@skavan said:
don't understand the benefit of converting it to a Catmull Spline - perhaps Dave R can explain...and when I did it, I noticed some funny loops, so I performed this procedure without that step.
The Catmull spline created a smoother curve. In your example you have straight runs of tiles along the longer straight segments and then a more severe angle when the next segment comes along. With the smoother curve I created, more tiles get tapered but that'll likely be more realistic. As long as you are satisfied with what you've got, that's fine.
As for the "funny loops", I'm not sure what that's about. I didn't see any when I did it.
Hello! It looks like you're interested in this conversation, but you don't have an account yet.
Getting fed up of having to scroll through the same posts each visit? When you register for an account, you'll always come back to exactly where you were before, and choose to be notified of new replies (either via email, or push notification). You'll also be able to save bookmarks and upvote posts to show your appreciation to other community members.
With your input, this post could be even better 💗
Register Login


Advertisement