Medeek Wall Plugin
-
I've added doors and garage doors:
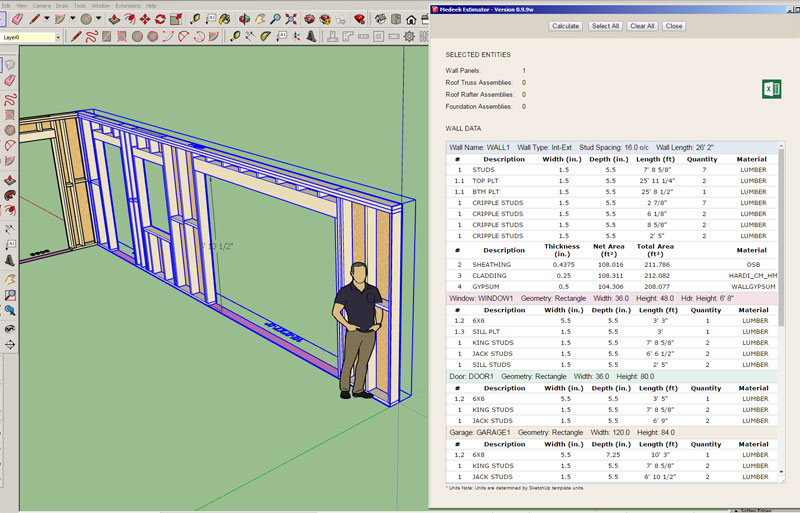
I've been working on incorporating the Ruby gem "prawn" for automatic PDF generation. In the case of the estimator it would be very nice to not only have the CSV export option but also the ability to instantly generate a PDF document of the material list.
I realize that you can always print the HTML preview screen as PDF but the formatting never comes out quite right with this sort of thing.
I will probably add in-wall columns next and if I get ambitious this evening maybe even beam and stair assemblies.
At this point I am focusing on just getting the basic framing data in place for the various elements. With doors and windows there is a vast amount of data that can be presented, all of this will be in good time. Right now it is baby steps...
-
Version 0.9.9z - 01.11.2019
- Added door framing: header, king studs and trimmer studs to the Medeek Estimator.
- Added garage door framing: header, king studs, trimmer studs and portal frame studs to the Medeek Estimator.
- Added in-wall columns to the Medeek Estimator.
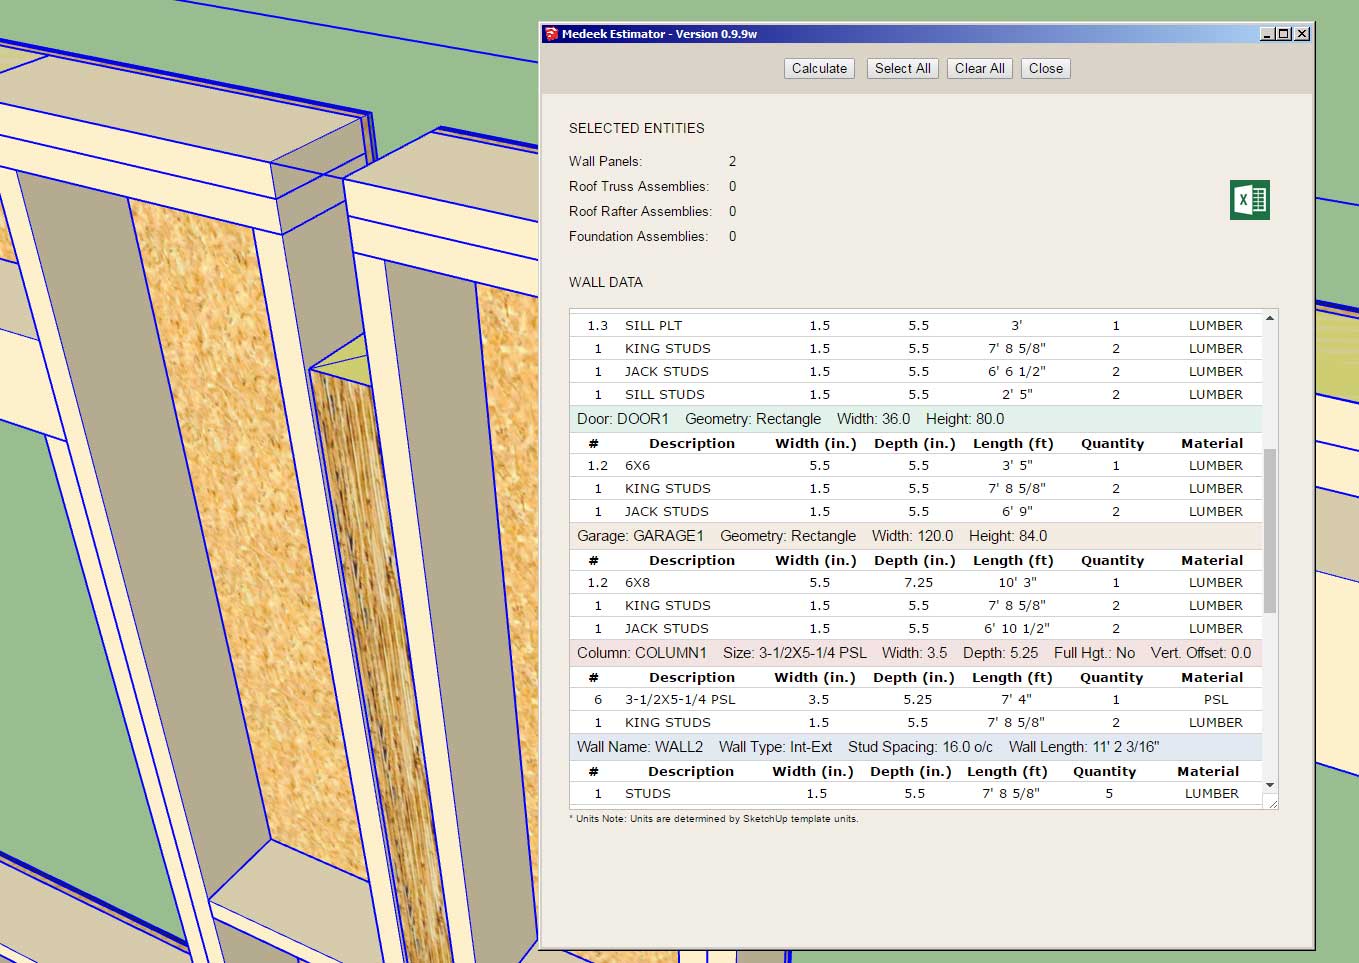
I think I am done with the Estimator for a while, at least until someone makes a specific request.
The next big thing will be the roll out of the gable walls and the end of the BETA phase of development for the plugin.
-
As I've been working on the estimating module it has become clear to me that I need to add a menu (or module) that allows the designer to customize the output of reports. Two key items are missing:
1.) Company/Corporate/Designer Information: Name, address, contact info. etc...
2.) Project Information: Customer Name, address, contact info, Project Title etc...
This information would be shared by all three plugins so it would be similar in some respects to the estimating module.
-
After giving my pricing structure and licensing system much thought over the last few weeks I've decided to keep the licensing system the way it is.
Rather than trying to force people to renew their license (with a subscription system) it makes more sense that they should only renew if the added features actually warrant them doing so. This has always been my philosophy, however recent financial pressures have caused me to seriously reconsider this business model and waiver from my core beliefs. I think if you offer a decent product at a fair price then the economics will sort themselves out.
With that in mind I will also be lowering the renewal costs on all plugins in order to encourage existing license holders to renew their licenses and take advantage of new features that have been recently added (Medeek Estimator, labels, construction dimensions etc...).
In order to offset the decrease in renewal fees I will be increasing the initial cost of the plugins for new clients.
Later this month I will probably introduce a volume license (3-in-1 price) for all three plugins (mdkBIM Suite), however this will be only for new license purchases and renewals will still be handled on a per plugin basis.
-
I just made a minor correction to the code and re-uploaded Version 0.9.9z, this fix only affects users on metric templates.
-
Another minor bug found in the metric template with regards to 3 and 4 block corners. Not a significant enough change to roll the revision but I have updated the plugin and uploaded the corrected version.
-
Version 1.0.0 is a signficant milestone, a remarkable achievement for what has become an essential must-have SKP plugin.
My sincerest congratulations Nathaniel.
David
-
Progress has been made, but to be honest looking at my todo list, I'm only about 50% there right now. Much more needs to be done before this plugin(s) is a polished gem that it is destined to become.
-
Version 1.0.0 - 01.15.2019
- The Medeek Wall extension moved from BETA status to initial full release.
- Added the Open/Close (icon and function) to the Medeek Wall Tools toolbar.
- Enabled opening and closing of all man doors: 90 deg. or 45 deg.

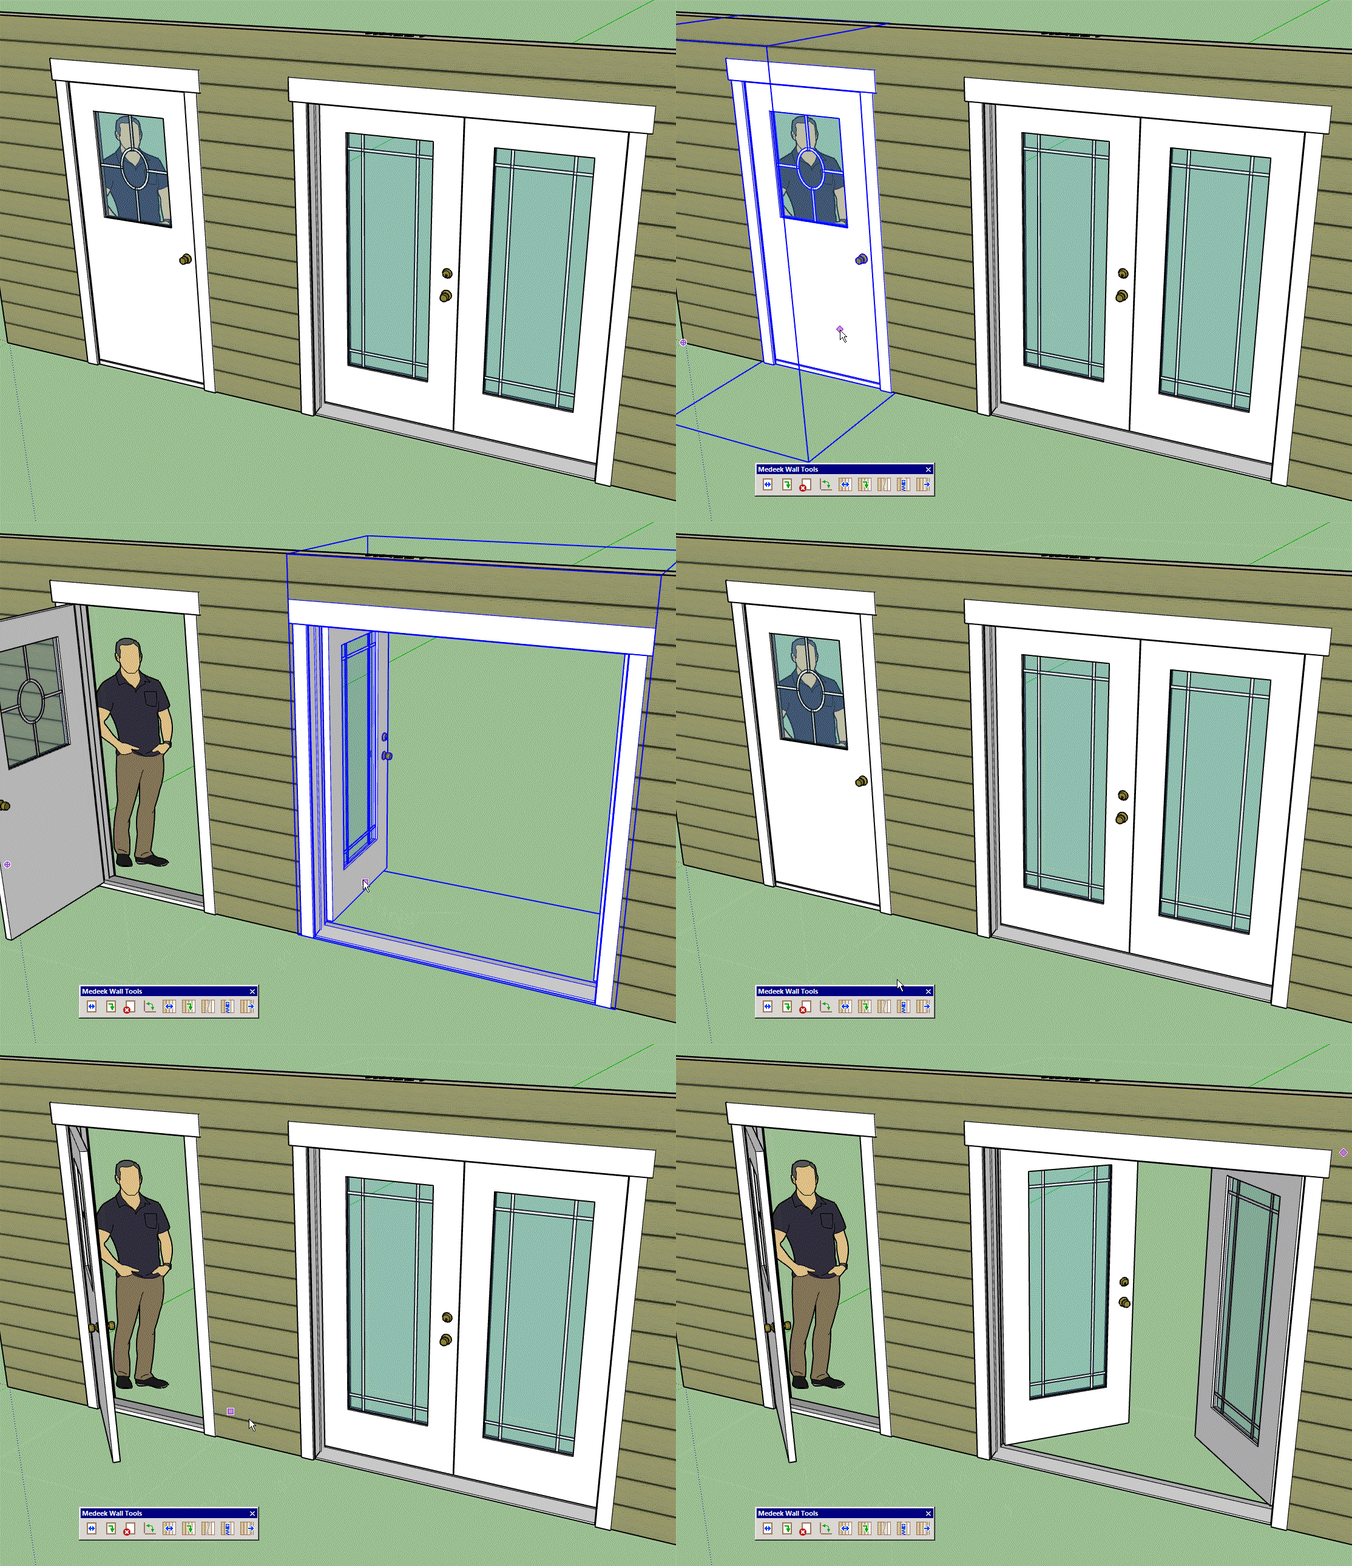
When using the Open/Close tool the opening angle can be toggled (45 deg. / 90 deg.) with the CTRL key on windows.
When the wall is modified, regenerated or moved the doors will automatically close up and return to their default state.
I may also extend this function/tool so that it can utilized with garage doors and windows but its not a high priority at this time.
The door opening/closing tool as was actually a very simple piece to add in. I probably should have added it a long time ago but no one had ever asked.
When you open and close doors the wall itself and all of its components/elements do not get altered in any way so the nice thing is that a wall regen is not required. This makes this feature very quick and lightweight. All that is really happening is the door(s) are getting rotated into their new positions or back again.
Since the tool is persistent, you can easily go around the model opening and closing doors until you are blue in the face.
-
Version 1.0.0b - 01.16.2019
- Enabled opening and closing of all garage doors.
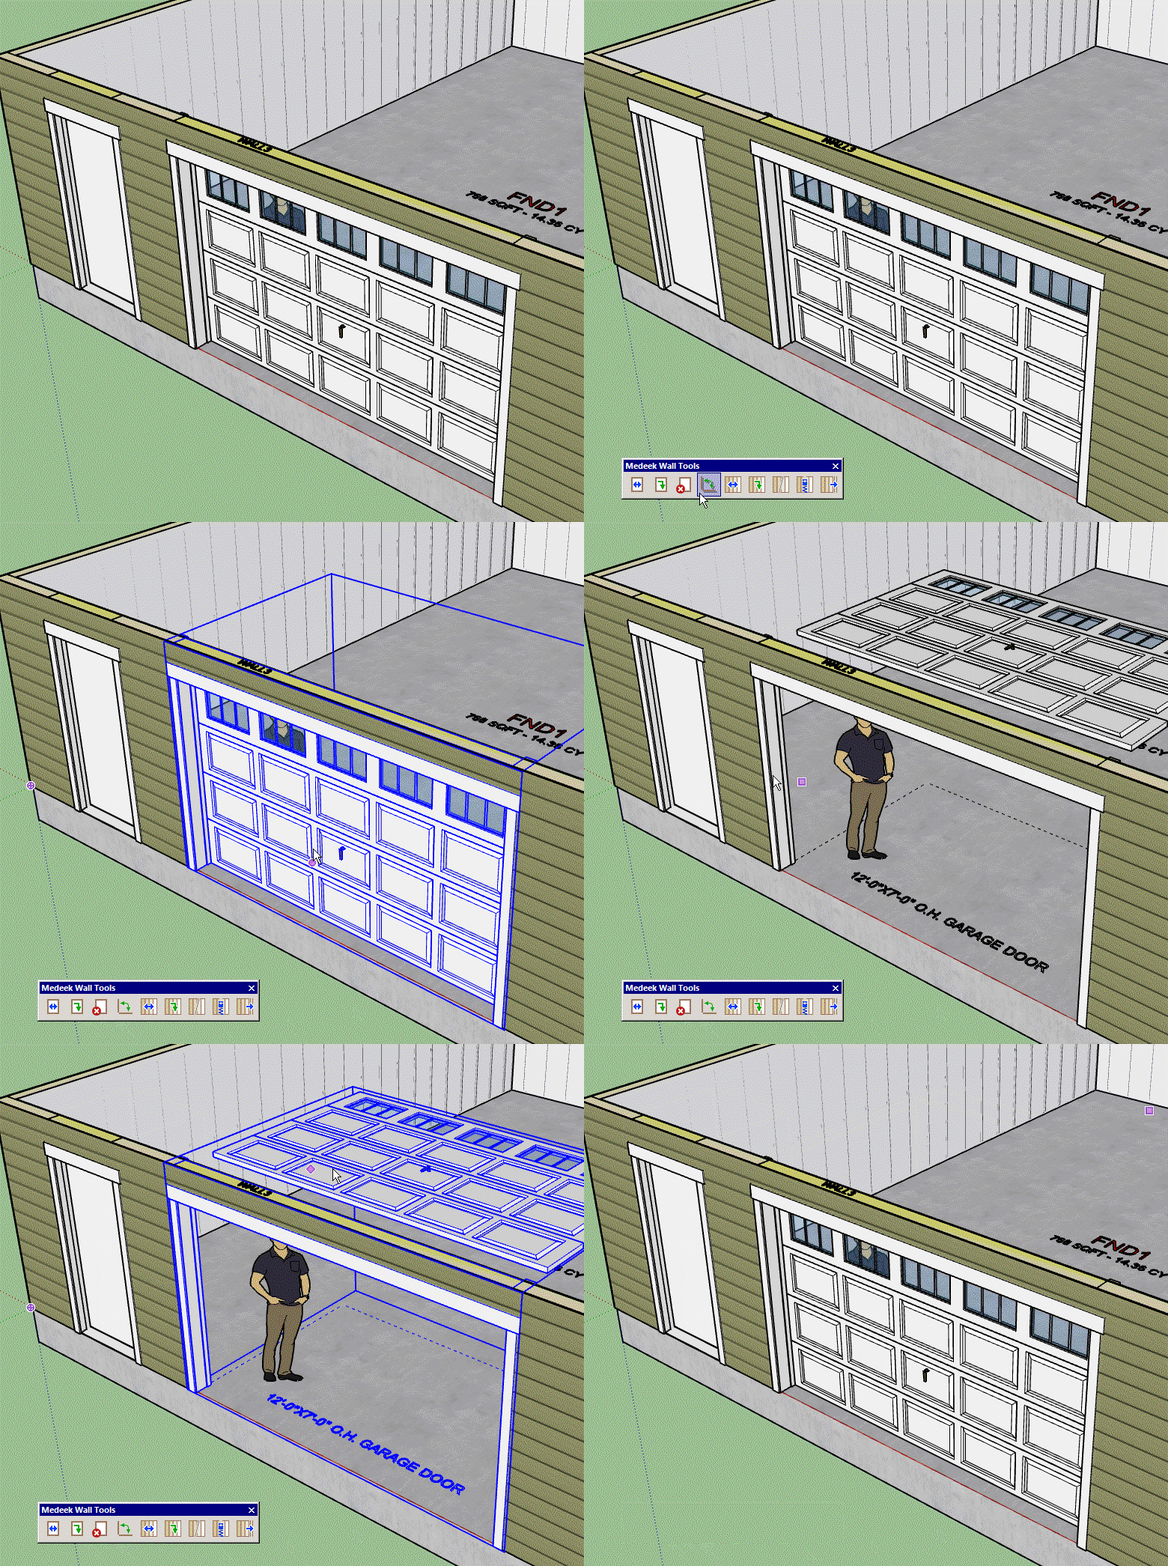
Toggling the opening angle will have no affect when you open a garage door, it only affects the man door openings.
With the garage doors the assumption is a 12" radius for the track of the garage door. When I further flesh out the Garage Door tab in the global settings I will make this parameter user definable. It appears that the most common radius for the garage door track is somewhere between 12" - 24". So for now I am using the minimum radius of 12" since it provides the least amount of headroom when the garage door is open but also allows for the least amount of installed space required (clearance between top of garage door and ceiling).
-
As I was pondering Basecamp 2018 and some of what I saw there in various presentations it caused me to wonder about architects and designers who seriously use SketchUp in their practices.
It seems there are two camps:
1.) Those who use SketchUp's native tools to essentially model everything manually.
2.) Those who need less control and more speed (production designers/builders) and prefer to utilize plugins as much as possible.
I'm not saying one is necessarily better than the other but there are certainly some major advantages in my opinion if you can offload some of the more menial tasks to a computer (plugin).
Which camp do you fall into? and why?
If you are in camp #1 then what would it take to get you to convert to camp #2?
And of course the loaded question: What can I do to make the plugins even that much more effective and easy to use for those already in camp #2?
-
I would like to add the stand alone post/column module since I have had quite a few people asking about it recently.
However as you can see from the photo below the wrapping of such posts can get really involved:


At the very least I would like to have the ability to wrap the post and also provide the option for an outer wrap (pedestal) or wainscot (with option to specify and set the ledge height and width).
Should I also have an option for molding at the top (capital) and bottom (base)? Astragal?
Also if I do have the wainscot option is there a need for an air gap? and does the outer wrap or wainscot cover the wrap or does the wrap end at the outer wrap/wainscot?
-
These are some of the options I have in mind, as you can see there are a number of possible permutations by enabling or disabling certain features:
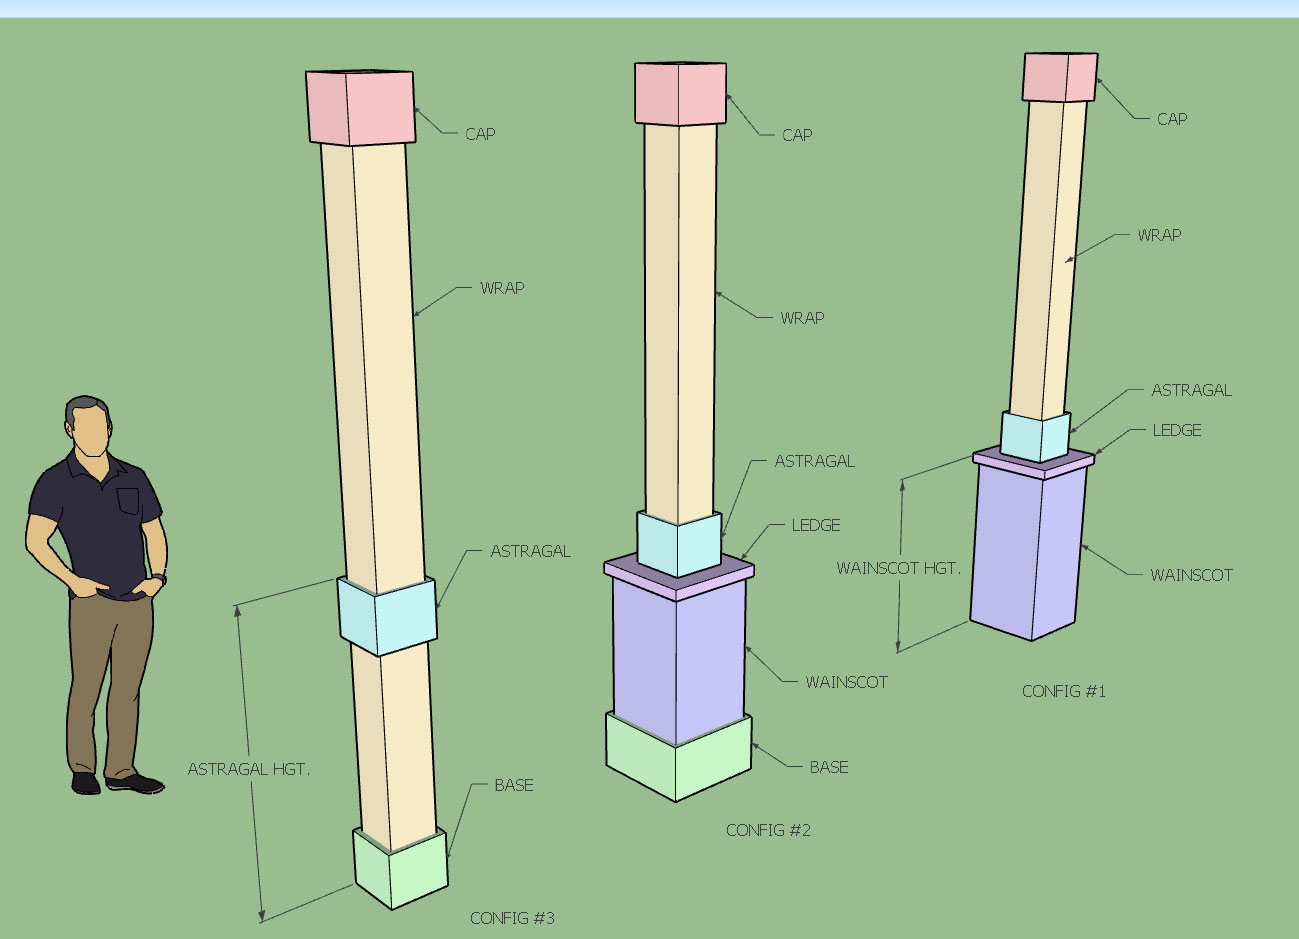
Each color denotes a unique material that can be specified by the user. Hopefully this should give enough flexibility when it comes to wrapping free standing columns.
For now I will stick with rectangular posts, circular posts/columns (greek columns) are a whole can of worms on their own.
Postscript: Now that I am thinking about it some more both the wrap and the wainscot will need an option for an air gap, since the wrap may be stone or brick and not butt up tight against the actual structural steel or wood post.
-
I've been having a conversation again with one of my mentors on the idea and concept of stories/levels in the plugins. I've come to the conclusion that assigning the geometry to levels is very powerful and I now have it very much in my mind to implement some form of a system that deals specifically with this issue.
All major assemblies (groups) that are created by the wall plugin (walls, posts, beams, stairs, etc...) need to be assigned to a level. This is important for a number of reasons.
1.) The Medeek Estimator will need to break out its estimate by level, currently it will order the walls by their name but really it needs to group them by level and then order them within each group. The same holds true for all other assemblies created by the plugin(s) or even geometry not created by the plugins that I want the estimator to include.
2.) Once I get further along to where I'm automatically setting up scenes and exporting those to Layout, DXF and/or PDF, again I need to organize assemblies by their level. A floor plan usually consists of walls on a specific level.
3.) The engineering module (way out in the future right now of course) will also need to know this information in order to make sense of the model.
Each assembly (main group) will have a parameter in its attribute library which specifies the level it is on regardless of where it actually is in space (in the model). The user of course can always change this.
There also needs to be a way that the user can set the Z height of each level and also set a specific level as "active" so that all new geometry (walls) is automatically placed on that level.
There also needs to be a way of adding new levels and deleting levels. If a level is deleted then the plugin should prompt the user where it wants to place any groups on that level being deleted and allow the user to select from available levels.
There should be a button that allows the user to hide all assemblies on a given level or unhide them. Probably another button that allows the user to select all assemblies on a given level, that would probably be useful.
I need to add a context menu so that the user can right click on any component or group (plugin geometry or not) and assign it to a specific level. For non-plugin geometry this means that a attribute library key is created for the entity and assigns it to a level.
I'm sure there are more things I am missing but of the top of my head and based on my recent thoughts on the matter this is what I'm coming up with.
-
Per customer request I will be adding in the octagon (fixed/picture) window:
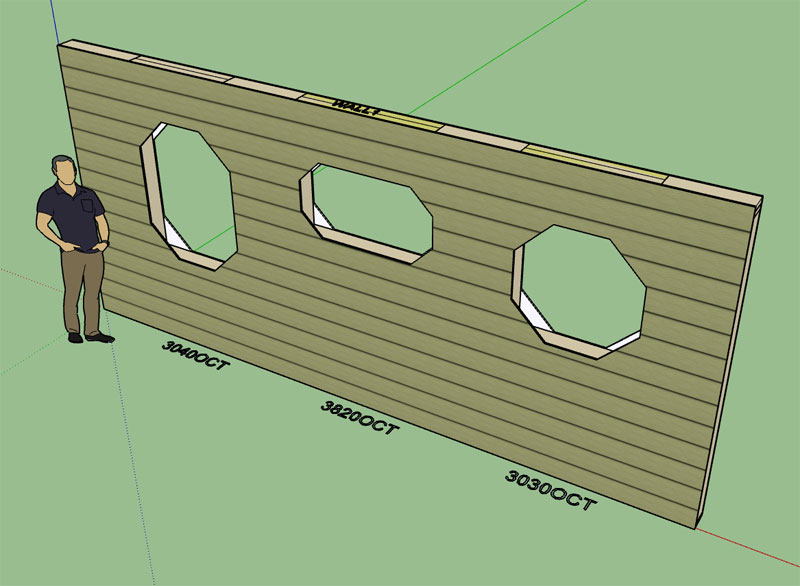
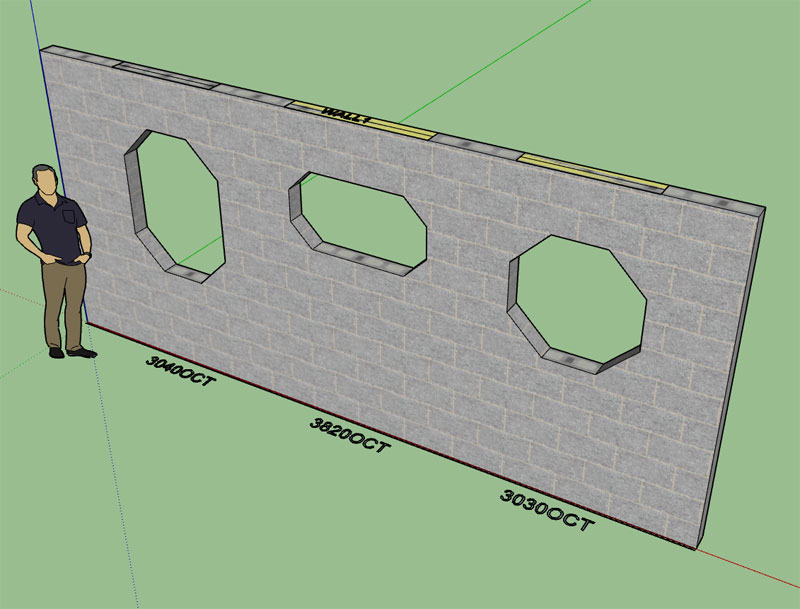
The ratio of the window height to width determines whether it is a true octagon or an elongated one. As usual the possibilities are infinite. I think for now I will just utilize rectangular shutters for this window type until someone tells me otherwise.
-
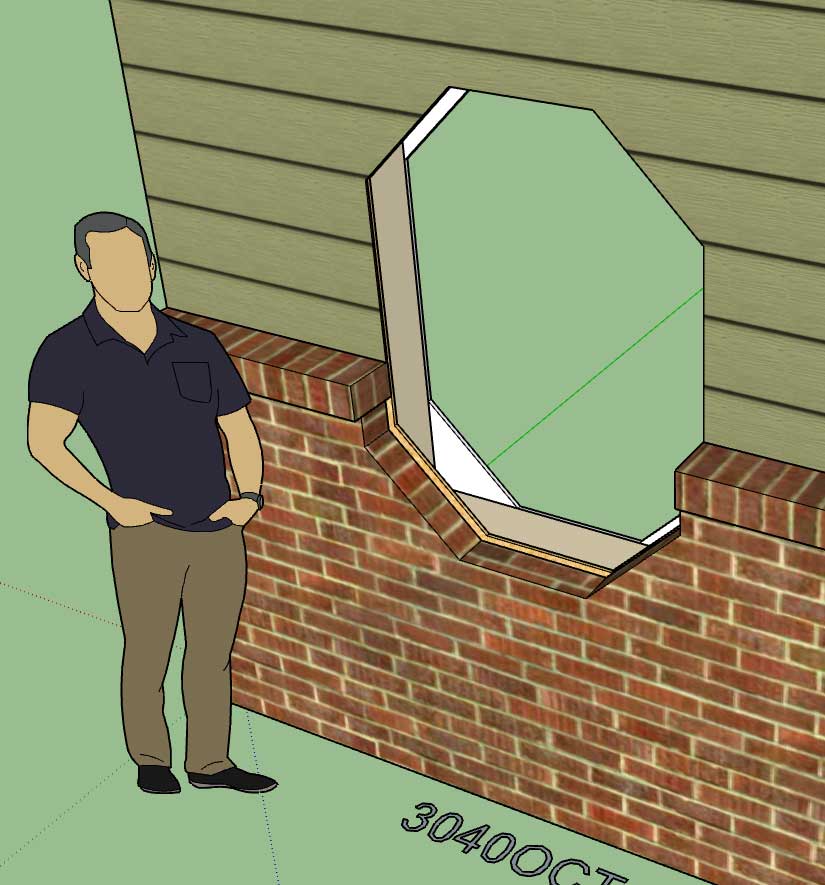
Similar to the Oval/Circle window I'm not installing a ledge with the Octagon window, let me know if this should be otherwise.
-
Version 1.0.1 - 01.18.2019
- Added octagon windows to the window draw and edit modules.
- Fixed a bug in the license and registration module.
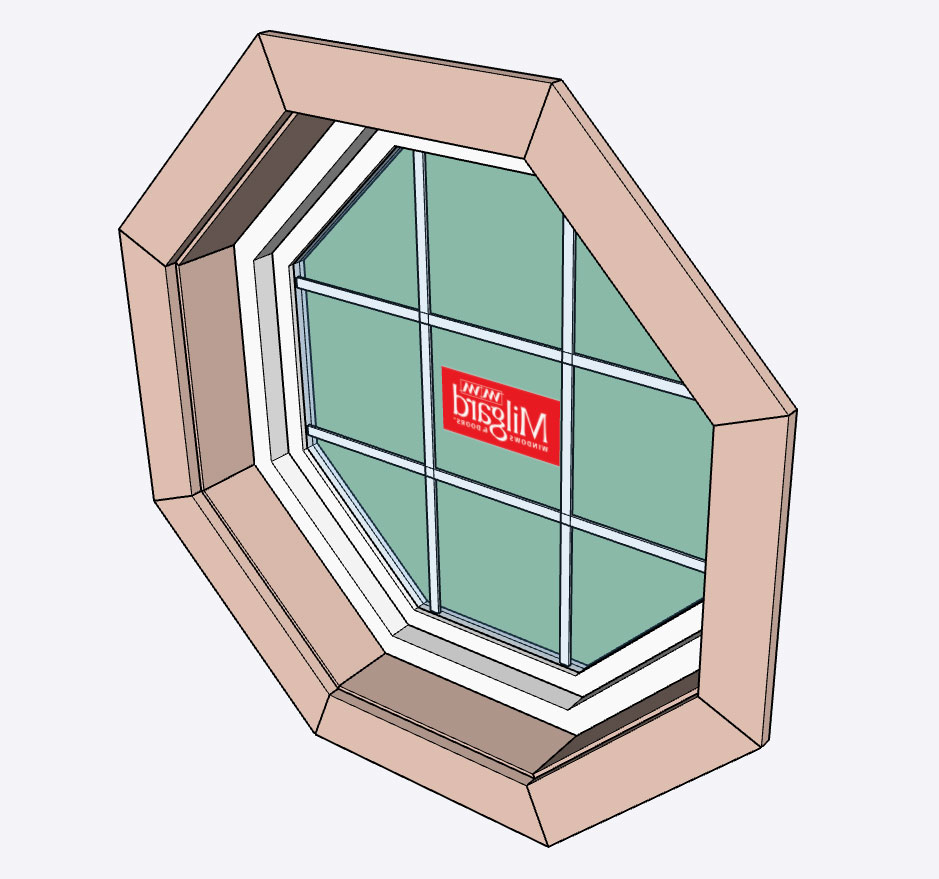
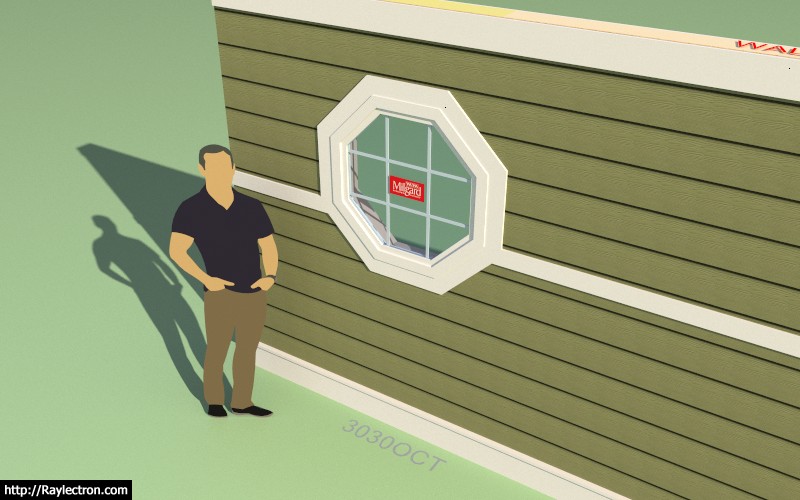
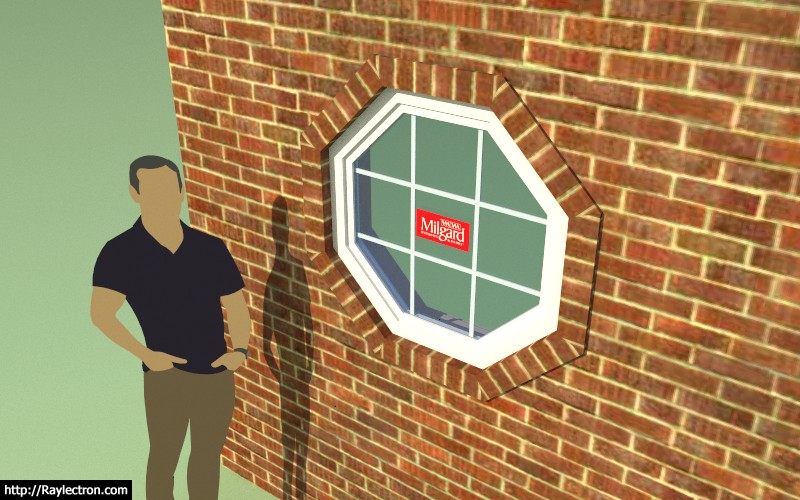
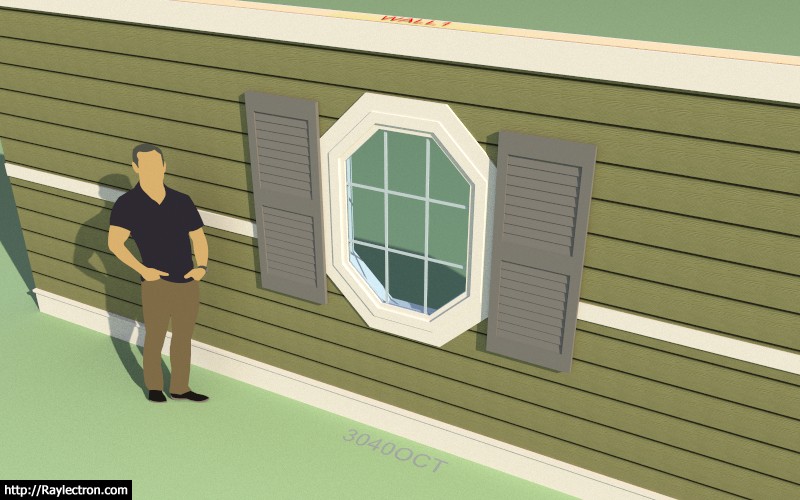
I've never actually seen an octagon window with ext. shutters so for now I will use rectangular shaped shutters on octagon windows until told to do otherwise.
I kind of forgot how much work it is to add in a new windows shape, there are so many options and elements and each one must be dealt with: sheathing, cladding, framing, trim, casing, shutters, band boards, frieze boards, water boards, wainscoting, labels.
The good news is that as I add in more window shapes/types a lot of the code begins to overlap so I can usually cobble together the logic based on work I've already done, which of course is easier and faster than creating something from scratch.
-
Version 1.0.2 - 01.19.2019
- Added a louver vent option for all window shapes: Rectangle, Half Round, Segmented Arch, Gothic Arch, Oval/Circle, Octagon
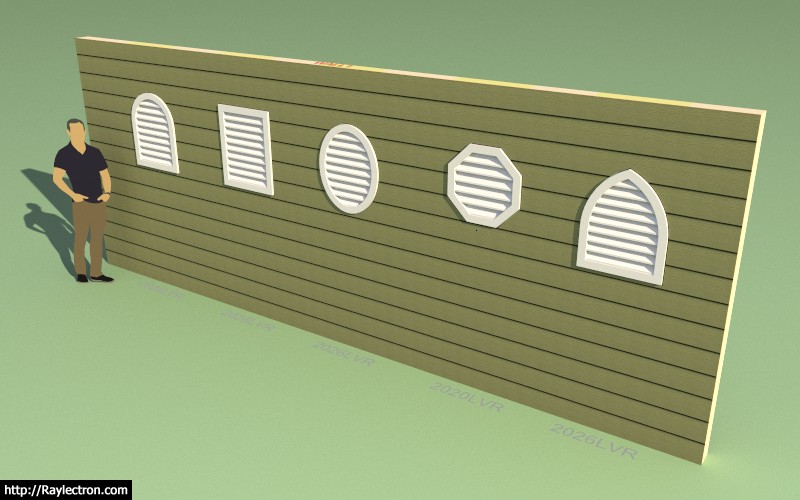
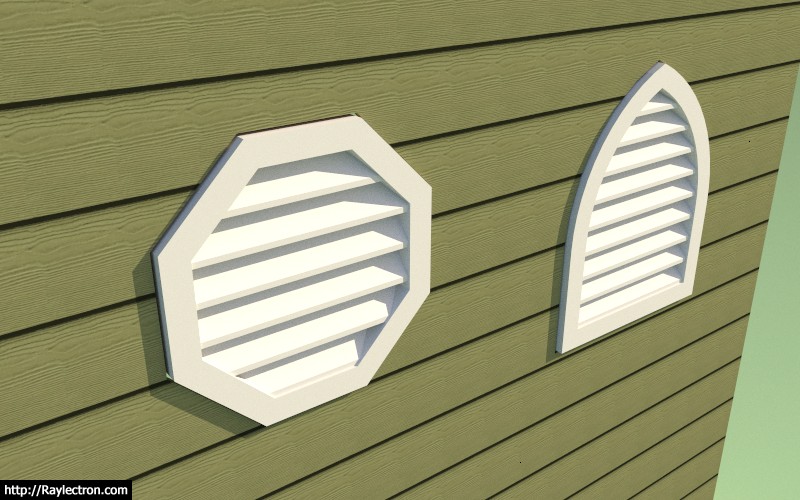
Louver vents are really nothing more than removing the sash and glass from a window assembly and replacing them with slats. Exterior trim around the louvers can also be applied (the same as regular windows).
-
The new volume licensing (3-in-1 price) for all three plugins (mdkBIM Suite) is now live.
-
I am adding a sponsors section to each plugin page:
Hopefully this will be another small source of revenue to help offset my recent decision to skip out on subscription licensing. I am also excited to be able to provide some recognition to those who have been instrumental in the development of these plugins.
If you feel like you should be included as one of the development or finanicial sponsors please contact me via email.
Each sponsorship includes a listing with your logo, name (individual or company), a short paragraph explaining your business, credentials, products etc... and a link to your website.
The same sponsors section will be shown at the bottom of all three plugin pages.
I am also open to suggestions on how to make this feature/listing more attractive to potential sponsors.
Advertisement


