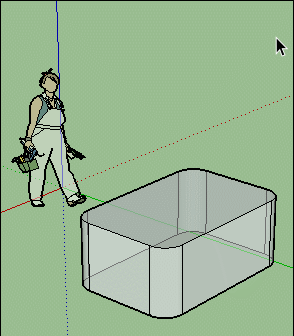
Make rounded rectangle with slanted top and bottom faces
-
Hello,
I have been trying various ways to make a rounded rectangle with slanted top and bottom faces... but facing some problems when using Follow Me.
Here's what I did:
-
Make a rectangle.
-
Select the edge at the top surface and use Move tool to move down a couple of cm. Do the same for the edge at bottom surface so that I get a slanted rectangle.
-
Use guides and created arcs at 4 corners at the top surface.
-
Select top surface, click Follow Me and then click on the arc surface to create the rounded edge. Repeat the same for other 3 corners.
My problem is, Follow Me created un-even corners. I have uploaded my file.
Is there any other way to do it?
Thanks a lot in advance!

best regards,
ST
-
-
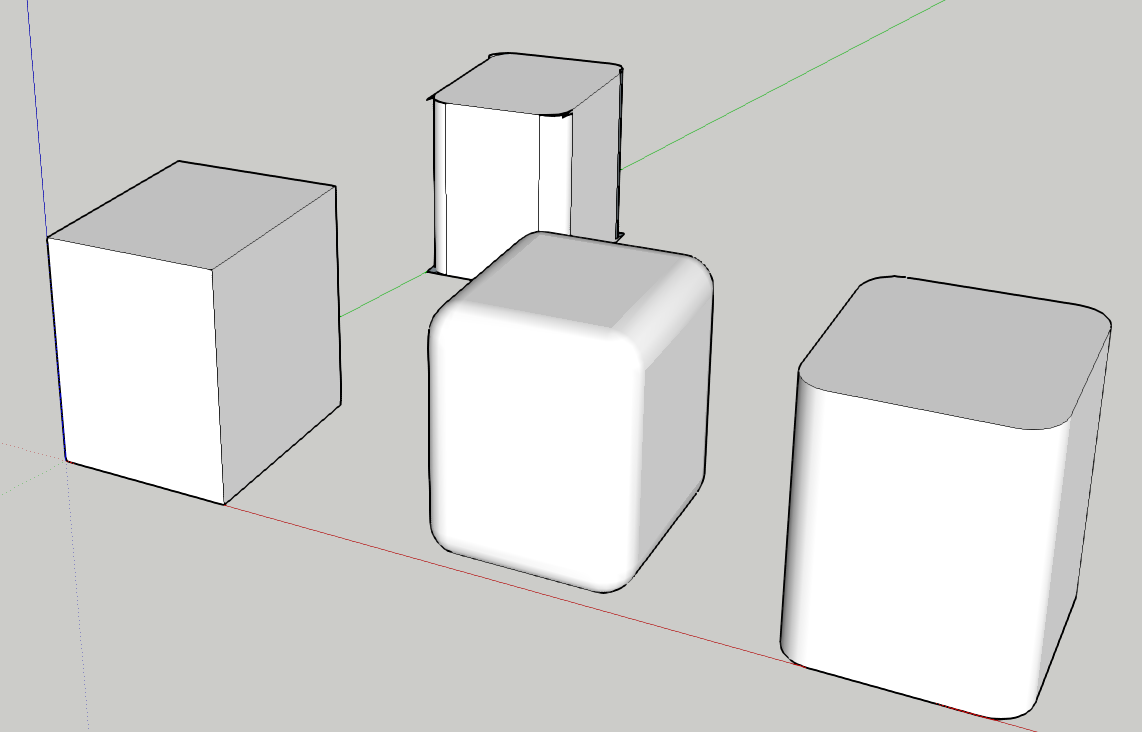
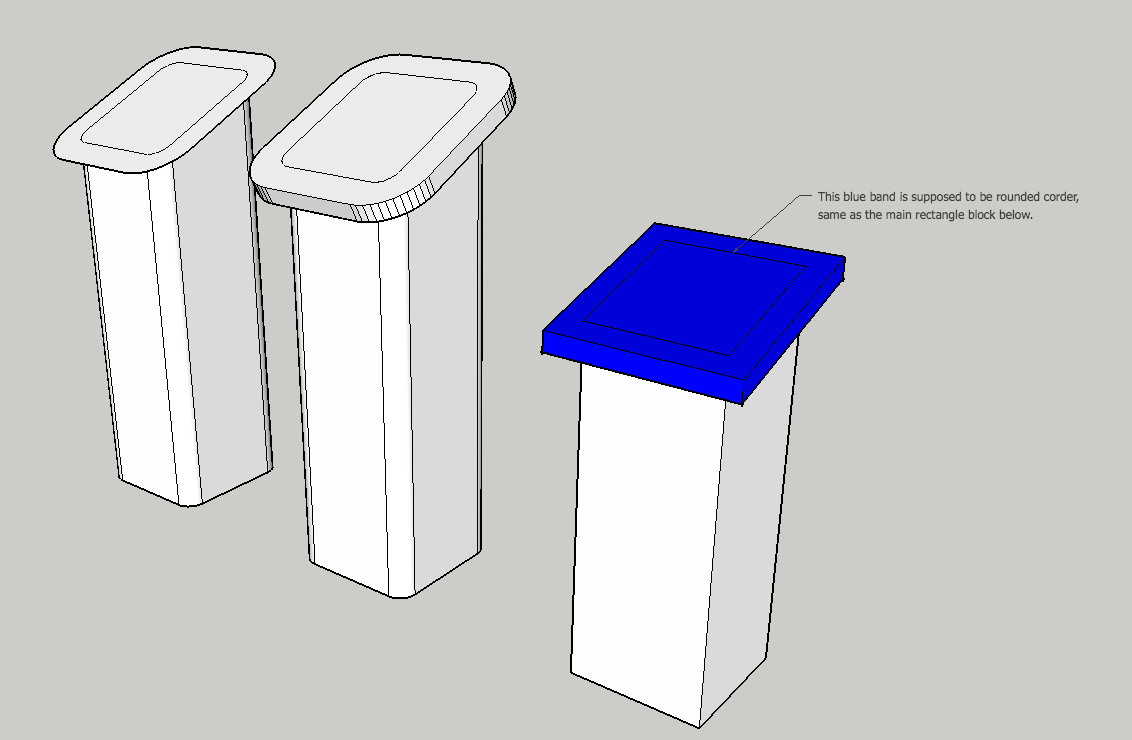
Which one do you want for the final? The middle one or the one on the right?
-
Hello Dave,
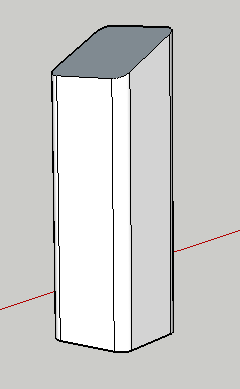
Thanks for your help. But... neither! I want the rounded rectangle to look like this (see attachment picture).
I played around for a few days and I found a solution:
-
Create a rectangle with rounded corners (using arcs).
-
Pull up to make a solid.
-
Using loads of guides, make a triangular wedge that will be intersected with the main rectangular block.
-
Delete all unwanted surfaces / edges.
I was wondering if this is the best way to do it? Or is there other way of doing it?
Thank you.
I also put in attachment the wedge that I need to subtract from the block. I did only the top part.
Best regards,
Shu Ting
-
-
Then it is the one I drew on the right. Maybe it doesn't look like it but the tops and bottoms are angled as in your drawing.
The entire thing from left to right.
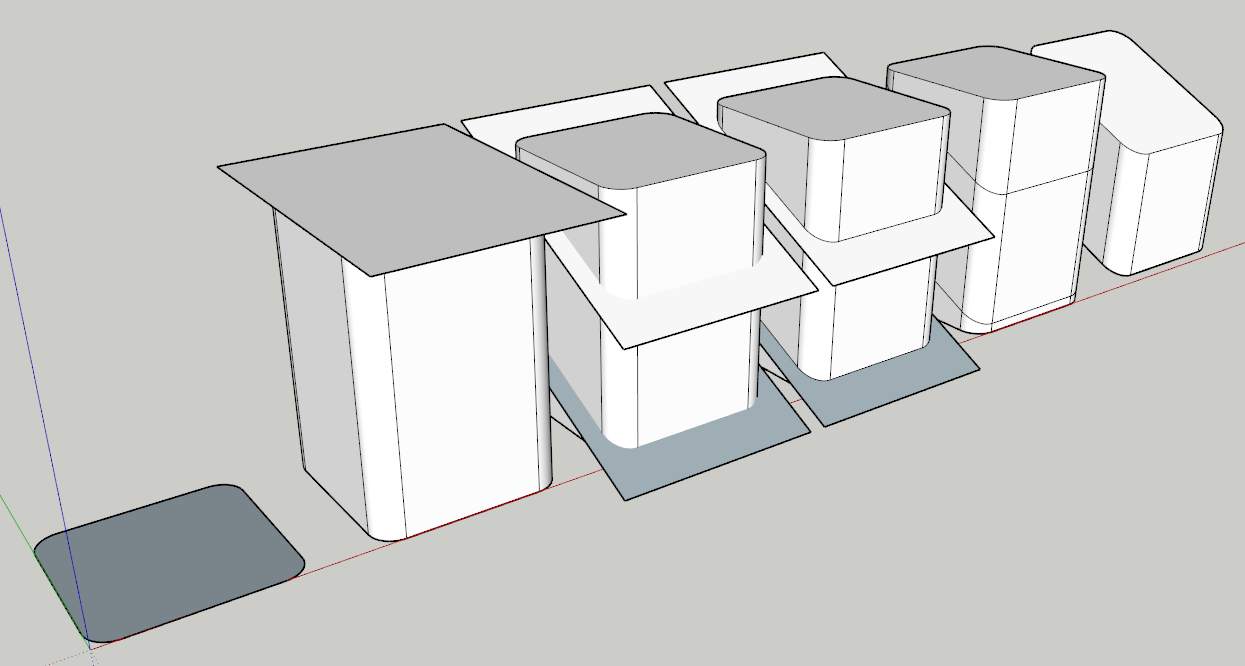
- Draw a square and round its corners.
Extrude to height. Be generous and make it extra tall. - I drew a rectangle above that is parallel to the top and slightly larger than the shape. Think of this as the cutter. It'll perform the same task as your wedge but it's easier to draw.
- Rotate the cutter to the desired angle and move it if needed to the right height. since the bottom gets cut at the same angle, use Move/Copy to make a copy of the cutter at the bottom. I reversed the face of the bottom cutter so its white front face is down.
- Select all of the geometry of both the block and the cutters, right click on it and choose Intersect Faces>With Selection. This will cut both the block and the cutter faces. Notice the new black edges in step 4.
- Erase the edges of the cutters.
- Erase the top and bottom parts of the block. This is where making the block extra long comes in handy. You can drag right-to-left selection boxes around just the top of the block and hit Delete.
The top and bottom faces are the remains of the cutters so you want there face orientation to be correct.
An alternative to would be to draw the block with the angled top and bottom and use Fredo's Round Corner to round over the corners. In this situation, it would be quicker but it's worth knowing how to do it manually because you might not always be cutting a simple square with rounded corners.
- Draw a square and round its corners.
-
As usual, there are many ways to skin a cat.
-
Another possibility
(you are not obliged to make a group before as in this video: just select all faces)
Fredo Scale
Without group ! A very Speedy method!

(Mode Xray for see if all is fine)
Click a face then...
-
Hello Dave & Pilou,
Thank you both for your solutions! Yeah it's always good to have a few tricks up one's sleeves when modelling! I have tried Dave's method and it worked very well. Thank you.
I have troubles installing Fredo Scale extension... oh well... will get there.
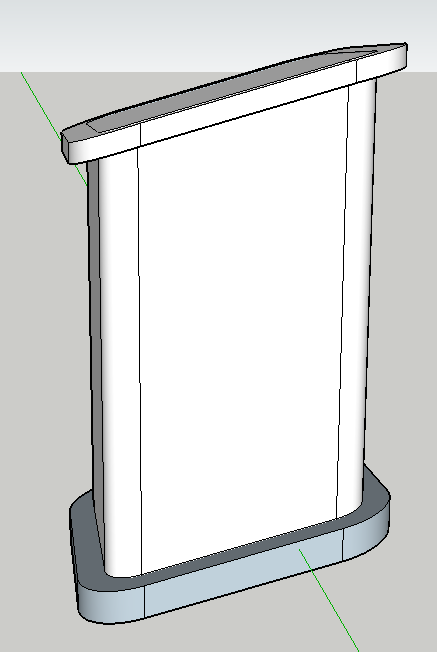
For now, I have got my slanted rounded rectangle. And next step, I want to add a band of rounded rectangle to the top and bottom. This band is slightly bigger than the main rectangle.
I tried using Outline to get the perfect size, but I could not push/pull it up because it will be angled. The band is supposed to be raised in the same direction as the rectangle's height.
I attach screenshot to show you what I mean. Here I showed you what happened when I pull out the outlined top. Since it's already slanted, pulling it will make the new solid angled.
To show you what I want to achieve, I drew a normal rectangle, outline the top, drop down guides (20 mm in this example) in all 4 corners, manually draw the whole band with 20mm thickness. The band is coloured in blue.
It's easy with normal rectangle. But when we have a rounded one... I have no clue how to go about doing it!

Thanks in advance for your help!
-
Hello Pilou,
I have installed the extension FredoScale. It works perfect! This is what I want:
You see the rounded rectangular bands at the top and bottom are slanted in the right direction.
I did this:
-
Create a rounded rectangle (call it Body).
-
Use Outline to create a larger rounded rectangle (let's call it Band).
-
Pull Band & body to desired heights.
-
At the top, use Outline to create a similar Band and pull it out.
-
Use FredoScale to slant the top and bottom edges.
A quick questions please... how do I pull down the top and bottom edge to be exactly the same angle? Using the extension, I see that I can enter some sort of ratio. But I don't really know how it works?
One disadvantage I find is that after the shape is done using the extension, we cannot push/pull to modify smoothed surface (such as the top side). I tried with the side faces and it's still ok to push/pull. Well, one cannot have everything, right?
Thanks for your time helping!
Best regards,
Shu Ting -
-
Hi! Here is a way without plugins, though for convenience I did use "Mirror"at one part.
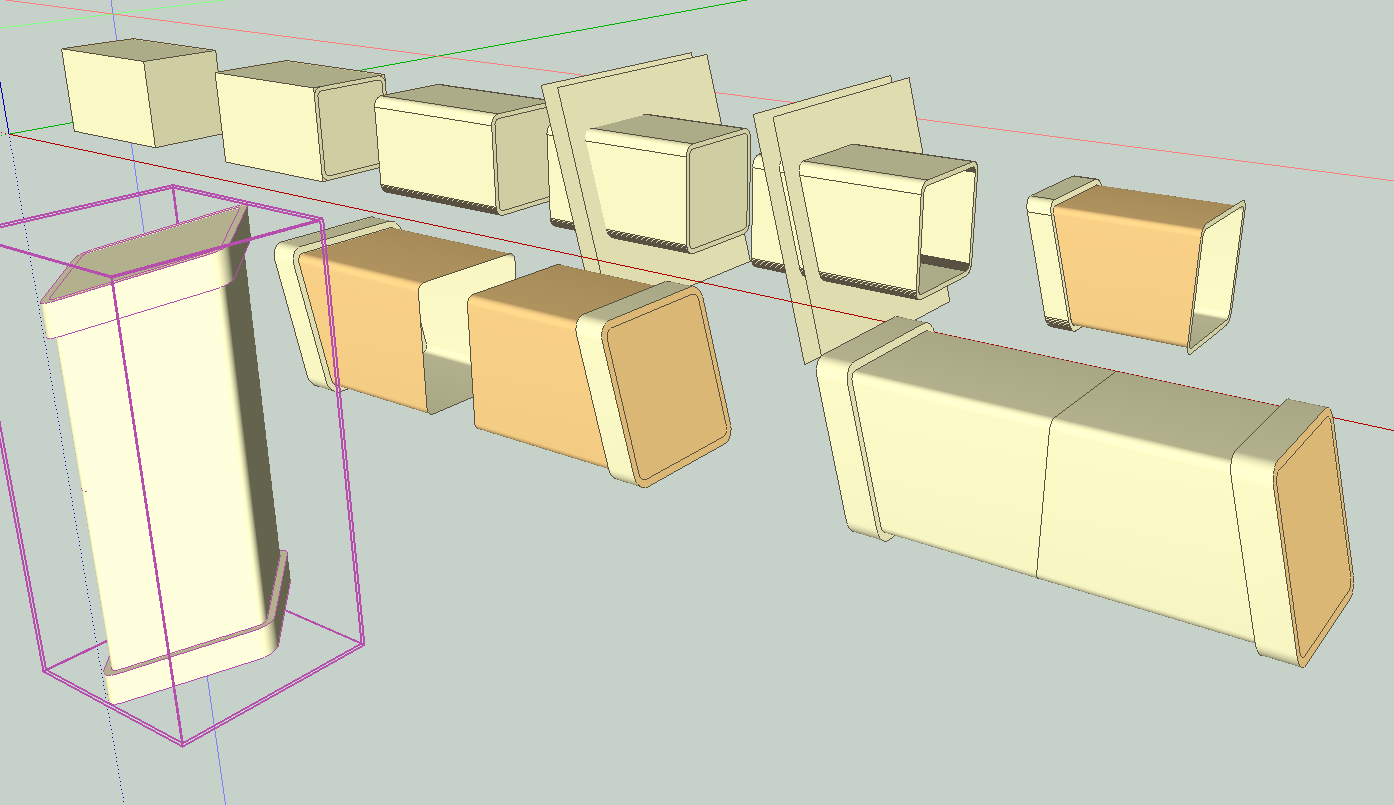
It's pretty much the same approach as Dave's. -
If I all understand
Seems i have not understood!
But you can use the same technic with variation!
Vertical Extrude by
Joint Push Pull by Fredo6 or Projection by Didier Bur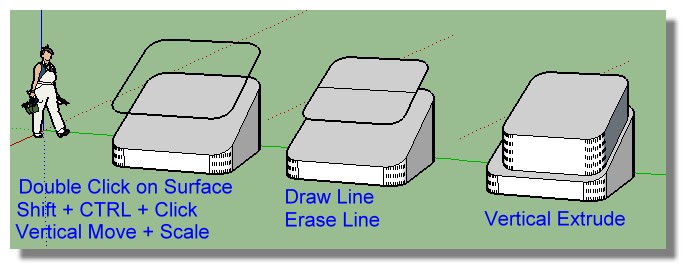 If I understand
 -
That looks like the quickest way so far Pilou!
-
Hello Pbacot, Pilou and Dave,
Oh wow I am so amazed by your skills!
I will definitely give pbacot's and pilou 's methods a go! It's always useful to learn t he manual way, as well as the plugins way. Thank you so very much! This forum is very useful.
I wish all a merry Christmas and happy new year 2017!
SketchUp to infinity and beyond!Best regards,
Shu Ting -
Hello pbacot! I tried to follow your methods, but am stuck at the 6th step. How do you make surface orange that is smaller than the base?
Thanks!
-
Back in step 3 I offset the rounded rectangle on the end--I could then push pull it through to the other end... but I forgot for a couple steps. after the intersect faces the outer surface can be removed. the inner surface is orange because that is my back face color, I reverse it later.
So note in step five the shape is a tube with thickness like a terra-cotta chimney flue--and you should make it this way before the intersect action. Sorry it wasn't clear. It's actually fairly fast when you've got the steps worked out.
Remember that if you smooth objects, it makes rounded edges one surface which makes it easier to select to edit or erase (there's edges in steps 3-5 that are not smooth and could have been--I eventually smoothed them). Also I may select unwanted parts all at once and group to delete, which leaves you the faces you want to keep.
-
Hello pbacot!
Oh ok! Thanks for the details procedures! I shall try them! And I didn't know that smoothing object makes it easier to edit!! Wow that's good to know!
Many thanks again. And wishing you a very happy new year and all the best for 2017!
Best regards,
Shu Ting -
@stshuting said:
Hello pbacot!
Oh ok! Thanks for the details procedures! I shall try them! And I didn't know that smoothing object makes it easier to edit!! Wow that's good to know!
Many thanks again. And wishing you a very happy new year and all the best for 2017!
Best regards,
Shu TingMakes it easier to surfaces at time, I guess I mean.
Hello! It looks like you're interested in this conversation, but you don't have an account yet.
Getting fed up of having to scroll through the same posts each visit? When you register for an account, you'll always come back to exactly where you were before, and choose to be notified of new replies (either via email, or push notification). You'll also be able to save bookmarks and upvote posts to show your appreciation to other community members.
With your input, this post could be even better 💗
Register Login


Advertisement