3D Truss Models
-
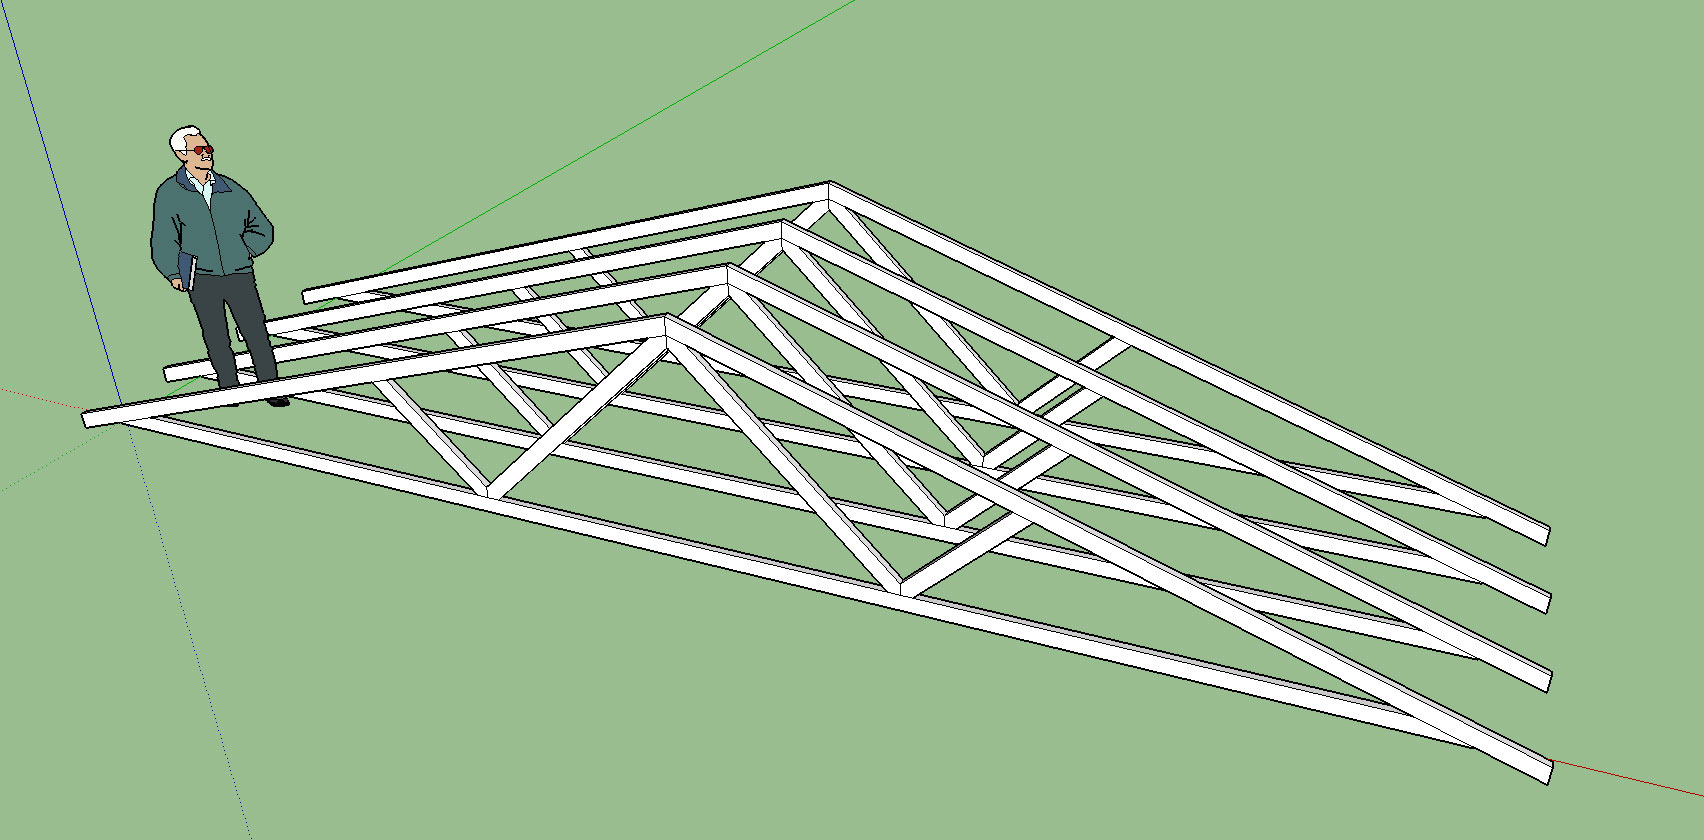
I've recently added the ability in my online truss calculator to output SketchUp 3D geometry. The generated file uses the plugin method (.rb) where you simply drop the file into your SketchUp plugins folder. The plugin prompts the user for the number of trusses to draw and the truss spacing so that one can create the usual array of trusses for architectural models. For example 4 fink trusses @ 24" o/c would give you something like this:
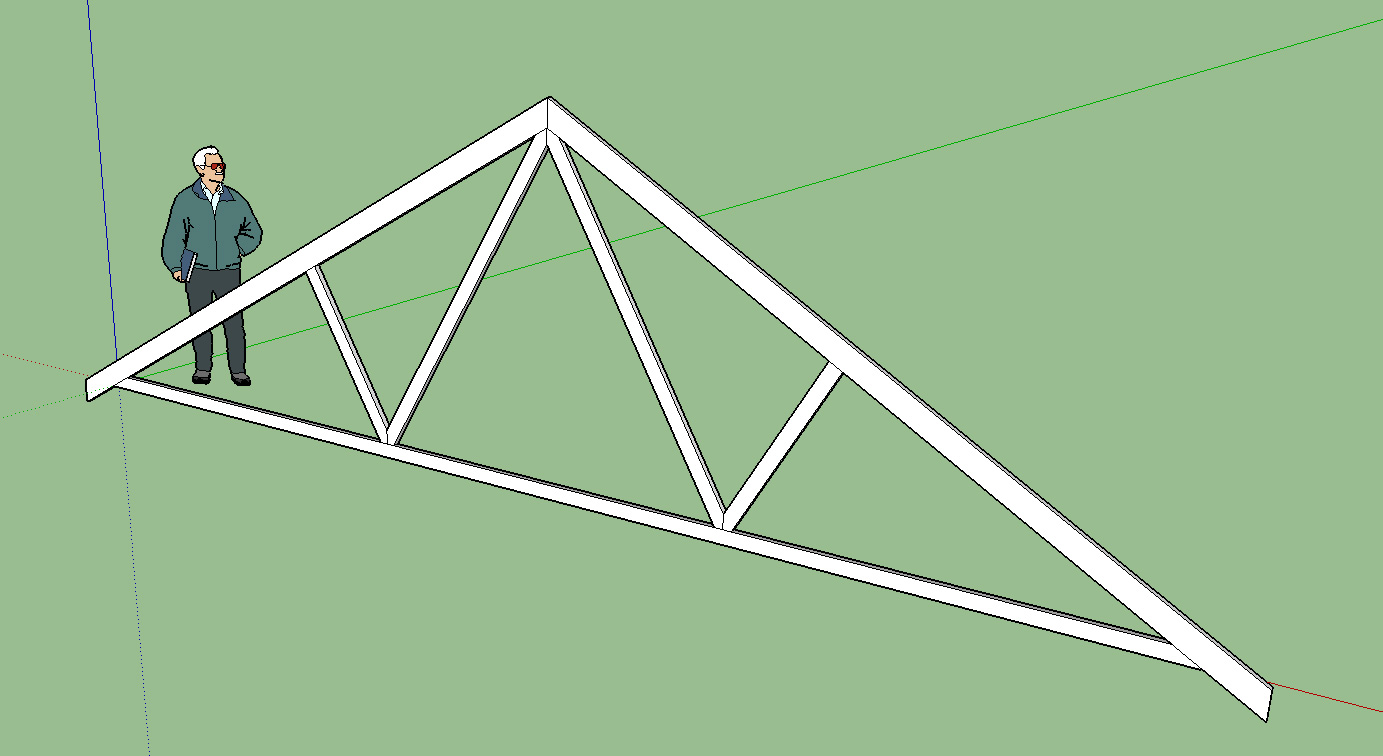
or a single truss might be:
The truss calculator has been around for almost two years but this is the first time I considered providing an output for SketchUp. I'm not a Ruby programmer (perl is my thing) but I found the SketchUp API to be very easy to use and the Ruby programming fairly straight forward and less clunky than even Perl.
Currently only the "fink" truss has the SketchUp output, the truss calculator is located here:
Technically this tool is geared toward the engineer but with the addition of the SketchUp output/functionality it might also be of some use for the DIYer who wants to draw up his/her own design in SketchUp.
Also note that there is a daily limit on the calculator since the server was getting hammered earlier this year and bandwidth became an issue.
-
Schweeeet... Thanks
-
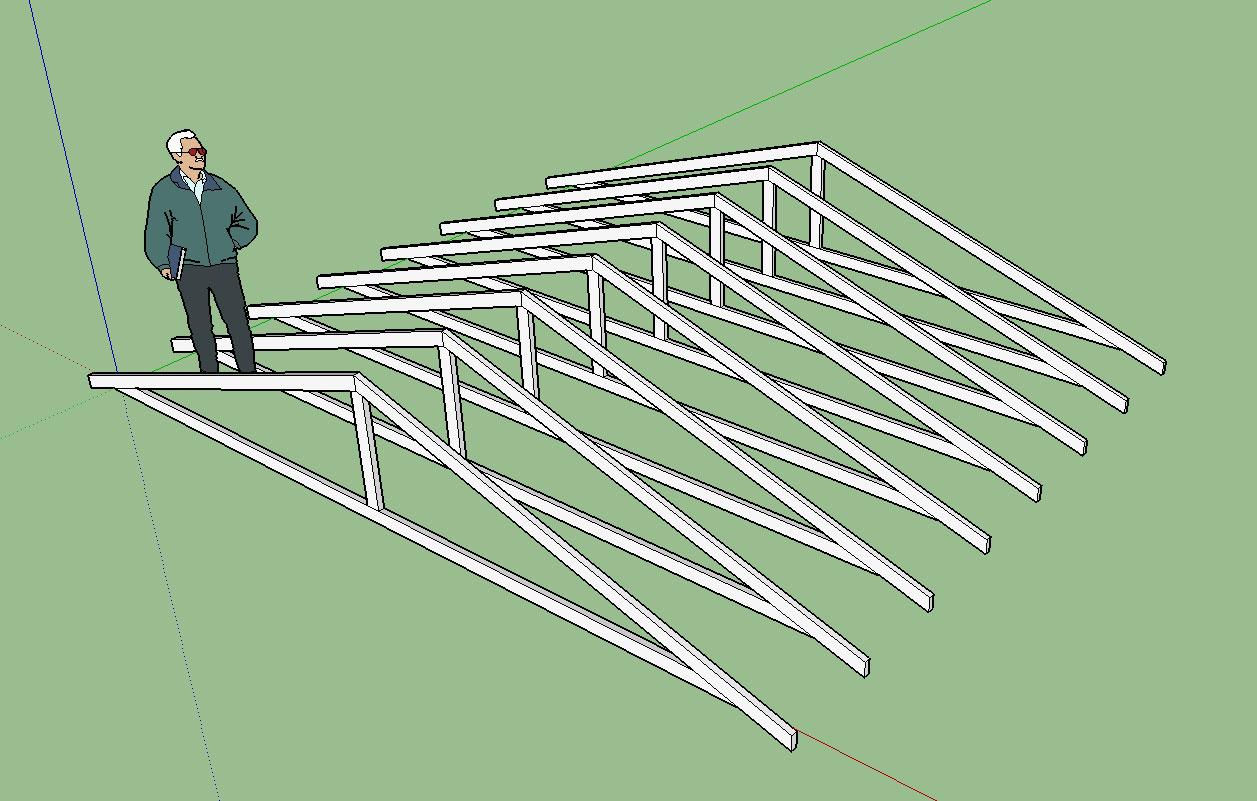
Today I had someone from one of the SketchUp boards ask me to implement the output for the king post truss so even though it does not do the engineering for this truss type you can now get both AutoCAD and SketchUp geometry for a King Post Truss:
-
Great work. Thanks! definitely moving the right direction.
-
This is an excellent tool for me to quickly create 3d truss layout for general purposes
-
will this be developed into a bona fide sketchup extension?
-
I don't know yet. What is a bona fide extension?
I'm thinking about taking the programming from my calculator that computes the truss geometry and re-coding that directly into the plugin. That way you can adjust the pitch, span, truss type, overhang and other parameters all within SketchUp itself. You won't get any of the actual engineering for the truss, at least not yet, but it will allow one to generate the truss geometry independent of the calculator which will make it much easier to use.
To do this though will take some programming hours which are hard to come by at the moment since my local customers are putting the food on the table. I tried to do some crowd funding for my calculator last year but that did not go anywhere. Maybe there would be more support for a SketchUp plugin?
-
@medeek said:
What is a bona fide extension?
To me, that would be an extension that runs from within SketchUp and produces output directly in SketchUp, no external (or online) sources / output required, it will run on your machine irrespective of having an internet connection or not.
I just bought the truss tool script, by "tomot", it works but it could be improved.
There are a few other solutions available for constructing roofs, but not really anything that does trusses, it doesn't have to be engineering quality (engineers design and sign off on trusses anyway) but a good amount of control and variety of trusses would be good. If an option for purlins sizes and spacing could be accommodated, great, also either auto spacing (within maximum parameter) of trusses or force specific spacing with one spacing unforced (within maximum parameter).
-
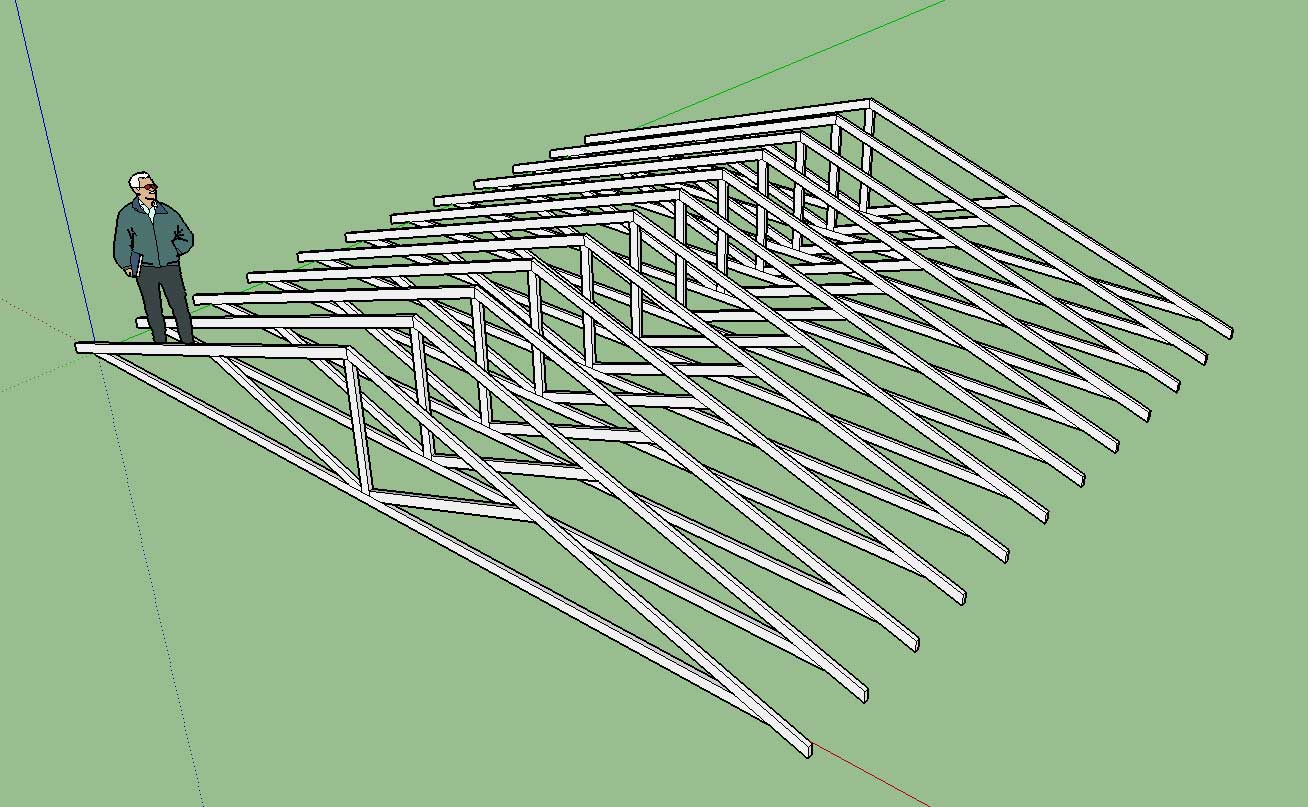
Added the Queen Post truss type SketchUp output:
-
Thanks! Great work! Unfortunately I am doing a stick framing job at the moment. Whenever i get into trusses they are never simple shapes it seems. Would be nice to have a tool for the user to outline the roof and ceiling shape in SketchUp and have it design the webs. Even then a house can have many many truss types, and sections to draw.
but a mono truss would be a good addition.
Although I haven't always bothered to go into this detail for my models which are used mostly for visualization. When designing, it can really help to just go ahead and "frame" the roof in the model and get some reality checks or even some new ideas.
-
Could we go glue-lam beam and custom truss by shape too?
-
medeek, it looks like you've started something...

-
I'm trying to make this easier to use for the SketchUp user and for the designer who does not need a bunch of engineering information. I've created a separate plugin that is used to generate the truss geometry (no engineering or loads). Please feel free to beta test it here:

Medeek Design Inc. - Medeek Truss Plugin
Medeek Design Inc. - Medeek Truss Plugin
(design.medeek.com)
Drop the .rbs file into your SketchUp plugins folder. Suggestions or bug notifications are welcomed. Currently only the fink truss type is available but I will add the others shortly.
A couple of ideas I'm tossing around:
1.) Add an option to generate gable end trusses with the typical 24" o/c verticals
2.) Add in an attic truss type, this could be a bit challenging but fun.
3.) There is a myriad of common truss shapes (ie. scissor, mono) that I can add, I just need to prioritize and add the ones that people need the most.
Please suggest any additional options or features you would like to see.
I plan on keeping this freeware until it reaches a point that it is a fairly significant product with all of the engineering included. At that point I will probably charge $10 - $20 for the advanced plugin. A lite version (without engineering) will remain free of charge.
-
Sounds Good!

-
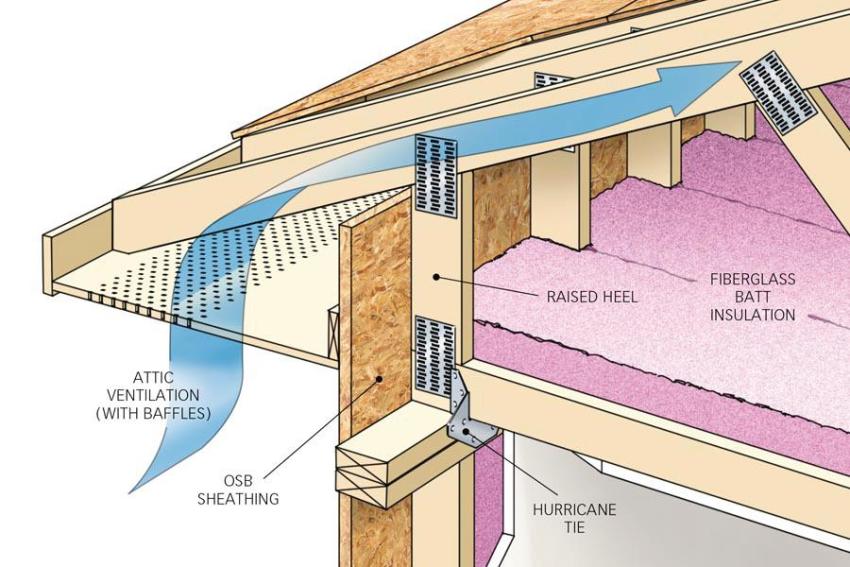
This is great for communicating how the truss layout would look A Raised heel design would be great. Since we are facing higher insulation requirements in the roof. A raised heel design is perfect for this.
-
What is the most typical raised heel height? Depending on the height the typical treatment is one of three options:
1.) Wedgeblock: Butt cut BC depth and top chord just touches bottom chord.
2.) Slider: Butt cut is larger than BC depth (3-1/2") and heel height is less than 12". Bottom chord and top chord do not touch.
3.) Vertical with Strut: heel height is 12" or greater. -
something like this
-
That would be option 3, however note that the image shown does not have a strut from the last web to either the top or bottom of the vertical member at the heel. When the heel height forces the use of vertical member (from a wedge or slider) a strut should be added otherwise you have a truss with a non-triangulated section (trapezoid).
I've updated the page for the plugin and also added the King Post and Queen Post, still working on the Howe. I think I've come up with a nice little algorithm that will allow one to set the heel height of the truss (raised heel option) and it will automatically insert either a wedge, slider or vert. member and strut depending on this heel height and other parameters.
-
I'm currently working on the algorithm for determining which option to show for the raised heel (wedge, slider or vert. web w/ strut). Sliders and wedges typically seem to be either 2x4 or 2x6 members. The length of the wedge or slider is still somewhat of a question. Most sliders seem to average between 3'-5' in length. Wedges extend about 6 inches.
The question of length of these two elements is important because it will determine the scarf of the heel and this determines the panel lengths and hence the web placement.
An interesting feature of the strut for higher raised heels is whether they are beveled to their centerline or this step is omitted. When the angle between the strut and the chord becomes to shallow the bevel is omitted, at least from a number of truss drawings I've reviewed.
-
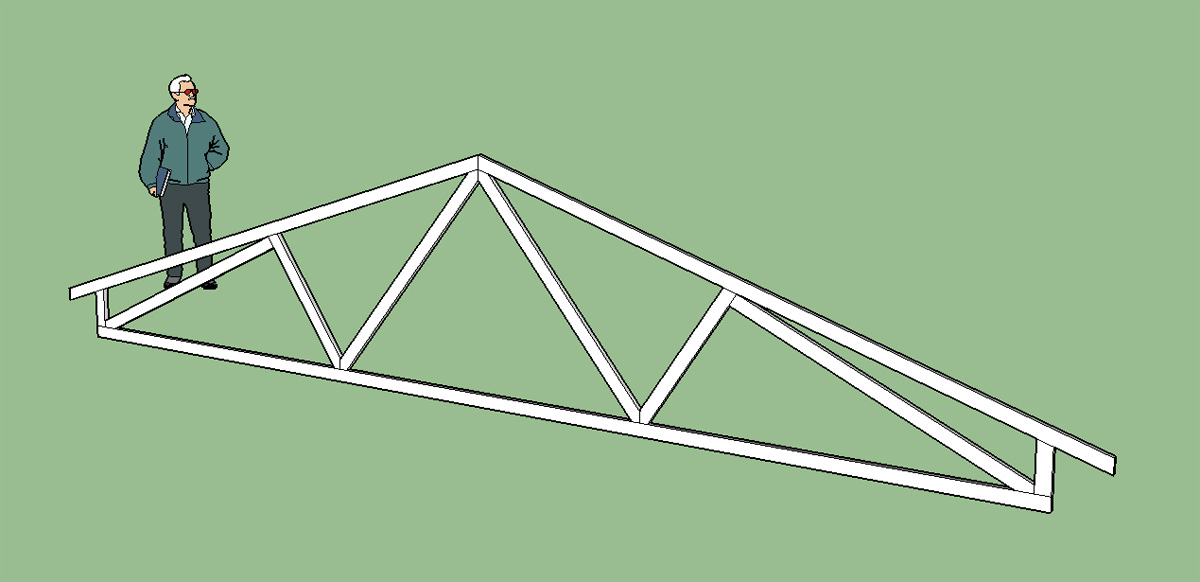
I have the raised/energy heel working now for a fink truss where a vertical member and strut is required (heel height greater than 12" approx.). Still working on the wedge and slider cases, they are actually easier to calculate and program, but I figured I would tackle the difficult one first.
When the angle between the strut and top chord exceeds 10 degrees I then apply a scarf cut to the strut at its centerline (try a raised heel height that exceeds 24" and you will notice the difference).
Here is an example of a fink truss with a 18" raised heel. Notice there is no scarf cut at the top of the strut where it meets the top chord.
Advertisement


