3D Truss Models
-
Hi Nathaniel,
Will you be able to include an option to generate purlins / battens? Here our standard construction method places this in the position where the roof sheathing goes, directly on top of the trusses. The top and bottom batten / purlin position could possibly be customisable (distance from apex and from edge / fascia). Obviously will require input field for width / height, maximum spacing field as well but this should possibly require a toggle for constant spacing from lowest portion of TC to apex position.
I would really appreciate this, unless the function is there and I'm missing it, please advise... Thanks in advance!
PS:
I know the focus of the plugin is for the roof trusses / structure, but could you have an option to include the roofing material? This only needs to be a simple structure, similar to the sheathing option but placement on top of purlins / battens with input field for thickness.
-
I forgot to add, the UI version seems to need a little TLC, see attached image.
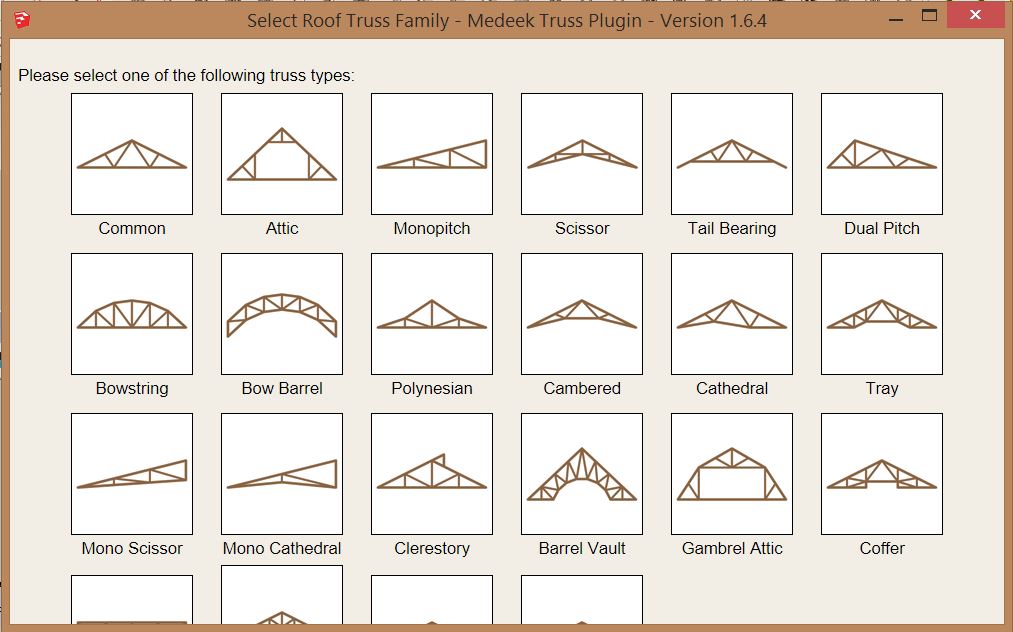
Probably one of the following:- window sizing to be increased
- icon sizing to be decreased
- resizable window
- scroll-bars

-
I just downloaded your plugin to try it out...
Although my need for something like this is very limited, it's excellent! Like Juju, I'm also having an issue with the window size, so I assume that it's something you'll take care of in an upcoming release...
-
I just re-installed the plugin into SU 2016 to further check into the html window size issue. The funny thing is that the window size appears to open to the same size for all my html UI pages regardless of the size I specify. Is this a bug with SketchUp or the API or is this something I'm doing wrong, the issue is with the WebDialog.new command where I specify the width and height of the webdialog. I need to look into this further.
-
@juju said:
Hi Nathaniel,
Will you be able to include an option to generate purlins / battens? Here our standard construction method places this in the position where the roof sheathing goes, directly on top of the trusses. The top and bottom batten / purlin position could possibly be customisable (distance from apex and from edge / fascia). Obviously will require input field for width / height, maximum spacing field as well but this should possibly require a toggle for constant spacing from lowest portion of TC to apex position.
I would really appreciate this, unless the function is there and I'm missing it, please advise... Thanks in advance!
PS:
I know the focus of the plugin is for the roof trusses / structure, but could you have an option to include the roofing material? This only needs to be a simple structure, similar to the sheathing option but placement on top of purlins / battens with input field for thickness.Can you send me model that shows how you want this to look. I can easily write a new module that adds the advanced option for purlins/battens. I can also have the roof sheathing applied to the top of the purlins when this option is selected.
The inputs for a purlin sub-menu would probably be:
- Purlin Spacing
- Purlin Height
- Purlin Width
I'm assuming they would always run to the edge of the roof (barge rafter) but some overhang or offset variable could also be given as an input.
I would also assume that the first purlin would start at the bottom edge of the roof at the fascia point coincident with the sheathing but again this could also be user driven.
-
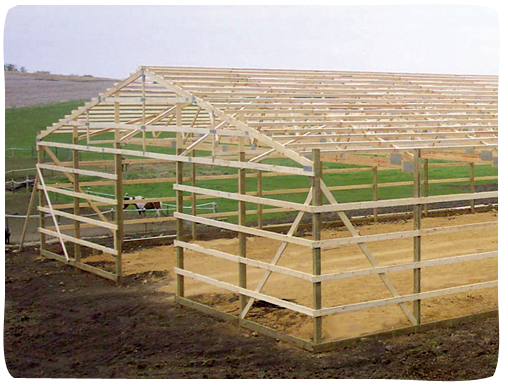
A purlin roof would look something like this:
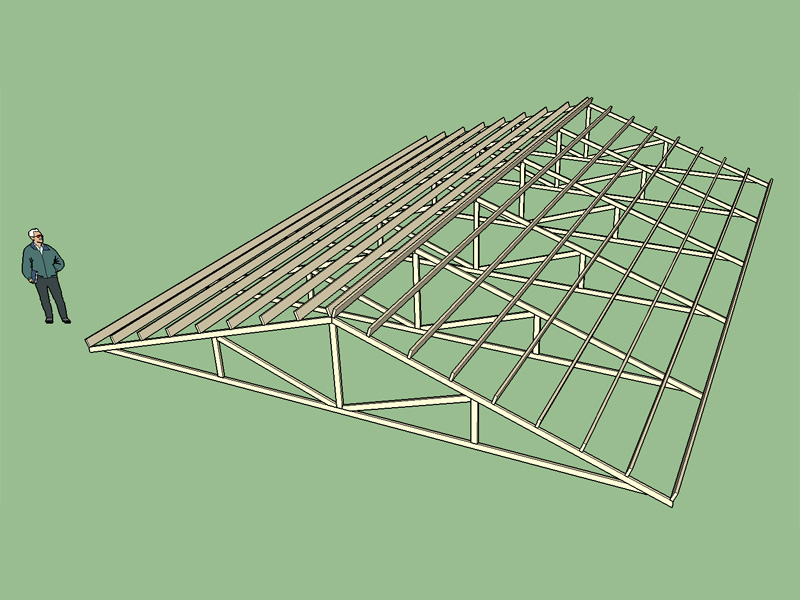
The question is what to do at the eaves and the peak of the roof?
View model here:
https://3dwarehouse.sketchup.com/model.html?id=73647695-bc53-42f4-ba40-830ab4cc9e6f
-
@medeek said:
@juju said:
Hi Nathaniel,
Will you be able to include an option to generate purlins / battens? Here our standard construction method places this in the position where the roof sheathing goes, directly on top of the trusses. The top and bottom batten / purlin position could possibly be customisable (distance from apex and from edge / fascia). Obviously will require input field for width / height, maximum spacing field as well but this should possibly require a toggle for constant spacing from lowest portion of TC to apex position.
I would really appreciate this, unless the function is there and I'm missing it, please advise... Thanks in advance!
PS:
I know the focus of the plugin is for the roof trusses / structure, but could you have an option to include the roofing material? This only needs to be a simple structure, similar to the sheathing option but placement on top of purlins / battens with input field for thickness.Can you send me model that shows how you want this to look. I can easily write a new module that adds the advanced option for purlins/battens. I can also have the roof sheathing applied to the top of the purlins when this option is selected.
The inputs for a purlin sub-menu would probably be:
- Purlin Spacing
- Purlin Height
- Purlin Width
I'm assuming they would always run to the edge of the roof (barge rafter) but some overhang or offset variable could also be given as an input.
I would also assume that the first purlin would start at the bottom edge of the roof at the fascia point coincident with the sheathing but again this could also be user driven.
Thanks for the consideration. The reason the purlin / batten spacing is a little tricky is when you do complex roofs and require a little flexibility at the top and bottom purlins / battens but also need purlins / battens to align. Also the top purlins need to be offset a little from the apex, this would differ depending on roof pitch, to fit standard sized flashings, hence the flexibility here as well. The bottom purlins possibly need to be set back depending on fascia size and position.
-
I'm starting to wonder of the purlins / battens (and thus probably sheathing as well, by implications) would not be better off as a separate function instead of automation within the same routine entry?
-
A separate routine, after the roof is created is also a possibility. The main thing is I need to know what variables need to be user specified, once I have that I create the algorithms that will generate the battens/purlins making sure that they comply with whatever rules that we impose. The more variables, the more user control but also the more complicated the interface becomes for the user. Finding the perfect balance is the goal.
-
Version 1.6.5 - 07.07.2016
- Added energy/raised heels for polynesian truss type (1 variant: vertical w/ strut).
- Fixed HTML truss selector menu so that window size no longer truncates truss images.
View model here:
https://3dwarehouse.sketchup.com/model.html?id=c4ecc314-9702-4c99-9148-ca0790178583
-
Still a lot of refinement and new features to add but with the Truss and Foundation Plugin I can create the concrete, TJI floor and truss roof, only missing the wall plugin:
I've been giving the Medeek Wall Plugin some thought and I think I can make a pretty decent go of it. Beyond basic walls with windows and doors I'm also thinking about including the following items:
- Portal frames for garage door openings.
- Stairs (L-Shape, U-Shape, Linear)
- Exterior Decks
- Stacked Windows (window walls)
- Option for external sheathing and internal sheathing (gypsum).
-
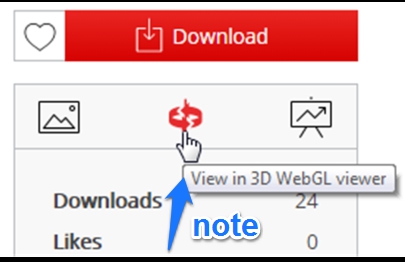
View Medeek skp models in 3D Viewer
When viewing plugin at given link such as
https://3dwarehouse.sketchup.com/model.XXXXXX
you can activate the 3D WebGL Viewer to inspect the 3D Model.
-
@facer said:
View Medeek skp models in 3D Viewer
When viewing plugin at given link such as
https://3dwarehouse.sketchup.com/model.XXXXXX
you can activate the 3D WebGL Viewer to inspect the 3D Model.Thank-you for this, I should have put up a similar note a while back.
-
Meedek (Nathaniel),
Glad to help, you are doing a great job.
I and your supporters benefit by assisting you to:- get the message out about your plugins
- offer encouragement and aid to you where practicable
- suggest ideas for improvement.
In regard the use of the 3D WebGL viewer.
I suggest this message should be repeated by yourself say every 3 months.
The reason is new viewers will most likely not be aware.I have been downloading plugins etc for over 5 years and never realized the 3D Viewer was there.
I only became aware of it when we discussed the use of Kubity (now qrVR) to complement
your postings.Kubity offers a smoother and more varied look at your models but has the drawback of not
currently having the option of showing lines. I think for your really complex models that
show "everything" Kubity (qrVR) offers added benefits. This will of course
increase in its applications of using Tour (scenes) and Walk (walk through) for PC.
(available now for i-phones, i-pads and tablets.%(#4000FF)[Quote from Kubity discussion on SketchUcation:
( Walk & Tour are already available on mobile, on the web it's going to be available at the end of the month.(July))
http://sketchucation.com/forums/viewtopic.php?f=400%26amp;t=65308%26amp;p=599582#p599582]Just a reminder that the manual, tutorials etc are important.
Perhaps there is a way of enlisting the SketchUcation Community to assist
in return for "free Medeek plugins". Many hands make light work or it
can turn into a "bloody shambles" with more effort trying to "herd the cats"!
Just a thought bubble
If you want to discuss this further just send me a PM.All the best in making your plugins financial winners!
You have already gained by making the "Medeek" name known. -
For those who find the plugins useful I agree it helps both you and me when you spread the word and there are more registered users. I've had some moments where its been hard to justify the time I've spent at this so I've been very careful with the items I've worked on recently. Most of the recent updates are directly a result of a suggestion by a user.
The user manual is still a mess but I'm still plugging away at it. I would really like to make a tutorial video on the dormer feature but I think I really need to get the roof portion of it finished first and then the video makes sense.
The foundation plugin was pretty much a no brainer to get started since I had already hacked together a much more simplified version of it for my own use. There is a lot to do yet on that one but at least I've got the basic icons and framework together, so that its started.
I'm more of an engineer than a plugin author, but a lot of user feedback and even assistance from other plugin authors has helped refine my methods and user interfaces. This has been a real learning experience, 8-9 months ago I did not even know SketchUp had the ability to have 3rd party plugins.
-
This is an example of a 24' x 24' garage that I would like to build on my property this summer or the next.

View model here:
https://3dwarehouse.sketchup.com/model.html?id=77329ddc-a170-4dde-945e-4e413304f620
I created the foundation and roof with minimal effort using my own plugins. The walls were created initially with the housebuilder plugin however I then manually edited the walls. Note that the top plates overlap properly as they should.
Also note that the garage door wall is a double portal frame. I would like for my wall plugin to automatically create this standard type of portal frame (PFH) both single and double (ie. Garage Door Option). Notice the embedded Simpson Strong-Tie STHD14 holdowns.
I like to use 2x jamb boards around the door perimeters when the stem wall projects above the concrete slab, this may be atypical constructon for others. Local contractors like to embed a pressure treated nailer into the concrete.
In theory I should be able to create this exact model using the Foundation, Wall and Truss Plugin and do it all within 5 minutes or less. That is the goal.
With the wall plugin I will have the standard linear wall tool but I would also like to have a rectangle wall tool that will immediately throw up 4 walls given three user selected points, similar to the truss and roof plugins.
-
Hi Nathan,
Do you have a roadmap for this plugin? I'm interested to see when purlins/battens options (maybe more?) can be expected.
-
I've been thinking about what to do with battens and purlins. They might be two different animals. With purlins you now have a fairly substantial structural member running parallel to the ridge. This will eliminate the need for outlookers (structural or non-structural) at the gable ends, or so I would think. Also the location and framing of the fascia and rake boards will probably change, or maybe not. Most post frame buildings that are using purlins have the fascia boards that are raised and flush with the purlins, the overhang of the trusses is eliminated.
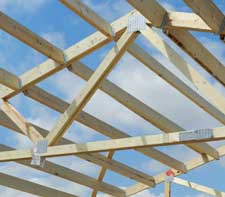
Battens are typically used for roofs with tile or slate coverings:

Since battens are usually much less substantial they probably do not remove the need for outlookers at the gable ends. Fascia and rake are probably not affected either.
Bottom line I need more details. I need to see a typical batten framed roof and understand what is going on at the eaves, peak, and gable ends.
I am still learning on this one.
-
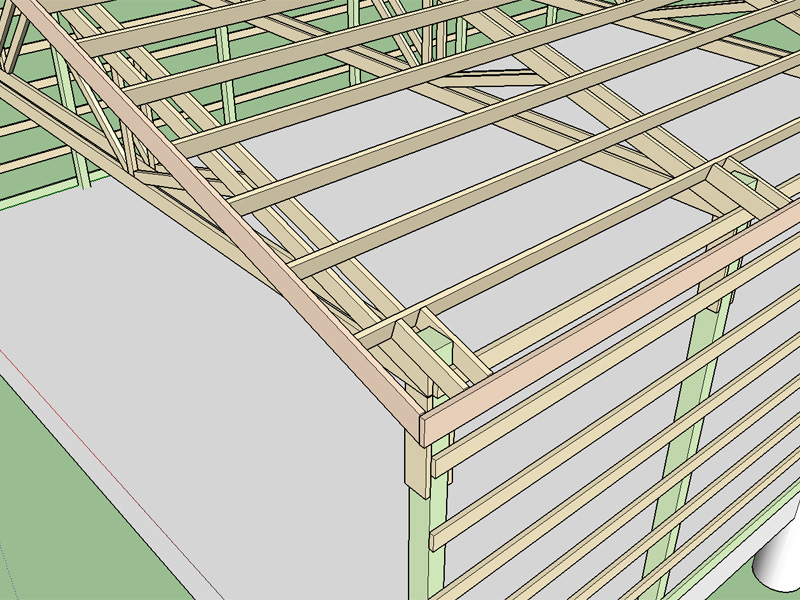
One can also inset the purlins between the trusses (fully recessed):
-
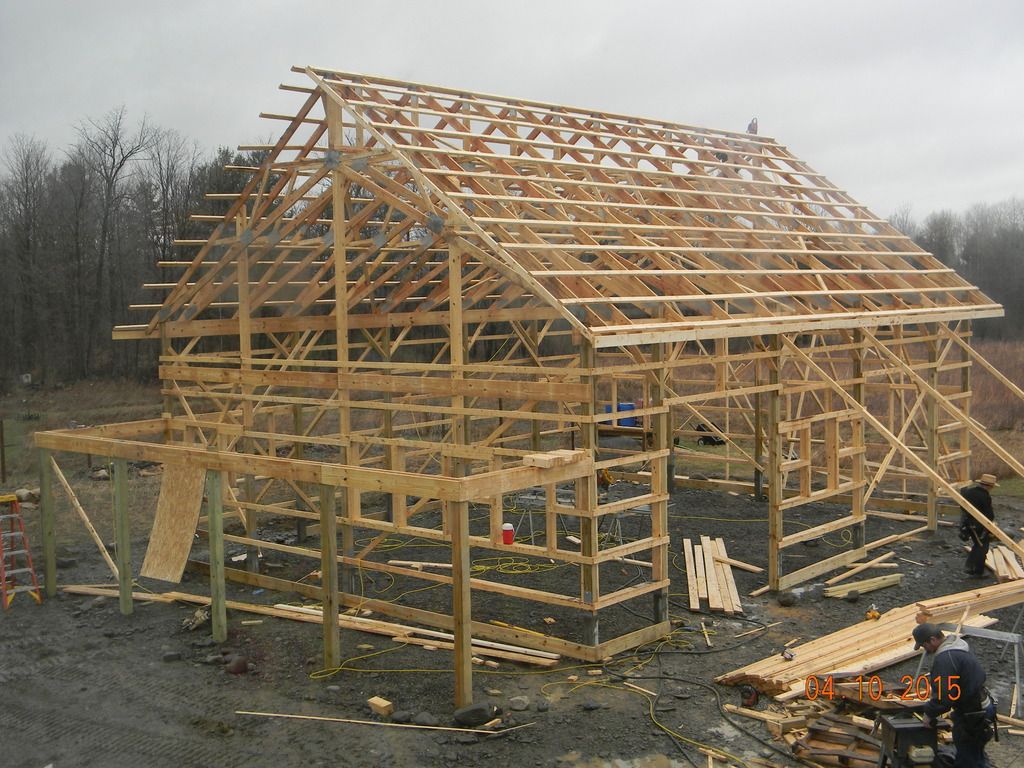
This is a quick study of a post frame roof using doubled trusses with 2x6 purlins @ 24" o/c. This is pretty typical for a pole barn or post frame building constructed locally:
View model here:
https://3dwarehouse.sketchup.com/model.html?id=0240f563-8350-460d-b07c-9f7dae117782
Notice how the rake and fascia boards are raised above the trusses so that they are flush with the roof plane and purlins. The overhang can be achieved a number of ways but one method is to extend rafters from an inboard purlin and also attach to the post as shown.
There are a number of other ways to frame the overhang, a quick search online will attest to this. Sometimes a header is used between posts which allows for a truss spacing which is closer than the post spacing.
Purlins position right at the peak seems fairly standard, based on some plansets that I have.
When you add end walls with posts you can usually eliminate the doubled truss at the gable ends and you often will see a gable end truss that has girts (horiz. members) instead of studs.

With a purlin roof I almost need to create a separate menu item and module to properly deal with it.
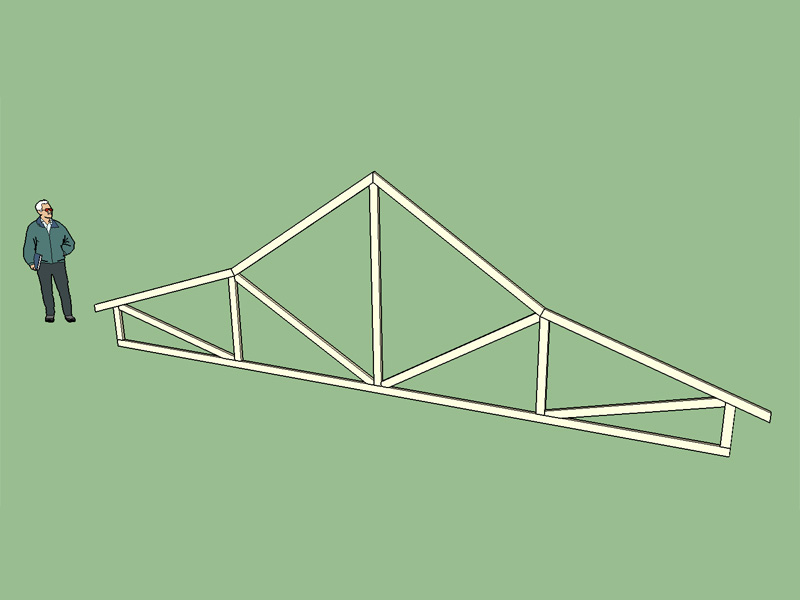
Here is an interesting double truss design but with scissor trusses:

Hello! It looks like you're interested in this conversation, but you don't have an account yet.
Getting fed up of having to scroll through the same posts each visit? When you register for an account, you'll always come back to exactly where you were before, and choose to be notified of new replies (either via email, or push notification). You'll also be able to save bookmarks and upvote posts to show your appreciation to other community members.
With your input, this post could be even better 💗
Register Login


Advertisement