[Plugin] GKWare Cabinet Maker
-
The main reason for wanting feedback is I want to make these 4 sections totally consistent.
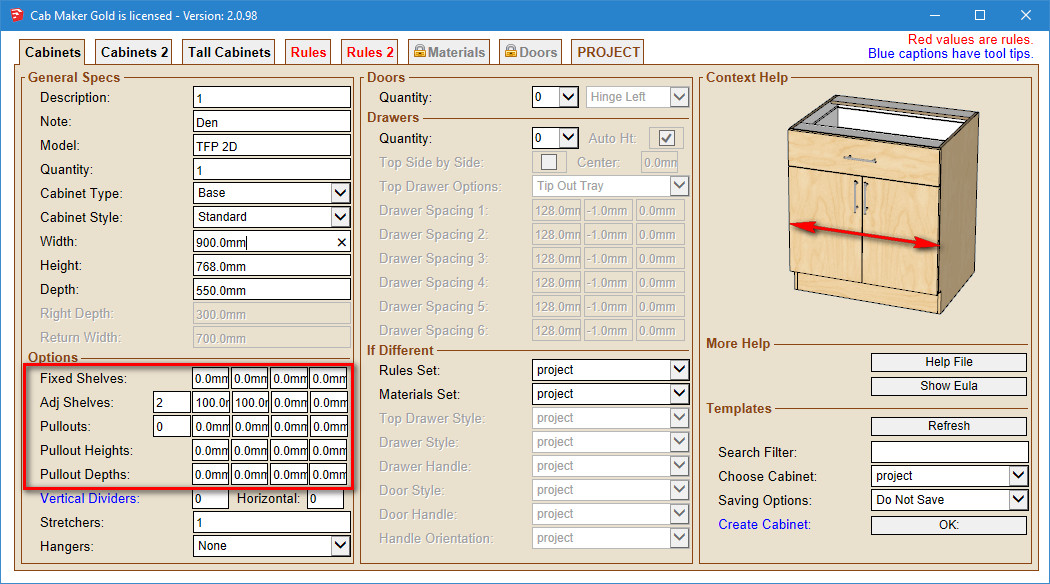
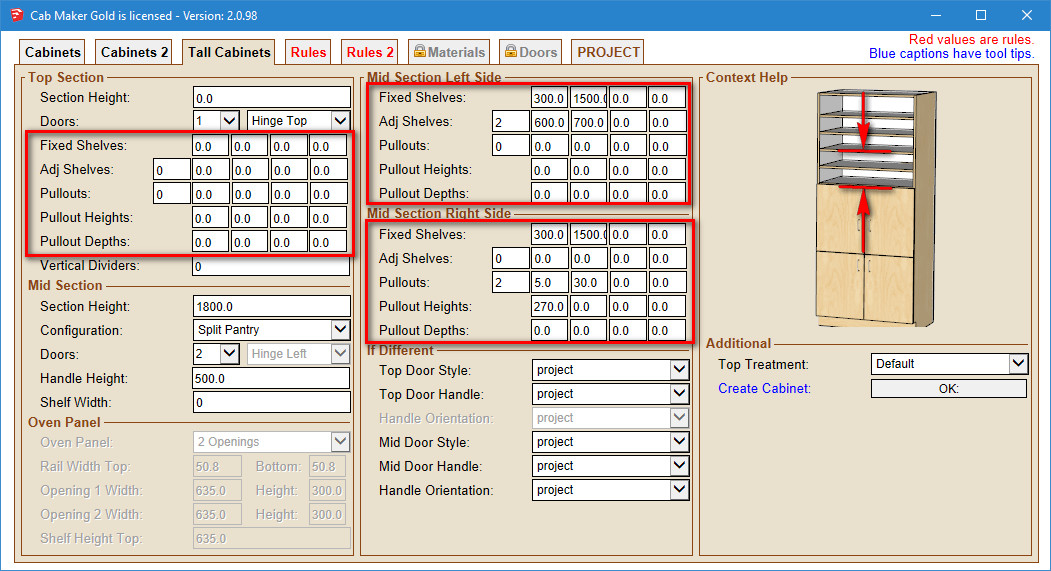
I've had requests for more control over the placement and size for the middle section of tall cabinets. As you can see - the items in outlined in red are consistent in look and feel. I think that they should also be consistent in how they work.
The only real problem is that this change will break user templates.
So is it worth it?
-
I've got + or - 20 templates and don't see it as any problem having to revisit each of them. Small price to pay for all of the added functionality you are adding.
-
I can say this one is inconsistent with the spacing of fixed vs. adjustable. I really do prefer to space any shelving fixed or otherwise with equal dimension between the shelf panels. I know the dimension of the shelf or pullout...what I need is to have however many shelves I call for spaced evenly from top to bottom. There is the occasional time that I would prefer to have unequal spacing but that is rare. Equal spacing is always the preferred method.
As a cabinet maker we provide consistent spacing (cutmaster settings) with the pin holes for the end user to make adjustment to their desire. However in graphic presentation equal spacing looks better.
-
Mostly we have holelines 32 mm distance and let the customers decide, where to put their adjustable shelves.
Pullouts and shelves should be equal for presentation. -
You have the choice for adjustable shelves to be spaced equal. Just give it a number and don't fill in the positional information.
With pullouts you can do the same - just fill in the number of pullouts. There is a setting in the rules which will provide that amount of space between pullouts.
However fixed shelves require you to place them exactly where they need to go.
The question is for those of you who want CutMaster to drill small clusters of holes you get to place the shelves precisely where you want them. In this case you can optionally fill out the positional information for adjustable shelves and pullouts and additionally adjust each and every pullout height and depth.
So again I refer to the first 3 images where I have put in the dimensions. The dimensions you see is how you must fill in the positional information. This is the part that I am considering making more consistent.
-
Making this consistent is a pretty good idea.
After thinking about it, I realize that I like to input the space I want between each. If the spaces all start from the bottom of the opening, I have to calculate what is the space left between each. If there is only 2 shelves, ok, but with 5 or 6, calculations would slow down the process. -
Currently with adjustable shelves if you want 6 inch space between shelves and you are using 3/4 inch material then you would enter 5 for number of shelves and 6 3/4 inches for the first position. Leave the rest of the spaces at 0. CabMaker will then position all shelves with 6 inches of space between them.
-
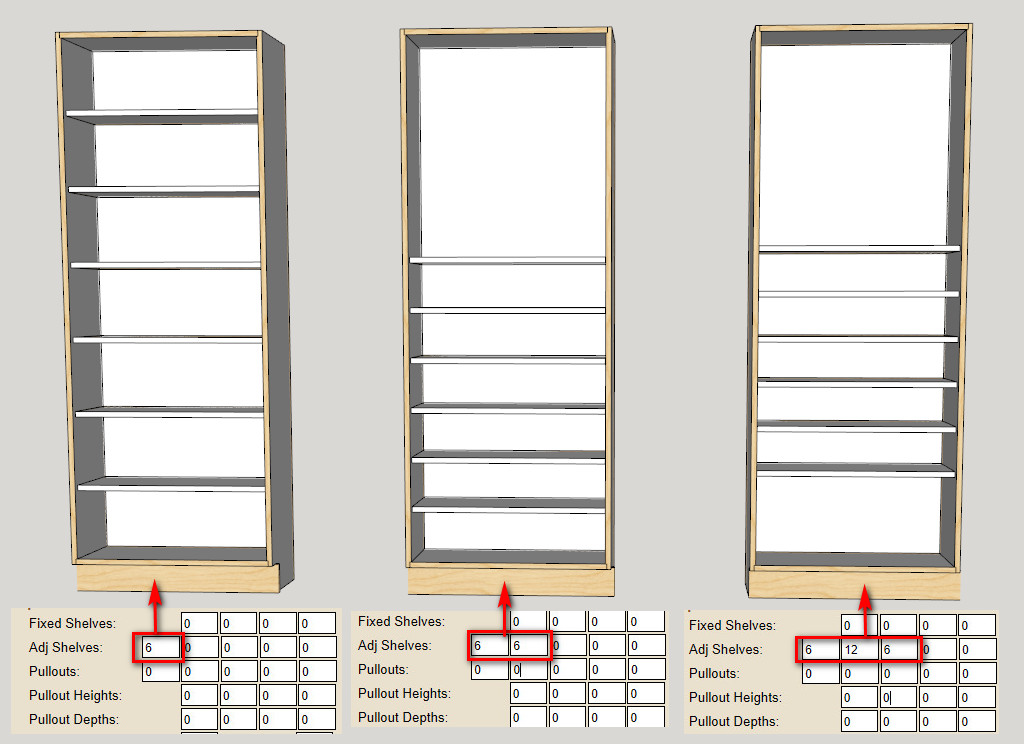
What I think I'm hearing is that users would like to control the space between the shelves.
With first cabinet the user types in 6 and cabmaker calculates the spacing and positions the shelves evenly within the opening.
With the second cabinet the user types in 6 and types in 6 inches in the first positional spot and cabmaker spaces places each shelf so that there is 6 inches between shelves.
With the third cabinet the user types in 6 and then 12 inches in the first positional spot and 6 inches in the second. CabMaker then places the first shelf with a 12 inch space and all the rest with a 6 inch space.
-
CabMaker version 2.0.98 is now available for download
- Added Fixed count for Fixed shelves
- Modified the way fixed shelves and adjustable shelves work. They are not consistent.
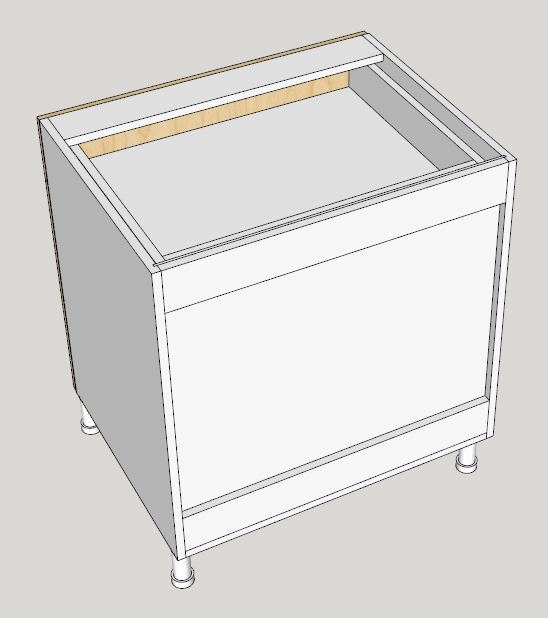
- Added overrides at the cabinet level for legs.
- You can now adjust left and right Finished panels independently.
- Added bottom offset for Finished Backs.
- You can now control adjustable shelves, fixed shelves and pullouts for Mid section of
Tall cabinets. - Added an Extend Kicks. You can now choose to have them extende out to the fillers or
not. - Added Sink Stretchers to materials. You can now create Sink cabinet without drawer
fronts and independently texture the Sink Stretcher. - Added a rule for edging Sink Stretchers.
CutMaster version 2.0.1.57 is now available for download
- Parts are now clickable
- Added CAD support for current parts or nested dxf for Gold version.
- Added Auto Depth for drilling.
- Added an Edge Banding usage report in Gold version.
- Completed Dxf Tall Partition for Tall cabinets in Gold version.
-
Hello, could you please help me? I downloaded cabmaker 2.0.98 trial version for sketchup 2016 and when I try to make a cabinet I get an error ''nil can't be coerced into float''. I don't know how to solve this. Very glad if you helped. Thank you.
-
Hello, could you please help me? I downloaded cabmaker 2.0.98 trial version for sketchup 2016 and when I try to make a cabinet I get an error ''nil can't be coerced into float''. I don't know how to solve this. Very glad if you helped. Thank you.
-
Antonis - Please email me at gkernan@telus.net and I will be happy to help.
-
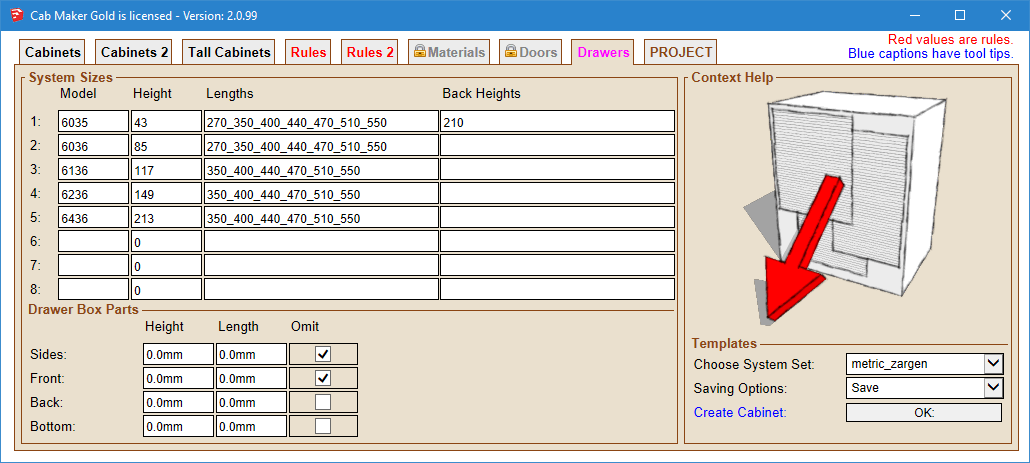
You can now adjust pullout width and position using hinge allowance. The red arrows are showing the extra clearance for hinges.

-
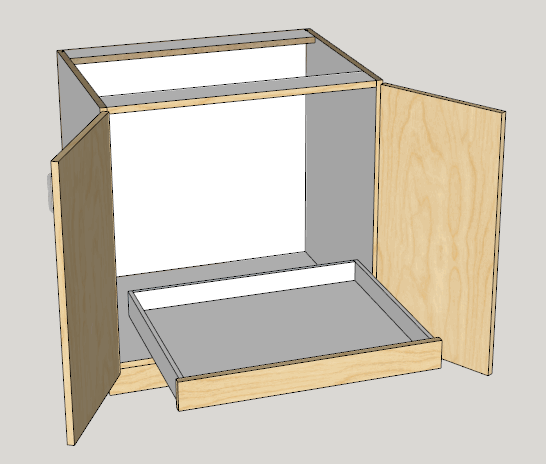
Here is an example of the new drawer system where you can specify at the project level a system for drawers and pullouts
You will be able to (very soon) add finished fronts to pullouts
-
I'm pleased to announce a major CabMaker release version 3.0.102 in conjunction with a major release for CutMaster 3.0.1.60.
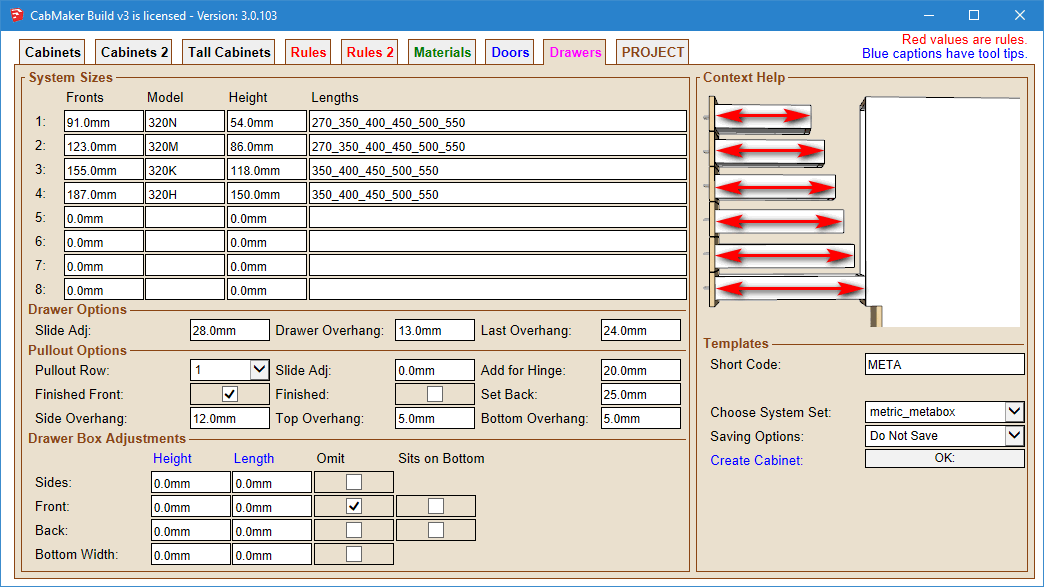
This includes the Drawer / Pullout subsystem. I now support Blum metabox, Grass, Zargen, DynaPro etc.
You may have choose a Drawer system at the Project level or override it at on a per cabinet basis. You can also choose a Pullout system at the Project level and it does not have to be the same system as Drawers.Here is the template for the Metabox
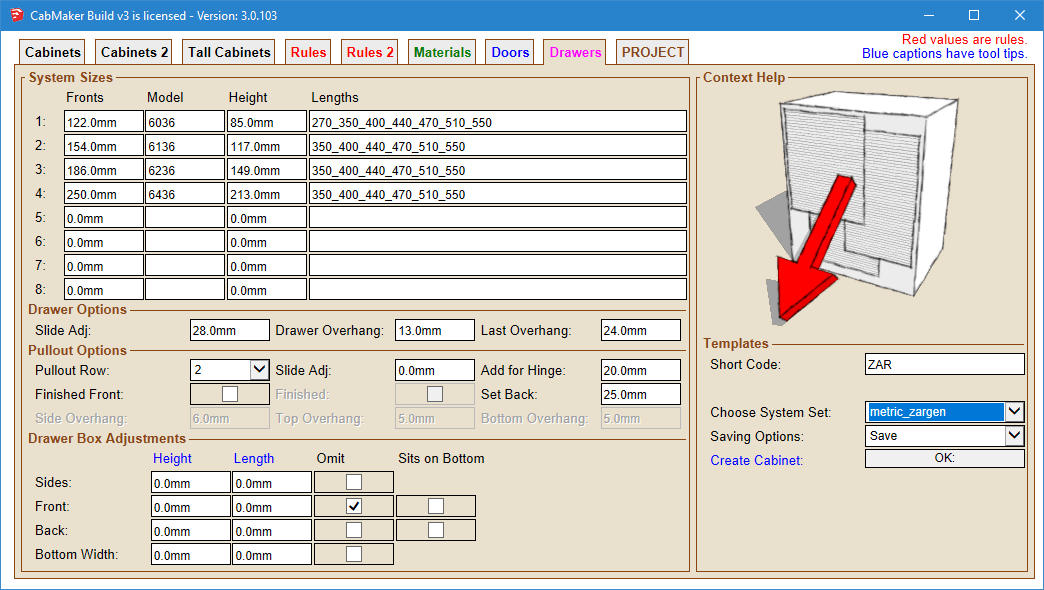
And here it is for the Zargen
-
The new release also has many smaller features such as edging more or less of the RAW exposed edges.
The Skins entry area controls how much of the cabinet is edged.
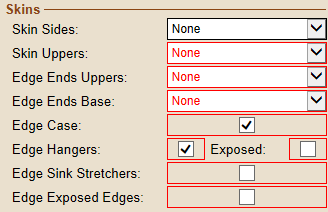
These settings give you a cabinet with as little extra edging as possible allowing you to control costs.
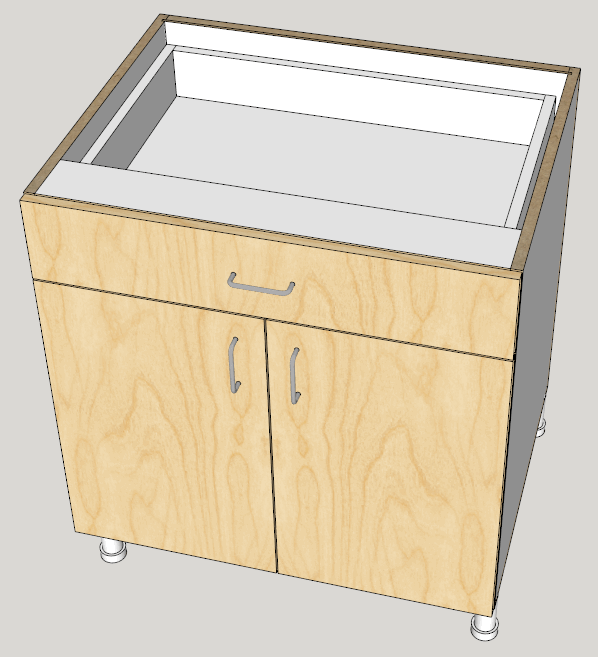
You can edge just the top of the side panels and if you want you can edge the top edge of the hanger (nailer strip)
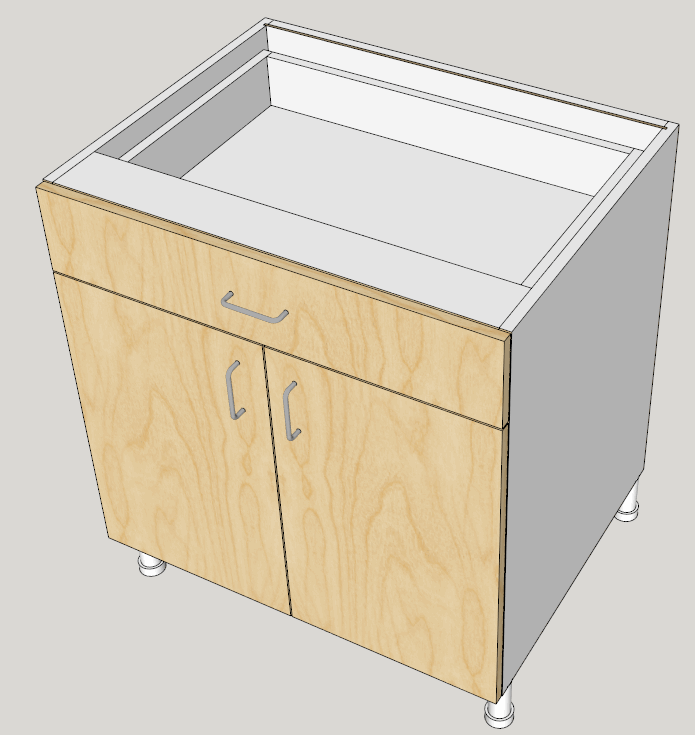
Here is the backside of the cabinet with the same settings.
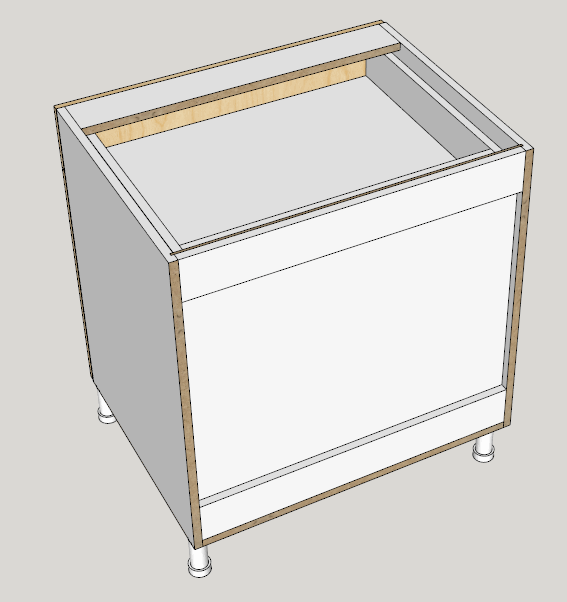
In high humidity areas you may need to edge all exposed raw edges which will seal them against panel swelling caused by wicking.
-
CutMaster reads in all the parts including edging information and adjusts the part dimensions based on the thickness of the edging. All drilling and grooving details automatically compensate.
The top door has 3mm edging on all 4 edges.
The bottom door is full size (edging thickness set to 0)
-
CabMaker 3.0.102 is now available in 2 flavors. CabMaker Design (formally Pro) and CabMaker Build (formally Gold)
Version 3.0.102 – Dec 9, 2017
- Changed CabMaker Pro to CabMaker Design and CabMaker Gold to CabMaker Build.
- There is a new Drawers Tab for the new Drawer / Pullout Sub System.
- Updated reports to provide CutMaster with information for new Drawer / Pullout Sub
System. - Added “Edge Exposed Edges”.
- Now including Jquery within cabmaker. CabMaker is no longer going to the internet
every time. - Fixed Integrated kicks when dadoing Sides for Fixed Shelves.
CutMaster 3.0.1.60 is now available in 2 flavors. CutMaster Plan (formally Pro) and CutMaster CNC (formally Gold)
Version 3.0.1.60 Dec 9, 2017
- Modified the layout of Options.
- You can now have multiple Drawer / Pullout Subsystems.
- Added more parameters to allow configuration of Zargen, Metabox etc.
-
What about DxfConfig ?
-
I haven't had anyone requesting updates to dxfconfig. I think it has outlived its usefulness. Since Cutmaster is now showing immediate changes to drilling and grooving options it is now in the work flow.
Create 1 cabinet. Click reports. CutMaster Pops up, import and optimize. Then go into CNC options and play around. You can now save your choice and see the results immediately on screen.
You can also now click on a part and everything is synchronized. Right click on part and choose CAD and view the DXF (after you have clicked DXF button)
Hello! It looks like you're interested in this conversation, but you don't have an account yet.
Getting fed up of having to scroll through the same posts each visit? When you register for an account, you'll always come back to exactly where you were before, and choose to be notified of new replies (either via email, or push notification). You'll also be able to save bookmarks and upvote posts to show your appreciation to other community members.
With your input, this post could be even better 💗
Register Login


Advertisement