[Plugin] GKWare Cabinet Maker
-
Version 1.0.40 now ready for download
-
1.0.41 ready for download
Version 1.0.41 - Mar 30, 2016
- Side dado's incorrect for Base cabinets with Integrated Kick with a 0 notch and side dadoes. Fixed
- Sink cabinets with side dado and rule to omit top had top dado. Top dado should be skipped. Fixed
- Parts report sometimes missing a part. Fixed
- Added new parts report for Gold. *_full_part_list.csv
- Added configuration setting for 'Silent Permissions'
- Update manual and added lines to translation files
-
I am working on a new way to choose a cabinet from the library for those of you who want to work with libraries.
The idea is to add a find button, then pop up a new window that contains pictures of your cabinets. There would be a bit of work on your part.
What does everyone think?
-
Garry,
I think it will consume a lot of your time without big advantage to the software.
That's my two cents. -
Version 1.0.42
- Added Confirm Save Configuration and a confirm popup to Web Dialog.
- Added context sensitive help for cabinet templates. If 320 X 240 png image exists in library folder
- Added version number to web dialog title
- Side by Side drawers now work for frameless construction and stretchers set to at least 1
- You now have option for edging upper cabinet ends of the sides if not skinning the top and or bottom
- Corner cabinet adjustable shelving had edging along the back where the shelf butts up against the corner brace. Fixed
- Sides, Top and Bottom front edges had edging with face frame construction. Fixed
- You can override shelf spacing for up to 3 shelves
- You can now set pullout spacing for up to 3 pullouts or use the default rule
- Cabinets with 1 door set to pullout now works with more than 1 pullout
-
You can set the openings (space between shelves) and (space between pullouts) here
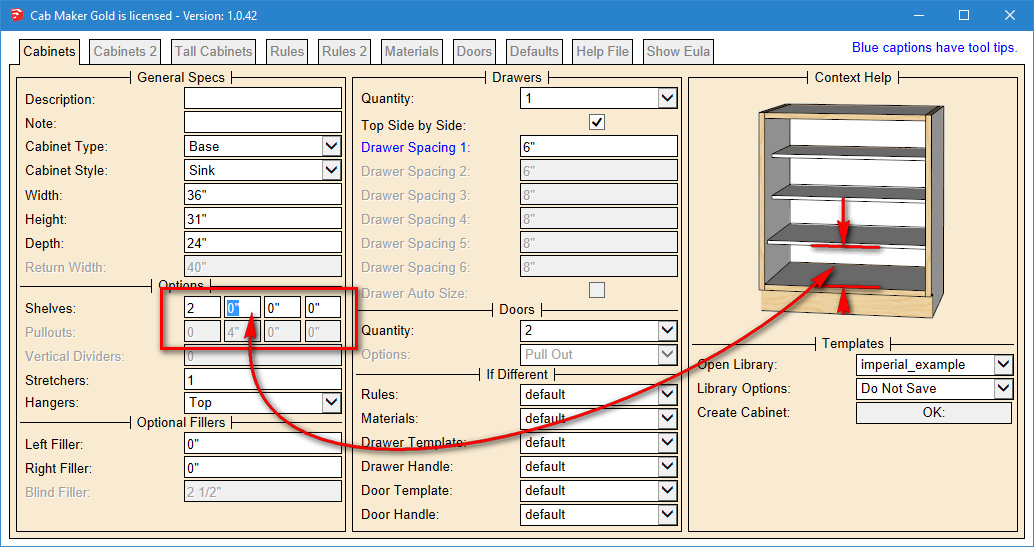
You can have different shelf width adjustments for Uppers and Base cabinets and have 2 widths for shelves for base cabinets. Also you can edge the ends of sides - bottom, top, none or both.
Set the new values to -1 to disable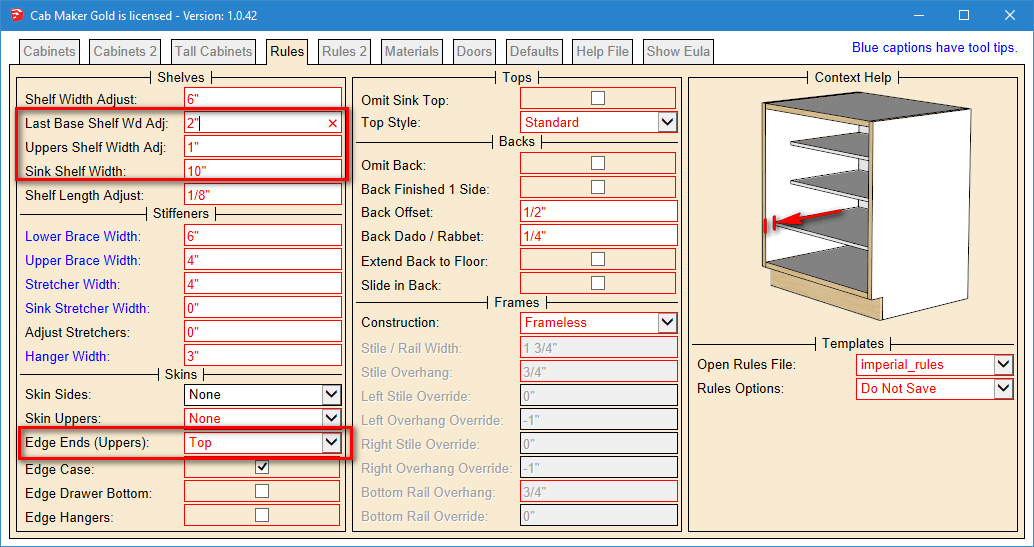
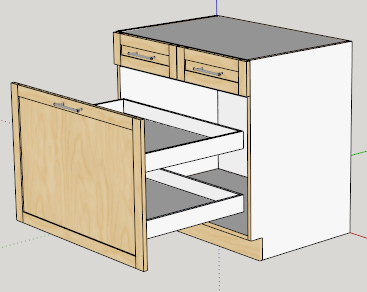
Here is the change for multiple pullouts with a door.
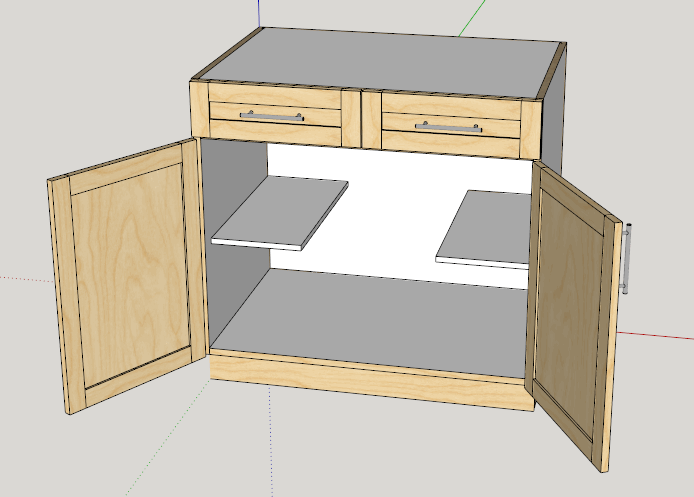
Here are split sink shelves - you set the length - set to -1 to disable.
-
Version 1.0.42 is now ready for download
-
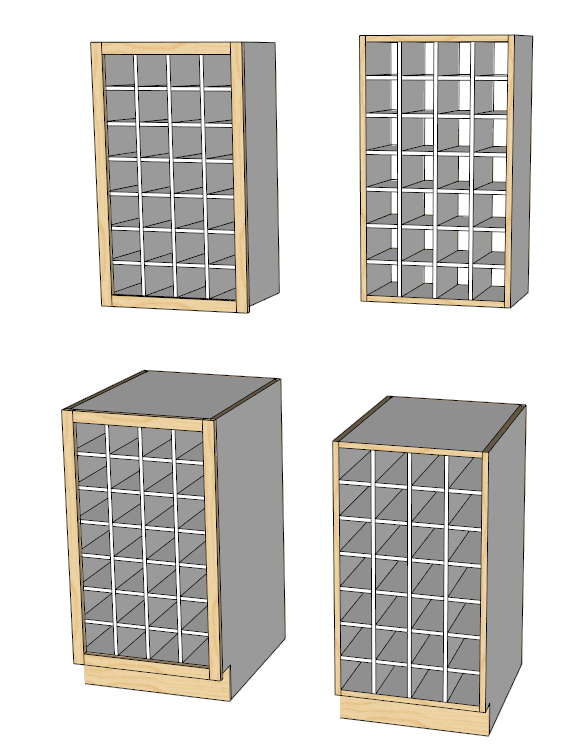
Added pigeon hole capability using vertical dividers and horizontal dividers. Works with frameless or face frame construction and for uppers or base cabinets.
This can work as a wine rack.
-
Looks like my wine rack, Garry...
Always empty.

-
Andrew - mine too. Someone suggested that I have to buy it faster than I drink it!
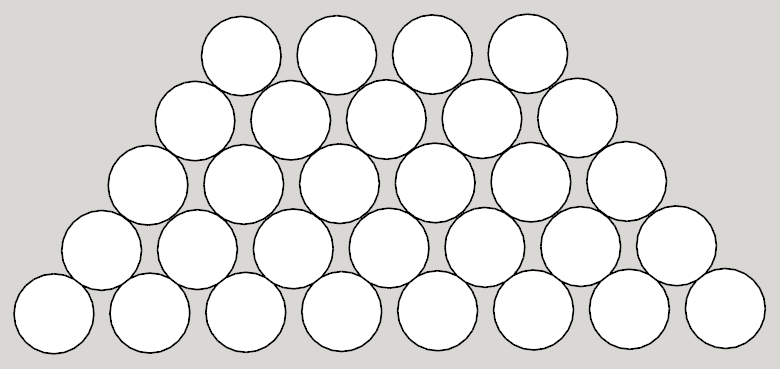
In actuality one of my hobbies is making wine. We live in wine country in British Columbia Canada. I do have a cool dark cellar and a metal wine rack that stores bottles 30 per shelf. Each shelf holds 8 bottles on the first row, 7 on the second row etc.
Wine ages best in a cool dark place. The advantage of having the bottles touch each other in this way is that it is suppose to reduce the effect of small temperature fluctuations.
-
Version 1.0.43 will be ready today for download
- Added horizontal grid along with vertical dividers. Can use as a wine rack.
- Modified the web dialog materials tab. Colors now show on a empty label just to the left of the color pulldown.
- Modified web dialog. When Mac users use arrow keys in a closed drop down the graphics now update like it does for Windows users.
-
Version 1.0.43 ready for download
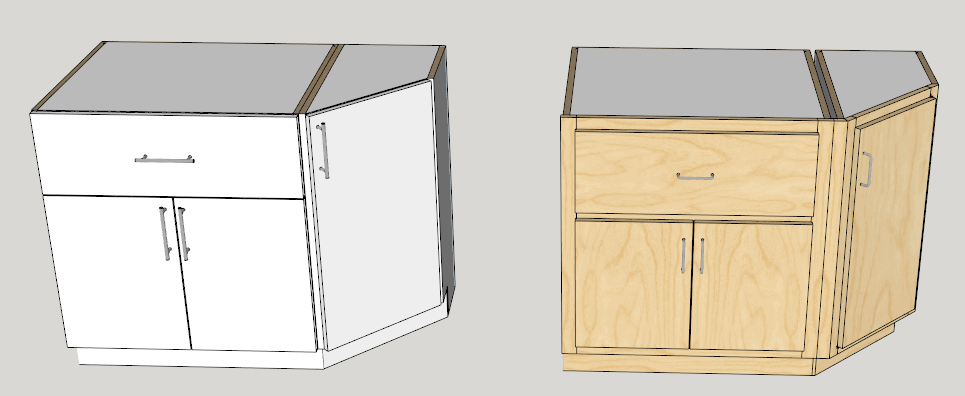
Next I am looking at adding a right and left angled cabinet. This style of cabinet is for finishing a run of cabinets.
-
Version 1.0.44 fixes a number of bugs that where version specific
Ready for download - those running sketchup 2016 do not need to upgrade.
- Older versions of sketchup that used Ruby 1.8 and did not support round(decimals). fixed
- Older versions of sketchup 7, 8 and 2013 do not support adding linear dimensions programatically. CabMaker now detects sketchup version and only attempts dimensions for version 14.0 and greater
- The way I was grabbing images for cabinet templates only worked on recent versions of sketchup. Fixed
-
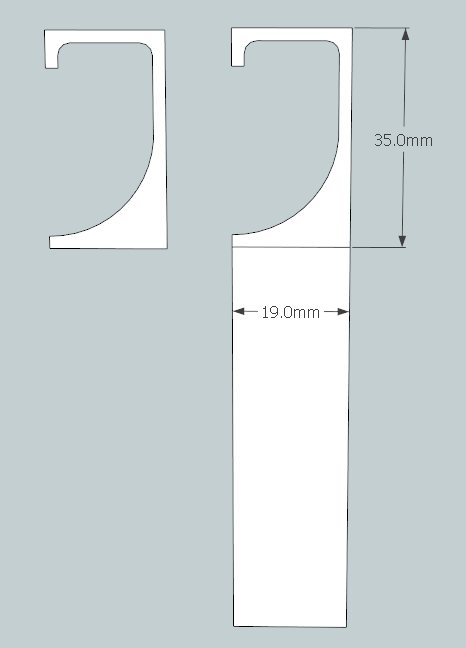
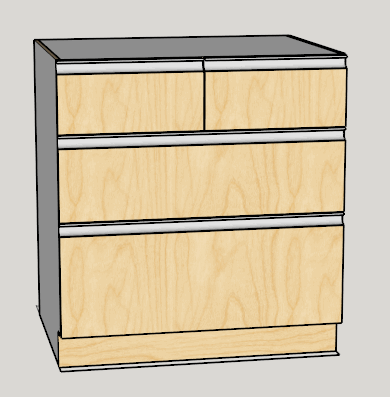
You can now create your own extruded profile and create plain doors or embossed doors with extruded handles.
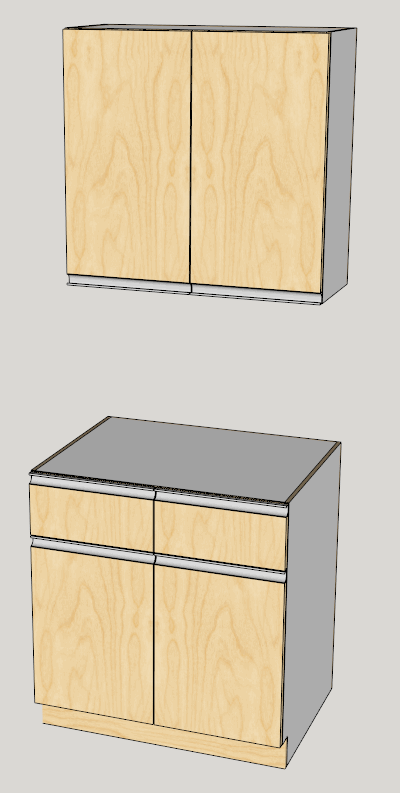
Here is the profile that I've included.
You can also create a top double drawer with a bank of drawers.
-
Awesome...!

-
Hi i have seen that some models use IKEA.
here is the IKEA Family-Color-Chart.
the base of the Colors is the PDF-File in the Archive.
This PDF was saved with " DIGITALFarbatlas"
the download for the Version5 is only avaiable in German.
-
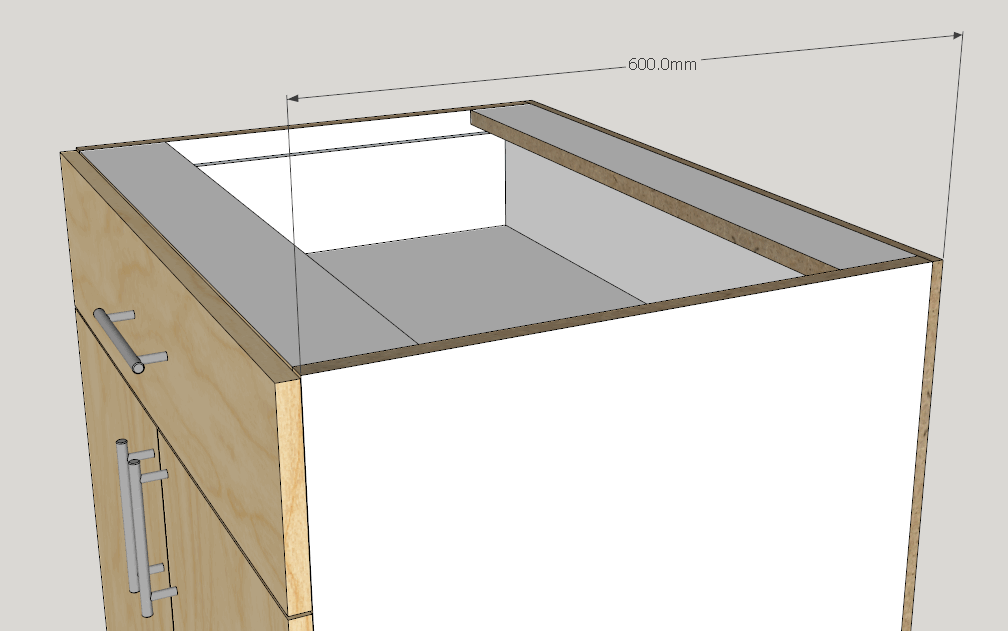
A user was asking how to have cabinets with plant on cabinet backs.
Simple. Set the "Back Offset" to 0 mm and set the "Back Dado / Rabbet" to the same value as the thickness of the case material.
In this case he uses a back thickness of 12 mm and a case thickness of 19 mm. His cabinet depth was set to 600 mm.
Also please note that the parts listing takes care of itself.
-
Version 1.0.45 now available for download.
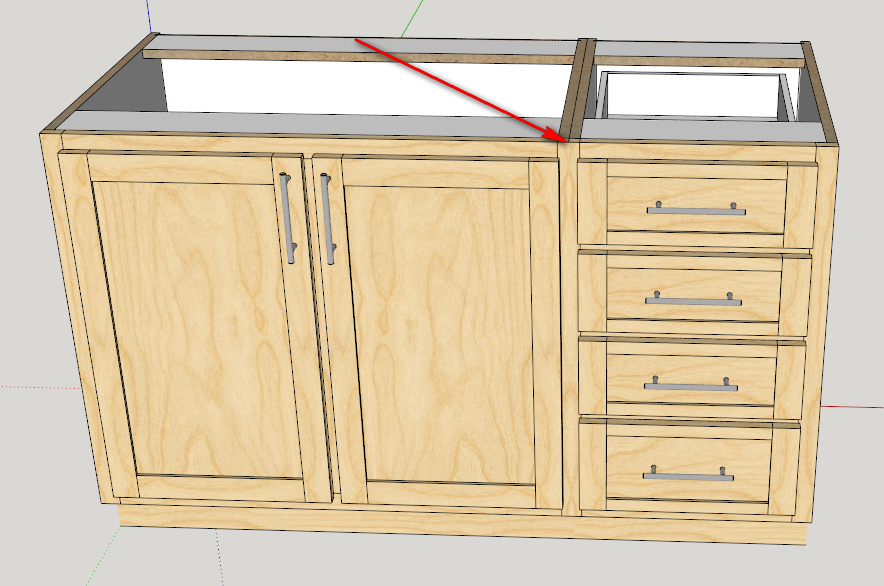
Add a requested feature for face frame construction. You can now hide the left and or right outer edge of the stiles. This means you can set up your cabinets so that where 2 stiles meet they appear to be a single stile. This along with adjusting the width of the stiles will provide the effect of a single stile. Please note that you must have edge profiles turned off.
-
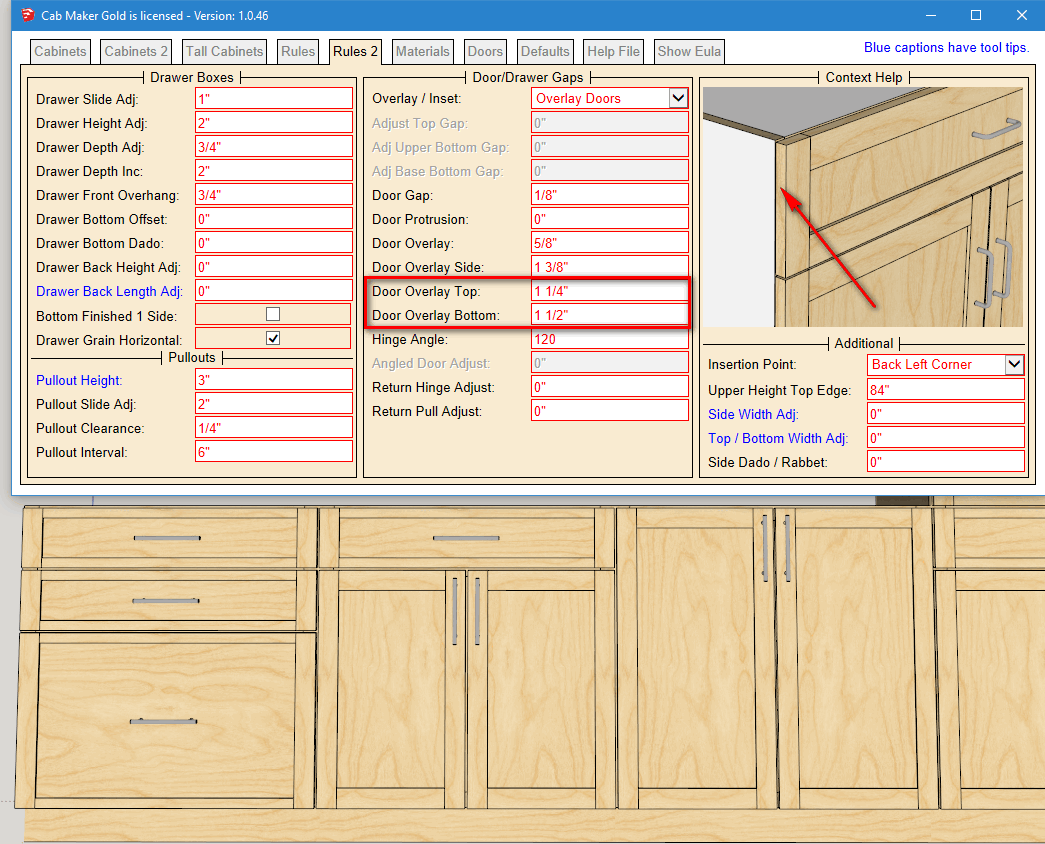
I've been requested for additional door overlay adjustments for face frame construction. Now you can adjust cabinets so that they have a similar look and feel to frame less cabinets but they have frames.
These cabinets have full face frames with 1 1/2" stiles and rails. Along with the 4 door overlay rules, this results in a consistent door gap of 1/4".
-
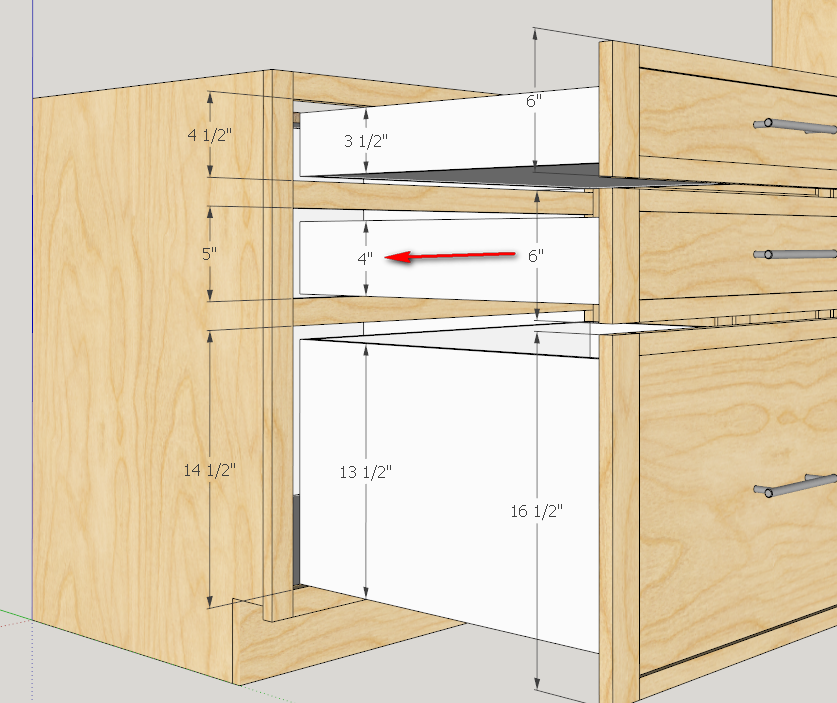
Just about ready to release. I have a question. Does this look reasonable for drawers and their drawer boxes or do you guys need something different.
I've got it all working but I'm not yet convinced that the drawer boxes are correct. For the 1-1/4" overlays I set the Drawer Height Adjustment to 2".
The 1-1/4" overlay has these settings.
Frame stile and rail width = 1-1/2"
Door Overlay = 1/2"
Overlay Side = "1-1/4"
Overlay Top = 1"
Overlay Bottom = 1-1/2"This works fine for the middle drawer where the drawer front ht is 1" greater than the opening.
However, the top drawer front ht is 1 1/2" greater than the opening.
And the bottom drawer front is 2" greater than the opening.What I have done so far is adjust the placement of the drawer box so that it has the same clearance at the bottom of each drawer. This part I think is right as it will better facilitate bottom mount drawer slides.
What I did is adjust the drawer box so that it maintains the same overall height clearance of 1". The other way to look at it is to try and use the same ht drawer box for the top 2 drawers and just adjust the bottom drawer.As we all know - the devil is in the details.
Advertisement


