I Need Help!!
-
Hi Guys!
I'm a total newbie to this forum and indeed to Sketchup! I only discovered its existence at the weekend, downloaded it, and have been playing about with it ever since. However I'm hoping to create something with it which I will then get printed by Shapeways, to help me with a hobby of mine, building model ships. My first project will be to take the Airfix 1/1200 scale Bismarck, improve the finished model, and also create the parts required to convert her into her sister ship, the Tirpitz. There's a slight problem with the turrets that come with the ship, so I hope to produce new ones which will be more accurate. Unfortunately I've hit a snag...
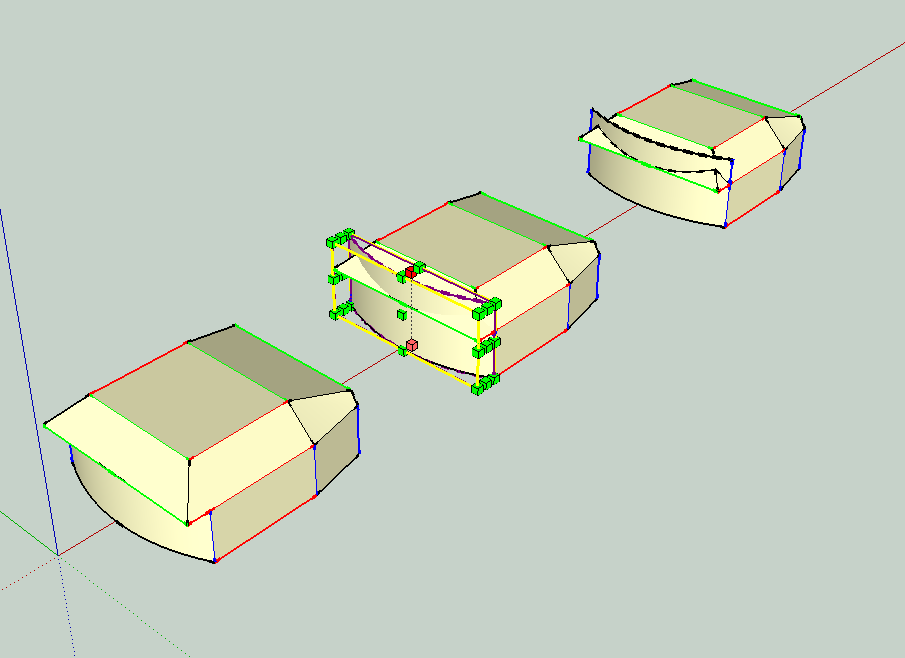
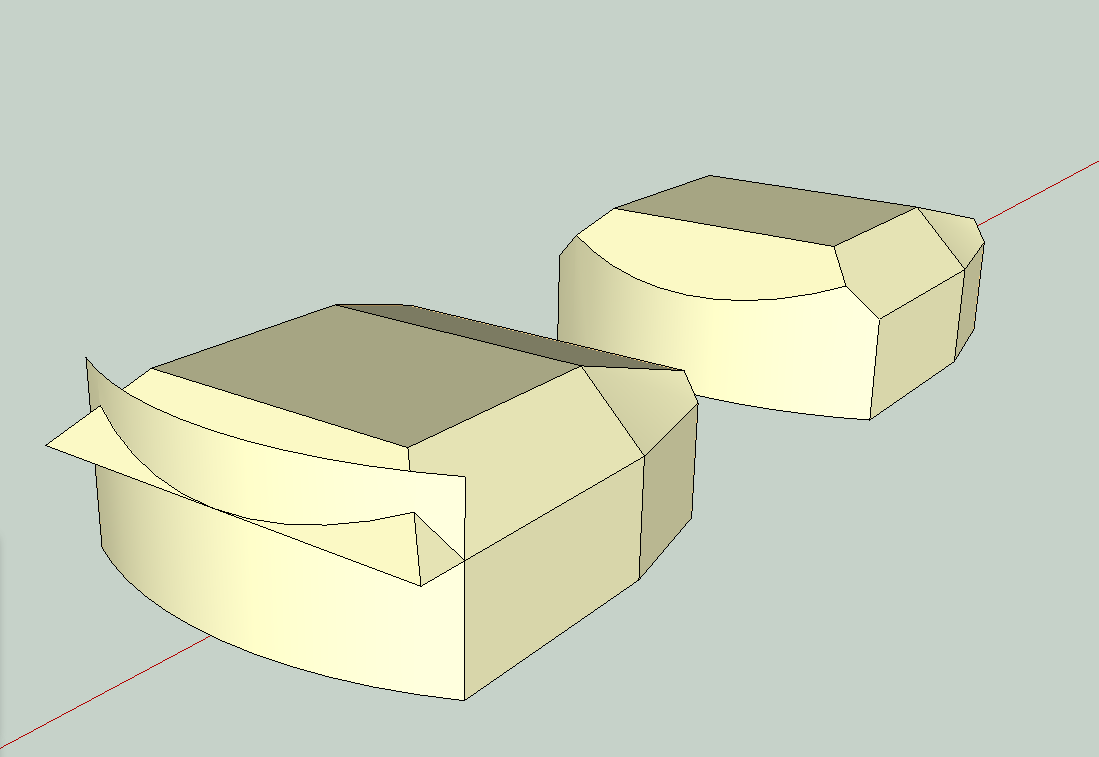
Imagine a block. Now push/pull the upper edges on three of the sides so that they slope downwards at 45 degrees until they reach half way down the sides and face of the block. So far I've managed to do that myself. The fourth side - the back of the turret - is the problem, it's curved! I can put the curve into this wall OK, but I just can't figure out how to get the upper surface - the roof of the turret - to meet with that curved surface while projecting down at 45 degrees.
I've tried the Follow Me tool, and while it will close the gap between the curved wall and the roof, it won't create the 45 degree angle on the upper half of this wall, at least not the way I'm using it.
I really need some help here people. I simply can't think of anything else to try, to achieve this effect. If you could give me even a few pointers on how to achieve this, I would be so very grateful.
As it's my first post, I suppose I better introduce myself. Well my name's David and I live not too far from Omagh in Northern Ireland. I work in the field of education administration, and live, breath and sleep WW2 warships. I am an avid collector of 1/1200-1/1250 scale model warships, and am also a keen wargamer. What else..? This is my first hesitant steps into the world of designing objects, and if I can learn to do this successfully, will be able to open doors to a whole new dimension of building and collecting my little ships.
That's about all I can think off, it's pretty late and I need to be up at 6am, so I'll get this plea for help posted, and hope someone will take pity on this newbie and offer a little assistance with the problem I've outlined above.
Thanks to all in advance!
-
I think what you describe is another slanted plane that cuts into the curved wall on the fourth side.
This may be a call for "intersect faces" which is in the context menu and also in edit menu.
You draw the curved wall and the slanted surface (make it long enough to cover the arc of the wall. Select the curved wall surface (double click) and group it. Scale that group up so that it completely pokes up through the slanted surface. Select all the other faces that will need cutting and select "intersect faces / with model" That will create the intersecting edges. Now if all goes well you can ungroup the curved surface. That surface and the sloped surfaces should all be separated now by the intersect edges you created and you can double-click on the unwanted faces, group, and delete them. (group each one after double click or multiple select, doesn't matter).
Oh and Welcome, David!
-
Welcome to this forum. You can add a picture to your questions that shows the desired shape...
-
Many thanks for taking the time to respond guys!
That sounds like the solution to my problem pbacot. It's a shame I really couldn't justify going pro at present to get the tool required. As my plans are limited to just producing a small number of bits and pieces for myself, I really can't see me paying the $596 price tag to upgrade - at least not at this time.
However I think there may be a couple of plugins available for the free version which may include this capability. I'll have to have a look for them when I get home from work.
Yes cotty, I just noticed the attachments button when I went to read these replies. Now I know this for next time.
-
There is no PRO functionality in Pbacots solution involved...
-
I just noticed that cotty. I really need to sit down and read what this software can do.
-
The pro version just makes it a couple of clicks instead of our standard way which produces the same result. Pretty lame!
-
@olishea said:
The pro version just makes it a couple of clicks instead of our standard way which produces the same result. Pretty lame!
What do you mean?
-
The included solid tools. I'm just saying they are pretty lame as a new feature, only for pro version iirc. Wasn't saying your solution is lame, although it kinda came across that way haha

-
oh I know. And it seems this way is more straightforward than making up blocks and aligning to chop up the main form. With a face-based modeler. The most direct way might be something like TIGs extrude edges to surface and supposedly you'd have a little less to trim. I can't think how even a ruby would be designed to do it faster.
-
Just a little update...
I spent all night last night playing about with the technique described by pbacot. It has to be said my initial attempts weren't all that successful. This was all my fault, I'm really still learning how this software works, and I would keep missing out some step or other which didn't help in producing a finished product. However...
Finally I did it right - the faces and edges that were not destained to be part of the turret were deleted to reveal a more than reasonable representation of one of Bismarck's turrets. The angled roofs of the thing looked a bit steep though, so I reduced it from 45 degrees to 30. The results were much more acceptable... indeed so pleased am I with what I achieved in my first attempt, I'm thinking of posting an image for you all to see! It's not the finished product yet, it's really only an exercise to get used to Sketchup, but I'm really delighted with how it has turned out so far!
There are still a few odds and ends to add to the turret, a couple of ladders, periscopes, etc. but so far things are looking good.
So again, thanks to everyone who responded to my request, especially pbacot for showing me the proper technique to get the back of the turret right, and cotty for pointing out the tool I needed was available on the free version.
You can watch this space for a view of my creation!
-
Congrats. Would love to see the results and your other ship modelling efforts as they unfold. You know there are some expert ship modelers here with great informative posts if you search for them. It seems too that some of these ship masters are more likely NOT to use plugins, but do their work with basic SU tools. Still some plugins should be great to help with the curvy things on ships. For that turret you may eventually want to use "R ound Corners" plugin to round off the edges, where appropriate.
These techniques and others can be a little confusing but eventually you'll see the way they work and it'll be faster and easier. Also your ability to use inferences, your mouse, and keyboard to manipulate and navigate will increase, so inaccuracies don't mess up what you are trying to pull-off--and you don't spend half the time just trying to get a good angle looking at the object. Good luck.
-
Well here it is! It may not be pretty, but it's not too bad for a first attempt.
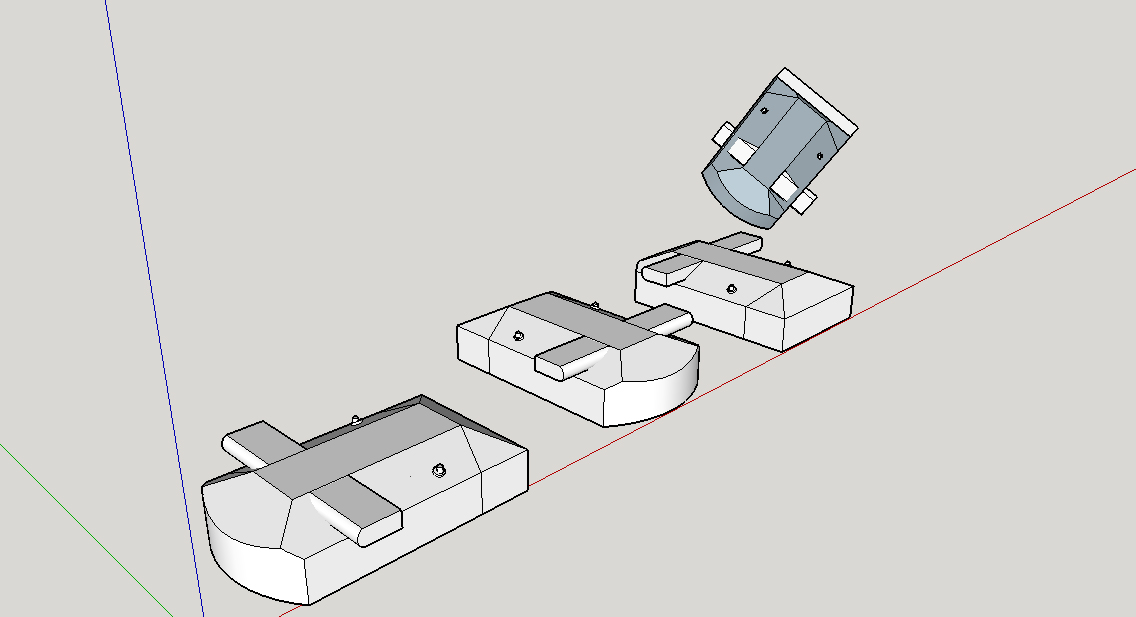
Obviously it still isn't complete, I have to fit a ladder to each side for one thing, and of course I have to stick a couple of slits in the front face for a couple of 15" guns. There's also something not quite right about the periscopes protruding vertically from the sides of the turrets, I don't know just what exactly, but there's something I'm not happy with. I'll have to have another look at that.Inn general, I wasn't really going for accuracy or proper scaling with this attempt, just something that looked like one of the three main turrets Bismarck had, which had the range finders on each side. The fourth turret had them removed in 1940. So with that in mind, I think i am not totally unjustified in feeling more than a little pleased with my efforts so far..?
Hello! It looks like you're interested in this conversation, but you don't have an account yet.
Getting fed up of having to scroll through the same posts each visit? When you register for an account, you'll always come back to exactly where you were before, and choose to be notified of new replies (either via email, or push notification). You'll also be able to save bookmarks and upvote posts to show your appreciation to other community members.
With your input, this post could be even better 💗
Register Login


Advertisement