Dynamic Rafter Tails
-
Greetings gurus,
I was wondering if anybody might be able to help me get moving on a project I've been trying to figure out for a while, with no success. I'd like to make a series of Dynamic Rafter Tails for myself and my firm, but I can't really even figure out where to start.
I've already made a series that glues themselves to the proper plain, has descriptions, correct and useful thumbnails embedded, but I'd love to be able to control the roof slope and the eve/overhang length as well. As an added bonus (if possible), it'd be amazing to control the shape of the tail cut as well!
Let me know if you guys have any idea on how to approach.
Thanks!
Matt

-
dose the scroll/fret work remain constant?
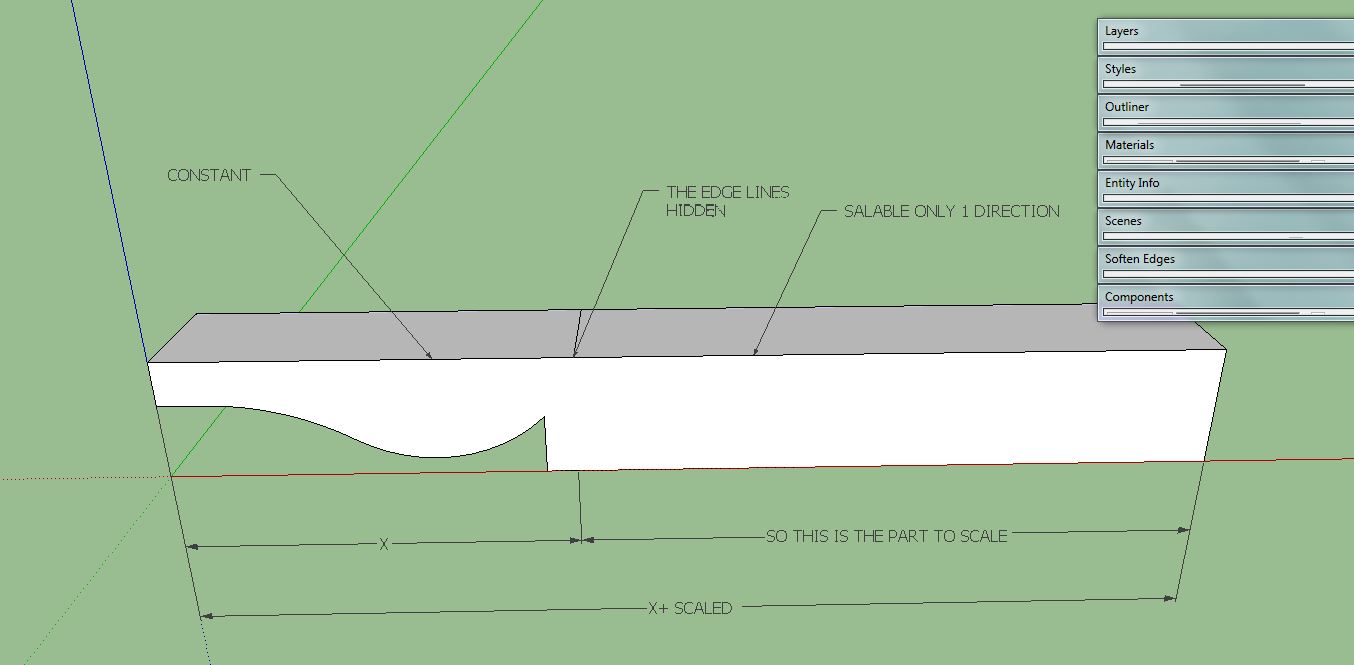
So I have made a few Dynamic Components I look at other and then use the math in them to help me with what I want it to do.- the Tail stays the same and the rafter end is scaled.if the end of the tail's angle changes then look into the hide and use different tips with the roof pitch.
Hope this helps.
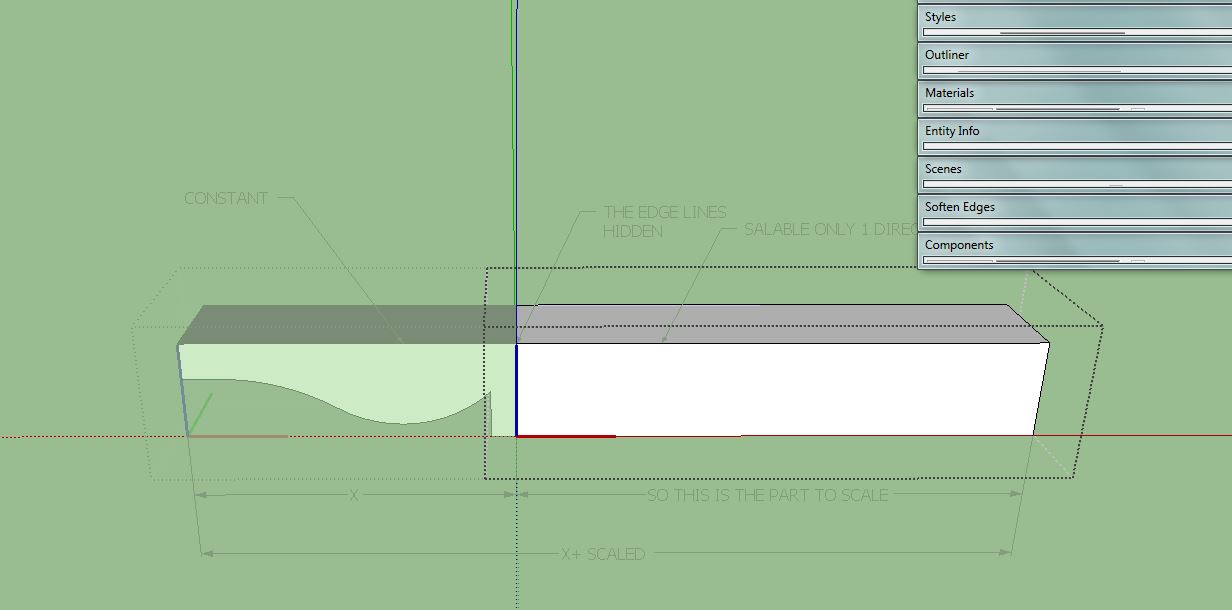
- the Tail stays the same and the rafter end is scaled.if the end of the tail's angle changes then look into the hide and use different tips with the roof pitch.
-
Thanks @TechDave02,
I'd thought about a similar type of component, but so far my trouble with having anything scale inside a Dynamic Component is that any textures that are applied to the portion with scaling become distorted, which somewhat kills it for the way we use models in the office.
Otherwise I think it could work for me. I'd love to be able to control the slope angle dynamically relative to the wall to which it's glued, but I think I've got to get the basic idea down before I go too crazy.Thanks!
-
Do you need something like that :
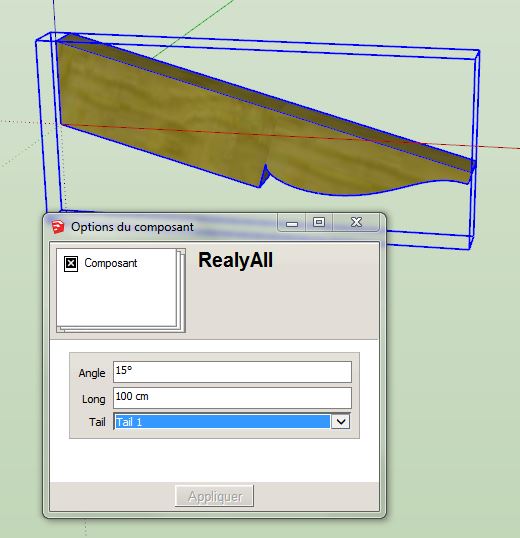
You can change angle (in degree but you can do the same in %, it's just trigonometry ), the length with a min (and you can add a max too) and the shape of the tail.
For the texture, as you saw in other thread, there is no solution...
test.skp -
Hi
There is a solution to the texture and BOM problem using multiple part DC's
First all parts must be solid, when hidden they must be placed within the finished component and separated by a distance (0.01?)
The component is made up with an outer, simple data representation attributes for BOM; the inner is the driver which controls its group geometry, complex operations and attributes.
The inner can be changed to a solid by (right click) "outer shell" then exploded. Thus leaving a child-less component (after closing)with required structure for material painting, or takeoff using "cut list" or report writer.if required later the DC can be swapped with its own definition or another.
attached two components for molding which demonstrate this technique. I have not bothered to hide the joins (recommend not to) so as to identify active components in the drawing. Once placed and the options made. Double click to the inner, right click, outer shell, right click explode. Then close, then can paint and take-off.
Now right click, Dynamic, swap with same or other. repeat.
Cheers
Philip
place component in a folder, then access using component browser
place component in a folder, then access using component browser
-
Hi
attached a rafter based on the same concept as the moldings
despite being clunky, heaviness of this component once outer shelled is very reasonable
follow same as previous postPhilip
-
@pcmoor Thanks!
These might take me some time to go through and understand, and certainly I'll likely have some questions for you, but I really appreciate you taking the time to build something like this.
Hello! It looks like you're interested in this conversation, but you don't have an account yet.
Getting fed up of having to scroll through the same posts each visit? When you register for an account, you'll always come back to exactly where you were before, and choose to be notified of new replies (either via email, or push notification). You'll also be able to save bookmarks and upvote posts to show your appreciation to other community members.
With your input, this post could be even better 💗
Register Login


Advertisement