Rolleiflex Automat [Model Progression Thread]
-
It's starting to get complicated.

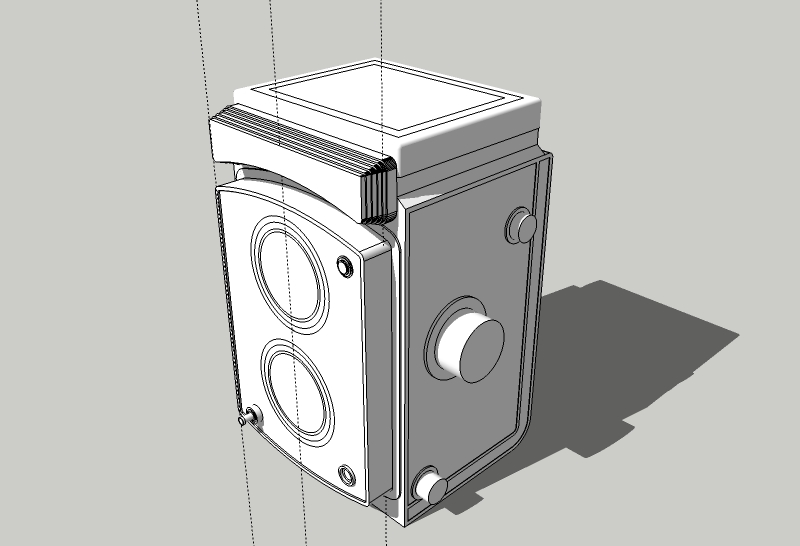
-
Thanks guys. It was posters who did progressive WIP posts that helped me to learn and see what was possible and the steps in order to make it possible.

More fiddly bits and a half dozen more to go.
Side hinge and strap brackets.(not complete) Feet. Lower rivets on face. Tripod mount. (can't see from this angle)
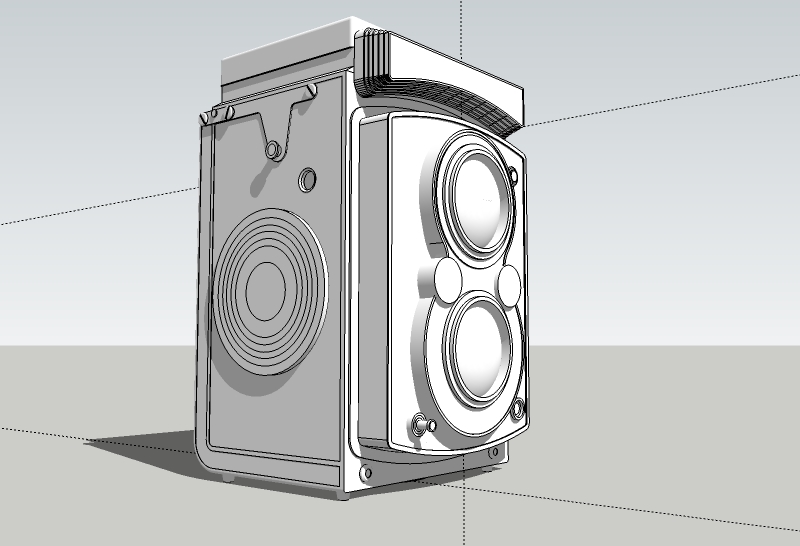
-
Keep it going all the way to final render.
-
Do you use pictures or a real one as a reference?
-
@cotty said:
Do you use pictures or a real one as a reference?
Pictures. I can only wish I had engineering dimensions for this one.

I have the overall dimensions, but none of the details. Oh well.

-
@solo said:
Keep it going all the way to final render.
Thanks solo. High praise from one of the masters.
I am and will.
I'm worried about some of the details the photo references aren't showing very well.
-
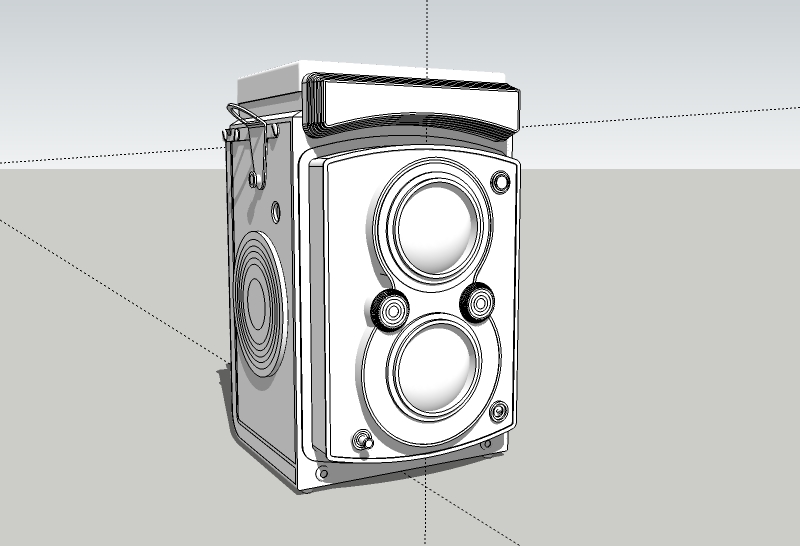
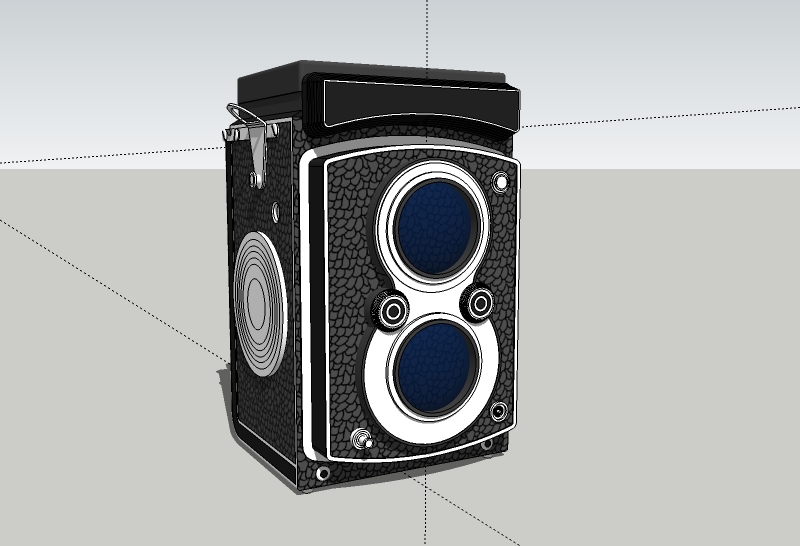
More fiddly bits added. Details begun. A few more brackets and attachments to go.
-
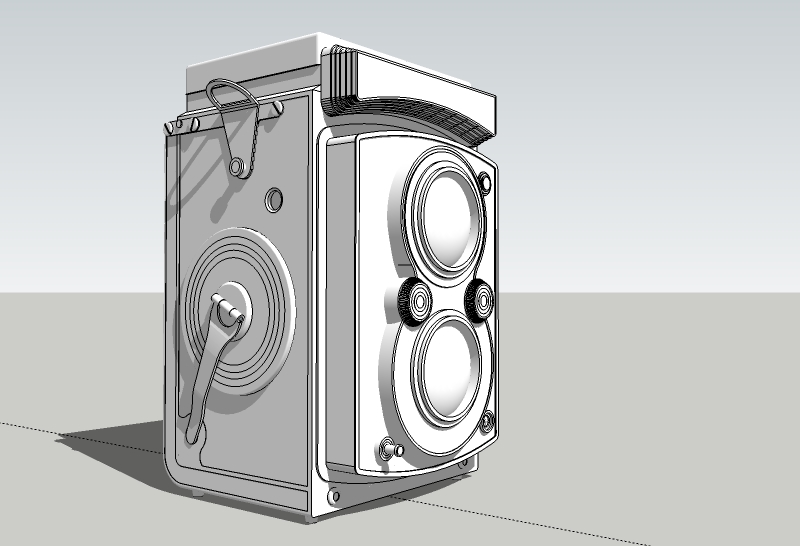
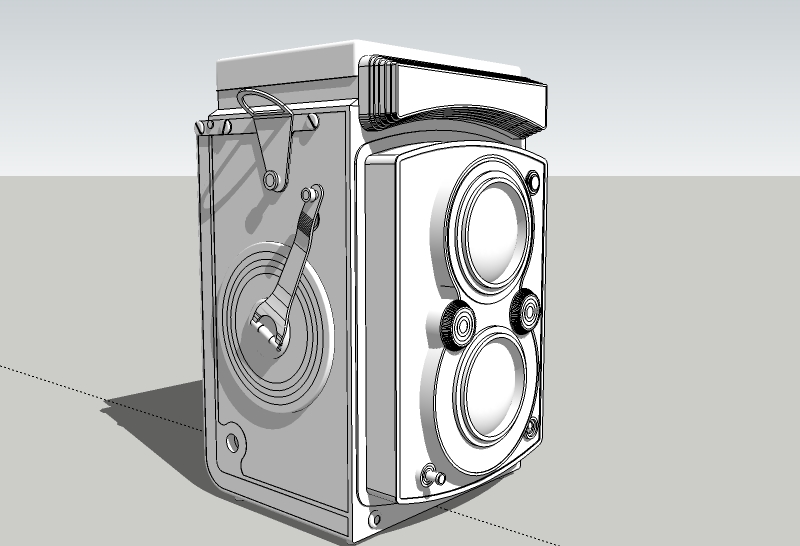
Winding handle complete. Do not ask me about the winding handle. (2 hrs)


Finger knob not right sized. Will fix later.
-
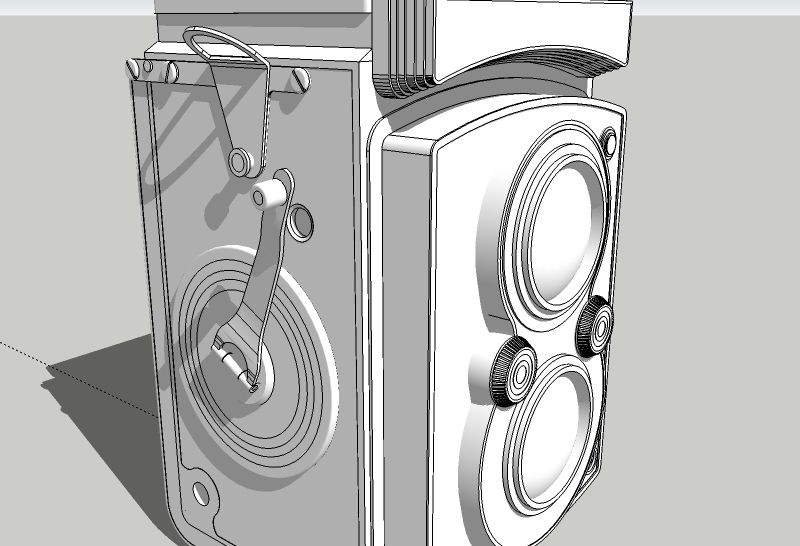
OK. Couldn't let the handle go for the night.
Fixed.
-
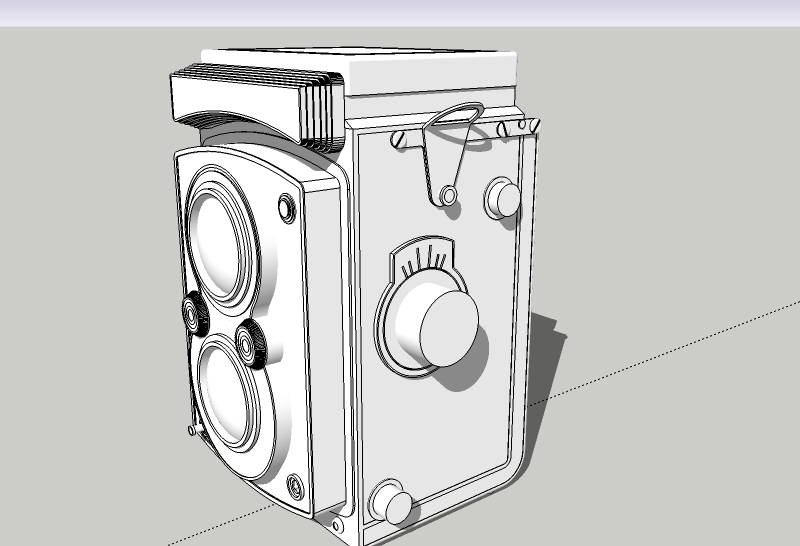
Winder side complete.
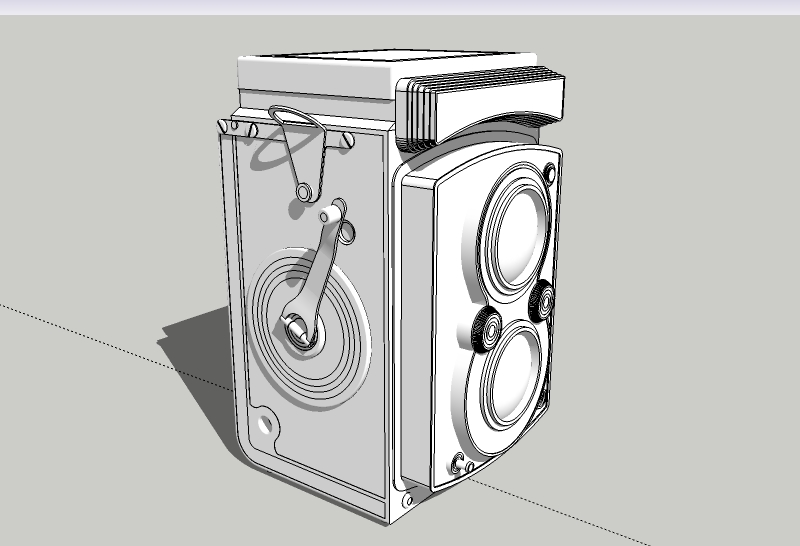
Beginning detail of knob controls.
-
Looking great Bryan
 . not sure if you've seen these http://www.flickr.com/search/?q=Rolleiflex+Automat
John
-
@tadema said:
Looking great Bryan
 . not sure if you've seen these http://www.flickr.com/search/?q=Rolleiflex+Automat
John
TIP: If I want to look at flickr pictures, I usually use http://flickriver.com/ for this...
-
@tadema said:
Looking great Bryan
 . not sure if you've seen these http://www.flickr.com/search/?q=Rolleiflex+Automat
John
Good find John. That will help a lot. Thanks and thanks.
-
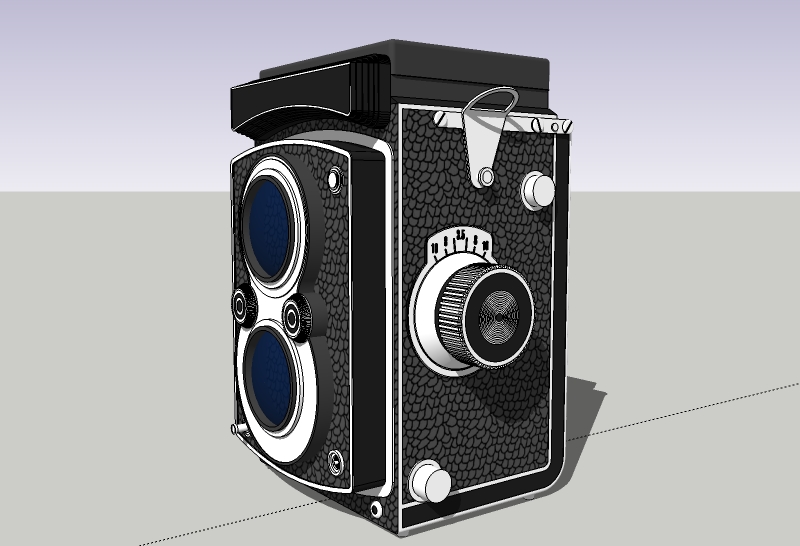
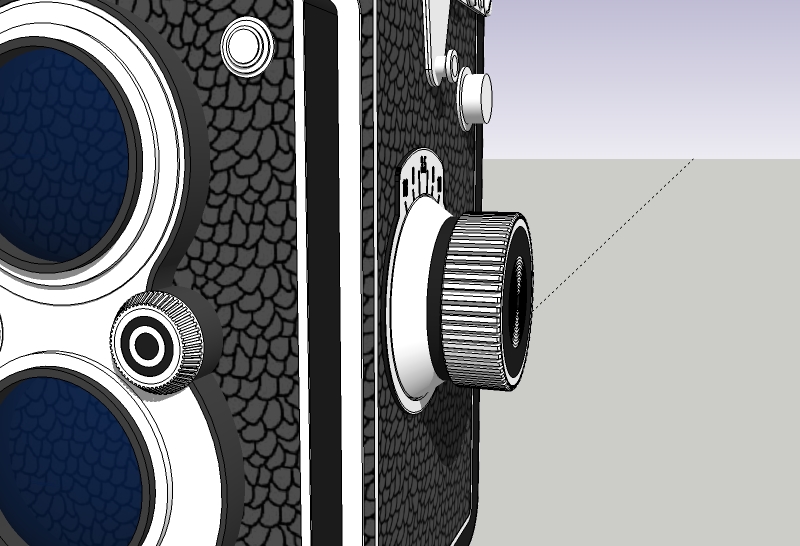
Focus knob almost complete.
But I have a problem. I need to put numbers on the angled dial face, between the finger grips and the focal length indicator (the 16,8,3.5) but it is conical. (see second picture).
I can't get regular SU letters to conform no matter what I try as the numbers are so big they cross over 3 faces of the cone due the angle required. (see close-ups from John's links)
Any suggestions?
-
Why not create in in PS and put it on as an image and not geometry?
I see you never modeled anything behind lenses, still getting to it?
-
@solo said:
Why not create in in PS and put it on as an image and not geometry?
I see you never modeled anything behind lenses, still getting to it?
I did think about that, but will that work across 3 angled faces or is that irrelevant? Here's a ref pic. And what would be the best way to layout the graphics and what final file should I create? Jpeg?
Honestly, I've only tried a custom image once and it didn't run out very good, so I really don't know the best way to go about that.
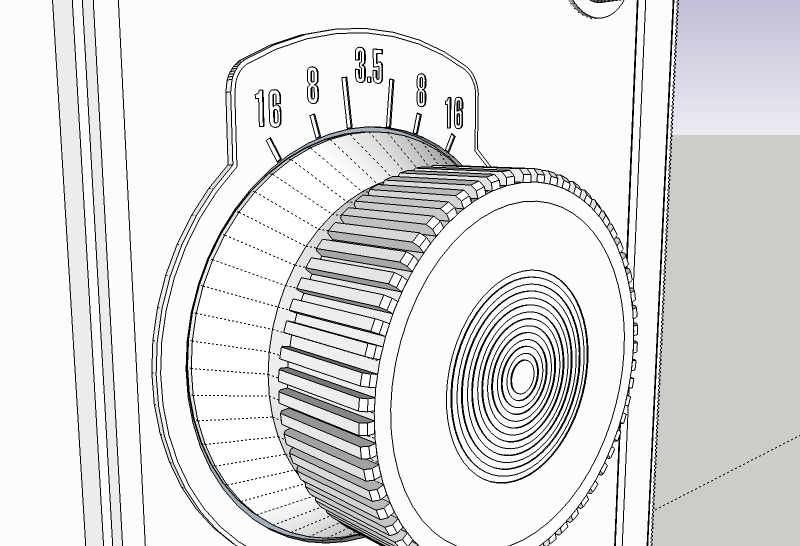
Yeah, the lenses are not finished. I'm completing the sides and then I will do the lenses last. There is still more detail to be added on the lenses, most of it, again, lettering.
-
Using 3d lettering can't you intersect the letters with the facets and remove the excess.
-
@box said:
Using 3d lettering can't you intersect the letters with the facets and remove the excess.
I did try that, but I'm having trouble with all kinds of things with this model. I think the file is slightly corrupted. In this case, I could not get the letters to rotate properly. It did once, and then would not do it again.
But mostly, it's a very odd 3 point rotation and would have to be done for something like 12 numbers. In other words, it would take days, if I can it to work again.
Also, the number size spreads across 3 faces.
-
But if you insert the number at the edge of one of the faces it will glue to that face, you should then be able to rotate it once into position, unglue it and scale it through the three faces, then select the three faces and intersect with model, remove the number and you should have the number cut into the surface.
-
@box said:
But if you insert the number at the edge of one of the faces it will glue to that face, you should then be able to rotate it once into position, unglue it and scale it through the three faces, then select the three faces and intersect with model, remove the number and you should have the number cut into the surface.
Exactly. And that's what I tried to do the first time and for some reason, it worked once and then didn't work again.
Like I said, the file or program has some weird issues. It's the same with other very large polygon models I've done. Things just seem to stop working.
I even made the focus knob a separate file and worked on it there, but it still had problems.
I may try it again and see what happens, but the number will have to be rotated on three axis, for each number because it's a cone.
I would rather have them etched into the face as in real life, they are stamped.
Advertisement


