Sketching S/S rail w angle in middle
-
Check the SU pic and see there is a gap in the wall with a rail and glass.....A
There are two more reveals there neighbouring, B and C. I want them to have the same theme as the first, rail and glass. Obviously the third, straight one is like the first and no problem.....though it would be nice if there was a way to kind of "copy" the first ail in A.
The middle space B has a 45% (roughly) angle in it (I have stuck and upright line there for the rail to go to before angling but realised it need and angle on the end not 90deg.
I want to sketch in a stainless rail about a metre high, then in the space below, a glass panel.
So the rail will go about a third way across the gap, to where the angle happens, then bend towards the next side of the reveal. Same goes for the glass underneath.How will I get this done easily?
Thanx!
ps: possible to make the glass look good?
pps: is there a clever way to just click something and continue the rail and glass theme in A to B and C?
-
To add......I have now replaced walls at the entry end of the long hall with glass.
Well.......I reduced the thickness to 10mm and filled with a pale green colour same as I did the glass panel under the rail in A. Funny thing was, one of the two "glass" walls ame out transparent and showed what was behind, while looking quite good.
Why did the other glass wall and the panel in A not do this?
(I'd like to put glass in the big window space in the main area too.)
-
Well, I was wondering if this is what you're after but now I guess I'll have to look at your new file.
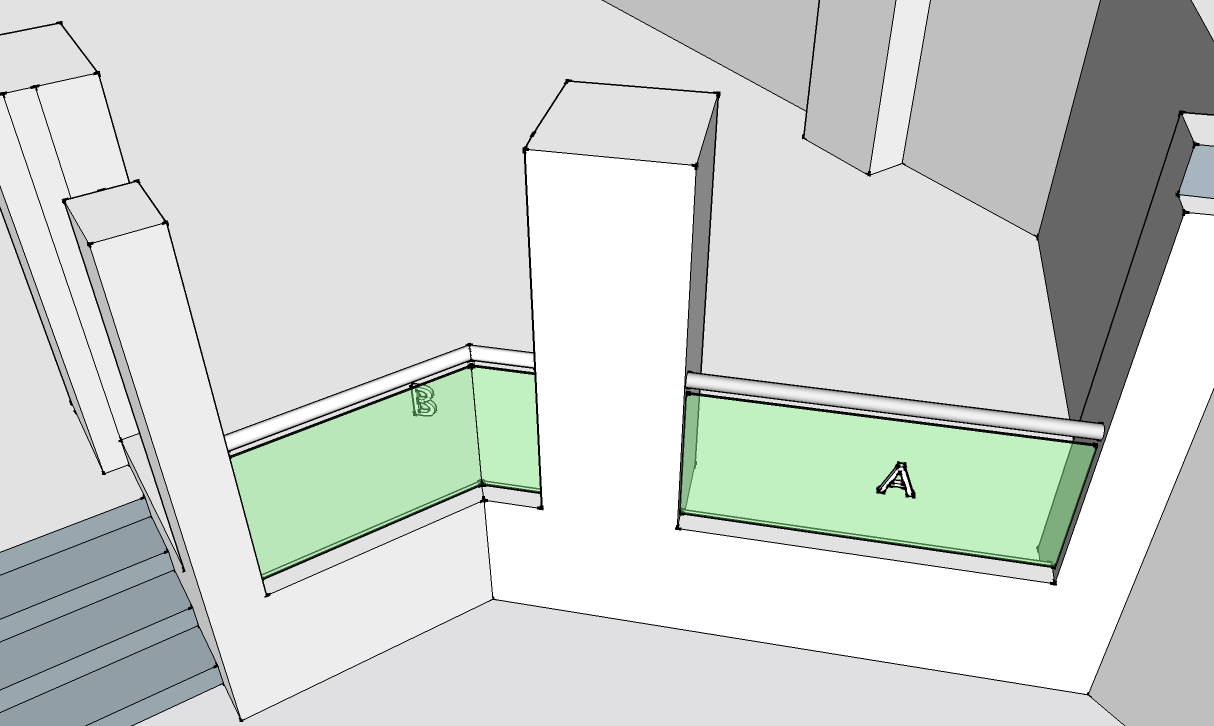
Have you ever heard of using components or groups? That would sure make it easier to work with your model.
-
That's perfect Dave.
Could you throw me a bone or two on how to do it?ps: I see you have sent a png file.
I'm guessing it's much smaller and quicker and of course will display with your post.
How did u do that? -
I extended the center line of the existing rail on the right through the post and constructed a path for Follow Me. Then I drew a circle for the rail and a tall, thin rectangle for the glass on the post. I selected the path lines, got the Follow Me tool and clicked on the face for the glass. I repeated the process for the rail.
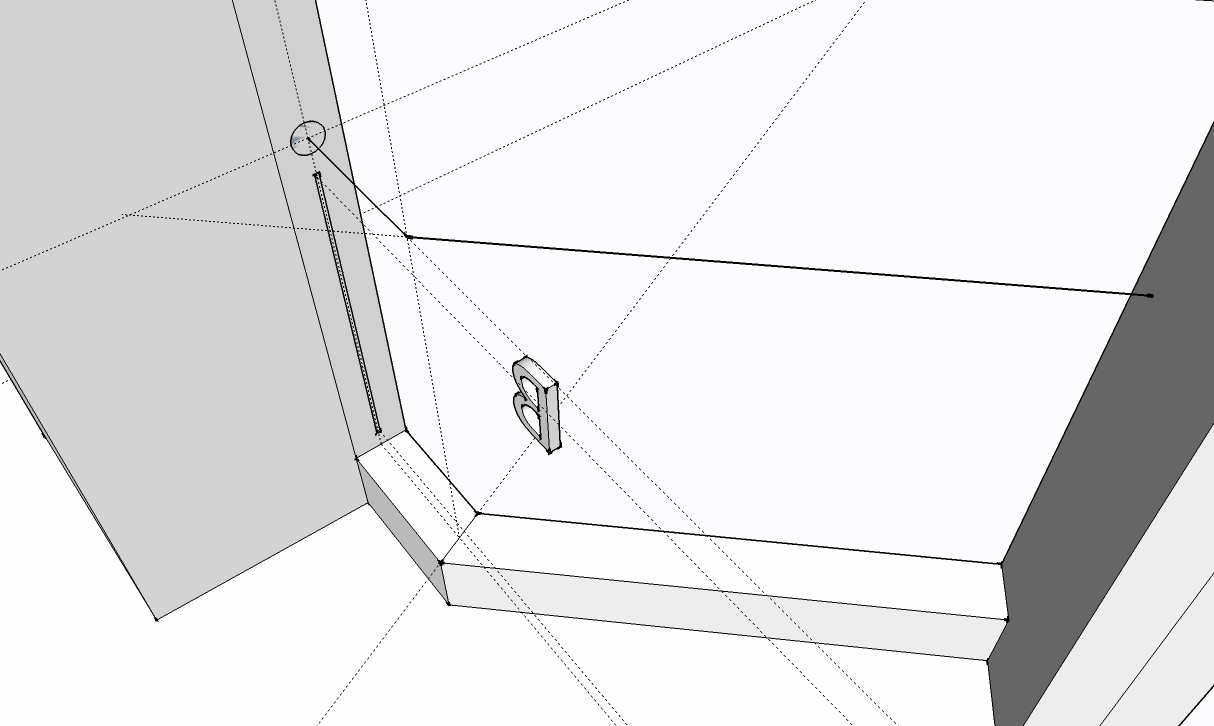
In this case since I'm not making screen shots, I used File>Export>2D.... to export a PNG file to upload here. Not difficult at all.
-
Thanx for your time Dave
It's late here in Thailand and missus calling me to bed much as I'd like to have a crack at sorting this.
I shall try your hints in the morning please stay tuned thanx! -
Hey Dave
I managed to get a decent picture out which served perfectly for our little meeting (we are condo committee members here in Thailand organising renovation of common areas.)I used follow me and it worked fine on the rail.
Just could not seem to get it to work with the glass but drew glass out from both sides and they met good enough for quick scrutiny, though if you look closely at the join in the glass you will see it's kinda overlapping. ......
uploaded according to your advice
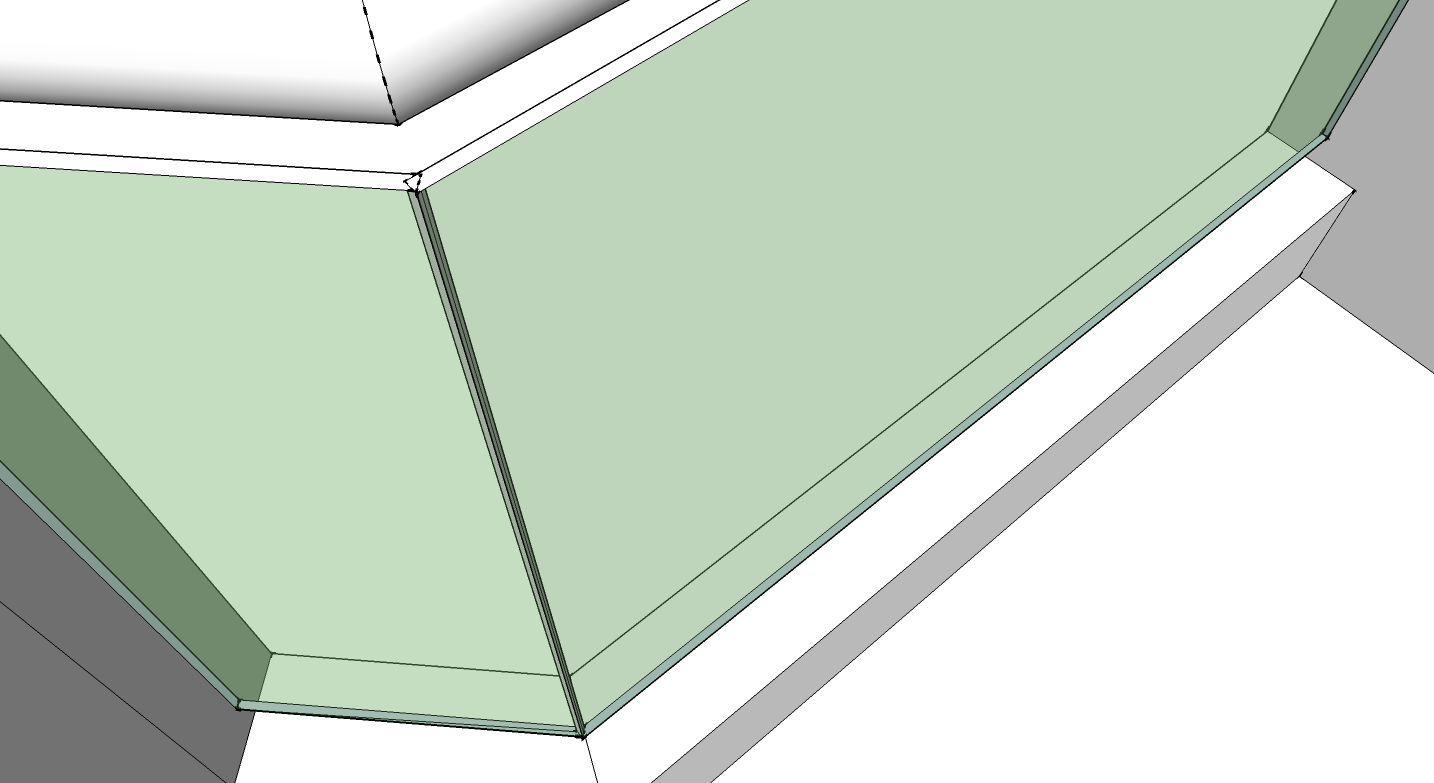
Would it not have been possible to highlight both the rail AND the glass and follow-me them together?
Thanx again!
-
No. You can't run Follow Me on two faces at the same time but if you reread my description of how I drew it, you'll see I used the center line for the rail as a Follow Me path for the glass first. Then I repeated the Follow Me operation for the rail using the same path. Try it the way I did it and I think you'll find it works easily.
You can use Follow Me in two different ways: get the tool, click on the face and then drag along the path or select the path, get the Follow Me tool and click on the profile face. I prefer the second method and almost never use the first.
-
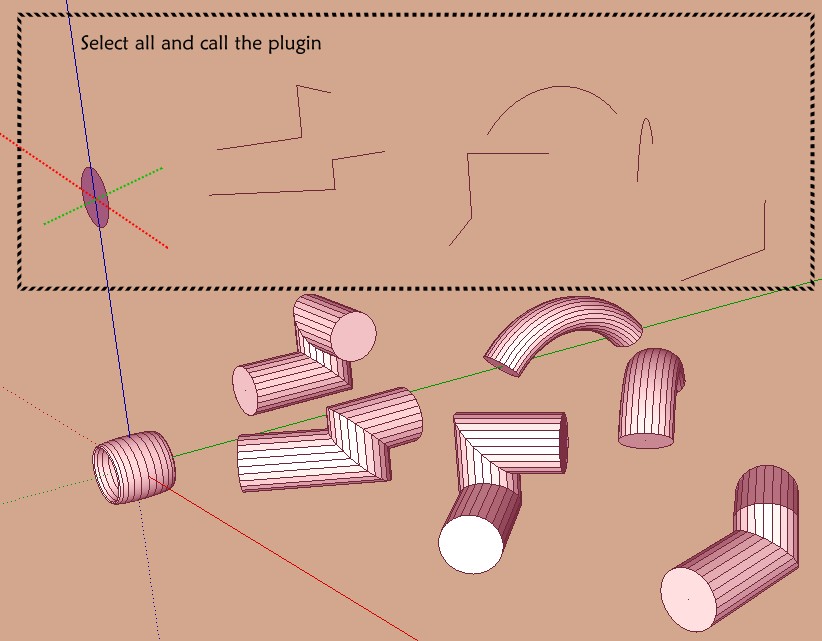
Sdmitch has made a Follow-me multiple

But surface section must be drawn at the origin!
Paths can be anywhere! (If paths are inside negative quadrants faces where reversed!
so better to stay in positive quadrant!
See instruction inside the header of the text Plugin
-
But Pilou, that's not what the OP was trying to do. He was trying to extrude two different profiles along the same path at the same time. There's no need for a plugin to do what he ultimately wants. All he needs to do is perform the Follow Me operations in the correct order so he doesn't lose access to the path.
FWIW, the path doesn't have to be down the center line of the rail. that was just a convenient place to put it. It really ought to be deleted once it is no longer required. Move the path up above the rail before using it would make deleting it easier although you could get to it easily by switching to Wireframe or X-ray.
-
ah ok

@unknownuser said:
FWIW, the path doesn't have to be down the center line of the rail. that was just a convenient place to put it.
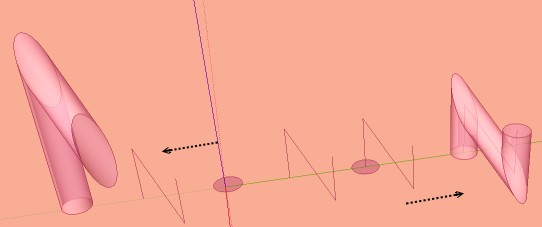
Seems you have not the same result following where is the path when using the Normal followme?
-
Pilou, Pilou, Pilou, what are we going to do with you?


If the path in the example I posted was straight above the rail and glass profile, the extrusions would be the same. Of course there are cases where that doesn't work but I was speaking to the OP and his specific situation.
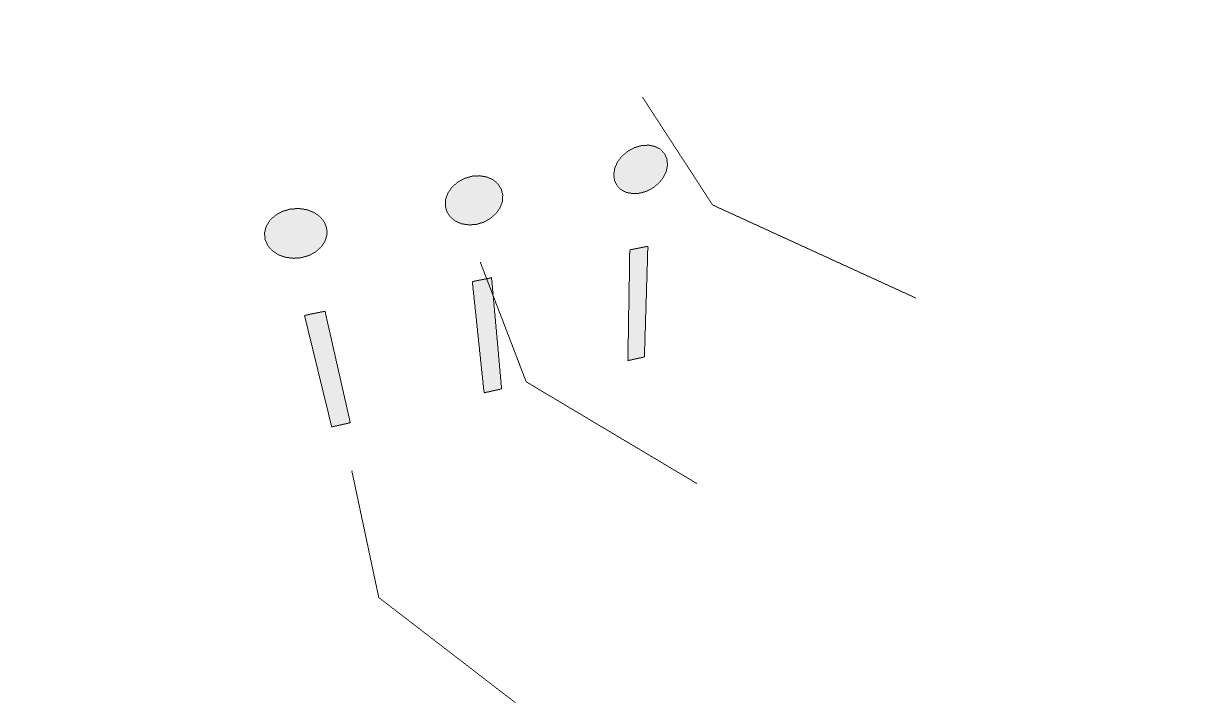
Three different locations for the path.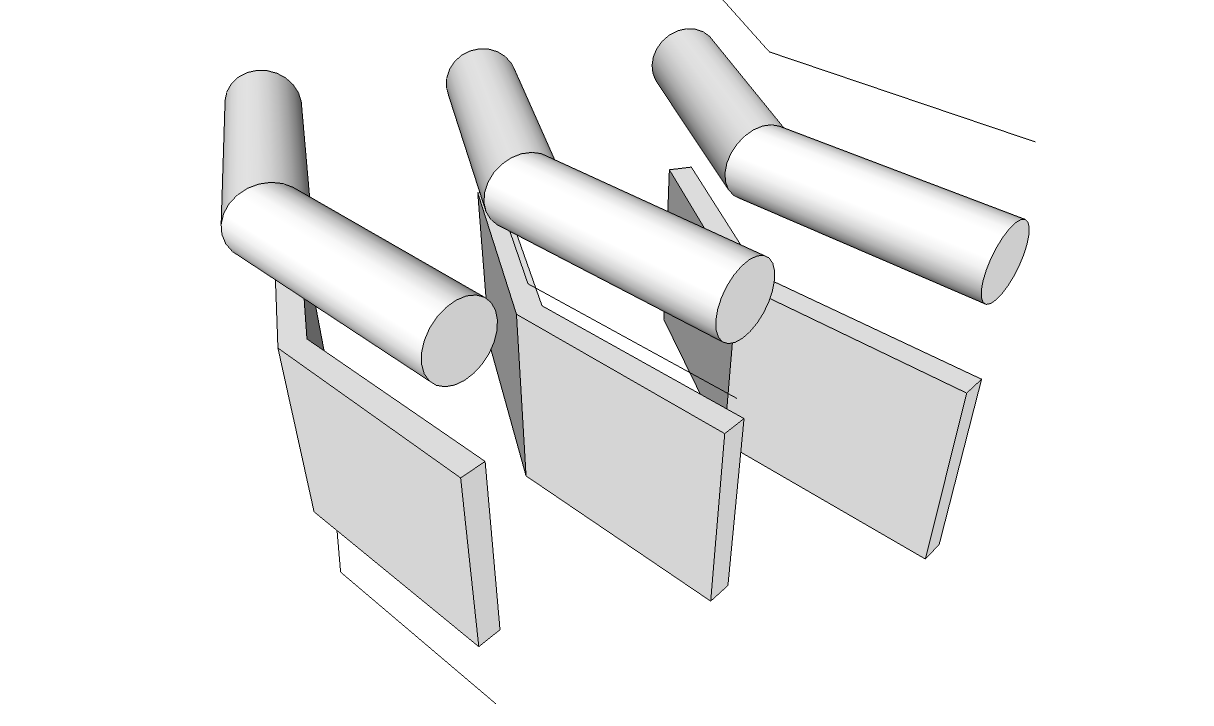
Three sets of identical extrusions -
Sure, because they are in the same vertical axe in front the middle of the surface!

-
Yes. Which is exactly what I did originally.
Advertisement


